Introduction
So, you've noticed something fishy going on with your Chrome browser. Maybe your default search engine has been hijacked, and every time you open a new tab, you're greeted with the unwelcome sight of Palikan Search. It's frustrating, intrusive, and downright annoying. But fear not, because I'm here to guide you through the process of removing Palikan Search from Chrome.
Palikan Search is a browser extension that often sneaks its way onto your browser through bundled software installations or deceptive pop-up ads. Once it's in, it can be a real pain to get rid of. But with a few simple steps, you can banish Palikan Search from your Chrome browser and restore peace and order to your online experience.
In this guide, I'll walk you through the process of identifying whether Palikan Search has infiltrated your browser, and then I'll show you how to kick it to the curb for good. We'll delve into Chrome's settings and explore the various options for removing unwanted extensions and resetting your browser to its default state.
By the time you're done reading this guide, you'll be armed with the knowledge and tools to reclaim control of your Chrome browser and bid farewell to Palikan Search once and for all. So, let's roll up our sleeves and get ready to restore your browsing experience to its former glory.
Step 1: Check for Palikan Search extension
The first step in ridding your Chrome browser of the pesky Palikan Search is to identify whether the culprit has indeed infiltrated your extensions. Here's how you can do that:
-
Open Chrome Extensions: Launch your Chrome browser and click on the three-dot menu icon in the top-right corner. From the dropdown menu, select "More tools" and then click on "Extensions." Alternatively, you can type "chrome://extensions/" in the address bar and hit Enter.
-
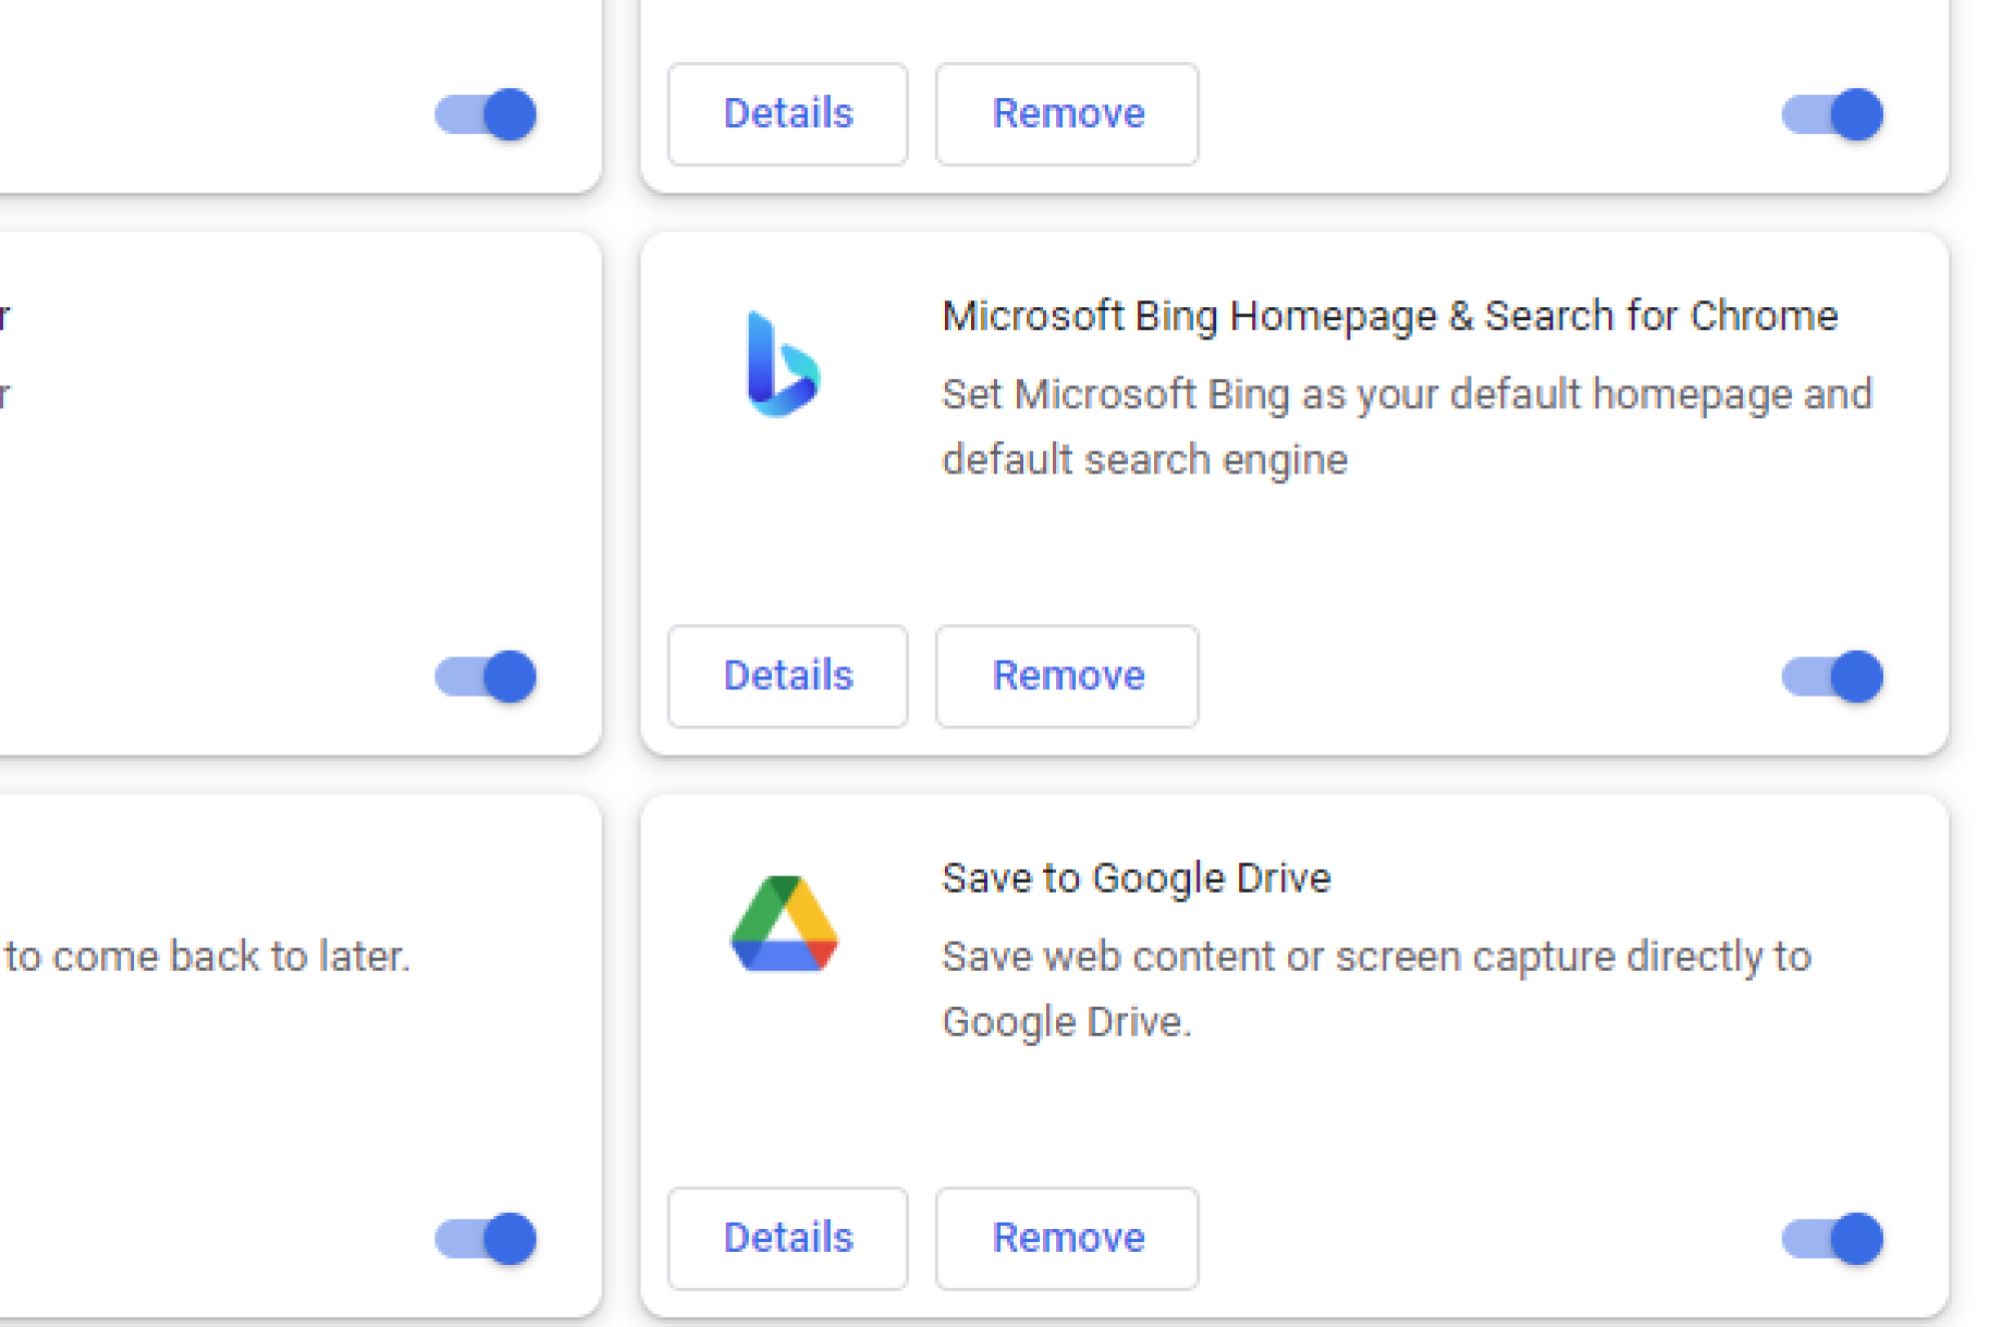
Scan the Extensions List: Once you're in the Extensions tab, carefully scan the list of installed extensions. Look for any entry related to Palikan Search or any unfamiliar or suspicious extensions that you don't remember installing. Palikan Search may disguise itself under different names or icons, so be vigilant in your search.
-
Remove Suspicious Extensions: If you spot any extensions that raise suspicion, click on the "Remove" button next to each of them to uninstall them from your browser. It's crucial to eliminate any potentially unwanted extensions to ensure a clean browsing environment.
-
Reset Chrome Sync: If you use Chrome Sync across multiple devices, it's advisable to reset the sync to prevent the Palikan Search extension from reappearing on other linked devices. To do this, go to the Chrome Settings, click on "Sync and Google services," and then select "Manage sync." From there, you can reset the sync to clear any synced extensions.
By following these steps, you can effectively identify and remove the Palikan Search extension from your Chrome browser. Once you've completed this initial phase, you'll be ready to proceed to the next step, where we'll delve into the process of eradicating Palikan Search from your Chrome settings.
Remember, vigilance is key when it comes to identifying and removing unwanted extensions. By staying proactive and regularly reviewing your browser's extensions, you can maintain a secure and hassle-free browsing experience.
Step 2: Remove Palikan Search from Chrome settings
Now that you've identified and removed any suspicious extensions, it's time to dive into the Chrome settings to ensure that Palikan Search is completely eradicated from your browsing experience. Follow these steps to thoroughly cleanse your Chrome settings:
-
Reset Homepage and Search Engine:
- Click on the three-dot menu icon in the top-right corner of your Chrome browser and select "Settings."
- In the Settings tab, navigate to the "On startup" section and ensure that your preferred homepage is set. If Palikan Search has tampered with your homepage settings, click on "Open a specific page or set of pages" and remove any unwanted URLs.
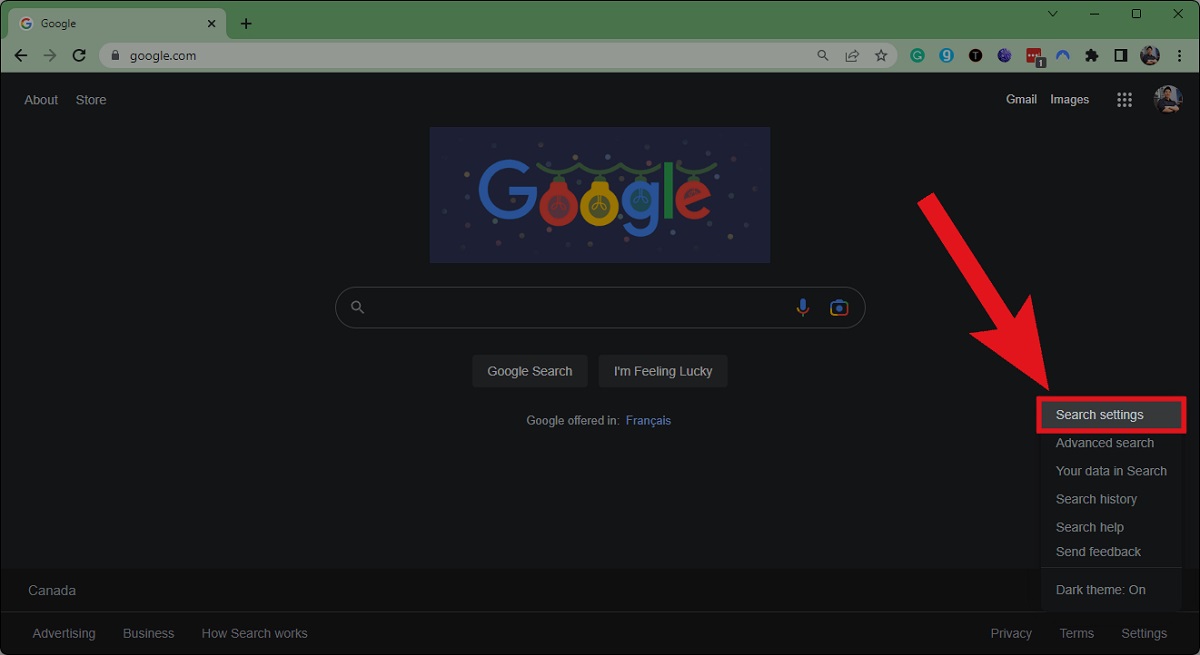
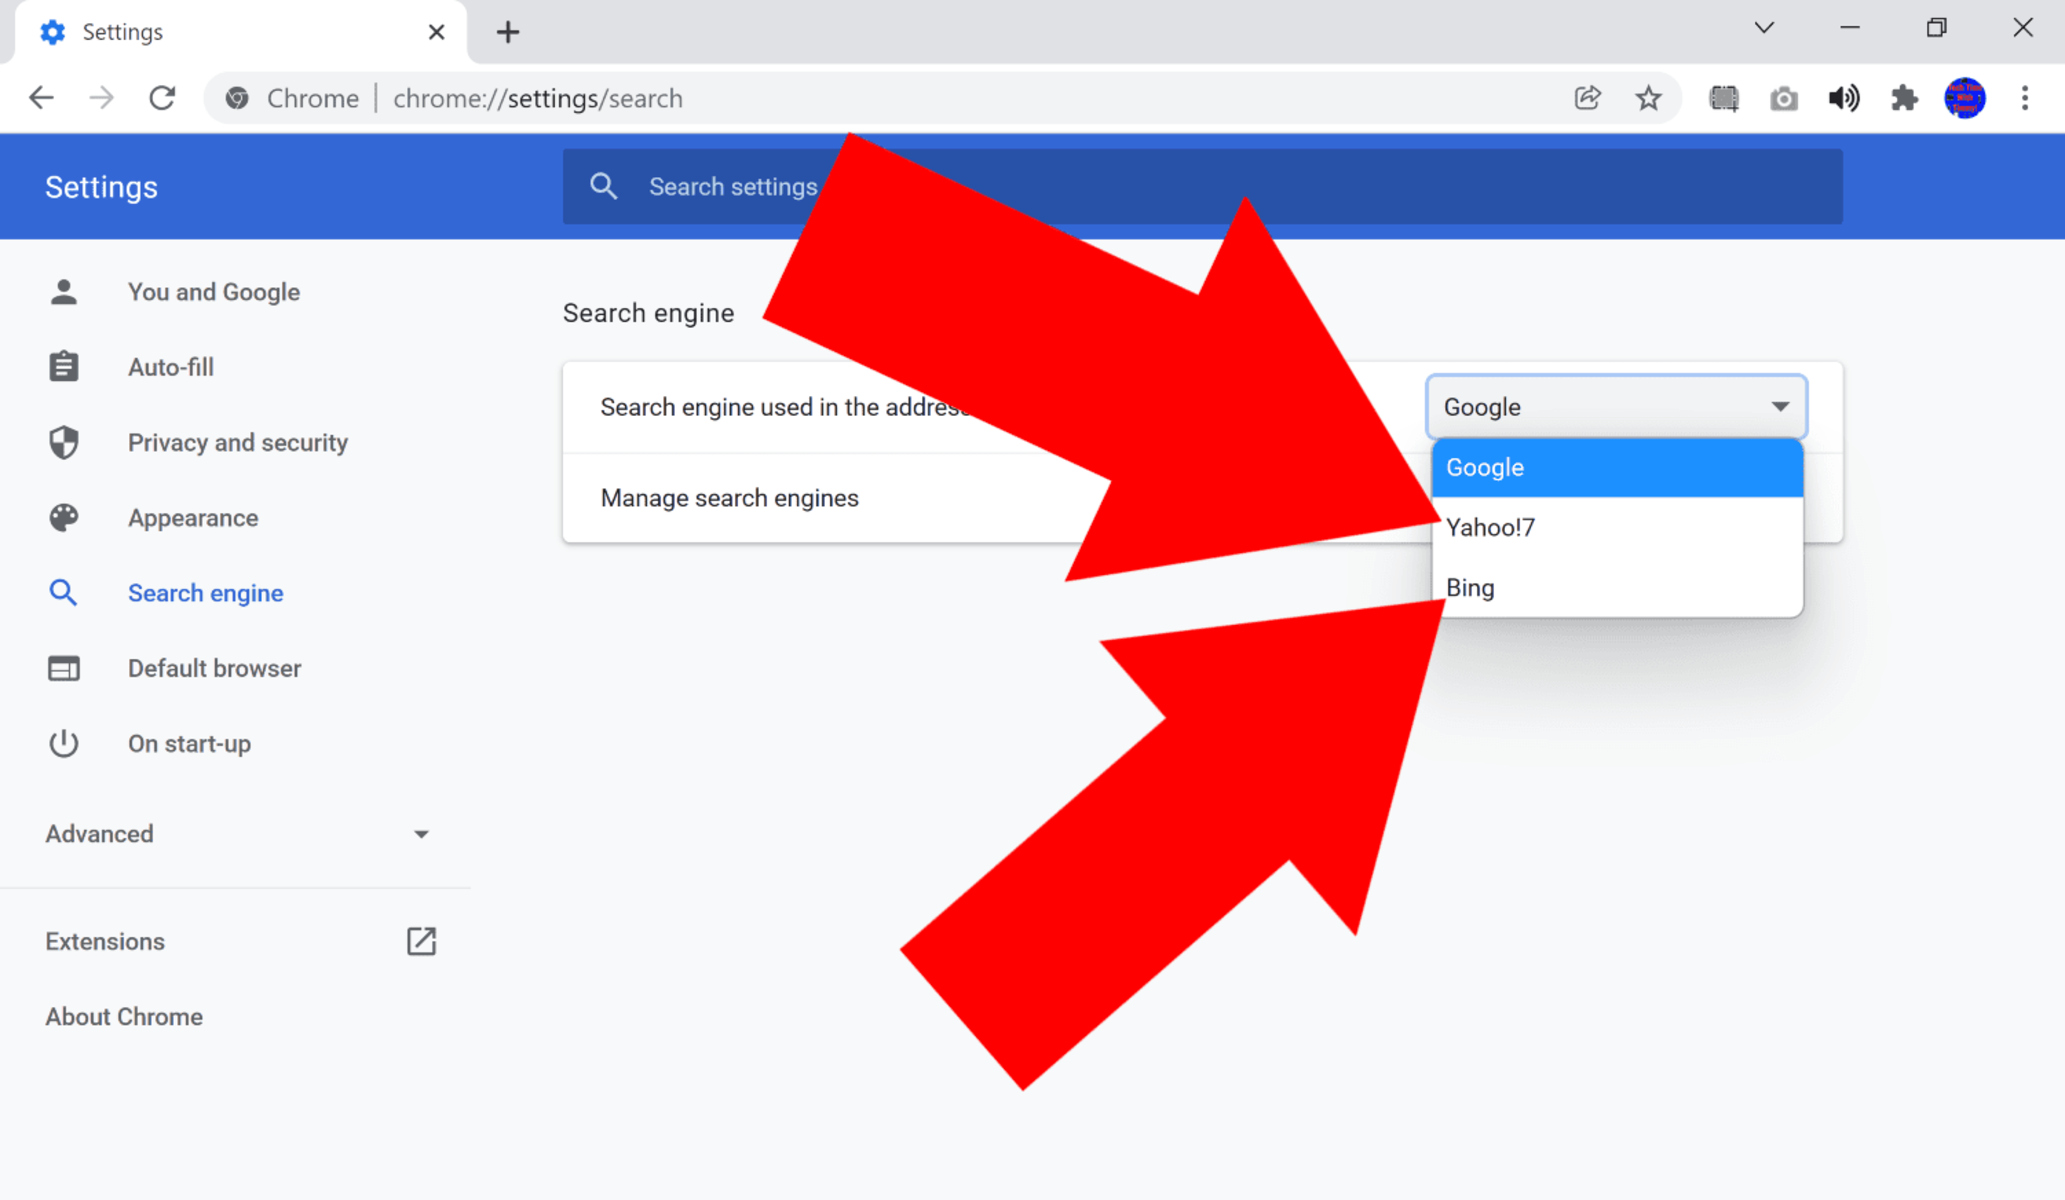
- Next, scroll down to the "Search engine" section and click on "Manage search engines." Ensure that your default search engine is the one you trust. If Palikan Search has hijacked your search engine, remove it from the list of search engines.
-
Clear Browsing Data:
- In the Chrome Settings, click on "Privacy and security" in the left-hand menu.
- Select "Clear browsing data" and choose the time range for which you want to clear data. Make sure "Browsing history," "Cookies and other site data," and "Cached images and files" are selected. Click on "Clear data" to remove any traces of Palikan Search from your browsing history and cache.
-
Reset Chrome Settings:
- In the Chrome Settings, scroll to the bottom and click on "Advanced" to expand the advanced settings.
- Under the "Reset and clean up" section, click on "Restore settings to their original defaults."
- A confirmation window will appear. Click on "Reset settings" to revert Chrome to its default state, effectively removing any unwanted changes made by Palikan Search.
-
Check for Unwanted Notifications:
- In the Chrome Settings, click on "Site settings" under the "Privacy and security" section.
- Select "Notifications" to review the list of sites allowed to send notifications. Look for any suspicious or unfamiliar sites and remove them from the list to prevent intrusive notifications related to Palikan Search.
By meticulously following these steps, you can ensure that Palikan Search is thoroughly expunged from your Chrome settings, leaving your browser free from its intrusive influence. With your Chrome settings restored to their default state and unwanted changes eradicated, you can once again enjoy a seamless and secure browsing experience.
Remember, maintaining a proactive approach to monitoring your browser settings and regularly reviewing your extensions is essential for safeguarding against potential intrusions and maintaining a clean browsing environment.
Step 3: Reset Chrome settings
Resetting Chrome settings can be a powerful solution to eliminate any lingering traces of Palikan Search and restore your browser to its default state. This process effectively undoes any unwanted changes made by the intrusive extension, providing a clean slate for your browsing experience. Here's a detailed walkthrough of how to reset Chrome settings:
Accessing Advanced Settings
- Begin by opening your Chrome browser and clicking on the three-dot menu icon in the top-right corner.
- From the dropdown menu, select "Settings" to access the browser's settings.
Navigating to Reset Options
- Within the Settings tab, scroll down to the bottom and click on "Advanced" to reveal additional options.
Restoring to Default Settings
- Under the "Reset and clean up" section, locate and click on "Restore settings to their original defaults."
Confirmation and Reset
-
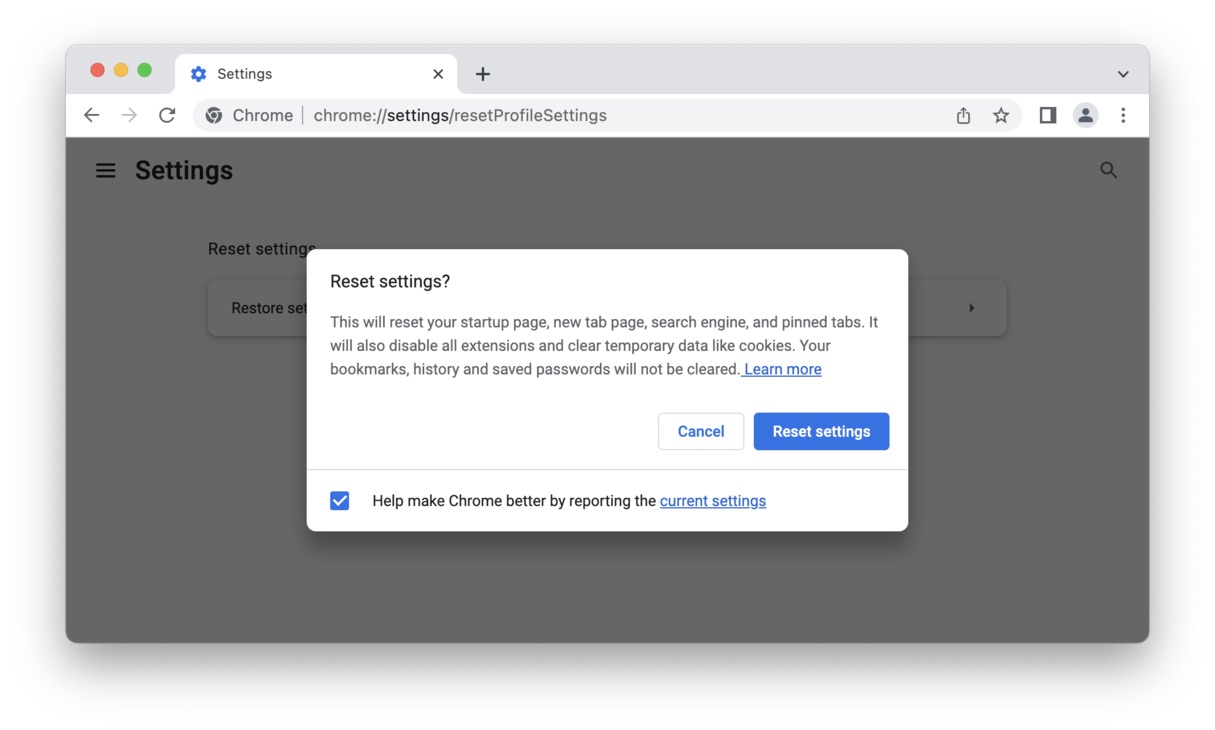
A confirmation window will appear, outlining the changes that will occur when resetting Chrome settings. This includes the restoration of default search engines, home pages, new tab pages, and the removal of extensions.
-
To proceed with the reset, click on "Reset settings." Chrome will then initiate the process of reverting to its original state.
Post-Reset Considerations
- After the reset is complete, Chrome will return to its default configuration, free from any unwanted alterations caused by Palikan Search.
By following these steps, you can effectively reset Chrome settings, eradicating any remnants of Palikan Search and restoring your browser to its pristine state. This comprehensive approach ensures that your browsing experience is free from the intrusive influence of unwanted extensions, allowing you to navigate the web with confidence and peace of mind.
Remember, maintaining a proactive approach to monitoring your browser settings and regularly reviewing your extensions is essential for safeguarding against potential intrusions and maintaining a clean browsing environment. With Palikan Search banished and your Chrome settings reset, you can once again enjoy a secure and seamless browsing experience.
Conclusion
Congratulations! By following the comprehensive steps outlined in this guide, you have successfully removed Palikan Search from your Chrome browser and restored it to its default, pristine state. The intrusive influence of unwanted extensions has been eradicated, and your browsing experience is now free from the disruptions caused by Palikan Search.
It's important to emphasize the proactive approach you've taken to safeguard your browser against potential intrusions. By regularly reviewing your extensions and staying vigilant for any suspicious activity, you've demonstrated a commitment to maintaining a clean and secure browsing environment. This proactive mindset will serve you well in safeguarding against future unwanted extensions or intrusive changes to your browser settings.
As you continue to enjoy your revitalized browsing experience, it's essential to remain mindful of the potential sources of unwanted extensions. Be cautious when installing new software and always opt for custom installation settings to carefully review and deselect any bundled add-ons or extensions. Additionally, exercise caution when encountering pop-up ads and be discerning about granting permissions to browser notifications.
By staying informed and proactive, you can effectively protect your browser from unwanted intrusions and maintain a seamless and secure online experience. Remember, the key to a hassle-free browsing experience lies in regular maintenance and vigilance.
With Palikan Search banished and your Chrome browser restored to its default state, you can once again navigate the web with confidence and peace of mind. Enjoy your clean and secure browsing experience, and may your online adventures be free from unwanted disruptions.
Happy browsing!