Introduction
Welcome to our guide on how to download Windows 11 to a flash drive! Microsoft’s latest operating system, Windows 11, offers a sleek and modern interface, improved performance, and exciting new features. Whether you’re a tech enthusiast, IT professional, or simply eager to try out the latest software, downloading Windows 11 to a flash drive allows you to easily install it on any compatible computer.
Downloading Windows 11 to a flash drive provides several advantages. First, it enables you to create a bootable installation media that can be used to install Windows 11 on multiple devices or as a backup in case you need to reinstall the operating system. Second, it allows you to have a portable version of Windows 11 that you can carry with you and use on different devices. This can be especially useful if you frequently work on different computers or need to troubleshoot issues on other machines.
In this guide, we will walk you through the step-by-step process of downloading Windows 11 to a flash drive. Before we begin, it’s important to note that Windows 11 has specific system requirements, so make sure your computer meets the minimum specifications before proceeding.
Now, let’s get started on our journey to download Windows 11 to a flash drive and experience all the exciting features and improvements this new operating system has to offer!
Step 1: Check System Requirements
Before downloading Windows 11 to a flash drive, it’s crucial to ensure that your computer meets the system requirements. Windows 11 introduces new hardware and software requirements to optimize performance and security. Here’s what you need to check:
- Processor: Windows 11 requires a compatible 64-bit processor with a minimum clock speed of 1 GHz or faster. Check your processor’s compatibility on the manufacturer’s website.
- RAM: Windows 11 requires a minimum of 4 GB of RAM, but it’s recommended to have 8 GB or more for optimal performance.
- Storage: Your computer must have at least 64 GB of storage available to accommodate Windows 11. Additionally, you may need extra space for applications, files, and updates.
- Display: Windows 11 features a more modern and visually appealing interface. To take full advantage of this, your computer should have a screen that supports at least 720p resolution. Higher resolutions are recommended for a better experience.
- Graphics Card: Your computer should have a DirectX 12 compatible graphics card or integrated graphics that support a WDDM 2.0 driver for Windows 11’s visual effects and performance enhancements.
- Internet Connection: For downloading Windows 11 and receiving updates, an internet connection is essential.
It’s important to note that these are the minimum system requirements. If you want to make the most of Windows 11’s features, consider upgrading your hardware accordingly.
To check your computer’s system information, you can go to the “Settings” menu, select “System,” and click on “About.” Here, you’ll find detailed information about your computer’s hardware and software, including the processor, RAM, and storage.
Once you have verified that your computer meets all the system requirements, you’re ready to proceed to the next step and download the Windows 11 ISO file.
Step 2: Download Windows 11 ISO File
Now that you’ve confirmed that your computer meets the system requirements, it’s time to download the Windows 11 ISO file. The ISO file contains all the necessary files to install Windows 11 onto your computer. Follow these steps to download the Windows 11 ISO file:
- Open your preferred web browser and visit the official Microsoft Windows 11 download page.
- Click on the “Download now” button or any similar option provided to begin the download.
- You may be prompted to select the edition and language of Windows 11 you wish to download. Choose your desired options and click “Next.”
- The download process may take some time, depending on your internet connection speed. It’s recommended to use a reliable and stable internet connection to ensure a smooth download.
Once the download is complete, you will have the Windows 11 ISO file saved on your computer. It’s important to note that the ISO file can be quite large, so make sure you have enough storage space available.
It’s worth mentioning that the download process may vary slightly depending on the Microsoft website updates and changes. Ensure you are downloading from an official and reputable source to avoid any potential security risks.
By downloading the Windows 11 ISO file, you now have the essential component needed to create a bootable flash drive. In the next step, we will guide you through the process of preparing the flash drive for the Windows 11 installation.
Step 3: Prepare the Flash Drive
Before we can create a bootable flash drive for installing Windows 11, we need to prepare the flash drive by formatting it and making it ready to receive the necessary installation files. Follow these steps to prepare the flash drive:
- Insert the flash drive into an available USB port on your computer. Ensure that the flash drive has enough storage capacity to accommodate the Windows 11 installation files.
- Open File Explorer (Windows Explorer) on your computer and locate the flash drive. Take note of the drive letter assigned to the flash drive, as we will need it later.
- If there are any important files on the flash drive, make sure to back them up as the formatting process will erase all data stored on it.
- Right-click on the flash drive and select “Format” from the context menu. In the Format window, choose the desired file system (usually FAT32 or NTFS) and give the flash drive a memorable name. Click “Start” to begin the formatting process.
- Wait for the formatting process to complete. Once finished, you will have a formatted and empty flash drive ready for the Windows 11 installation files.
It’s important to ensure that the flash drive is formatted correctly with a compatible file system to avoid any issues during the installation process. Most Windows computers can recognize and work well with the FAT32 or NTFS file systems.
Formatting the flash drive will erase all existing data on it, so make sure you have backed up any important files before proceeding. Additionally, double-check that you are formatting the correct flash drive to avoid accidentally formatting the wrong storage device.
Now that your flash drive is prepared and formatted, we can move on to the next step of creating a bootable flash drive by adding the Windows 11 installation files. This will allow us to install Windows 11 on any compatible computer.
Step 4: Create Windows 11 Bootable Flash Drive
With the flash drive prepared, it’s time to create a bootable Windows 11 flash drive. This will allow you to start the Windows 11 installation process on any compatible computer. Follow these steps to create a bootable flash drive:
- Download a reliable third-party tool that specializes in creating bootable USB drives. One popular tool is Rufus, which is free and widely used for this purpose.
- Open the downloaded tool and connect the prepared flash drive to your computer.
- In the tool, select the flash drive as the target device. Ensure that the correct drive letter is selected to avoid formatting any other connected storage device accidentally.
- Next, locate the Windows 11 ISO file that you downloaded previously. The tool may have an option to browse for the ISO file or drag and drop it onto the tool’s interface.
- Review the settings and options in the tool to ensure they match the desired configuration. For most cases, the default settings will work fine.
- Click on the “Start” or “Create” button in the tool to begin the process of creating the bootable flash drive. This may take some time, so be patient and avoid interrupting the process.
- Once the tool completes the process, you will have a bootable Windows 11 flash drive ready for installation. Safely eject the flash drive from your computer.
It’s important to use a reliable and trusted tool for creating bootable flash drives to avoid any potential issues during the installation process. Rufus is a popular choice due to its simplicity and effectiveness, but there are other tools available as well.
Remember to double-check that you have selected the correct flash drive in the tool to avoid any data loss on other connected devices. Creating a bootable flash drive will overwrite any existing data on the flash drive, so ensure you have backed up any important files.
Now that you have a bootable Windows 11 flash drive, you can proceed to the final step of the installation process: installing Windows 11 on a computer using the bootable flash drive.
Step 5: Install Windows 11 from the Bootable Flash Drive
Now that you have a bootable Windows 11 flash drive, you’re ready to install the operating system on your computer. Follow these steps to install Windows 11 from the bootable flash drive:
- Insert the bootable flash drive into an available USB port on the computer you want to install Windows 11 on.
- Restart the computer and access the BIOS settings. The key to enter the BIOS may vary depending on your computer’s manufacturer (common keys include F2, F10, or DEL).
- In the BIOS settings, navigate to the “Boot” or “Boot Order” section. Change the boot order so that the flash drive is set as the first boot device.
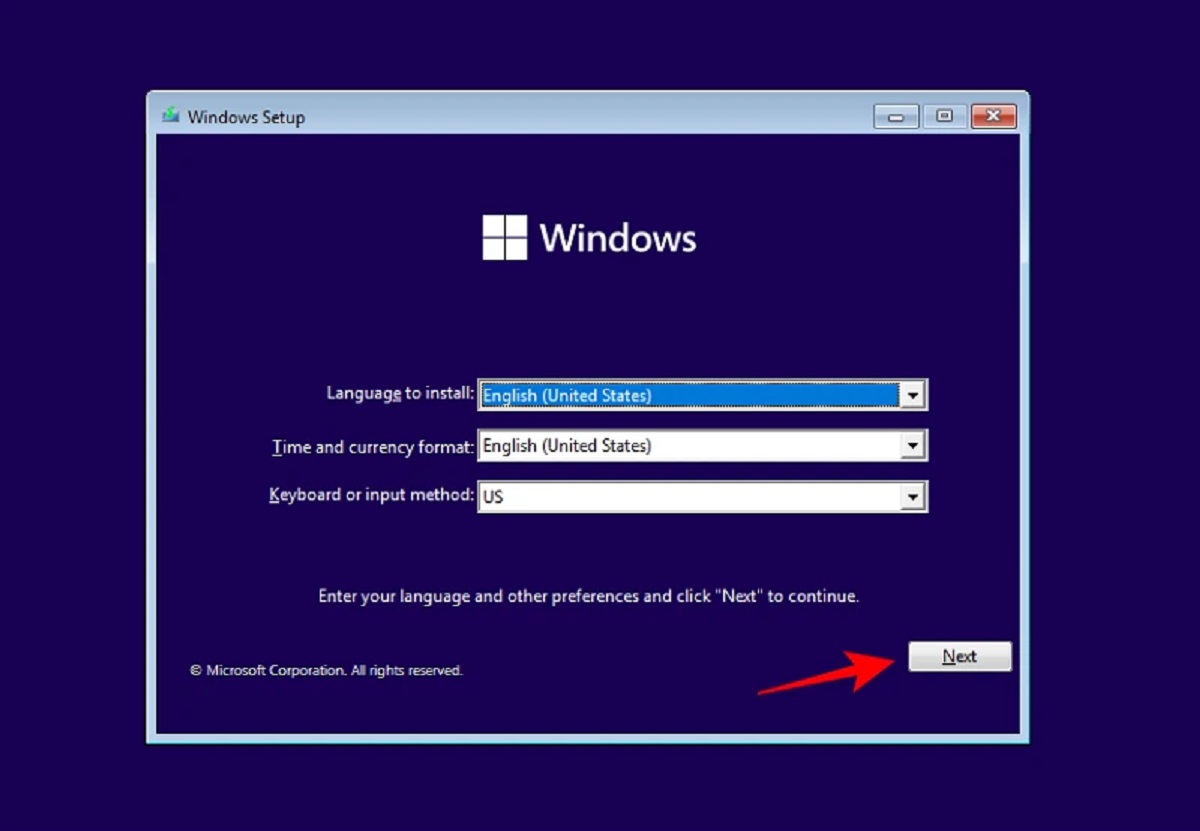
- Save the changes and exit the BIOS settings. The computer will restart, and the Windows 11 installation process will begin.
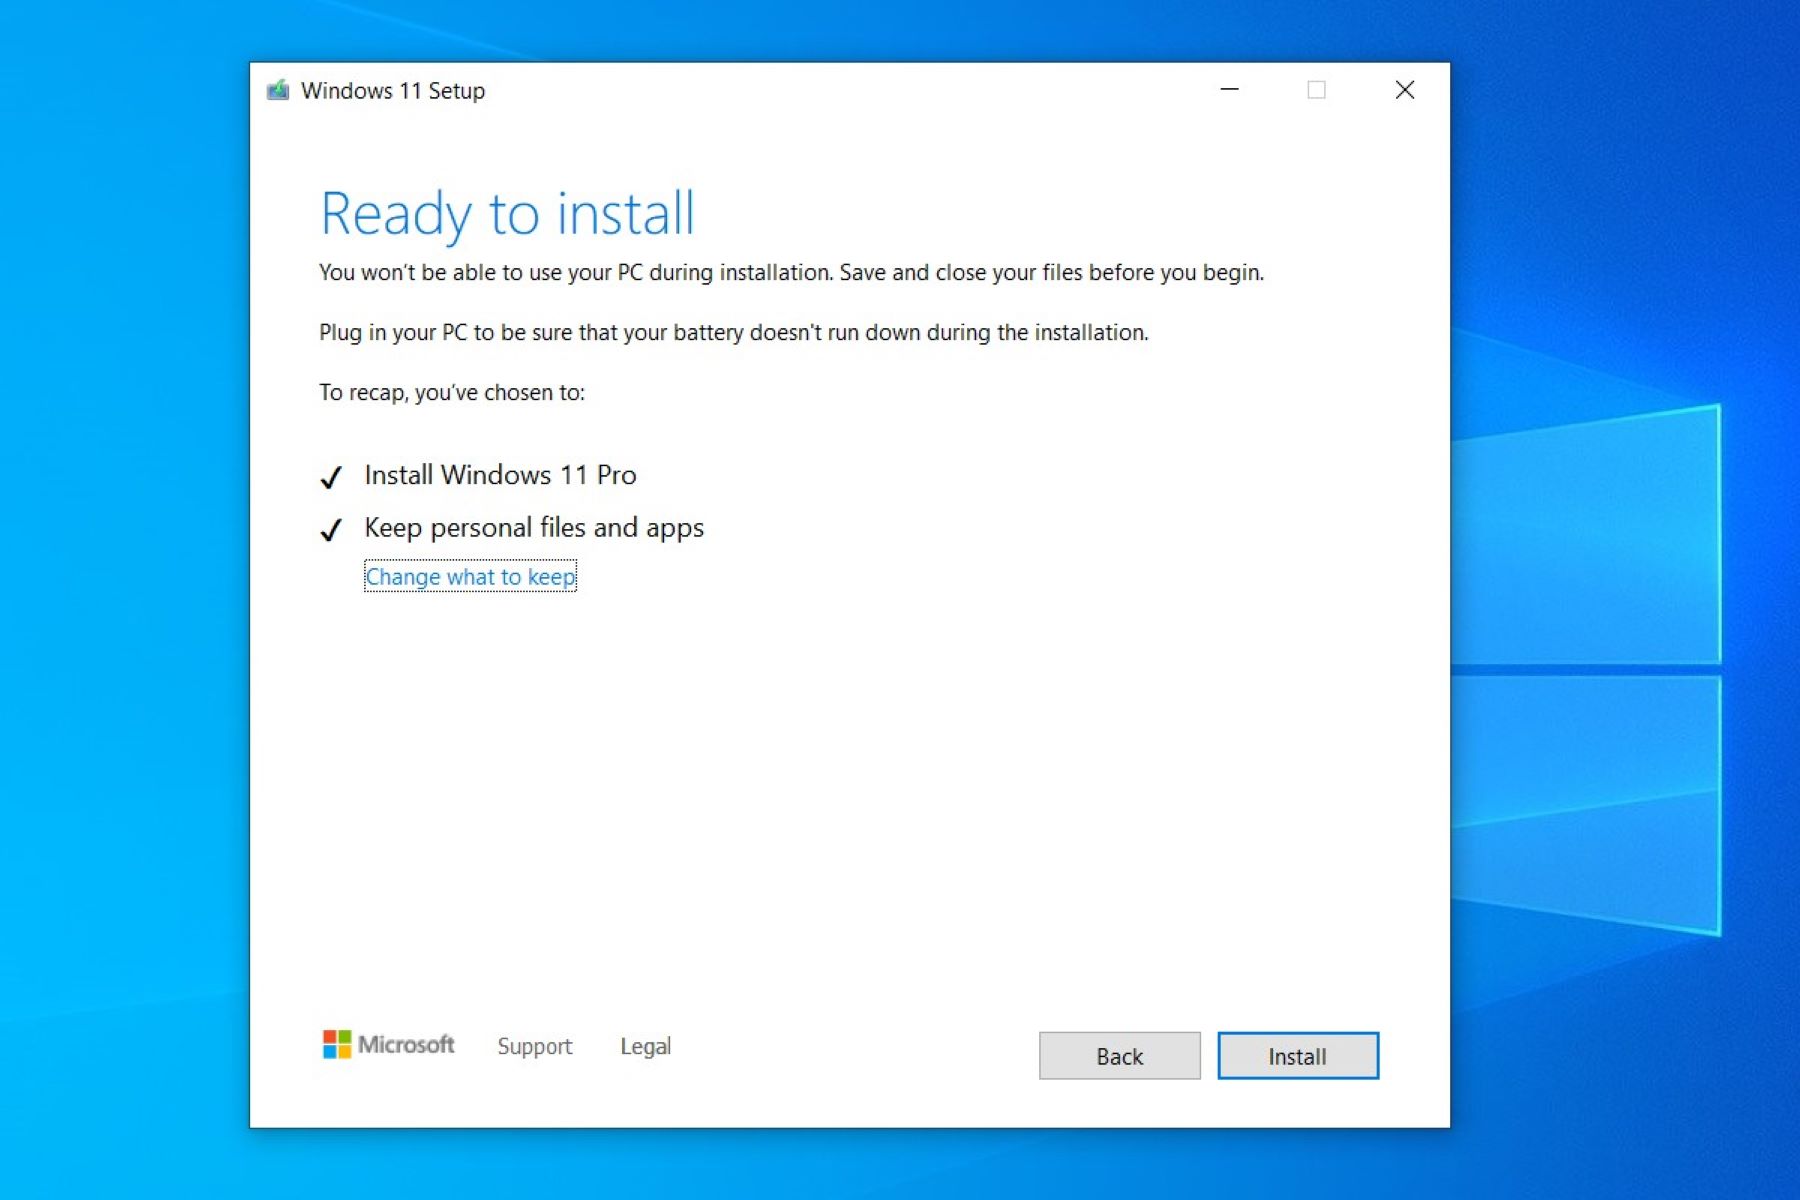
- Follow the on-screen instructions to proceed with the Windows 11 installation. You may be asked to select your language, keyboard layout, and other preferences.
- When prompted, choose the option to install Windows 11. You may be asked to enter your product key if you have one.
- Specify the partition or drive where you want to install Windows 11. You can choose to create a new partition or overwrite an existing one (make sure you have backed up any important data before proceeding).
- Wait for the installation process to complete. The computer may restart several times during the installation.
- Once the installation is finished, follow the on-screen instructions to set up Windows 11, including signing in with a Microsoft account and customizing your settings.
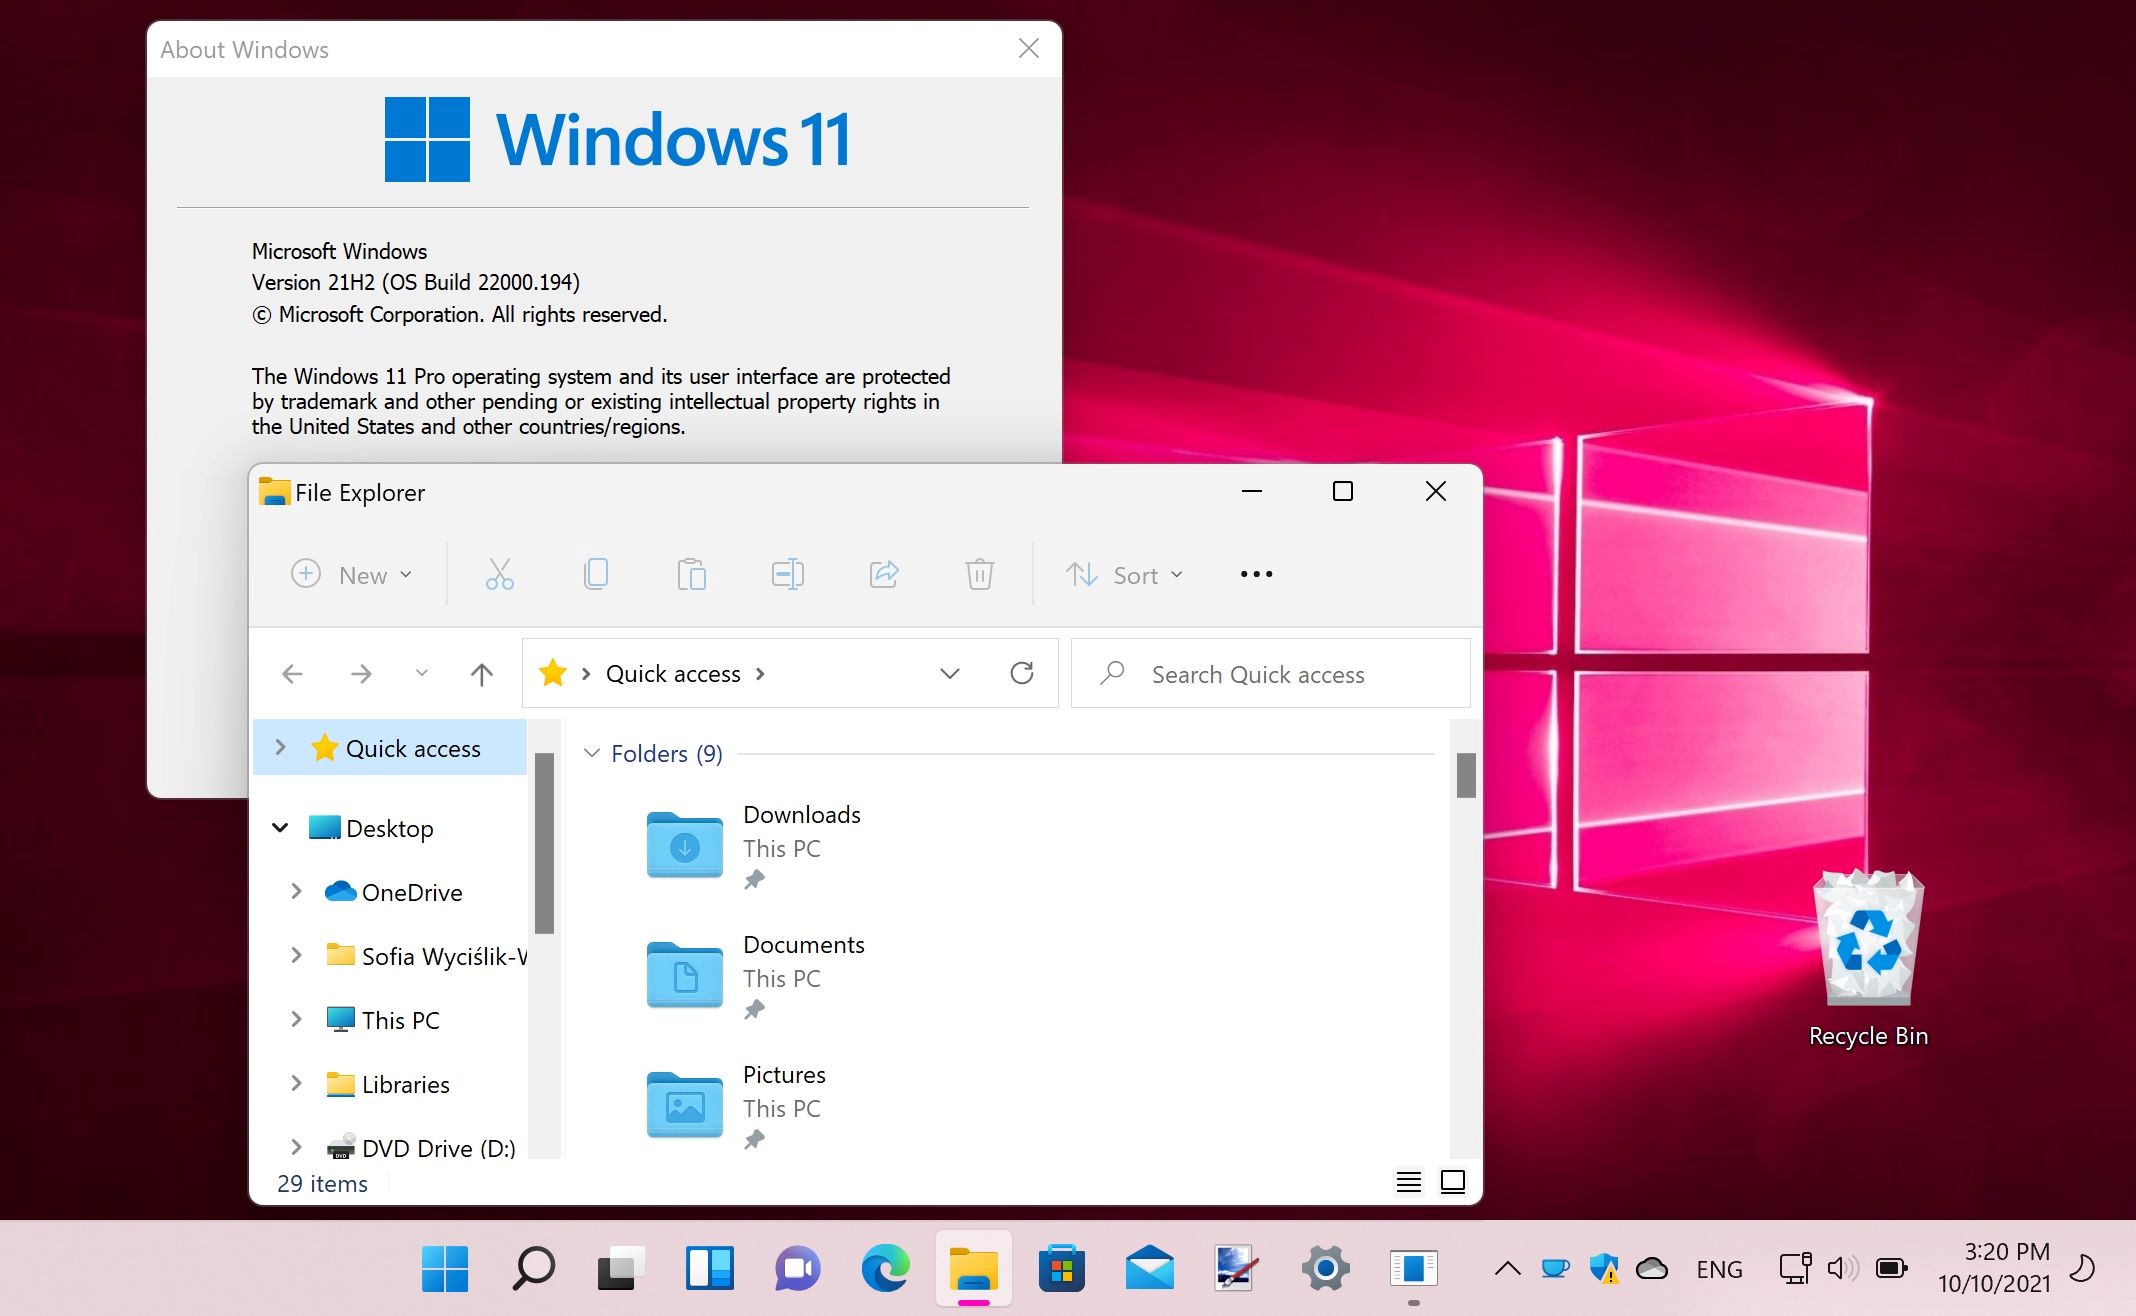
- After the setup is complete, you will have a fresh installation of Windows 11 on your computer.
During the installation process, it’s important to follow the on-screen instructions and make the necessary selections based on your preferences. Make sure to allocate enough time for the installation process to complete, as it may take some time depending on your computer’s speed and specifications.
Once Windows 11 is successfully installed, you can begin exploring the new features, improvements, and personalized settings that this exciting operating system has to offer.
Conclusion
Congratulations! You have successfully learned how to download Windows 11 to a flash drive and install the operating system on your computer. By following the steps outlined in this guide, you can now enjoy the sleek interface, improved performance, and exciting new features that Windows 11 has to offer.
Remember to check your computer’s system requirements before downloading Windows 11 to ensure compatibility. Creating a bootable flash drive allows you to easily install Windows 11 on multiple devices or have a portable version that you can carry with you.
Checking the system requirements, downloading the Windows 11 ISO file, preparing the flash drive, and creating a bootable flash drive are essential steps that lay the foundation for a successful installation process. Make sure to follow the steps carefully and use reliable tools to avoid any issues.
Installing Windows 11 from the bootable flash drive is straightforward, thanks to the on-screen instructions provided during the installation process. Take your time, select the desired options, and enjoy the seamless installation.
Once Windows 11 is installed, you can personalize your settings, explore the new features, and make the most of this powerful operating system. Keep your computer up to date with the latest updates from Microsoft to ensure security, stability, and access to new features and improvements.
We hope this guide has been helpful in your journey of downloading and installing Windows 11 to a flash drive. Embrace the future of computing and enjoy all the benefits that Windows 11 has to offer.