Introduction
Welcome to the world of Python programming! Python is a versatile and powerful programming language that is widely used for various purposes, from web development to data analysis. If you’re a Mac user and want to get started with Python programming, you’ve come to the right place. In this article, we will walk you through the step-by-step process of downloading Python 3 on your Mac.
Python 3 is the latest major release of the Python programming language and comes with several new features and improvements over its predecessor, Python 2. It is recommended to use Python 3 for new projects as Python 2 has reached its end of life.
By following the instructions in this guide, you will be able to download and install Python 3 on your Mac. This will enable you to write and execute Python code, explore Python’s extensive library ecosystem, and dive into the amazing world of Python programming.
Whether you’re a beginner taking your first steps into the world of programming or an experienced developer looking to expand your skillset, Python is a fantastic language to learn and work with. Its simplicity, readability, and the abundance of resources available make it a popular choice among developers of all levels.
So, let’s get started and set up Python 3 on your Mac!
Step 1: Go to the official Python website
The first step in downloading Python 3 on your Mac is to visit the official Python website. Open your preferred web browser and enter “python.org” in the address bar.
Once you’re on the Python website, you’ll find yourself on the home page that provides a wealth of information about Python. Take a moment to explore the site and familiarize yourself with the different sections and resources available.
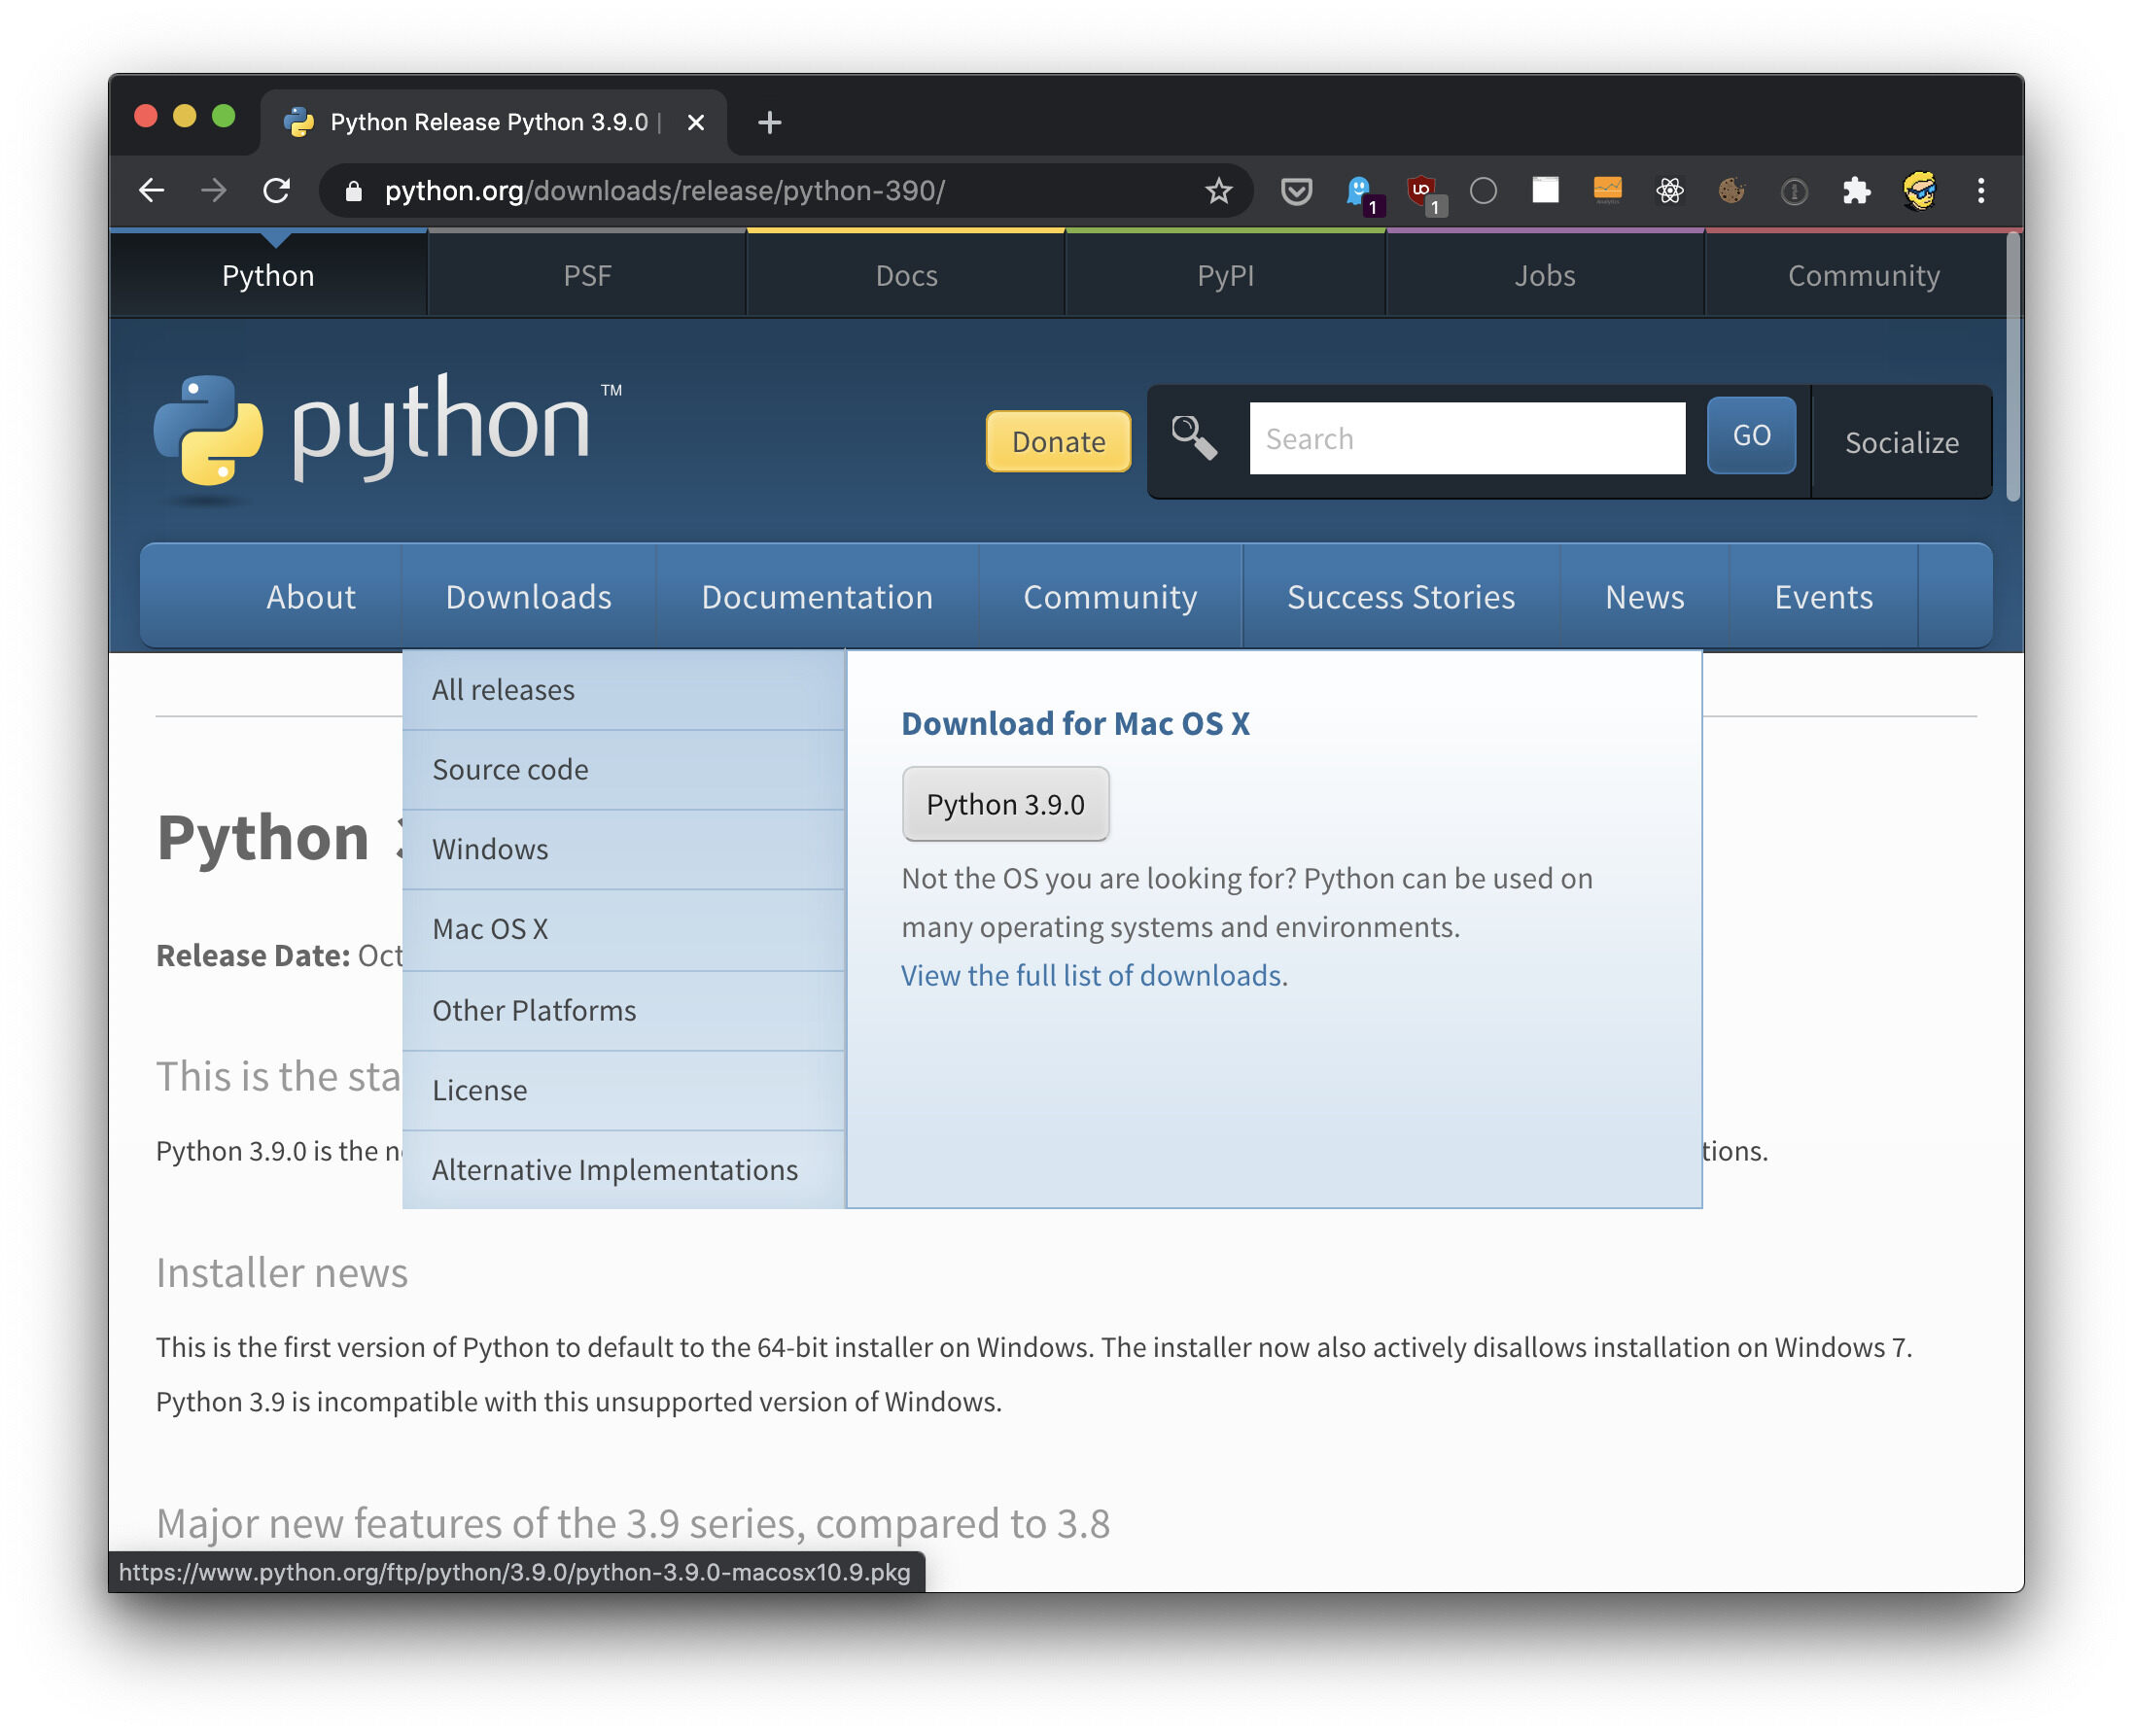
From the home page, navigate to the “Downloads” section. This section provides you with access to the latest stable release of Python 3 for different operating systems, including macOS.
Click on the “Downloads” link to proceed to the download page specifically tailored for macOS. On this page, you will find a list of available versions of Python 3 for macOS, including the latest version.
At this point, it’s important to note that depending on your specific requirements, you may need to choose between the 64-bit/32-bit installer or the macOS installer package. Generally, the 64-bit version is suitable for most users, but if you’re unsure, you can refer to the documentation or community forums for guidance.
Once you’ve determined the appropriate version of Python 3 for your Mac, click on the corresponding download link to initiate the download. The download should begin shortly, and the installation package will be saved to your default downloads location.
Now that you’ve successfully navigated to the official Python website and downloaded the installation package, you’re ready to move on to the next step – choosing the Python version.
Step 2: Choose the Python version
After downloading the installation package from the official Python website, it’s time to choose the appropriate Python version for your Mac. When selecting the Python version, consider factors such as compatibility with existing code and libraries, project requirements, and the stability of the version.
On the download page, you will see various versions of Python 3 available for macOS. The latest stable release is typically recommended, and it should be compatible with most projects. However, there may be cases where you need to use a specific version to maintain compatibility with your codebase.
If you’re uncertain about which version to choose, it’s a good idea to consult the documentation or seek advice from the Python community. There are forums and discussion boards where you can ask questions and get recommendations based on your specific needs.
It’s also worth considering whether you need the 64-bit installer or the macOS installer package. Most Mac computers nowadays are 64-bit, so the 64-bit installer is generally suitable. However, if you have an older Mac or specific requirements, you may need to opt for the macOS installer package instead.
Additionally, you may come across different Python distributions such as Anaconda or Miniconda, which provide pre-packaged environments for data science and scientific computing. These distributions come with Python and many popular libraries pre-installed, making it easier to set up your development environment for specific use cases.
Take some time to carefully evaluate your requirements and make an informed decision about the Python version that best suits your needs. Once you have decided on the desired Python version, you can proceed to the next step and begin the installation process on your Mac.
Step 3: Download the installation package
Now that you have chosen the Python version that suits your needs, it’s time to download the installation package on your Mac. The installation package contains all the necessary files to set up Python on your system.
Locate the downloaded installation package file, which typically has a .pkg extension. You can find it in your default downloads location or the location you specified when saving the file.
Double-click on the installation package file to launch the installation wizard. This will guide you through the process of installing Python on your Mac.
During the installation process, you may be prompted to enter your administrator password. This is required to grant permission for the installation. Provide the necessary credentials to proceed.
The installation package will present you with several options and customization settings. You can choose the destination folder for the installation, customize the installation components, and select additional features to include.
By default, the installation package includes the necessary components for running Python on your Mac. However, depending on your needs, you may want to install additional components, such as development headers or documentation. Review the available options and select the ones that are relevant to your requirements.
Once you have reviewed and selected the desired options, click on the “Install” button to begin the installation process. The installer will then copy the necessary files and set up Python on your Mac.
The installation process may take a few moments to complete, depending on your system’s performance. Once the installation is finished, you will see a confirmation message indicating that Python has been successfully installed on your Mac.
Now that you have downloaded and installed the Python installation package, you’re ready to move on to the next step – running the installation package on your Mac.
Step 4: Run the installation package
After downloading the Python installation package and customizing the installation settings, it’s time to run the installation package on your Mac. This will initiate the installation process and set up Python on your system.
Locate the downloaded Python installation package file with the .pkg extension on your Mac. Double-click on the file to open it.
A wizard will appear, guiding you through the installation process. Click on the “Continue” button to proceed with the installation.
Read and review the information and instructions provided in each installation step. This ensures that you are aware of any important details or options that may affect the installation process.
Specify the destination location where Python will be installed on your Mac. By default, this will be the “/Applications/Python 3.x” directory, where “x” represents the specific version number you downloaded.
You can choose a different destination if you have specific requirements or preferences. However, it is generally recommended to stick with the default location to ensure compatibility with other tools and libraries.
Once you have selected the installation destination, click on the “Install” button to initiate the installation process.
Depending on your system’s performance and the size of the installation package, the installation process may take a few minutes to complete. You will see a progress bar indicating the installation status.
During the installation, you may be prompted to enter your administrator password. This is necessary to grant permission for the installation process to make changes to your Mac’s system files.
Once the installation is complete, you will see a confirmation message indicating that Python has been successfully installed on your Mac.
Now that you have successfully run the installation package, you are almost ready to start using Python on your Mac. The next step is to customize the installation based on your preferences, which we will cover in the following section.
Step 5: Customize the installation
After running the Python installation package on your Mac, it’s time to customize the installation according to your preferences. This step allows you to tailor the Python setup to meet your specific needs.
During the installation process, you may have already selected certain options and components. However, if you want to further customize the installation or make changes later, you can do so using the Python installer.
After the installation is complete, locate the Python application in the “/Applications/Python 3.x” directory, where “x” represents the specific version number you installed. Double-click on the Python application to open it.
The Python installer interface will appear, presenting you with various customization options that you can modify if needed.
One important customization option is choosing the Python version to use as the default interpreter on your Mac. If you have multiple versions of Python installed, you can select the one that you want to be the default when executing Python scripts or running Python commands from the terminal.
Additionally, the installer allows you to install additional packages and libraries that are commonly used in Python development. These packages may include tools for web development, scientific computing, data analysis, and more. Review the available options and select the packages that are relevant to your needs.
Another customization option is the installation location for additional packages. By default, Python will install additional packages in its own site-packages directory. However, you have the option to change this location if desired.
Once you have made the desired customization selections, click on the “Install Now” button to apply the changes. The installer will make the necessary modifications to your Python setup based on your selections.
Keep in mind that it is not necessary to customize the installation if you’re satisfied with the default settings. The customization step is optional and allows you to further tailor your Python installation to your specific requirements.
With your installation now customized to your preferences, you can move on to the final step – verifying the installation to ensure everything is set up correctly.
Step 6: Verify the installation
After customizing the Python installation on your Mac, it’s important to verify that everything has been set up correctly. Verifying the installation ensures that Python is working as expected and ready for you to start coding.
To verify the installation, open the Terminal application on your Mac. You can find it by navigating to Applications > Utilities > Terminal, or you can use the Spotlight search by pressing Command + Space and typing “Terminal”.
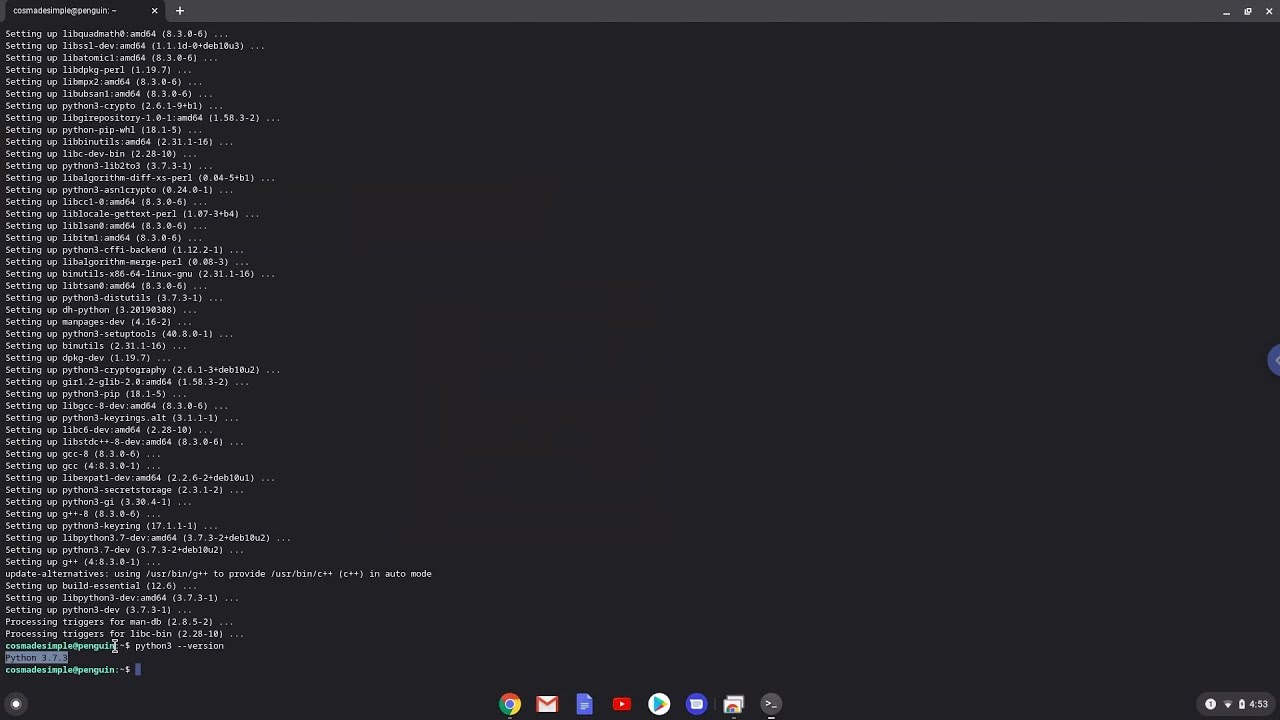
In the Terminal, type the following command:
python3 --versionThis command will display the version of Python that is currently installed on your Mac. If the installation was successful, you should see the Python version number that you installed, such as “Python 3.x.x”.
If you see the expected Python version, congratulations! Your Python installation is working correctly.
In addition to verifying the version, you can also test that Python is functioning properly by entering the Python interactive shell. Enter the following command in the Terminal:
python3This will open the Python interpreter, where you can type Python commands and see the output interactively. Try entering a simple Python command, such as:
print("Hello, Python!")If you see the expected output, such as “Hello, Python!”, then Python is running correctly on your system.
Once you have verified the installation and tested Python’s functionality, you are ready to embark on your Python programming journey. Whether you’re a beginner exploring the basics or an experienced developer diving into advanced topics, Python offers a wide range of possibilities.
Now that you have installed and verified Python on your Mac, it’s time to unleash your creativity and start coding!
Conclusion
Congratulations! You have successfully downloaded and installed Python 3 on your Mac. Python is a powerful and versatile programming language that offers numerous possibilities for both beginners and experienced developers.
In this guide, we walked you through the step-by-step process of setting up Python 3 on your Mac. We started by visiting the official Python website, selecting the appropriate Python version, and downloading the installation package. Then, we ran the installation package, customized the installation to suit our preferences, and verified that Python was installed correctly.
Now that Python is up and running on your Mac, you are equipped to dive into the world of Python programming. Python offers a clean and readable syntax, a vast library ecosystem, and a supportive community, making it an ideal choice for a wide range of projects and applications.
As you continue your Python journey, be sure to explore the Python documentation, online tutorials, and forums to deepen your understanding and expand your skills. There are plenty of resources available to help you navigate the intricacies of the language and tackle complex problem-solving tasks.
Remember, practice is key. The more you code and experiment with Python, the stronger your skills will become. Challenge yourself with coding exercises, work on small projects, and collaborate with others to gain insights and broaden your perspective.
Whether you’re interested in web development, data analysis, machine learning, or automation, Python has the tools and libraries to support your ambitions. Harness the power of Python to bring your ideas to life, solve problems, and build innovative applications.
Now that you have Python installed and ready to go, there’s no limit to what you can achieve. So, grab your favorite text editor or integrated development environment (IDE), and start coding your way towards success with Python!