Introduction
Welcome to our guide on how to download music from your iPod to iTunes. If you have ever lost your music library on your computer or accidentally deleted your iTunes library, you may be wondering how to recover the music you have stored on your iPod. Thankfully, with a few simple steps, you can easily transfer your music from your iPod back to your iTunes library, ensuring that your favorite songs are safely stored on your computer.
Whether you are switching to a new computer, recovering from a computer crash, or just want an extra layer of backup for your music, this guide will walk you through the process of transferring your music from your iPod to iTunes. You don’t need any advanced technical skills – just a computer, your iPod, and iTunes installed.
By following the steps outlined in this guide, you will be able to retrieve your music files from your iPod and have them back in your iTunes library in no time. This will allow you to easily manage and play your music, create playlists, and sync your iPod with your iTunes library.
So, if you’re ready to learn how to download music from your iPod to iTunes, let’s dive into the step-by-step process!
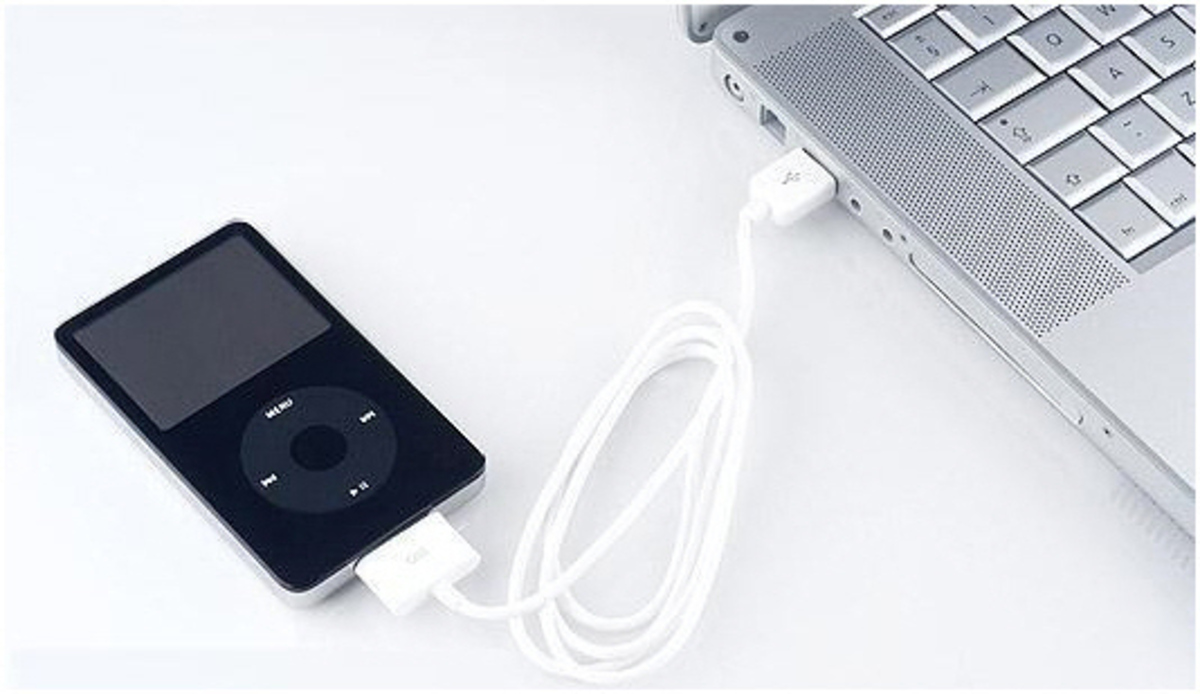
Step 1: Connect Your iPod to Your Computer
The first step in transferring your music from your iPod to iTunes is to connect your iPod to your computer using the USB cable that came with your device. Make sure your computer is powered on and running the latest version of iTunes.
Once you have connected your iPod to your computer, you may need to unlock your device by entering your passcode or using Touch ID, depending on your iPod model. If prompted, authorize your computer to access your iPod by entering your Apple ID and password.
After successfully connecting your iPod to your computer, you should see your device appearing in the iTunes interface. Look for the iPod icon on the top-left corner of the iTunes window, indicating that your iPod has been recognized by iTunes.
If you’re having trouble connecting your iPod to your computer, make sure the USB cable is securely plugged in at both ends and try using a different USB port on your computer. Additionally, check for any software updates for iTunes and make sure you have the latest drivers installed for your iPod.
Once your iPod is successfully connected and recognized by iTunes, you’re ready to move on to the next step: launching iTunes.
Step 2: Launch iTunes
Now that your iPod is connected to your computer, it’s time to launch iTunes and prepare for the music transfer process.
If you already have iTunes installed on your computer, you can simply open the application by clicking on the iTunes icon in your desktop or locating it in your applications folder.
If you don’t have iTunes installed, you can download it for free from the official Apple website. Follow the instructions provided on the website to complete the installation process.
Once iTunes is launched, you will see the familiar interface with a menu bar at the top and various sections such as Library, For You, Browse, and Radio. These sections allow you to explore and manage your music collection.
Before proceeding with the transfer process, make sure your iTunes settings are properly configured. Go to the iTunes Preferences by clicking on ‘iTunes’ in the top menu bar and selecting ‘Preferences’ (or ‘Settings’ on Windows).
In the Preferences window, navigate to the ‘Devices’ tab and ensure that the checkbox next to ‘Prevent iPods, iPhones, and iPads from syncing automatically’ is checked. This will prevent iTunes from syncing your iPod automatically and potentially erasing its content.
With iTunes launched and your settings adjusted, you’re now ready to proceed to the next step: enabling Disk Use mode on your iPod.
Step 3: Enable Disk Use Mode
In order to transfer your music files from your iPod to iTunes, you need to enable the Disk Use mode on your iPod. This mode allows your computer to recognize your iPod as an external storage device and access its files.
Here’s how you can enable Disk Use mode on your iPod:
- Open iTunes on your computer and ensure that your iPod is connected.
- Select your iPod from the list of devices in iTunes. You can find it under the “Devices” section on the left-hand side of the iTunes window.
- In the main summary window for your iPod, scroll down until you find the “Options” section.
- Check the box next to “Enable Disk Use” or “Manually manage music and videos”, depending on your iPod model and iTunes version.
- Click the “Apply” or “Sync” button to save the changes and apply the Disk Use mode to your iPod.
Enabling Disk Use mode essentially turns your iPod into an external hard drive. This allows you to access and transfer the music files stored on your iPod directly through your computer’s file explorer or Finder.
Keep in mind that once Disk Use mode is enabled, you should avoid disconnecting your iPod abruptly or ejecting it without properly ejecting it through iTunes or your computer’s operating system. Doing so can result in data loss or corruption.
Now that Disk Use mode is enabled on your iPod, you’re ready to move on to the next step: locating the music files on your iPod.
Step 4: Locate iPod Music Files
Now that your iPod is in Disk Use mode, you can locate and access the music files stored on your device. Follow these steps to find the music files:
- Open the file explorer or Finder on your computer.
- Navigate to the list of external devices or drives.
- You should see your iPod listed as an external device. Click on it to access its contents.
- Look for a folder named “iPod_Control” or something similar. This folder contains all the music files on your iPod.
- Open the “iPod_Control” folder and locate the “Music” folder. Inside this folder, you will find subfolders with random four-letter names.
- The subfolders contain your music files, which are typically encoded in a format like “XYZ.mp3” or “ABC.m4a”.
If your iPod is an older model or you have set it to manually manage your music collection, you may find the music files directly in the iPod’s root directory rather than inside the “iPod_Control” folder.
While browsing through the subfolders, you may notice that the random four-letter names can be difficult to identify. However, each folder should contain multiple music files with various track names, artists, and album titles.
Now that you have located the music files on your iPod, it’s time to transfer them to your iTunes library. Proceed to the next step to learn how.
Step 5: Transfer Music Files to iTunes
With the music files on your iPod located, it’s time to transfer them to your iTunes library. Follow these steps to complete the transfer:
- Open iTunes on your computer if it’s not already open.
- Click on the “File” menu in iTunes and select “Add File to Library” or “Add Folder to Library”, depending on whether you want to transfer individual music files or entire folders.
- Navigate to the location where you found the music files on your iPod.
- Select the desired music files or folders and click “Open” to begin the transfer.
- Wait for iTunes to import the music files into your library. The time it takes will depend on the size of the files you are transferring.
During the transfer process, iTunes will analyze and organize the music files, retrieving the title, artist, album, and other metadata information. This allows you to easily search, browse, and manage your music collection within iTunes.
After the transfer is complete, you can find your imported music files in the “Music” section of your iTunes library. You can now play, create playlists, and sync them with other devices as desired.
It’s worth noting that if you have existing music files with the same names in your iTunes library, iTunes may prompt you to either replace the existing files or keep both versions. Choose the option that best suits your needs.
With the music files successfully transferred, you can move on to the next step to organize them within your iTunes library.
Step 6: Organize Your Music in iTunes
Now that your music files are safely transferred to your iTunes library, it’s time to organize them for easy browsing and management. Follow these steps to organize your music in iTunes:
- Open iTunes on your computer, if it’s not already open.
- Navigate to the “Music” section of your iTunes library.
- Click on the “Songs” tab to view all your music files.
- Use the options in the top menu bar to sort your music by various criteria such as artist, album, genre, or release year.
- Create playlists to categorize your music based on your preferences. To create a playlist, click on the “File” menu, select “New”, and then choose “Playlist”. Give your playlist a name, drag and drop music files into it to populate the playlist.
- Edit the metadata of your music files to ensure accurate information is displayed. Right-click on a song, select “Get Info”, and update the relevant fields such as title, artist, album, and artwork.
- Utilize the search bar in iTunes to quickly find specific songs, albums, or artists by typing keywords.
- Take advantage of the various features and options in iTunes to further customize your music library, such as creating smart playlists, enabling iCloud Music Library, or syncing your library with your other Apple devices.
By organizing your music in iTunes, you can easily navigate and enjoy your favorite songs, create personalized playlists for different moods or occasions, and have a well-structured library for future use.
Remember to periodically back up your iTunes library to prevent data loss. You can back up your entire library or use the built-in iTunes feature to back up specific playlists.
Congratulations! You’ve successfully downloaded music from your iPod to iTunes and organized your music files for easy access and enjoyment.
Conclusion
Transferring music from your iPod to iTunes doesn’t have to be a complicated process. By following the steps outlined in this guide, you can retrieve your music files and enjoy them on your computer within your iTunes library. Whether you need to recover lost music after a computer crash or simply want to have a backup of your music collection, this guide has provided you with a straightforward solution.
Remember to connect your iPod to your computer, launch iTunes, enable Disk Use mode, locate the music files on your iPod, transfer them to your iTunes library, and finally, organize your music within iTunes for easy navigation and management. While the process may vary slightly depending on your iPod model and iTunes version, the overall steps remain the same.
Now that you have successfully downloaded music from your iPod to iTunes, take the time to explore the various features and options within iTunes. Create playlists, sync your music with other Apple devices, and customize your library to suit your preferences.
If you encounter any difficulties during the process, make sure to check for updates for iTunes and your iPod’s firmware, and consult the official Apple support website or community forums for additional guidance.
We hope this guide has been helpful in assisting you with downloading music from your iPod to iTunes. Enjoy your music collection on your computer and never worry about losing your favorite tunes again!