Introduction
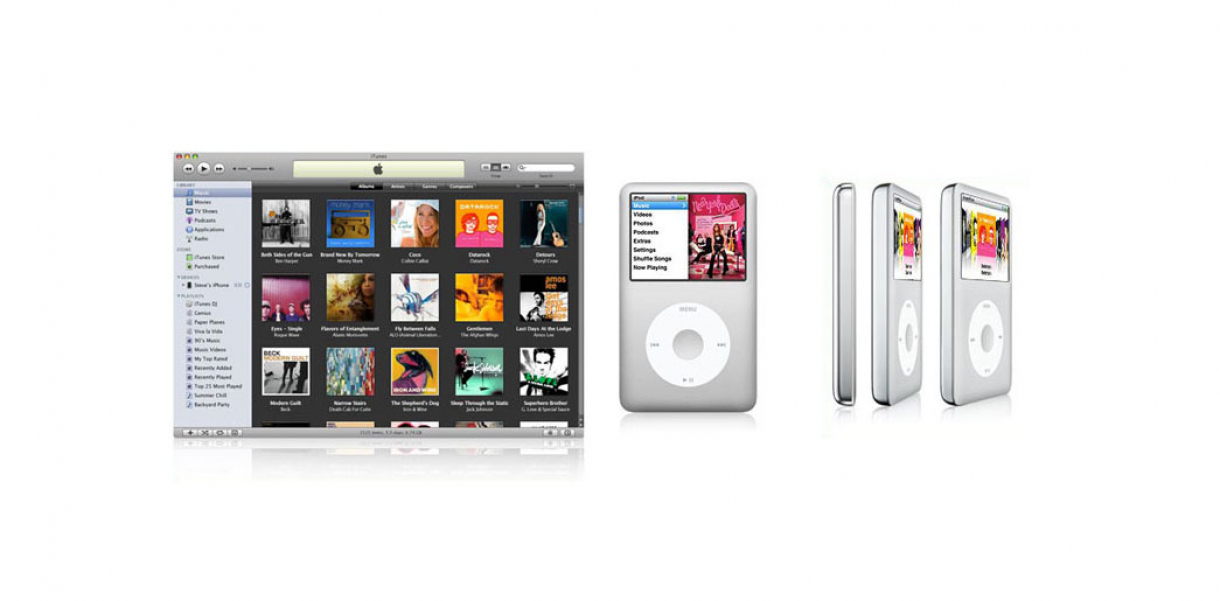
Music is an important part of many people’s lives, and having it readily available on your iPod can enhance your listening experience. While iTunes has long been the go-to software for managing music on Apple devices, there are alternative methods to download music to your iPod without relying on iTunes. Whether you want to explore different music streaming platforms or transfer music from your computer, this article will provide a variety of methods that can help you achieve your goal.
By using third-party software, you can bypass iTunes and gain more control over your music library. Windows Media Player, Google Play Music Manager, and Floola are just a few examples of software that allow you to transfer music to your iPod without relying on iTunes. These tools provide alternative ways to manage your music, giving you flexibility in how you choose to enjoy your favorite tunes.
If you prefer to keep your music library in the cloud, iCloud Music Library allows you to import and sync your music across multiple devices. This feature enables you to download music directly to your iPod without the need for iTunes. Additionally, cloud-based music platform Spotify offers a method to transfer music to your iPod directly through their app, expanding your choices for music streaming and customization.
Furthermore, if you want to download music directly from YouTube, there are software options to convert and transfer those files to your iPod. And for those who prefer a more organized approach, MediaMonkey and Dropbox provide alternative ways to import and manage your music collection without relying on iTunes.
With these various methods at your disposal, you can download and enjoy music on your iPod without being limited to iTunes. Whether you want to explore third-party software, cloud-based services, or alternative platforms, this article will guide you through the steps to expand your options for enjoying music on your iPod.
Method 1: Using Third-Party Software
One popular way to download music to your iPod without iTunes is by using third-party software. These programs provide alternative methods to manage and transfer music to your device. Here are a few software options to consider:
- Windows Media Player: If you’re using a Windows computer, you can leverage the built-in Windows Media Player to import and sync music to your iPod. Simply connect your iPod to your computer, open Windows Media Player, and select the songs you want to transfer. Then, click the “Sync” button, and the selected music will be copied to your iPod.
- Google Play Music Manager: If you have a Google account and access to the Google Play Music Manager, you can easily transfer your music to your iPod. Start by downloading and installing the Music Manager software on your computer. Then, add your music library to the Music Manager, and select the option to download or transfer your uploaded songs to your iPod. This method allows you to enjoy your Google Play Music library on your iPod without the need for iTunes.
- Floola: Floola is a third-party software that supports music management for various Apple devices, including iPods. It provides a user-friendly interface and allows you to add music to your iPod without iTunes. Simply download and install Floola on your computer, connect your iPod to the computer, and start adding music files to your device. Floola also offers additional features such as converting audio formats and managing playlists, making it a versatile choice for iPod users.
By utilizing these third-party software options, you can bypass iTunes and have more control over managing your music library. Whether you prefer using Windows Media Player, Google Play Music Manager, or Floola, these tools offer alternative ways to transfer music to your iPod. Experiment with these options and find the one that suits your needs and preferences the best.
Method 2: Importing Music with Windows Media Player
If you’re a Windows user, another method to download music to your iPod without iTunes is by using Windows Media Player. Windows Media Player is a built-in media management software that allows you to import and sync music to various devices, including iPods. Here’s how you can do it:
- Connect your iPod: Start by connecting your iPod to your computer using the USB cable. Ensure that your iPod is properly recognized and connected.
- Launch Windows Media Player: Open Windows Media Player on your computer. You can find it in the “Start” menu or by searching for it in the search bar.
- Add music to your library: To import music from your computer to Windows Media Player, click on the “Library” tab. From here, you can choose to add music files or entire folders to your library. Select the songs you want to transfer to your iPod.
- Create a sync list: Once you have added the music to your library, select the songs you want to transfer to your iPod by checking the boxes next to their titles. You can also create playlists if you prefer to sync an entire playlist to your iPod.
- Sync your iPod: Click on the “Sync” tab in Windows Media Player. Here, you will see a list of all the selected songs or playlists that are ready to be synced. Make sure your iPod is listed as the sync device. If not, select your iPod from the drop-down menu.
- Start the sync: Once you have double-checked the songs and the sync device, click on the “Start Sync” button. Windows Media Player will start transferring the selected music to your iPod. The progress bar will indicate the status of the sync process.
- Eject your iPod: Once the sync is complete, you can safely disconnect your iPod from your computer. Make sure to eject it properly to avoid any data loss or corruption.
Using Windows Media Player to import music is a convenient way for Windows users to download songs to their iPods without having to rely on iTunes. Give this method a try and enjoy your favorite music on your iPod with ease.
Method 3: Transferring Music with iCloud Music Library
If you are looking for a cloud-based solution to download music to your iPod without iTunes, using the iCloud Music Library is a great option. The iCloud Music Library allows you to import and sync your music across multiple devices seamlessly. Here’s how you can transfer music to your iPod using the iCloud Music Library:
- Enable iCloud Music Library: On your iPod, go to “Settings” and tap on your name at the top of the screen. Then, navigate to “iCloud” and select “Music.” Toggle on the “iCloud Music Library” option to enable it.
- Upload music to iCloud Music Library: Open iTunes on your computer and sign in with your Apple ID. Then, go to “Preferences” and select the “General” tab. Check the box that says “iCloud Music Library” and click “OK.” Next, click on the “File” tab and choose “Add File to Library” or “Add Folder to Library” to import your music to iTunes. Your songs will be uploaded to the iCloud Music Library.
- Download music on your iPod: On your iPod, open the “Music” app. Tap on the “Library” tab at the bottom and select “Songs.” Scroll through your music library and find the songs you want to download. Tap on the download icon (cloud with the downward arrow) next to each song to start the download process. The downloaded songs will be available offline on your iPod.
- Access your music: Once the songs are downloaded, you can access them in the “Library” tab of the Music app on your iPod. You can organize your music by playlists, artists, albums, or genres to easily navigate through your collection.
Utilizing the iCloud Music Library simplifies the process of downloading music to your iPod without relying on iTunes. By enabling the iCloud Music Library and uploading your music to iTunes, you can easily access and download your songs on your iPod from the cloud. Enjoy your personalized music collection wherever you go with this convenient method.
Method 4: Using Google Play Music Manager
If you have a Google account and want to download music to your iPod without iTunes, using Google Play Music Manager is an excellent option. The Google Play Music Manager provides a convenient way to transfer your music to your iPod. Here’s how you can do it:
- Download and install Google Play Music Manager: Start by downloading and installing the Google Play Music Manager software on your computer. This tool allows you to upload and manage your music library with ease.
- Sign in to your Google account: Launch the Google Play Music Manager and sign in using your Google account credentials. If you don’t have a Google account, you’ll need to create one before proceeding.
- Upload your music library: Once signed in, the Google Play Music Manager will prompt you to select the location of your music library on your computer. Choose the appropriate folder or directories that contain your music files. The Music Manager will then begin uploading your music to your Google Play Music account.
- Access your music on your iPod: On your iPod, download and install the Google Play Music app from the App Store. Sign in to the app using the same Google account credentials. Once signed in, you’ll be able to access your uploaded music library on your iPod and stream or download songs for offline listening.
- Download music for offline listening: To download music from your Google Play Music library to your iPod, simply find the song or album you want to download and tap the download button. The downloaded songs will be available for offline listening on your iPod.
Using Google Play Music Manager provides a seamless way to download and manage your music on your iPod without iTunes. By uploading your music library to your Google Play Music account and using the Google Play Music app on your iPod, you can enjoy your favorite songs on the go. Explore the vast Google Play Music library and expand your music collection effortlessly.
Method 5: Syncing Music with Floola
If you’re looking for an alternative method to download music to your iPod without iTunes, Floola is a great option. Floola is a third-party software that supports music management for various Apple devices, including iPods. Here’s how you can use Floola to sync music to your iPod:
- Download and install Floola: Start by downloading Floola from the official website and installing it on your computer. Floola is compatible with both Windows and Mac operating systems.
- Connect your iPod to your computer: Use a USB cable to connect your iPod to your computer. Floola should recognize your iPod and display it in the software interface.
- Manage and organize your music: With Floola open, you can add music files to your iPod by simply dragging and dropping them into the software’s interface. Floola also provides options to create and manage playlists, edit track information, and organize your music library.
- Synchronize your music: Once you have added your desired songs or playlists to Floola, click on the “Synchronize” button to initiate the syncing process. Floola will transfer the selected music to your iPod, making it available for playback.
- Eject your iPod: Once the synchronization process is complete, safely eject your iPod from your computer. This ensures that all changes and additions to your music library are saved and ready to be enjoyed on your iPod.
Floola offers a user-friendly interface with various features to help you manage and transfer music to your iPod without using iTunes. Explore the options provided by Floola, such as creating playlists and editing track information, to personalize your music listening experience on your iPod.
By utilizing Floola, you can have more control over your music library and enjoy seamless synchronization with your iPod. Give this method a try and enjoy your favorite tunes on your iPod hassle-free.
Method 6: Downloading Music from YouTube
If you’re looking for a way to download music to your iPod without iTunes and have access to a wide range of songs, downloading music from YouTube can be a convenient option. Although YouTube does not officially support downloading videos or audio, there are third-party tools that allow you to convert and transfer YouTube videos into audio files compatible with your iPod. Here’s how you can download music from YouTube:
- Find a YouTube to MP3 converter: Search for a reliable YouTube to MP3 converter online. There are various websites and software options available that allow you to convert YouTube videos into downloadable audio files. Choose a converter that fits your needs and preferences.
- Copy the YouTube video URL: Go to YouTube and find the music video you want to download. Copy the URL of the video from the address bar of your browser.
- Paste the URL into the converter: Open the YouTube to MP3 converter and paste the copied URL into the designated field. Choose the desired audio quality or format, if available.
- Convert and download the audio file: Click on the “Convert” or “Download” button to start the conversion process. The converter will extract the audio from the YouTube video and generate a downloadable audio file.
- Transfer the downloaded music to your iPod: Once the audio file is downloaded, connect your iPod to your computer using a USB cable. Open iTunes and select your iPod from the device list. Go to the “Music” tab and click on “Add File to Library” or “Add Folder to Library” to import the downloaded audio file to your iTunes library. Finally, sync your iPod with iTunes to transfer the music onto your device.
Downloading music from YouTube provides you with access to a vast library of songs for your iPod, even without iTunes. Remember to respect copyright laws and ensure that you’re downloading music legally. By using a YouTube to MP3 converter, you can easily convert and transfer your favorite songs to your iPod for on-the-go enjoyment.
Method 7: Transferring Music with Spotify
If you’re a Spotify user and want to download music to your iPod without iTunes, you’ll be pleased to know that Spotify provides a method to transfer music directly to your iPod through their app. Here’s how you can do it:
- Download and install the Spotify app: If you don’t already have the Spotify app installed on your iPod, go to the App Store and download it. Sign in to your Spotify account or create a new account if you don’t have one.
- Find and select the songs you want to download: Search for the songs you want to transfer to your iPod within the Spotify app. Create playlists or add songs to existing playlists to organize your selection.
- Enable the “Offline” mode: To download the songs for offline access, you need to enable the “Offline” mode in the Spotify app. Go to the playlist or album you want to download and toggle the switch next to “Download” or “Available Offline.” This will start the download process for those songs onto your iPod.
- Access downloaded music on your iPod: Once the songs are downloaded, go to your Spotify library and navigate to the “Your Library” or “Playlists” section. You’ll find the downloaded music available for offline listening on your iPod.
Transferring music with Spotify not only allows you to download songs directly to your iPod but also gives you access to a vast music library and personalized playlists. Enjoy your favorite tunes even without an internet connection by utilizing the offline mode offered by Spotify.
Experiment with different playlists and explore new music genres to broaden your musical horizons. With Spotify, you can have a diverse collection of songs at your fingertips, all ready to be enjoyed on your iPod.
Method 8: Using Dropbox to Import Music
Another method to download music to your iPod without iTunes is by using Dropbox, a popular cloud storage service. Dropbox allows you to store and sync files across multiple devices, making it a convenient option for transferring music to your iPod. Here’s how you can use Dropbox to import music:
- Sign up for a Dropbox account: If you don’t already have a Dropbox account, sign up for one on their website. The basic account is free and provides enough storage space for your music files.
- Install Dropbox on your computer and iPod: Download and install the Dropbox app on your computer and your iPod from the respective app stores. Sign in to the Dropbox app using the same account credentials.
- Upload music files to Dropbox: Open the Dropbox app on your computer and navigate to the folder where your music files are located. Drag and drop the music files or folders into the Dropbox folder to upload them to your Dropbox account. The files will then sync to the Dropbox app on your iPod.
- Access and download the music on your iPod: Open the Dropbox app on your iPod and navigate to the folder where you uploaded your music files. Tap on the music file you want to download and select the “Make Available Offline” option. This will download the file to your iPod, and you can access it anytime without an internet connection.
Using Dropbox to import music to your iPod provides a convenient way to access and transfer your music files across devices. As long as you have an active internet connection, you can upload and download music to and from Dropbox, making it readily available on your iPod.
Organize your music files into folders within your Dropbox account for easy navigation. This method allows you to add or remove music files at any time, ensuring that you always have a personalized selection of songs on your iPod.
Method 9: Adding Music with MediaMonkey
If you’re looking for an alternative to iTunes for adding music to your iPod, MediaMonkey is a powerful media management software that provides a seamless way to transfer music. Here’s how you can use MediaMonkey to add music to your iPod:
- Download and install MediaMonkey: Start by downloading and installing MediaMonkey on your computer. It supports both Windows and Mac operating systems.
- Connect your iPod to your computer: Use a USB cable to connect your iPod to your computer. MediaMonkey should recognize your iPod and display it in the software interface.
- Import music to MediaMonkey: Open MediaMonkey and go to “File” > “Add/Rescan Tracks to the Library” or click on the “Add/Rescan Tracks” button. Select the music files or folders you want to add to MediaMonkey’s library. MediaMonkey will import and organize your music files.
- Create a playlist: To create a playlist, go to the “Playlists” section in MediaMonkey. Click on “New Playlist” and give it a name. Then, drag and drop the desired songs from your library to the playlist.
- Select your iPod as the sync device: In MediaMonkey, go to the “Devices” section and select your iPod from the list of connected devices. Make sure your iPod is set as the sync device.
- Sync music to your iPod: Select the playlist or songs you want to transfer to your iPod. Right-click and choose “Send to” > [your iPod name]. MediaMonkey will start syncing the selected music to your iPod. The progress will be displayed within the software.
- Eject your iPod: Once the syncing process is complete, safely eject your iPod from your computer. Your newly added music will be available for playback on your iPod.
MediaMonkey offers an intuitive interface with extensive features for managing and transferring your music library to your iPod. With its powerful organization capabilities and playlist creation options, you can have complete control over your music collection.
Experiment with MediaMonkey’s advanced features such as automatic tagging and metadata updates to ensure your music library remains organized and up to date. Enjoy your personalized music collection on your iPod with the help of MediaMonkey’s comprehensive media management abilities.
Conclusion
Downloading music to your iPod without relying on iTunes is not only possible but also offers a wide range of options to suit your preferences. Whether you choose to use third-party software, cloud-based services, or alternative platforms, there are various methods available to transfer music to your iPod.
By using third-party software such as Windows Media Player, Google Play Music Manager, or Floola, you can bypass iTunes and have more control over your music library. These tools allow you to sync music to your iPod directly from your computer, giving you the freedom to manage and transfer your favorite songs effortlessly.
Cloud-based solutions like iCloud Music Library and Spotify offer convenience and flexibility. With iCloud Music Library, you can import and sync your music library across multiple devices, making it accessible on your iPod without the need for iTunes. The Spotify app not only provides a vast music library but also allows you to download songs for offline listening directly on your iPod.
Alternative methods, such as downloading music from YouTube or using Dropbox to import music, provide additional ways to expand your music collection. With YouTube to MP3 converters, you can extract audio from YouTube videos and transfer them to your iPod. Dropbox enables you to store and sync your music files, granting you easy access to your library on your iPod.
Furthermore, MediaMonkey offers robust media management capabilities, allowing you to add and organize music on your iPod. Its playlist creation options and advanced features make it a versatile tool for managing your music collection.
With these diverse methods at your disposal, you can download and enjoy music on your iPod without being limited to iTunes. Explore the options presented in this article and find the method that best suits your needs and preferences. Embrace the freedom to personalize your music library and elevate your listening experience on your beloved iPod.