Introduction
Music has the power to uplift our spirits, invoke memories, and bring joy to our lives. If you have a beloved CD collection that you want to enjoy on your computer or portable music player, you’ll need to know how to download the music from the CD onto your computer. Fortunately, the process is relatively simple, and in this article, we’ll guide you through the steps to download music from a CD to your computer.
Before we get started, it’s important to note that downloading music from a CD for personal use is legal. However, sharing copyrighted material without permission is against the law. So, make sure you only download music from CDs that you own and have acquired legally.
In this guide, we’ll walk you through the step-by-step process of transferring your CD music to your computer. Whether you’re a tech-savvy individual or a beginner, you’ll find these instructions easy to follow.
Before we dive into the process, let’s briefly discuss the equipment you’ll need. To download music from a CD to your computer, you’ll need a computer with a CD/DVD drive, a blank writable CD (if you plan to create a new CD), and music management software such as Windows Media Player or iTunes.
Now that we have all the necessary information, let’s get started with the process of downloading music from a CD to your computer.
Step 1: Gathering the Necessary Equipment
Before you can start downloading music from your CD to your computer, you’ll need to gather the necessary equipment. Here’s what you’ll need:
- A computer with a CD/DVD drive: Ensure that your computer has a CD/DVD drive that can read CDs. If you have a newer computer without a built-in CD drive, you may need to purchase an external CD/DVD drive.
- A blank writable CD (optional): If you want to create a new CD with the downloaded music, make sure you have a blank writable CD. This step is optional, as you can also choose to simply save the music files on your computer.
- Music management software: You’ll need music management software to facilitate the download process. Popular options include Windows Media Player (for Windows users) and iTunes (for Mac users). If you don’t already have music management software installed on your computer, you can download it for free from the official websites or app stores.
Once you have gathered all the necessary equipment, you’ll be ready to proceed to the next steps of downloading music from your CD to your computer. These steps will vary slightly depending on the software you are using, but the overall process remains similar.
Now that you have everything you need, let’s move on to the next step, which is inserting the CD into your computer.
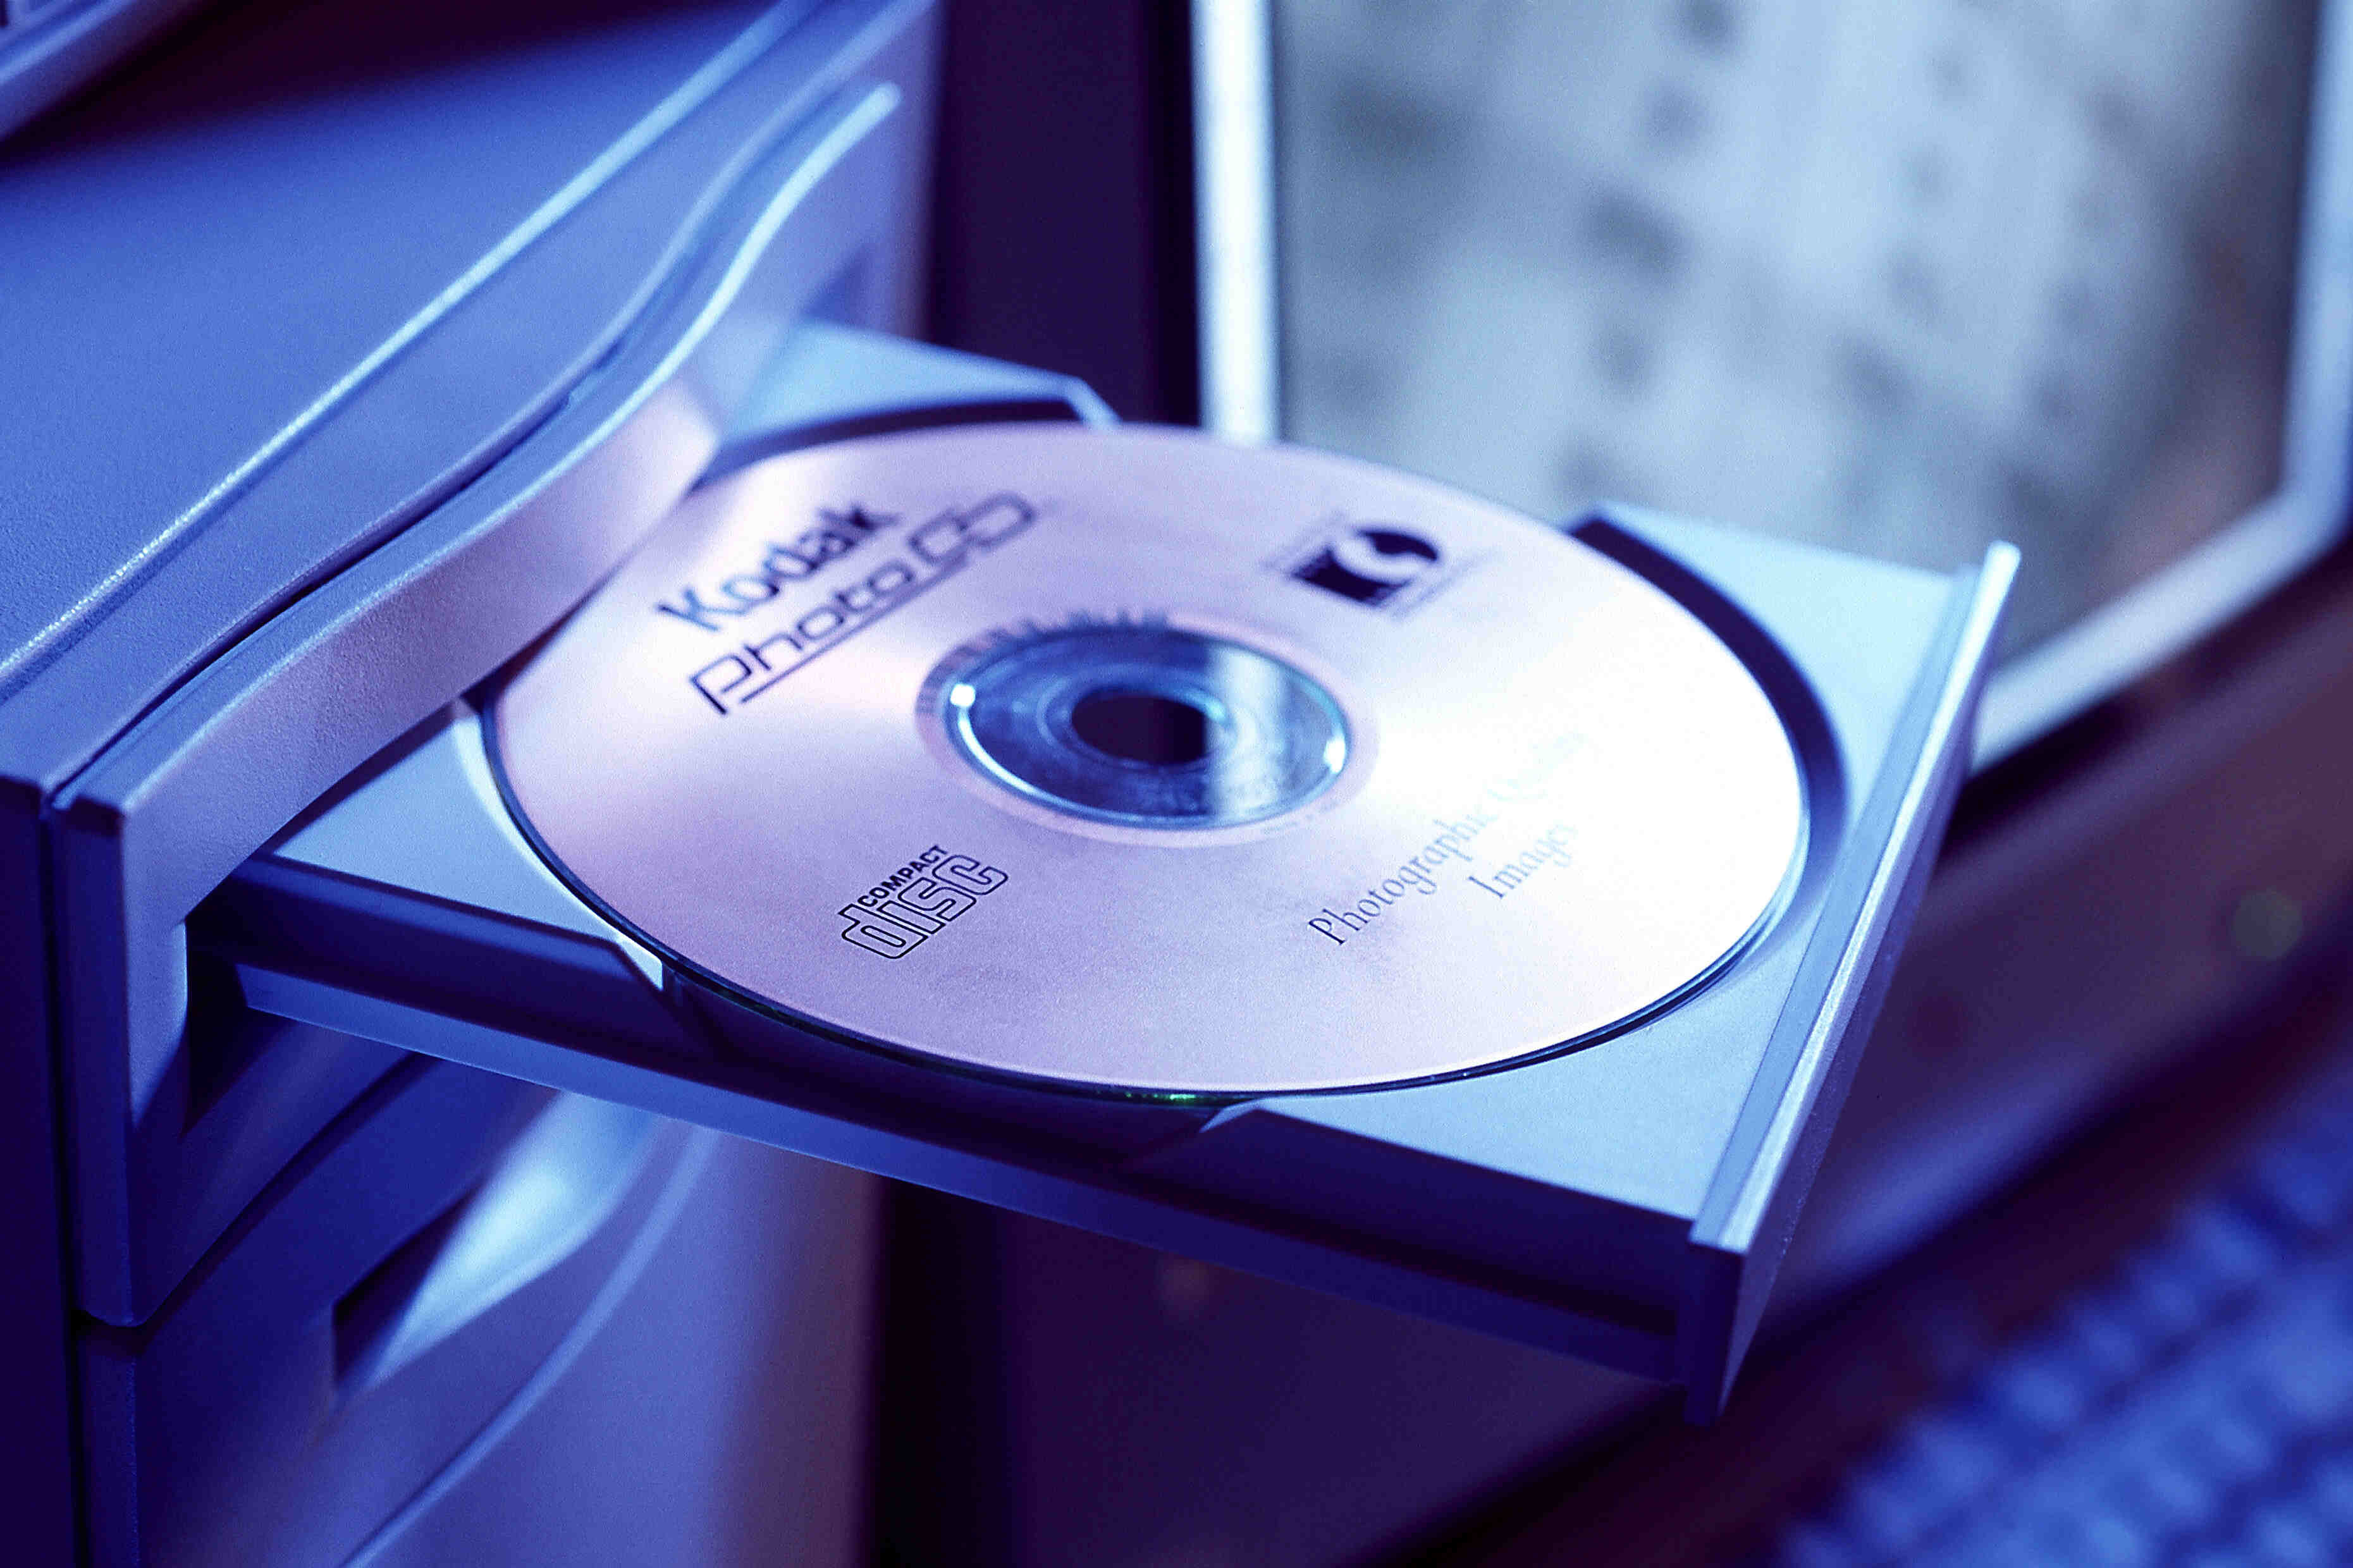
Step 2: Inserting the CD into Your Computer
Now that you have gathered the necessary equipment, it’s time to insert the CD into your computer’s CD/DVD drive. Follow these steps:
- Locate the CD/DVD drive on your computer. It is usually located on the front of a desktop computer’s CPU unit or on the side of a laptop.
- Press the eject button on the CD/DVD drive. This will open the drive tray.
- Take your CD and place it gently onto the tray, ensuring that the disc label is facing up.
- Push the tray back into the drive until it is securely closed.
Once you have inserted the CD, your computer will recognize it and the music management software will automatically launch (or prompt you to open the software). If the software does not open automatically, you can manually open it by double-clicking on its icon on your desktop or in your applications folder.
Now that the CD is successfully inserted into your computer, we can move on to the next step, which is opening the CD on your computer.
Step 3: Opening the CD on Your Computer
After inserting the CD into your computer, it’s time to open it and access the contents. Follow these steps to open the CD on your computer:
- If the music management software did not automatically open when you inserted the CD, open it manually by double-clicking on its icon on your desktop or in your applications folder.
- Look for the option to “Import” or “Rip” the CD within the music management software. This option may be available in the menu bar or displayed prominently on the main interface of the software.
- Click on the “Import” or “Rip” option to start the process of importing the CD into your music library.
- The software will begin reading the CD and retrieving information about the tracks. This process may take a few moments, depending on the speed of your computer and the number of tracks on the CD.
- Once the software has finished analyzing the CD, it will display a list of the tracks available on the CD in the software’s interface. You may also see album artwork, track names, and additional information about the CD.
At this point, you have successfully opened the CD on your computer, and the music management software has recognized the tracks on the CD. Now, it’s time to proceed to the next step, which involves selecting the songs you want to download.
Step 4: Selecting the Songs You Want to Download
Once you have opened the CD on your computer and the music management software has recognized the tracks, it’s time to select the songs you want to download. Follow these steps:
- Review the list of tracks displayed in the music management software’s interface. You can usually see the track names, lengths, and other information.
- Check the box or select the individual songs you want to download. You can typically do this by clicking on the checkboxes next to the track names or by using a “Select All” option if you want to download all the tracks.
- Take a moment to customize any preferences or settings for the downloaded songs. This may include choosing a file format (such as MP3 or WAV), adjusting the audio quality, or specifying the destination folder where the downloaded songs will be saved.
- Once you have made your selections and customized any preferences, proceed to the next step by clicking on the “Download” or “Import” button within the music management software.
The music management software will then begin the download process, transferring the selected songs from the CD to your computer. The time it takes to complete the download will depend on the size of the songs and the speed of your computer.
Now that you have successfully selected the songs you want to download, let’s move on to the next step, which involves choosing the destination folder for your downloaded music.
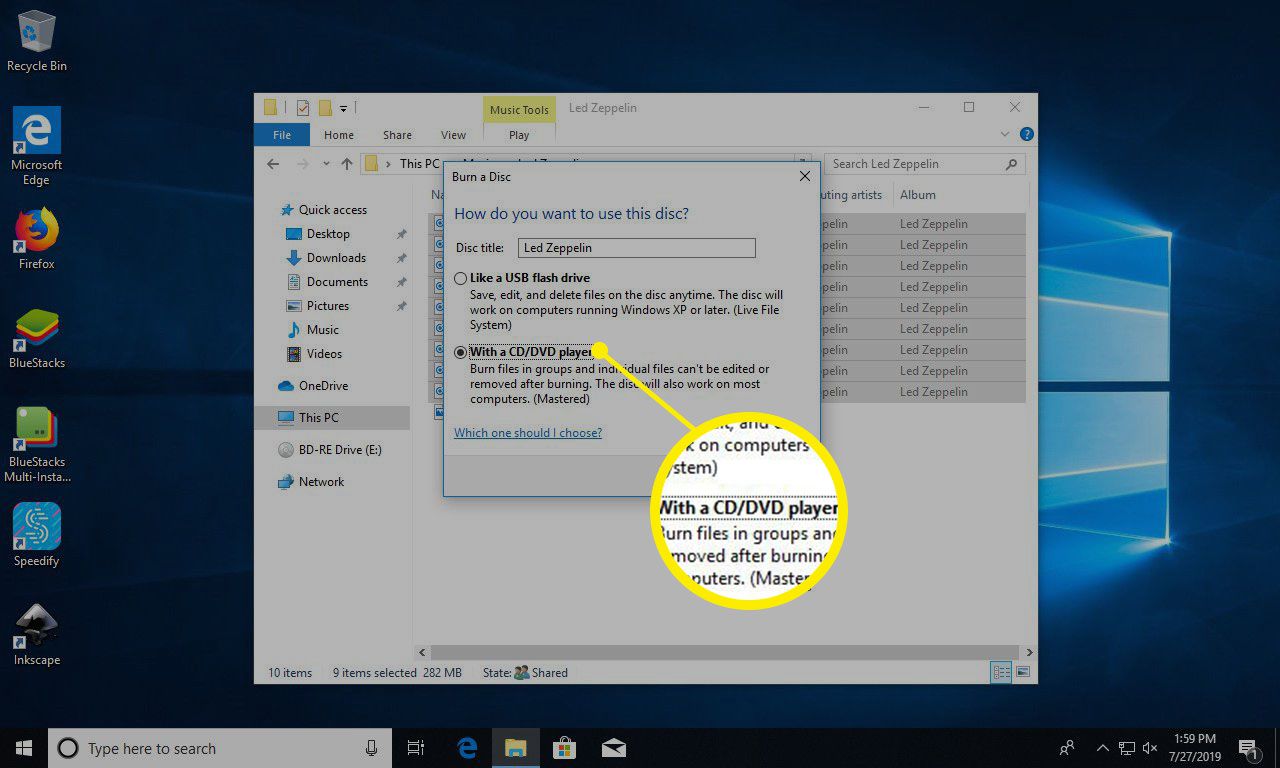
Step 5: Choosing the Destination Folder for Your Downloaded Music
After selecting the songs you want to download, it’s time to choose the destination folder where your downloaded music will be saved. Follow these steps:
- Within the music management software, look for the option to specify the destination folder for your downloaded music. This option is usually found in the software’s settings or preferences menu.
- Click on the option to choose the destination folder.
- A file navigation window will appear, allowing you to browse through your computer’s folders and drives.
- Select a folder where you want your downloaded music to be saved. This can be the default music folder on your computer or a custom folder that you have created.
- Once you have chosen the destination folder, confirm your selection by clicking on the “OK” or “Choose” button in the file navigation window.
By choosing the destination folder for your downloaded music, you ensure that the music management software knows where to save the files on your computer. This makes it easier for you to locate and organize your downloaded music in the future.
Now that you have successfully chosen the destination folder, you are ready to move on to the next step, which involves initiating the download process.
Step 6: Initiating the Download Process
With the destination folder set, it’s time to initiate the download process and start transferring the selected songs from the CD to your computer. Follow these steps to initiate the download:
- Within the music management software, look for a button or option that says “Download” or “Import.” Click on this button to start the download process.
- The software will begin transferring the selected songs from the CD to your computer. A progress bar or indicator may appear to show the status of the download.
- During the download process, you may see the names of the songs being downloaded, along with the progress of each song.
- Depending on the size of the songs and the speed of your computer, the download process may take a few minutes or longer. It’s important to be patient and let the software complete the download.
- Once the download is complete, the music management software will notify you that the songs have been successfully transferred to your computer.
By initiating the download process, you are allowing the music management software to transfer the selected songs from the CD to your specified destination folder. This ensures that you have easy access to your downloaded music for future listening or transferring to other devices.
Now that the download process is complete, let’s move on to the next step, which involves monitoring the progress of the download.
Step 7: Monitoring the Progress of the Download
While the download process is underway, it’s important to monitor the progress to ensure a successful transfer of the selected songs. Follow these steps to monitor the progress of the download:
- Keep an eye on the music management software’s interface. Most software will display a progress bar, percentage completion, or a list of songs with their respective download status.
- If available, you can also check the software’s download manager or activity log to get detailed information about the download progress.
- Be mindful of any error messages or alerts that may appear during the download process. These messages can indicate potential issues, such as a scratched CD or a problem with the software’s settings.
- If you encounter any errors or issues, pause or cancel the download process and refer to the software’s documentation or online support resources for troubleshooting instructions.
- Remember to be patient as the download progresses. Larger files or a slower computer may cause the download process to take more time.
Monitoring the progress of the download allows you to ensure a smooth transfer of the selected songs from the CD to your computer. It allows you to identify any potential issues early on and take appropriate actions to resolve them.
Once the download is complete and you have verified that all the selected songs have been successfully transferred, you can proceed to the final step, which involves verifying the downloaded music on your computer.
Step 8: Verifying the Downloaded Music on Your Computer
After the download process is complete, it’s essential to verify that the downloaded music has been successfully transferred to your computer. Follow these steps to verify the downloaded music:
- Navigate to the destination folder where you chose to save the downloaded music. You can do this by opening the file explorer or finder on your computer and locating the folder.
- Look for the downloaded music files within the designated folder. They should be in the format and file type that you selected during the download process (such as MP3 or WAV).
- Check that all the selected songs from the CD appear in the folder. You can compare the list of songs in the folder to the tracklist of the original CD to ensure that they match.
- Play a few seconds of each downloaded song using a media player on your computer to confirm that the audio is clear and matches the original tracks on the CD. This step can help identify any potential issues, such as incomplete or corrupted downloads.
- If there are any discrepancies or issues with the downloaded music, such as missing tracks or distorted audio, you may need to repeat the download process or seek assistance from the music management software’s support resources.
Verifying the downloaded music on your computer ensures that you have successfully transferred the selected songs from the CD and that they are in the correct format and playable condition. It allows you to enjoy your favorite music without encountering any unexpected issues.
With the verification process complete, you can now enjoy the downloaded music on your computer or transfer it to other devices for on-the-go listening.
Conclusion
Downloading music from a CD to your computer is a convenient way to enjoy your favorite songs digitally and on-the-go. By following the step-by-step process outlined in this guide, you can easily transfer your CD music to your computer and have it readily accessible for playback.
In this article, we discussed the necessary equipment required for the download process, such as a computer with a CD/DVD drive, a blank writable CD (optional), and music management software. We also covered the steps of inserting the CD into your computer, opening the CD on your computer, selecting the songs you want to download, and choosing the destination folder for your downloaded music.
Furthermore, we explained how to initiate the download process and monitor the progress to ensure a successful transfer. Lastly, we emphasized the importance of verifying the downloaded music on your computer to confirm that the transfer was completed accurately.
Now that you are familiar with the process of downloading music from a CD to your computer, you can enjoy your favorite tunes anytime and anywhere. Remember to respect copyright laws and only download music from CDs that you own and have acquired legally.
So, gather your CDs, fire up your computer, and start downloading your cherished music collection today. Happy listening!