Introduction
Are you a Mac user looking to download Microsoft Excel for your device? Look no further! Microsoft Excel is a powerful spreadsheet software that is widely used in various industries and professions. Whether you are a student, working professional, or a business owner, having access to Microsoft Excel can greatly enhance your productivity and organizational capabilities.
In this article, we will guide you through the step-by-step process of downloading Microsoft Excel for Mac. By following these instructions, you will be able to install Excel on your Mac device and unlock its vast range of features and functionalities.
Having Microsoft Excel on your Mac allows you to create, edit, and analyze data with ease. It enables you to organize financial data, track expenses, create charts and graphs, and perform complex calculations. With a user-friendly interface and a plethora of templates and formulas, Microsoft Excel simplifies complex data management tasks and helps you make informed decisions.
Whether you are a student preparing for exams, a small business owner managing finances, or a data analyst crunching numbers, Microsoft Excel for Mac is an essential tool in your arsenal. Let’s get started with the step-by-step process of downloading and installing Microsoft Excel for Mac.
Step 1: Visit the Office website
The first step to downloading Microsoft Excel for Mac is to visit the official Office website. Open your preferred web browser and enter the URL: www.office.com. This will take you to the Microsoft Office homepage.
Once you are on the homepage, you will see various options and products offered by Microsoft Office. Since you are specifically looking to download Microsoft Excel, navigate to the Excel section on the website. You can usually find this by either scrolling down or by clicking on the “Products” or “Applications” tab at the top of the page and selecting Excel from the list of available applications.
Click on the Microsoft Excel option, and it will redirect you to the Excel download page. Here, you can find detailed information about the features and benefits of Microsoft Excel.
Before proceeding with the download, it is important to ensure that your Mac meets the system requirements for Microsoft Excel. This information can usually be found on the download page or in the product description. Check that your Mac has the necessary operating system and hardware specifications to run Excel smoothly.
Once you have confirmed that your Mac is compatible with Microsoft Excel, you are ready to move on to the next step of the download process.
Step 2: Sign in with Microsoft account
To download and access Microsoft Excel for Mac, you need to sign in with your Microsoft account. If you already have a Microsoft account, proceed to the next step. If you don’t have one, you can easily create a new account by clicking on the “Sign In” or “Create Account” button on the Office website.
On the sign-in page, enter your email address or phone number associated with your Microsoft account. Then, click on the “Next” button to proceed. If your account information is correct, you will be prompted to enter your password. Enter your password and click on the “Sign In” button.
In some cases, a two-step verification process may be required to ensure the security of your account. This additional step could involve verifying your identity through a code sent to your email or phone. Follow the instructions provided and complete the verification process to continue.
If you are using a public or shared computer, be sure to sign out of your Microsoft account after you have finished using Excel to protect your personal information.
Signing in with your Microsoft account allows you to access additional features and benefits, such as cloud storage and collaboration features. By signing in, you can save your Excel files to the cloud, making them accessible from any device with an internet connection. This ensures that your files are secure and easily accessible, even if you switch to a different device or encounter any computer issues.
Once you have successfully signed in, you are now ready to proceed with downloading Microsoft Excel for Mac in the next step.
Step 3: Select Mac as your operating system
After signing in with your Microsoft account, you will be redirected to the download page for Microsoft Excel. Here, you will have the option to select your operating system. Since you are using a Mac, ensure that you choose Mac as your operating system.
On the download page, you may see different versions or editions of Microsoft Excel available. Select the version that suits your needs. The options may include the latest version or specific versions based on your subscription plan, such as Microsoft 365 or Office Home & Student.
Take a moment to review the details and features listed for each version, making sure it meets your requirements. Choose the version that best suits your needs and click on the “Download” button next to it.
The download process will begin, and you may be prompted to confirm the download location or agree to any terms and conditions. Follow the on-screen instructions and proceed with the download. Depending on your internet speed, the download may take a few minutes.
It’s important to note that the download size for Microsoft Excel for Mac can vary based on the version chosen and any additional features included. Ensure that you have enough storage space available on your Mac to accommodate the download and installation process.
Once the download is complete, you are now ready to move on to the next step to install Microsoft Excel for Mac.
Step 4: Choose the Office 365 subscription
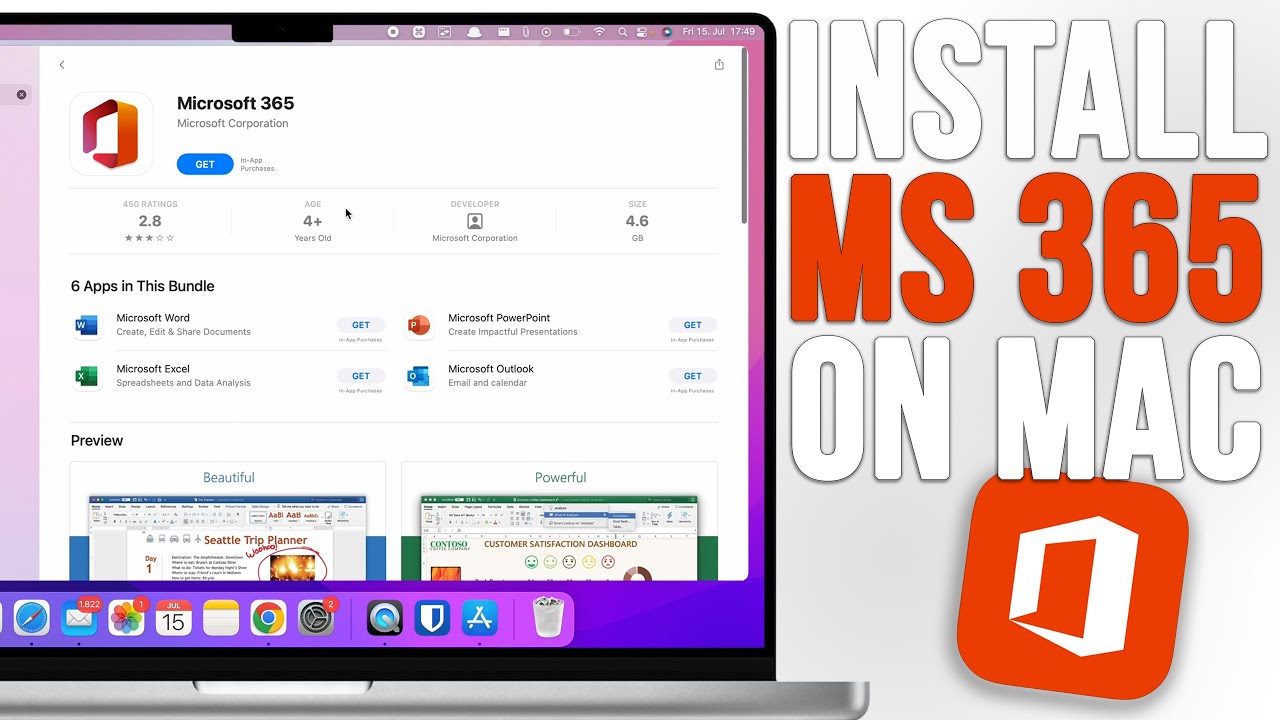
After downloading the Microsoft Excel setup file onto your Mac, it’s time to select the Office 365 subscription plan that suits your needs. Office 365 offers a range of subscription options, each with different features and pricing. Choose the subscription plan that best aligns with your requirements and budget.
To make an informed decision, carefully review the details of each plan, including the included applications, storage space, and additional benefits. Take into consideration factors such as the number of users, whether you need access to other Office applications like Word and PowerPoint, and the amount of cloud storage you require.
When choosing an Office 365 subscription, keep in mind the specific features and functionalities that are important to you. For example, certain plans may include advanced data analysis and collaboration features, while others may focus more on personal productivity and document creation.
Once you have determined the subscription plan that meets your needs, proceed with the selection by clicking on the appropriate option. This will usually be presented as a button or link on the download page.
Next, you will be redirected to the subscription details page, where you may be asked to provide additional information such as your payment method, billing address, and contact details. Follow the instructions provided and provide the necessary information to complete the subscription process.
It’s important to note that Office 365 is a subscription-based service, which means you will need to renew your subscription periodically to continue using the Microsoft Excel application. Make sure to keep track of your subscription details and renewal dates to avoid any interruptions in your access to Microsoft Excel on your Mac.
With your Office 365 subscription selected and set up, you are now ready to proceed with the installation of Microsoft Excel on your Mac.
Step 5: Click on the Install button
With your Office 365 subscription in place, it’s time to install Microsoft Excel on your Mac. After choosing the subscription plan that suits your needs, you should be redirected to a page where you can initiate the installation process.
On the installation page, you will typically see an “Install” button or a similar option. Click on this button to start downloading and installing Microsoft Excel on your Mac. The installation file size may vary based on the version and additional features included in your chosen subscription plan.
During the installation process, you may be prompted to confirm the installation location on your Mac. Select the desired location or leave it as the default and proceed. Depending on your Mac’s processing speed and internet connection, the installation process may take some time, so be patient.
It’s crucial to note that during the installation, your Mac may require administrative privileges. You may be prompted to enter your system password or provide authorization for the installation to proceed. Follow the on-screen instructions and provide the necessary information as required.
While the installation is in progress, avoid shutting down or restarting your Mac, as it may interrupt the process and lead to installation errors. It’s best to let the installation complete before performing any other tasks on your Mac.
Once the installation is finished, you will receive a notification or confirmation message indicating the successful installation of Microsoft Excel on your Mac. Now, you are just one step away from using the powerful spreadsheet software.
In the next step, we will guide you through the process of opening and setting up Microsoft Excel for Mac, so you can start utilizing its extensive features and functionality.
Step 6: Open the downloaded file
After the successful completion of the installation process, it’s time to open the downloaded Microsoft Excel file on your Mac. Locating and launching the application will allow you to start using Excel and explore its wide range of features.
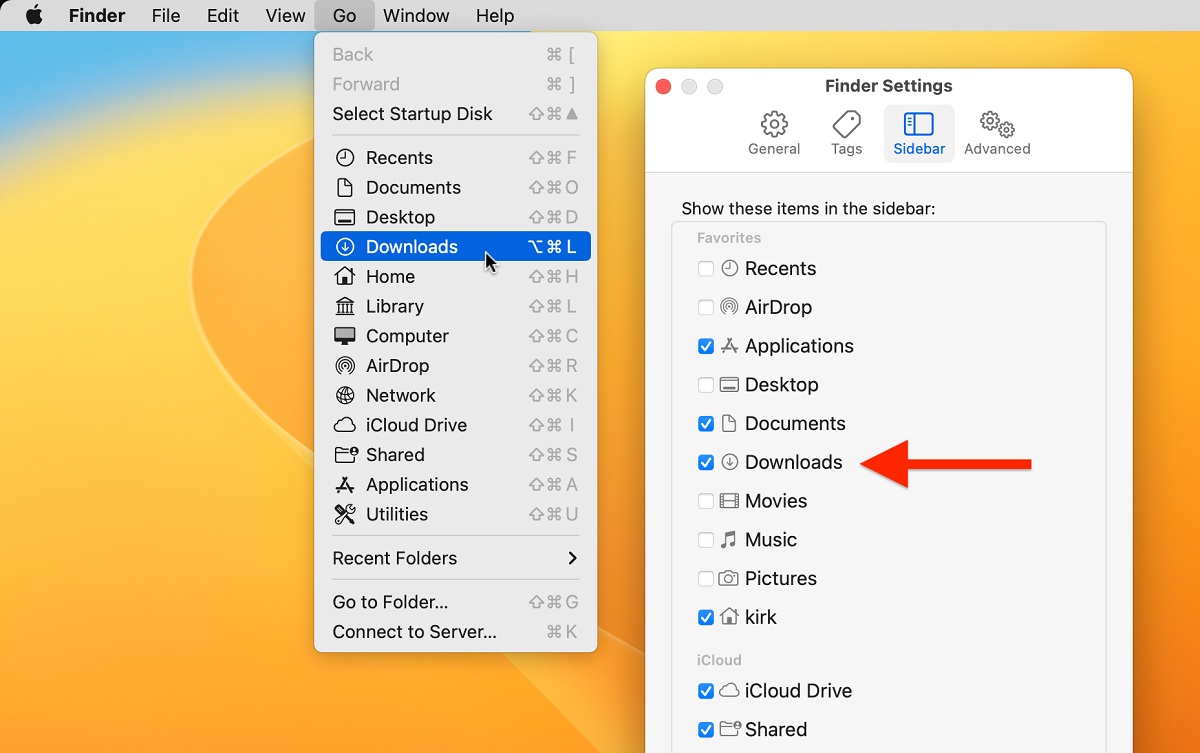
To begin, navigate to the location where you saved the downloaded file. By default, the file may be saved in your “Downloads” folder. Use the Finder or Spotlight search to quickly find the file. The downloaded file will typically have the extension “.dmg” or “.pkg.”
Once you have located the file, double-click on it to open the installation package. This will open a new window or prompt that contains the Microsoft Excel installation package. The exact appearance may vary based on your Mac’s operating system version.
In the installation package window, you may see an icon representing the Microsoft Excel application. Drag and drop this icon into your “Applications” folder or the designated location for installed applications on your Mac.
As the file is being moved, your Mac may ask for your system password or require your authorization to complete the process. Enter your password or provide the necessary authorization to proceed.
Once the Microsoft Excel application is successfully moved to the “Applications” folder, you can close the installation package window. The Excel application is now installed on your Mac and ready to use.
To access Microsoft Excel, you can either navigate to the “Applications” folder using Finder or utilize the Launchpad, which displays all the installed applications on your Mac. Locate the Microsoft Excel icon, click on it, and the application will launch, allowing you to start working with spreadsheets and data analysis.
Congratulations! You have successfully opened the downloaded Microsoft Excel file and installed it on your Mac. Now, it’s time to move on to the next step and configure Microsoft Excel to suit your preferences and needs.
Step 7: Follow the instructions to complete the installation
After opening Microsoft Excel on your Mac, you may need to follow additional instructions to complete the setup process and configure the application to your preferences. These instructions will guide you through important settings and options that will enhance your experience with Microsoft Excel.
During the initial launch of Excel, you may be prompted to sign in with your Microsoft account again. This step is essential to access the full functionality of Excel, including cloud storage, collaboration features, and personalized settings. Enter your account credentials to sign in.
Next, you may be asked if you want to enable automatic updates for Microsoft Excel. Enabling automatic updates ensures that you receive the latest security patches, bug fixes, and new features as they become available. It is recommended to keep this option enabled to ensure you have the most up-to-date version of Excel.
After setting up your account and preferences, you will be presented with the Microsoft Excel interface. Familiarize yourself with the various menus, toolbars, and options available. Explore the templates, formulas, and features offered by Microsoft Excel to maximize your productivity and efficiency.
If you are new to using Microsoft Excel, consider exploring the Help section or online tutorials to get started. Excel offers a wide range of resources, including help files, video tutorials, and community forums where you can ask questions and get assistance.
In addition to the default settings, you can customize Microsoft Excel to suit your specific needs. Configure options related to calculations, appearance, accessibility, and collaboration through the preferences or settings menu. Spend some time experimenting with different settings to optimize Excel for your workflow.
Keep in mind that Excel offers a vast array of features and functionalities, ranging from basic spreadsheet tasks to advanced data analysis and visualization. Take the time to explore and learn about the various tools available to you in Excel, as this will greatly enhance your productivity and proficiency with the software.
By following these instructions and completing the setup process, you are now ready to unleash the power of Microsoft Excel on your Mac. Embrace the possibilities that this versatile spreadsheet software offers and uncover new insights and solutions with every calculation, analysis, and graph you create.
Enjoy your journey with Microsoft Excel and make the most of its capabilities to streamline your data management tasks and elevate your productivity to new heights.
Step 8: Launch Microsoft Excel for Mac
Congratulations! You have successfully completed the installation and setup process for Microsoft Excel on your Mac. Now it’s time to launch the application and start utilizing its powerful features for your spreadsheet and data analysis needs.
To launch Microsoft Excel, navigate to the “Applications” folder on your Mac. You can do this by clicking on the Finder icon in the Dock and selecting “Applications” from the left-hand sidebar. Alternatively, you can use the Spotlight search by clicking on the magnifying glass icon in the menu bar and typing “Excel.”
Once you have located the Microsoft Excel application icon, click on it to launch the program. After a few moments, the Excel interface will appear on your screen, ready for you to create and edit spreadsheets, perform calculations, and analyze data.
Take a moment to familiarize yourself with the Excel interface. The toolbar and menu options at the top of the screen provide access to various functions and features, while the spreadsheet grid represents the workspace where you can enter and manipulate data.
If you’re new to using Microsoft Excel, consider exploring the built-in templates to help you get started. Excel offers a wide range of pre-designed templates for various tasks, such as budgeting, inventory management, and project tracking. These templates can save you time and provide a foundation for your own spreadsheet projects.
To start a new spreadsheet, click on the “File” menu at the top-left corner of the screen and select “New.” This will open a panel that displays different categories of templates and blank workbook options. Choose the template or blank workbook that suits your needs, and Excel will open a new sheet ready for your data entry.
If you have an existing Excel file that you want to open, you can do so by clicking on the “File” menu, selecting “Open,” and navigating to the location of the file on your Mac. Select the file and click “Open” to load it into Excel.
As you work on your spreadsheets, remember to save your progress regularly. To save a file, click on the “File” menu and select “Save” or “Save As” to specify a new file name or location. Excel also enables you to save your work to the cloud using OneDrive or other supported cloud storage options for easy access across devices.
With Microsoft Excel for Mac launched, the possibilities for organizing data, performing calculations, and creating insightful visualizations are at your fingertips. Continue to explore the various formulas, functions, and features available in Excel to enhance your productivity and analytical capabilities.
Remember to regularly check for software updates to ensure you have the latest version of Microsoft Excel, bringing you new features, bug fixes, and performance improvements that can further enhance your experience.
Embrace the power of Microsoft Excel for Mac and let it assist you in accomplishing your data-driven tasks effectively and efficiently. Happy spreadsheeting!
Conclusion
Congratulations on successfully downloading and installing Microsoft Excel for Mac! You have now gained access to a powerful and versatile spreadsheet software that will greatly enhance your productivity and data management capabilities. Excel offers a wide range of features, from basic calculations to advanced data analysis and visualization tools, making it an indispensable tool for students, professionals, and businesses alike.
Throughout this step-by-step guide, you have learned how to visit the official Office website, sign in with your Microsoft account, select Mac as your operating system, choose the Office 365 subscription plan that suits your needs, click on the Install button, open the downloaded file, follow the instructions to complete the installation, and finally, launch Microsoft Excel for Mac.
As you continue your journey with Microsoft Excel, take advantage of the numerous online resources, tutorials, and communities that can help you further enhance your skills and make the most out of the software. Excel is a versatile tool that can assist you in a wide range of tasks, from organizing financial data to analyzing complex datasets.
Remember to regularly save your work and consider utilizing cloud storage options for easy access to your spreadsheets from any device. Be sure to keep your Microsoft Excel software up to date by installing any available updates, as they often include new features, bug fixes, and security enhancements.
Whether you are a student, professional, or business owner, Microsoft Excel for Mac will undoubtedly prove to be an invaluable tool in your toolkit. Leverage its power, explore its vast capabilities, and discover new ways to streamline your data management and analysis processes. With Microsoft Excel for Mac, the possibilities are endless, and you are well-equipped to excel in your endeavors.
Good luck and enjoy your journey with Microsoft Excel for Mac!


