Introduction
When it comes to creating personalized crafts with your Cricut machine, having a wide variety of images at your disposal is essential. Whether you’re looking for intricate designs, fun illustrations, or beautiful patterns, finding the right images can take your projects to the next level. In this article, we will explore various methods to download images for Cricut.
Creating unique and eye-catching crafts starts with sourcing images that capture your creativity. However, it’s important to respect copyright laws and ensure that you have the necessary permissions to use the images you find. We will explore ways to find images that are free to use or those that fall under Creative Commons licenses, giving you the freedom to unleash your creativity without any legal implications.
We will begin by discussing how to find Creative Commons images, as these are images that are available for public use under certain conditions. This will allow you to utilize a vast library of images from photographers, designers, and artists who have generously shared their work online.
In addition to Creative Commons images, we will also delve into using stock photo websites. These platforms offer a vast collection of high-quality images, often requiring a license or subscription for full access. However, we will also explore free image websites that provide a selection of images for personal and commercial use without any fees.
Moreover, we will discuss how to download images from social media platforms. This can be a valuable resource for finding unique and captivating images that others have shared. Additionally, we will explore how to save images from Google Images, which is an extensive search engine for pictures. However, it is crucial to verify the copyrights of these images before usage.
Once we have a collection of images to work with, we will dive into the process of editing and resizing them specifically for use with your Cricut machine. This step is crucial as it ensures that your images will fit perfectly within the designated cutting or printing areas, allowing for accurate and precise results.
Finally, we will walk you through the process of importing your downloaded images into Cricut’s design software, Design Space. This software allows you to arrange and manipulate your images before sending them to the Cricut machine for cutting or printing.
By the end of this article, you will have a comprehensive understanding of how to find, download, edit, and prepare a range of images for use with your Cricut, enabling you to bring your creative visions to life with ease. So, let’s embark on this journey together and discover the exciting world of image downloading for Cricut!
Finding Creative Commons Images
When searching for images for your Cricut projects, utilizing Creative Commons images can be a great option. These images are shared by photographers, artists, and designers who have granted others the right to use their work under specific conditions. By following the guidelines set by the Creative Commons license, you can ensure that you are using the images legally and ethically.
One of the best places to find Creative Commons images is through dedicated platforms such as Flickr, Pixabay, and Unsplash. These websites provide a vast collection of high-quality images, carefully curated to meet the requirements of a Creative Commons license. You can search for specific keywords or browse through various categories to find the perfect image for your project.
When using these platforms, it’s important to pay attention to the specific Creative Commons license associated with each image. Some licenses require attribution, meaning you must give credit to the creator of the image. This is typically done by including the artist’s name and a link to their profile in your project or its accompanying documentation.
Another valuable resource for finding Creative Commons images is the Wikimedia Commons. This platform hosts millions of media files, including images, videos, and audio, that are available under various Creative Commons licenses. Here, you can search for images related to a specific topic or browse through different categories to discover unique visuals for your Cricut projects.
Additionally, some websites, such as Pexels and Freepik, aggregate images from multiple sources, including those with Creative Commons licenses. These platforms simplify the search process by providing a wide selection of images from different websites, allowing you to find the perfect image without having to visit multiple sources individually.
When downloading Creative Commons images, it’s essential to ensure that you are complying with the specific terms of the license. Some licenses may restrict commercial use, while others may require modifications or adaptations to be released under the same Creative Commons license. By understanding and respecting these conditions, you can confidently incorporate Creative Commons images into your Cricut projects.
Remember, Creative Commons images provide a valuable resource for finding high-quality visuals that can enhance your crafts. By using these images responsibly and respecting the licenses and conditions established by the creators, you can confidently showcase your creativity while giving credit where it’s due. With a wide array of images available, the sky is the limit when it comes to designing and personalizing your Cricut projects!
Using Stock Photo Websites
Stock photo websites are a valuable resource for finding high-quality images for your Cricut projects. These websites offer a vast collection of professionally captured and curated photographs, illustrations, and vector graphics that can add a professional touch to your crafts.
One of the most popular stock photo websites is Shutterstock, which provides a wide range of images across various categories. With millions of images available, you can easily find visuals that align with your project’s theme and aesthetic. Shutterstock offers both free and paid images, with the latter often requiring a license or subscription for full access.
Adobe Stock is another well-known platform that offers a diverse library of images. With the integration of Adobe Creative Cloud, you can seamlessly access and directly import images from Adobe Stock into your design software. This convenience makes it a great option for those already familiar with Adobe products.
iStock is yet another popular stock photo website that provides a large selection of images at different price points. You can browse through their extensive collection to find images that fit your project’s style and requirements. Additionally, iStock offers a flexible pricing model, allowing you to choose between purchasing images individually or subscribing to a plan for regular downloads.
When using stock photo websites, it’s important to consider the licensing restrictions associated with each image. Most stock photo websites have their own licensing agreements, which determine how the images can be used, whether they require attribution, and if they can be modified or used for commercial purposes. Make sure to carefully read and understand the terms of use before downloading or using any images from these platforms.
While some stock photo websites require paid subscriptions or licenses, there are also free alternatives available. Websites like Pexels, Pixabay, and Unsplash offer a selection of high-quality, royalty-free images that can be used for personal and commercial purposes, without any cost. These platforms provide a diverse range of visuals contributed by talented photographers and artists worldwide, making them perfect for finding unique and captivating images for your Cricut projects.
Stock photo websites provide a convenient and comprehensive solution for sourcing images for your Cricut projects. Whether you opt for paid stock photos or explore the free alternatives, these platforms offer a wide array of high-quality visuals that can elevate your crafts to the next level. So go ahead, browse through the vast collections, and find the perfect images to bring your Cricut creations to life!
Using Free Image Websites
Free image websites are a fantastic resource for finding a plethora of high-quality images for your Cricut projects without breaking the bank. These websites offer a wide selection of visuals that can help bring your creative vision to life without any cost or licensing restrictions.
One of the most popular free image websites is Pixabay. With over 1.8 million images, illustrations, and vector graphics, Pixabay provides a vast library of visuals for personal and commercial use. You can easily search for images using keywords or explore different categories to find the perfect fit for your Cricut project.
Unsplash is another renowned platform that offers a diverse collection of high-resolution, copyright-free images. With a community of talented photographers contributing to its library, Unsplash is a treasure trove of captivating visuals that can add a touch of creativity to your crafts.
Pexels is also a noteworthy free image website that features a wide range of high-quality images. Similar to Pixabay and Unsplash, Pexels offers a user-friendly platform to search for images that suit your project’s theme, style, and requirements. Whether you are looking for nature, people, abstract, or any other category, Pexels has you covered.
Freepik is a unique free image website that specializes in vector graphics and illustrations. With its extensive collection, you can find beautifully designed illustrations that can be resized or customized to fit your Cricut projects perfectly. Freepik also offers premium content for those who need access to exclusive and premium-quality visuals.
When utilizing free image websites, it is important to note that while the images are free to use, they may still require attribution or have certain limitations on commercial usage. Make sure to review the specific licensing agreements associated with each image to ensure compliance with their terms. This may involve providing proper credit to the photographer or adhering to any other conditions mentioned in the licensing agreement.
Free image websites provide a wealth of options for finding stunning visuals that can enhance your Cricut creations without any financial burden. Whether you need landscapes, textures, patterns, or any other image category, these platforms offer a vast collection of visuals to ignite your creativity and inspire your projects.
So, don’t hesitate to explore the world of free image websites to find the perfect images that will take your Cricut crafts to new heights!
Downloading Images from Social Media
Social media platforms are teeming with captivating and unique images that can be a great resource for your Cricut projects. Whether it’s Instagram, Pinterest, or Facebook, these platforms provide access to a wealth of visual inspiration. However, it’s important to respect the copyright of images shared on social media and ensure that you have the necessary permissions to use them.
When it comes to downloading images from social media, it’s essential to follow the platform’s terms of service and copyright guidelines. Some social media platforms allow users to share images under a Creative Commons license, while others grant certain usage rights to the original content creator.
One way to download images from social media is by requesting permission from the content creator directly. If you come across an image that you would like to use for your Cricut project, reach out to the person who posted it and kindly ask for their permission to download and use the image. Be sure to provide a clear explanation of how you intend to use the image and always credit the original creator in your project.
Alternatively, some social media platforms allow users to download images directly from their platform. On platforms like Instagram and Facebook, you’ll often find a download option or the ability to save the image to your device. However, keep in mind that the terms of service of each platform and the specific copyright permissions associated with the image will determine whether you can use it for your Cricut projects.
When downloading images from social media, it’s important to verify the copyright status before using them in your creations. Some content creators may reserve all rights to their images, while others may choose to share them under a specific license. Take the time to read the caption, profile information, or any other accompanying details to determine if the image can be used and if any attribution is required.
It’s crucial to remember that just because an image is shared on social media does not automatically mean it is free to download and use for any purpose. Always exercise caution and respect the intellectual property rights of others when sourcing images from social media platforms.
Additionally, it’s worth noting that social media platforms have their own terms of service and usage policies, which may prohibit the collection or use of images without explicit permission or a proper license. Familiarize yourself with these terms to ensure that you are using social media platforms and the images they contain in a lawful and ethical manner.
By navigating the world of social media responsibly and obtaining proper permissions, you can find a wealth of visually appealing images that will make your Cricut projects truly stand out.
Saving Images from Google Images
Google Images is a widely-used search engine for finding and exploring a vast collection of images. While it’s convenient to search for images on Google, it’s important to understand the copyright implications and ensure that you have the necessary rights or permissions to use the images you find.
When saving images from Google Images, it’s crucial to verify the copyright status of the image and determine if it is available for use. Not all images found through a Google search are free to use, as many of them may be protected by copyright. The copyright owner has the exclusive rights to reproduce and distribute their work, so it’s essential to respect their intellectual property rights.
Google Images provides a helpful feature that allows you to filter your search results by usage rights. To access this feature, click on “Tools” located below the search bar, and then select “Usage rights.” You can filter the results to show only images that are labeled for reuse, including those available for commercial use or modification.
However, it’s important to exercise caution even when using the filtered search results. The accuracy of the usage rights labels can vary, and there is a possibility of mislabeled or misclassified images. It’s always a good idea to double-check and verify the licensing information on the original website or the image source to ensure that you have the necessary permissions to use the image.
In some cases, you may come across images that are labeled for non-commercial use or with specific attribution requirements. If you wish to use these images for your Cricut projects, be sure to comply with the specified terms. This may involve providing proper attribution to the creator, such as including their name and a link to the original source.
It’s also worth noting that reverse image search can be a useful tool when saving images from Google Images. By uploading or dragging and dropping an existing image into the search bar, Google can identify similar images and their sources. This can be helpful in locating the original source and verifying the copyright status and usage rights associated with the image.
While Google Images can be a convenient way to find visual inspiration for your Cricut projects, it’s crucial to be mindful of copyright and usage rights. Always take the time to understand the licensing requirements and obtain the necessary permissions to use the images responsibly.
By being diligent and ensuring that you have the proper rights and permissions, you can confidently save and utilize images from Google Images in your Cricut projects, without infringing upon the rights of others.
Editing and Resizing Images for Cricut
Once you have sourced the perfect images for your Cricut projects, the next step is to edit and resize them to ensure they fit seamlessly within your design. By making adjustments and optimizing your images, you can create stunning and professional-looking crafts with your Cricut machine.
There are numerous image editing tools available that can help you manipulate and enhance your images. Adobe Photoshop is a popular option for professionals, providing a wide range of advanced editing features. However, if you’re looking for a simpler solution, there are also user-friendly online editors such as Canva and Pixlr that offer a range of editing capabilities.
When editing images for Cricut, you may need to make various adjustments such as cropping, resizing, and removing backgrounds. Cropping allows you to eliminate unwanted elements from the image, giving it a cleaner and more focused composition. Resizing is crucial to ensure that the image fits within the specific dimensions of your Cricut project. Removing backgrounds can be useful if you want to isolate the main subject or create a transparent image for your design.
It’s important to keep in mind that Cricut machines have specific size limitations for cutting or printing. The maximum width and length may vary depending on your machine model. Therefore, when resizing images, consider the intended size of your final project and make sure the image dimensions fall within the machine’s capabilities.
Additionally, you might want to consider adjusting the image’s brightness, contrast, and color saturation to enhance its visual appeal. These tweaks can add depth and vibrancy to your image, making it more engaging and visually pleasing.
Furthermore, if you are planning to use intricate or complex designs, you may need to simplify and optimize them for cutting or printing with your Cricut machine. This can involve simplifying intricate details, reducing the number of colors, or converting the image into a suitable format, such as SVG (Scalable Vector Graphics).
It’s worth noting that Design Space, the software provided by Cricut, offers basic editing functions that might be sufficient for your needs. You can upload your images into Design Space and make simple adjustments, such as resizing and cropping, directly within the software.
Remember to save your edited images in a format compatible with Cricut, such as JPEG or PNG, to ensure seamless import and compatibility with the machine and software.
By editing and resizing your images for Cricut, you can tailor them to your project’s specific requirements, ensuring that they fit perfectly and create stunning results. Get creative, experiment with different adjustments, and let your edited images shine in your Cricut crafts!
Preparing Images for Cutting or Printing
After editing and resizing your images for your Cricut projects, the next step is to prepare them specifically for cutting or printing. Proper preparation ensures that your images are optimized for accurate and precise results with your Cricut machine.
If you are planning to cut your images, it’s important to ensure that they are in a format compatible with your Cricut machine and its software, such as SVG or DXF. These vector file formats allow for smooth and precise cutting, ensuring that your designs are replicated accurately. You can use compatible design software, such as Adobe Illustrator or Inkscape, to convert your images into these formats if they are not already in the required format.
Another crucial step in preparing images for cutting is to ensure that they have clear and distinct lines or edges. This helps the Cricut machine accurately detect and cut along the intended shape or design. If the edges are blurry or unclear, you may need to refine them using image editing tools, such as the Pen Tool or the Eraser Tool, to create crisp and defined lines.
It’s also important to consider the thickness and size of your design elements. Thin and intricate details may be difficult for the Cricut machine to cut accurately, so it’s a good idea to simplify or thicken these elements to ensure successful cutting. Additionally, if your design includes small or delicate pieces, such as fragile letters or shapes, it’s important to reinforce them by resizing them slightly larger or using a thicker material to prevent tearing or breakage during the cutting process.
When preparing images for printing with your Cricut, it’s crucial to set the correct image resolution and color profile. Ensure that your image has a high enough resolution (at least 300 dpi) for sharp and clear printing results. Adjusting the color profile to CMYK (Cyan, Magenta, Yellow, Key – black) is ideal for print output, as it ensures accurate color representation on your final printed project.
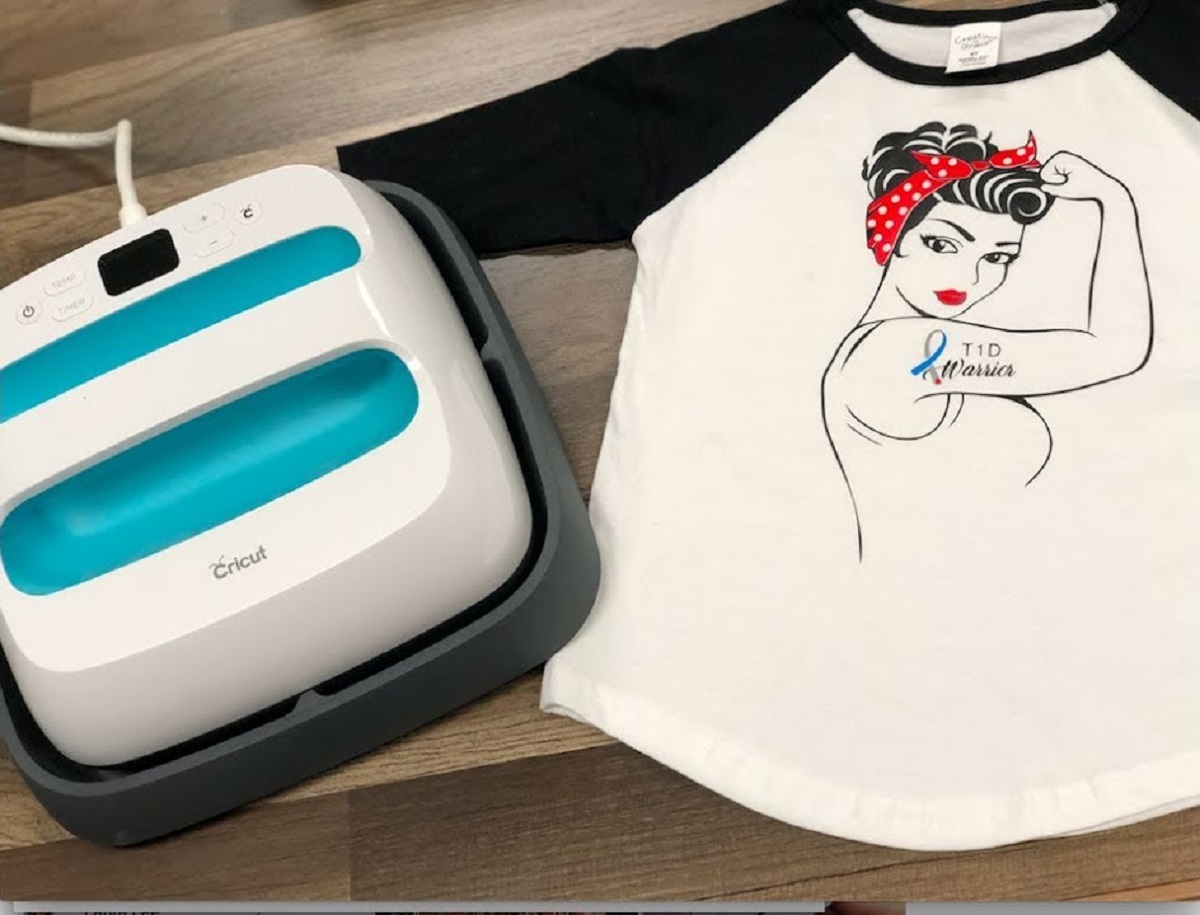
Consider the material you will be printing on, whether it’s paper, fabric, or other materials compatible with your Cricut machine. Different materials may require specific adjustments or preparation techniques to ensure optimal printing results. For example, if you’re printing on fabric, it’s advisable to use fabric stabilizer or adhesive paper to secure the fabric and prevent fraying during the cutting process.
Before sending your images to the Cricut machine, it’s always a good idea to perform a test cut or print using scrap materials. This allows you to evaluate the settings, size, and overall appearance of your design, ensuring that it meets your expectations before proceeding with your final project.
By properly preparing your images for cutting or printing, you can optimize them for accurate and precise results with your Cricut machine. Take the time to refine your designs, adjust settings, and perform test runs to ensure the best possible outcome for your Cricut projects.
Importing Images into Design Space
Once you have prepared your images for use with your Cricut machine, the next step is to import them into Cricut’s design software, Design Space. Design Space provides a user-friendly interface that allows you to arrange, manipulate, and customize your images before sending them to your Cricut machine for cutting or printing.
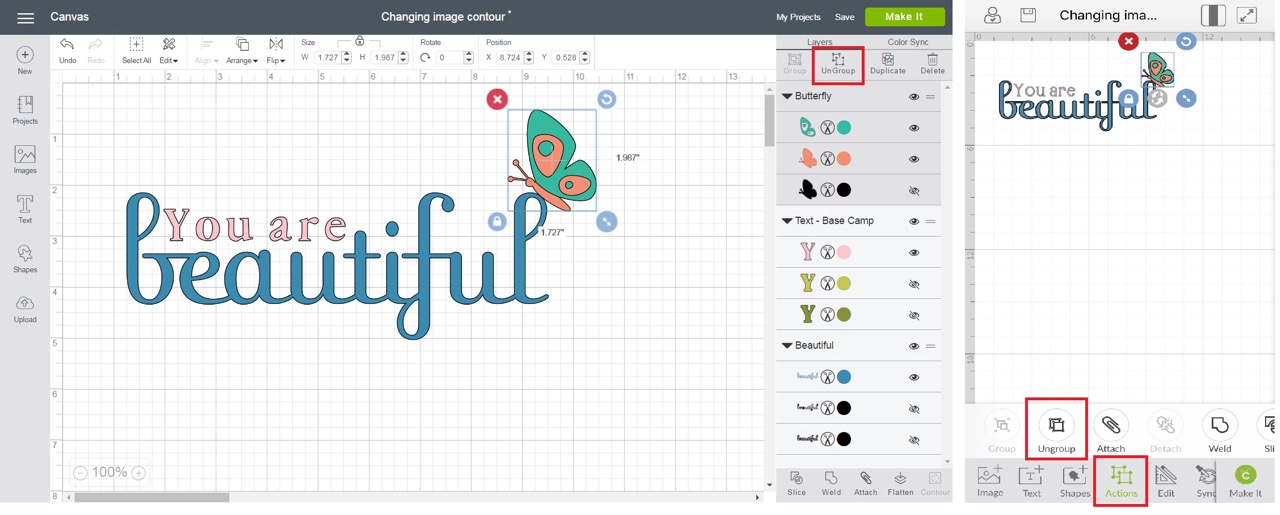
Importing images into Design Space is a straightforward process. Start by opening Design Space on your computer or mobile device and creating a new project. Once you have your canvas ready, you can choose to import your own images by clicking on the “Upload” button in the sidebar menu.
In the upload menu, you’ll have the option to browse for the image file on your device and select the appropriate file format. Design Space supports various formats, including SVG, PNG, JPEG, and DXF. Choose the file corresponding to the format you saved your prepared images in.
After selecting the file, Design Space will analyze and process the image for upload. Depending on the complexity of the image, this process may take a few seconds. Once uploaded, you’ll see a preview of the image and be able to choose the image type: cut or print.
If you’re importing an image to be cut, you’ll have the option to further refine the image by removing any unwanted elements or background. Drawing a simple shape around the area you wish to keep will automatically remove the rest of the image outside that shape, allowing for more precise cutting.
If you’re importing an image for printing, Design Space will preserve the colors, details, and dimensions of the image as is. You can resize, position, and duplicate the image as desired to fit your project.
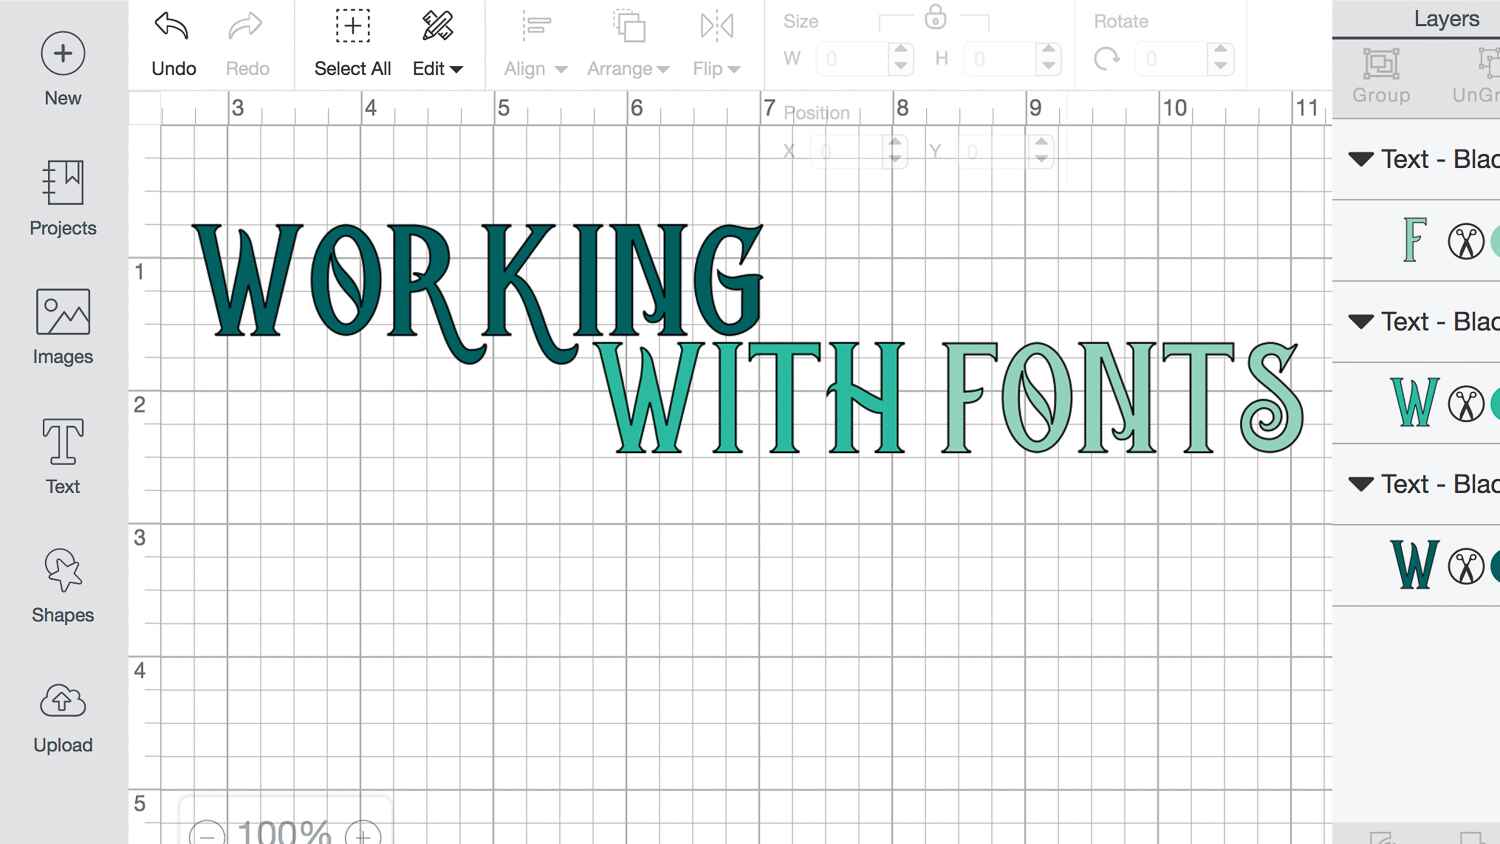
Design Space also provides editing tools that allow you to make additional adjustments to your images. You can rotate, flip, scale, and align your images to create the perfect composition. Additionally, you can layer multiple images or add text and shapes to enhance your design.
Once you’re satisfied with the arrangement and editing of your images, you can proceed to send your project to your Cricut machine. Design Space will guide you through the necessary steps, such as selecting the appropriate material and setting the desired cutting or printing parameters.
Before cutting or printing your final project, it’s always advisable to perform a test run using scrap materials to ensure that the settings and alignment are correct. This allows you to make any necessary adjustments before committing to the final project materials.
By importing your prepared images into Design Space, you gain full control over arranging, editing, and customizing your designs. Take advantage of the features and tools offered in Design Space to create unique and personalized projects that truly reflect your vision and creativity.
Conclusion
Downloading and using images for your Cricut projects is an exciting and creative process that can elevate your crafts to new levels. By following the methods outlined in this article, you can find a wide variety of images that suit your style and requirements, while also respecting copyright laws and usage rights.
Finding Creative Commons images allows you to access a vast collection of visuals shared by generous creators. Platforms like Flickr, Pixabay, and Unsplash offer a wide selection of images that are available for use under specific conditions. Make sure to understand and adhere to the licensing requirements associated with these images to use them legally and ethically.
Stock photo websites provide an extensive range of high-quality images that you can use for your Cricut projects. Platforms such as Shutterstock, Adobe Stock, and iStock offer diverse collections of visuals, both free and paid, catering to various themes and design needs. Make sure to review the licensing agreements to understand any usage restrictions or attribution requirements.
Free image websites like Pixabay, Unsplash, and Pexels are excellent resources for finding captivating images without any cost. These platforms offer images that can be used for personal and commercial purposes, often without attribution requirements. However, always double-check the specific licensing terms associated with each image to ensure compliance.
When downloading images from social media or Google Images, it’s crucial to navigate and use them responsibly. Request permission if necessary, verify the usage rights, and always credit the original creators when required. Take advantage of features on social media platforms and Google Images, such as filters and reverse image search, to find and verify the copyright status of the images you wish to use.
In preparing images for Cricut, ensure they are edited, resized, and optimized for accurate cutting or printing. Crop, resize, and enhance the images using editing tools to achieve the desired results. Pay attention to licensing restrictions, simplify intricate designs for cutting, and set appropriate resolutions and color profiles for printing.
Finally, importing your prepared images into Cricut’s design software, Design Space, allows you to arrange, manipulate, and customize them for your projects. Take advantage of the editing tools and features in Design Space to create unique designs that reflect your vision and creativity. Always perform a test run before cutting or printing to ensure accuracy and desired outcomes.
Through these steps and techniques, you can confidently incorporate a wide array of images into your Cricut projects. Let your creativity flourish as you personalize your crafts and bring your unique visions to life. Enjoy the process of finding, downloading, and preparing images for Cricut, and unleash your imagination in every project you create!