Introduction
Welcome to the world of Cricut and the endless possibilities it offers for creating beautiful and personalized crafts. If you’re new to Cricut Design Space, you might be wondering how to download images and use them in your projects. Well, you’ve come to the right place! In this article, we’ll guide you through the steps of downloading images to Cricut Design Space and preparing them for cutting.
Cricut Design Space is a user-friendly software that allows you to design and customize your projects. Whether you want to create intricate paper cutouts, iron-on decals, or vinyl stickers, Cricut Design Space has got you covered. But before you dive into the design process, you’ll need to find and save the images you want to use.
In the following sections, we’ll walk you through the step-by-step process of downloading images to Cricut Design Space and give you some tips on how to optimize your images for the best cutting results. So, let’s get started and unlock the full potential of Cricut Design Space!
Step 1: Find and Save the Image
The first step in using an image in Cricut Design Space is finding and saving the image you want to work with. There are several ways to do this:
- Search the web: Look for websites that offer free or paid images specifically designed for use with cutting machines like Cricut. Many websites allow you to download images in different formats, such as SVG, PNG, or JPG.
- Create your own: If you have a creative side, you can design your own images using graphic design software like Adobe Illustrator or CorelDRAW. Once you’ve created your image, save it in a compatible format.
- Use Cricut Access: If you have a Cricut Access subscription, you’ll gain access to a vast library of images that you can download and use in your projects. This is a convenient option if you’re looking for a wide variety of designs without spending time searching and downloading from different sources.
Once you’ve found the image you want to use, save it to a location on your computer where you can easily locate it later. Make sure to keep track of the file type and make a note of it, as it will come in handy in the next steps.
Remember, when selecting an image, opt for high-quality graphics with clear lines and well-defined edges. This will ensure better cutting results and give your projects a polished look.
Now that you have your image ready, let’s move on to the next step: opening Cricut Design Space.
Step 2: Open Cricut Design Space
Now that you have your desired image saved on your computer, it’s time to open Cricut Design Space. To do this, follow these simple steps:
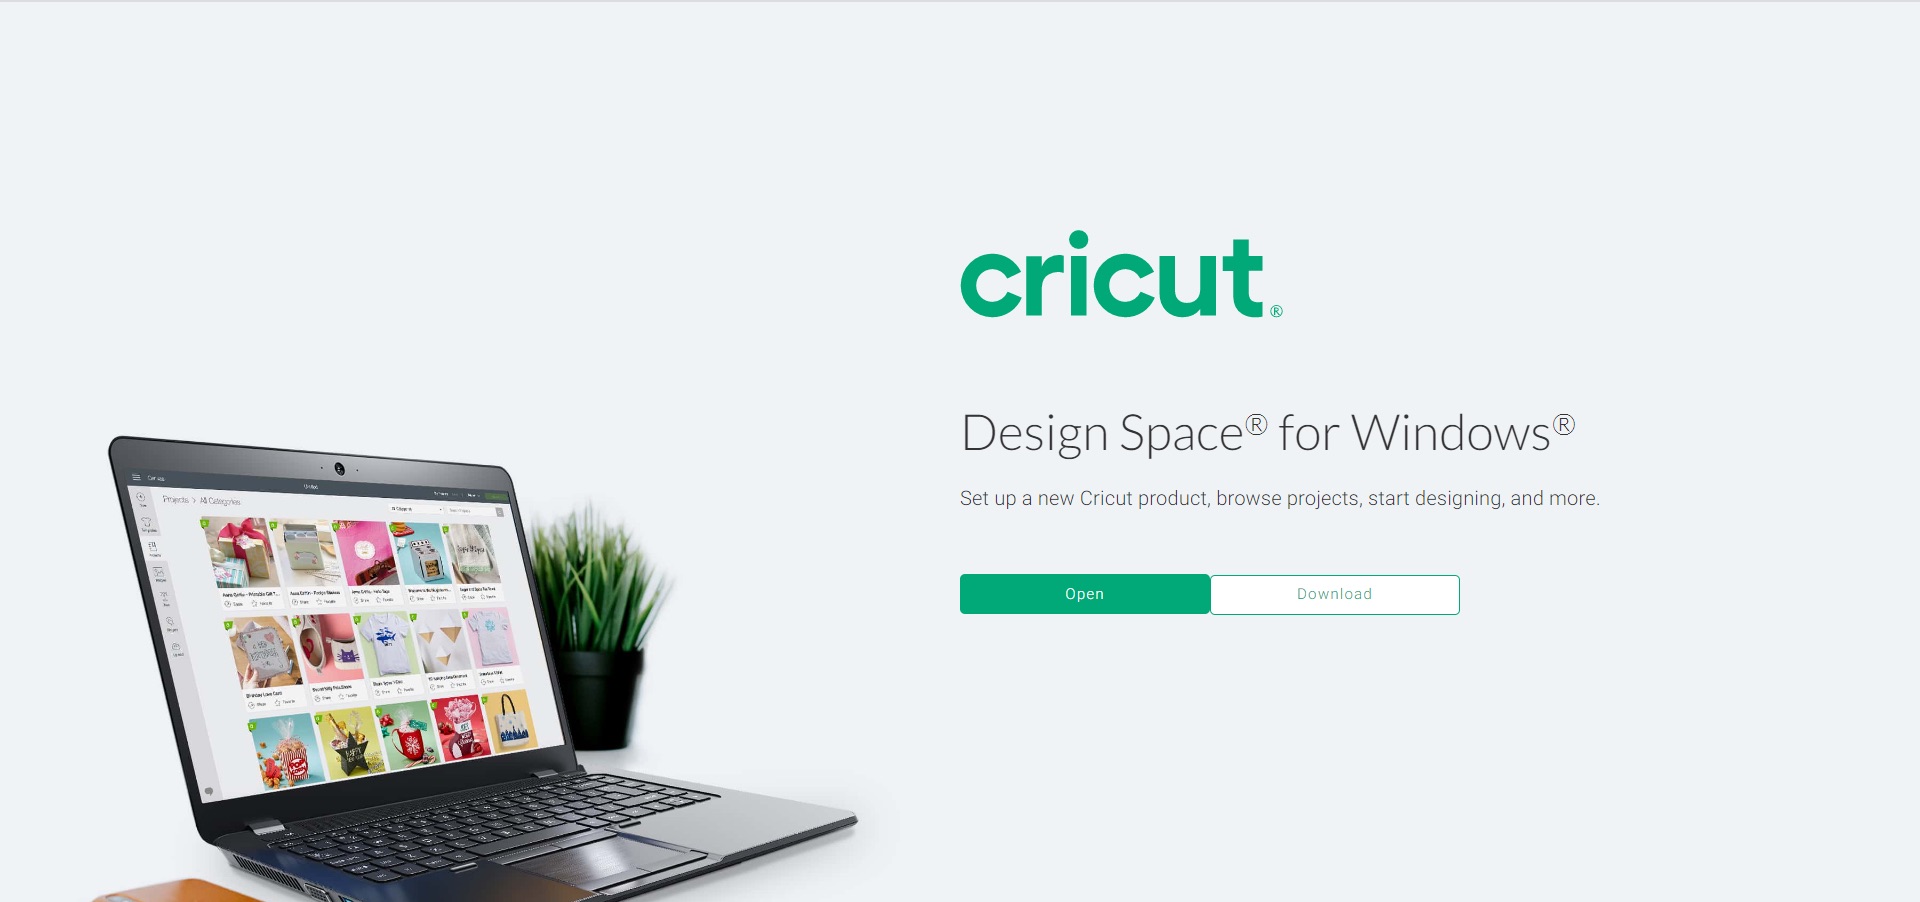
- Launch your preferred web browser and navigate to the Cricut Design Space website. If you haven’t created an account yet, now is the time to do so. Sign in with your account credentials.
- Once you’re logged in, you’ll be taken to the Cricut Design Space dashboard. This is where you’ll do most of your design work. Take a moment to familiarize yourself with the different options and tools available.
- On the left-hand side of the screen, you’ll find the main navigation panel. This panel allows you to access various features of Cricut Design Space, such as creating a new project, uploading images, and selecting materials.
- Click on the “New Project” button to create a new project. This will open a blank canvas where you can start designing and adding your image.
It’s important to note that Cricut Design Space is a web-based application, which means you don’t need to download any additional software to use it. As long as you have a stable internet connection, you can access Cricut Design Space from any computer or device.
Now that you have successfully opened Cricut Design Space, it’s time to move on to the next step: uploading the image you saved in Step 1.
Step 3: Create a New Project
With Cricut Design Space open and ready, it’s time to create a new project where you can bring your ideas to life. Follow these steps to create a new project:
- On the Cricut Design Space dashboard, click on the “New Project” button located on the left-hand side. This will open a blank canvas where you can start designing.
- Give your project a name by clicking on the “Untitled Project” text at the top of the canvas. This will allow you to easily identify and organize your projects in the future.
- Next, you’ll have the option to select the canvas size. Cricut Design Space offers a variety of preset canvas sizes, or you can customize the dimensions to fit your specific project needs. Choose the size that best matches the dimensions you want to work with.
- Once you’ve selected the canvas size, click on the “Create” button. This will create a new project with the chosen canvas size, and you’ll be ready to start designing!
Creating a new project allows you to have a dedicated space for your design and makes it easier to organize and edit your work. Whether you’re working on a small vinyl decal or a large paper cutout, Cricut Design Space provides the flexibility to customize the canvas size to suit your project requirements.
Now that you have created a new project, it’s time to move on to the next step: uploading the image you want to use in your design.
Step 4: Upload the Image
Now that you have created a new project in Cricut Design Space, the next step is to upload the image you want to use. Follow these simple steps to upload the image:
- Click on the “Upload” button located on the left-hand side of the screen. This will open the Upload panel.
- On the Upload panel, click on the “Upload Image” button. This will open the Upload Images window.
- On the Upload Images window, click on the “Browse” button to locate the image file on your computer. Once you have located the file, select it and click on the “Open” button.
- Cricut Design Space will now process the image and present you with options for customization. You can choose the image type (simple, moderately complex, or complex), select an image category, and add tags to help you easily locate the image in the future.
- Once you have set the customization options, click on the “Save” button to complete the image upload process.
It’s important to note that Cricut Design Space supports various image file formats, including SVG, PNG, and JPG. When uploading an image, it’s recommended to use the SVG format for the best results, as SVG files allow for scalable and editable designs, ensuring the highest quality output.
By uploading the image to Cricut Design Space, you now have access to this image in your project and can start incorporating it into your design. In the next step, we’ll explore how to edit and prepare the image for cutting.
Step 5: Edit and Prepare the Image for Cutting
Now that you have uploaded your desired image to Cricut Design Space, it’s time to edit and prepare it for cutting. Follow these steps to customize your image:
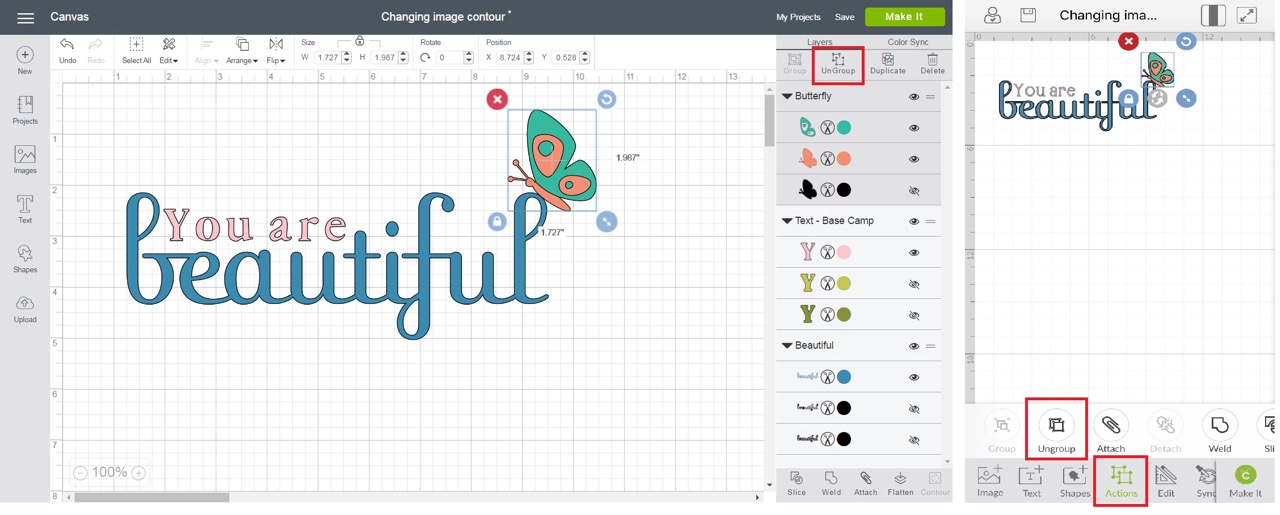
- Select the uploaded image on your canvas by clicking on it. You will notice a bounding box that indicates the boundaries of the image.
- Using the editing tools located on the top toolbar, you can make various adjustments to the image. Scale the image up or down by dragging the corner handles of the bounding box. Rotate the image by moving the circular handle at the top center of the bounding box.
- If needed, you can also choose to crop or slice the image to remove unwanted parts or combine multiple images together. These advanced editing options allow you to create unique and customized designs.
- Once you are satisfied with the positioning and adjustments, you can further refine the cutting settings. On the right-hand sidebar, you will find the “Make It” button. Click on it to proceed to the next step.
- Cricut Design Space will analyze your design and suggest the most suitable cutting settings based on the materials you plan to use. You can review and adjust these settings if necessary, ensuring optimal cutting precision.
- After finalizing the cutting settings, click on the “Continue” button to proceed. Cricut Design Space will prompt you to select your Cricut machine and load the appropriate cutting mat.
- Follow the on-screen instructions and load the designated cutting mat into your Cricut machine. Once everything is set up, click on the “Go” button in Cricut Design Space to start the cutting process.
By editing and preparing the image, you can make it perfectly fit your project and ensure precise cutting. Take your time to experiment with different adjustments and settings to achieve the desired outcome.
In the next step, we will learn how to add the image to your canvas and incorporate it into your project.
Step 6: Add the Image to Your Canvas
Now that you have edited and prepared your image for cutting, it’s time to add it to your canvas and incorporate it into your project. Follow these steps to seamlessly integrate the image:
- Click on the uploaded image in Cricut Design Space to select it. You will see a bounding box around the image, indicating that it is active.
- Using your mouse or trackpad, drag the image to the desired location on your canvas. You can place it anywhere you like, allowing for maximum customization and creativity.
- If you want to add multiple copies of the same image, simply click on the image and press the “Ctrl” (Windows) or “Cmd” (Mac) key while dragging the image to duplicate it. This is particularly useful when creating patterns or repeating designs.
- Feel free to resize and rotate the image further to achieve the perfect look and placement. You can do this by dragging the corner handles of the bounding box to adjust the image’s size or by rotating it using the circular handle at the top center of the bounding box.
- If you’re working on a more complex project with multiple design elements, you can also layer the image with other shapes, text, or images. This allows you to create dynamic and visually appealing compositions.
- Once you are satisfied with the placement and arrangement of your image, take a moment to review your overall project. Make any necessary adjustments or add additional design elements to enhance the overall aesthetic.
Adding the image to your canvas is a crucial step in the design process. It allows you to see how the image interacts with other elements and ensures that your vision is coming to life. Take your time and experiment with different placements and layering techniques until you achieve the desired outcome.
In the next step, we will explore how to resize and position the image for a perfect fit in your project.
Step 7: Resize and Position the Image
After adding the image to your canvas and incorporating it into your project, the next step is to resize and position the image for a perfect fit. Follow these steps to achieve the desired size and placement:
- Click on the uploaded image on your canvas to select it. The bounding box will appear around the image, indicating its active status.
- To resize the image, click and drag any of the corner handles of the bounding box. Dragging a corner handle outward will increase the image size, while dragging it inward will decrease the size. Maintain the aspect ratio by holding the “Shift” key while resizing.
- To maintain the proportion of the image, you can also manually input the desired dimensions by typing into the “Width” and “Height” fields located in the top toolbar.
- To position the image, simply click and drag it to the desired location on your canvas. You can place it anywhere you like, align it with other design elements, or create visual balance within your project.
- If you need to rotate the image for better alignment or visual effect, click and drag the circular handle at the top center of the bounding box. Rotating the image allows for even more creative possibilities.
- As you resize and position the image, take the overall composition of your project into consideration. Ensure that it harmonizes with other elements and contributes to the desired visual appeal.
- Feel free to experiment with different sizes and positions until you achieve the perfect fit. Don’t be afraid to make adjustments and try out various configurations to bring your vision to life.
By resizing and positioning the image, you have the flexibility to customize its appearance and make it seamlessly integrate into your project. Take your time to find the optimal size and placement that best suits your design.
In the next step, we will explore how to choose your materials and load the cutting mat to prepare for the cutting process.
Step 8: Choose Your Materials and Load the Cutting Mat
After resizing and positioning the image to perfection, it’s time to choose the appropriate materials and set up the cutting mat for the next step of the process. Follow these steps to prepare for cutting:
- On the right-hand sidebar of Cricut Design Space, you’ll find the “Make It” button. Click on it to proceed to the cutting settings.
- Cricut Design Space will analyze your design and suggest the most suitable cutting settings based on the materials you plan to use. Review these settings and make any necessary adjustments to ensure precise cutting.
- Click on the drop-down menu next to the “Material Size” to select the size of your material. Choose from the available options or select “Custom” to input your own dimensions.
- Now, select the appropriate material from the drop-down menu under the “Cut” section. The available options include various types of vinyl, paper, cardstock, fabric, and more. Choose the material that matches the one you will use for your project.
- If you’re using specialty materials such as glitter or heat transfer vinyl, make sure to select the corresponding option and follow the specific guidelines for those materials.
- After selecting the material, Cricut Design Space will provide a summary of the cutting settings and recommendations for blades and tools to use. Make sure you have the appropriate blade and tool loaded in your Cricut machine.
- Prepare your cutting mat by placing the chosen material onto it. Make sure the material is aligned properly and adhered securely to the cutting mat’s surface.
- Load the cutting mat into your Cricut machine according to the instructions provided in the machine’s user manual. Ensure it is correctly positioned and securely inserted.
- Once everything is set up, click on the “Go” button in Cricut Design Space to start the cutting process. Your machine will begin cutting the design according to the specified settings.
Choosing the right materials and properly loading the cutting mat are essential to achieve accurate and precise cuts. Pay close attention to the recommended settings for your chosen material, as this will ensure optimal results.
In the next step, we will explore how to send the image to the Cricut machine and bring your design to life.
Step 9: Send the Image to the Cricut Machine
After choosing your materials and loading the cutting mat, it’s time to send the image to your Cricut machine and bring your design to life. Follow these steps to complete the cutting process:
- In Cricut Design Space, review the final layout of your project on the canvas. Ensure that all elements are positioned correctly and that you’re satisfied with the overall design.
- Double-check the cutting settings one last time. Make sure the correct material and blade type are selected, and adjust any other settings as needed.
- Connect your computer to the Cricut machine using a USB cable or establish a wireless connection, depending on the model of your machine. Refer to the manufacturer’s instructions for the specific steps on how to connect.
- Once your Cricut machine is connected, click on the “Send to Cricut” or “Start” button in Cricut Design Space. This will initiate the transfer of the cutting instructions to your machine.
- On the Cricut machine’s interface, you may need to confirm the cutting settings and select any additional options, such as the number of copies or the cutting speed. Follow the on-screen prompts and make the necessary selections.
- Press the “Go” or “Start” button on your Cricut machine to initiate the cutting process. The machine will start cutting your design based on the instructions received from Cricut Design Space.
- Depending on the complexity and size of your design, the cutting process may take a few minutes. Allow the machine to complete the cutting before removing the cutting mat or unloading the material.
- Once the machine has finished cutting, carefully remove the cutting mat from the machine. Gently peel off the material from the cutting mat, taking care not to damage the cut design.
- Inspect the cut design for any imperfections or inconsistencies. If necessary, use a weeding tool to remove any excess material or bits left behind.
- Congratulations! You have successfully sent the image to your Cricut machine and completed the cutting process. Your design is now ready to be incorporated into your project or crafting masterpiece.
Sending the image to the Cricut machine is an exciting step that brings your design to life. Ensure that your machine is properly connected, and carefully follow the instructions to have a successful cutting experience.
Once the cutting process is complete, you can now take your cut design and explore a world of creative possibilities. Whether it’s a vinyl decal, a paper cutout, or any other craft project, your cut design is ready for the next steps of your creative journey.
Conclusion
Congratulations on completing the process of downloading images to Cricut Design Space and preparing them for cutting. You have learned the necessary steps to find and save images, open Cricut Design Space, create a new project, upload images, edit and prepare them for cutting, add them to your canvas, resize and position them, choose materials and load the cutting mat, and finally, send the image to your Cricut machine.
By following these steps, you have unlocked the potential of Cricut Design Space and set yourself up for success in creating beautiful, personalized crafts. The possibilities are endless with the ability to customize and cut intricate designs, whether it’s for paper crafts, vinyl decals, fabric projects, or more.
Remember to take your time in each step, experiment with different settings and materials, and let your creativity shine. Explore the vast library of images available, or create your own unique designs using graphic design software. With Cricut Design Space as your tool, you can bring your creative ideas to life and produce stunning, professional-looking results.
So, what are you waiting for? Dive into Cricut Design Space, unleash your imagination, and start creating your next masterpiece. Happy crafting!