Introduction
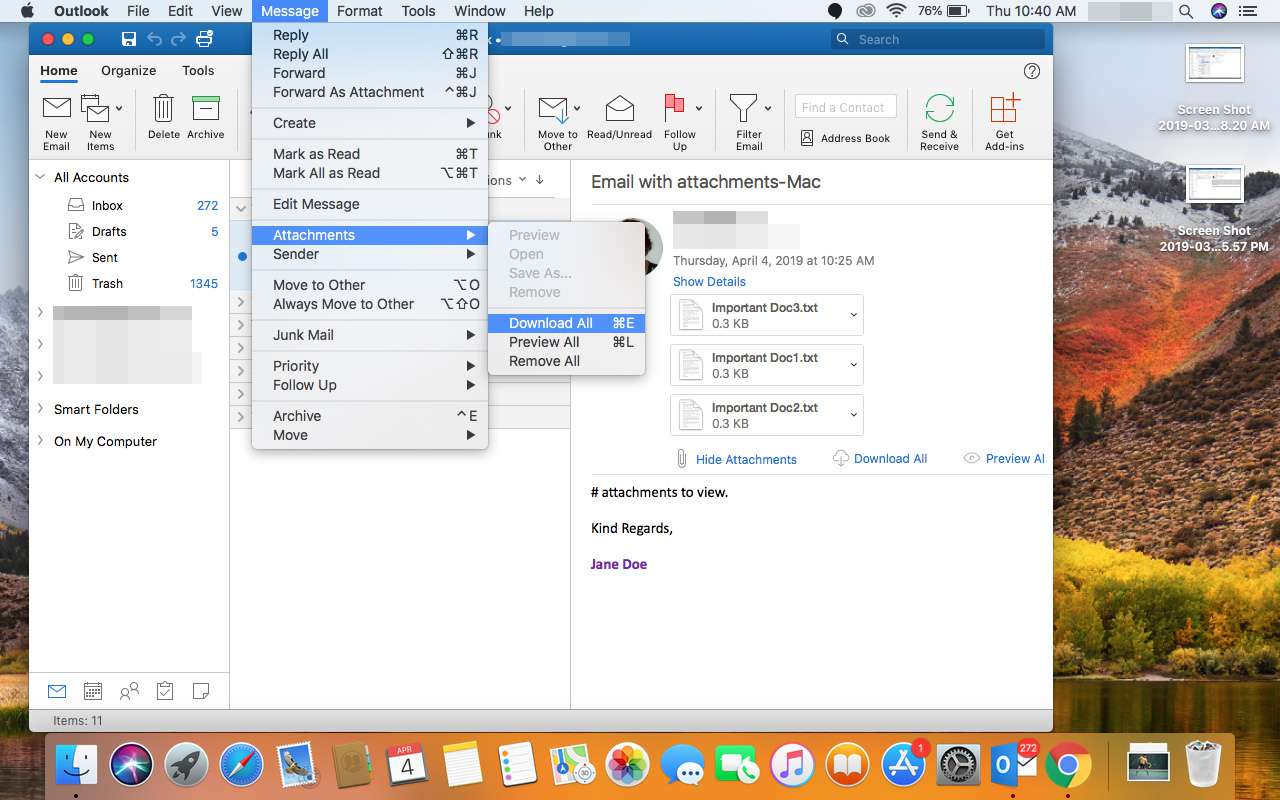
Welcome to this comprehensive guide on how to download attachments from Outlook automatically. As many of us know, managing email attachments can be a time-consuming task, especially if we receive numerous emails with attachments on a daily basis. Manually downloading each attachment can be tedious and inefficient, which is why automating this process can greatly improve productivity and save valuable time.
In this guide, we will walk you through the steps to set up auto-download for attachments in Microsoft Outlook. Whether you are a busy professional, a student, or simply someone who wants to streamline their email workflow, this guide will provide you with the knowledge and tools needed to automate the download process effortlessly.
By automating the attachment download process, you can ensure that your attachments are saved to a specific folder of your choice without the need for manual intervention. This can be a game-changer for professionals who regularly receive attachments as part of their work routine or for individuals who want to keep their attachments organized and easily accessible.
We will cover everything from enabling auto-download in Outlook to customizing the download settings and creating rules to automate the process. Additionally, we will also address common troubleshooting issues that may arise when setting up and using the auto-download feature.
So, whether you’re tired of downloading attachments one by one or simply looking for a more efficient way to manage your email attachments, let’s dive into the world of automatic attachment downloading in Outlook.
Why Download Attachments Automatically?
Downloading attachments automatically can significantly streamline your email workflow and enhance your overall productivity. Here are a few reasons why you should consider setting up auto-download for attachments in Outlook:
- Saves time and effort: Manually downloading attachments from each email can be time-consuming, especially if you receive a large number of emails with attachments on a daily basis. With auto-download, you can eliminate the need for manual intervention and have your attachments automatically saved to a designated folder, saving you valuable time and effort.
- Organizes your attachments: Keeping track of downloaded attachments can be challenging, especially if you receive attachments from multiple sources. Auto-download allows you to specify a folder where all attachments will be saved, ensuring that they are organized and easily accessible for future reference.
- Reduces the risk of missing attachments: It’s easy to accidentally overlook an important email attachment when manually downloading each one. By automating the process, you can minimize the risk of missing attachments and ensure that all relevant files are promptly and automatically saved to your preferred folder.
- Improves efficiency: Automating repetitive tasks, such as downloading attachments, allows you to focus your time and energy on more important and meaningful work. By freeing up time spent on manual tasks, you can increase your overall efficiency and productivity.
- Enhances collaboration: With auto-download enabled, you can quickly access and share attachments with colleagues or team members, making collaboration smoother and more efficient. Instead of searching through numerous emails for specific attachments, you can easily locate them in the designated folder.
By downloading attachments automatically, you can simplify your email management process, improve organization, and ensure that you never miss an important document or file. Whether you are a busy professional, a student, or simply someone who wants to optimize their email workflow, setting up auto-download in Outlook can greatly enhance your productivity and efficiency.
Setting Up Auto Download in Outlook
Microsoft Outlook provides a convenient feature that allows you to automate the process of downloading attachments. By following the steps outlined below, you can set up auto-download in Outlook:
- Step 1: Enabling Auto Download
- Step 2: Customizing Download Settings
- Step 3: Creating a Rule for Auto Download
- Step 4: Testing the Auto Download Rule
To begin, open Microsoft Outlook and navigate to the “File” tab in the top menu bar. From there, select “Options” and click on “Trust Center.” In the Trust Center window, choose “Automatic Download” and check the box that says “Don’t download pictures automatically in HTML email messages or RSS items.” Once you have made these selections, click on “OK” to save the changes.
Next, you can customize the download settings according to your preferences. To do this, go to the “File” tab again and select “Options.” In the Options window, click on “Mail” and scroll down to the “Message format” section. Here, you can choose whether to automatically download attachments for all messages or only for specific senders or domains. You can also set size limits for automatic downloads to prevent large files from being downloaded. Once you have adjusted the settings to your liking, click on “OK” to save.
Now it’s time to create a rule that will trigger the automatic download of attachments. Start by going to the “File” tab and selecting “Manage Rules & Alerts.” In the Rules and Alerts window, click on “New Rule” and choose the “Apply rule on messages I receive” option. Then, specify the conditions for the rule, such as messages from a specific sender or with specific keywords in the subject. In the next step, select the action “Download the attachment to the specified folder” and specify the folder where you want the attachments to be saved. Finally, click on “Finish” to create the rule.
After setting up the rule, it’s important to test its functionality. Send yourself an email with an attachment that meets the conditions defined in the rule. Check if the attachment is automatically downloaded and saved to the specified folder. If everything works as expected, you have successfully set up auto download in Outlook.
By following these steps, you can streamline your email workflow and save valuable time by automating the process of downloading attachments in Outlook. Customizing the download settings and creating a rule that suits your needs will help ensure that your attachments are organized and easily accessible, enhancing your productivity and efficiency.
Step 1: Enabling Auto Download
The first step in setting up auto download for attachments in Outlook is to enable the necessary settings. Follow these steps to enable auto download:
- Open Microsoft Outlook and navigate to the “File” tab in the top menu bar.
- Select “Options” from the drop-down menu.
- In the Outlook Options window, click on the “Trust Center” tab.
- Within the Trust Center, click on the “Automatic Download” button.
- Check the box that says “Don’t download pictures automatically in HTML email messages or RSS items.”
- Optionally, you can choose whether to download attachments from specific senders or domains only.
- Click on “OK” to save the changes and close the Trust Center window.
- Click on “OK” again to exit the Outlook Options window.
By following these steps, you have successfully enabled auto download in Outlook. This setting ensures that attachments are not automatically downloaded unless you specifically allow it.
Enabling auto download can be particularly useful for improving security, as it prevents potentially unsafe content from being automatically downloaded. By selecting the option to not download pictures automatically in HTML email messages or RSS items, you can avoid potential risks from malicious attachments or unwanted content.
However, it is important to note that certain trusted senders or domains may include important attachments that you want to download automatically. In such cases, you can manually specify those senders or domains to allow automatic downloads. This flexibility enables you to balance security with convenience, ensuring that attachments from trusted sources are easily accessible.
Now that you have enabled auto download in Outlook, you can proceed to the next step of customizing the download settings to further tailor the automatic download process to your needs.
Step 2: Customizing Download Settings
Once you have enabled auto download in Outlook, you can customize the download settings to fit your preferences. Follow these steps to customize the download settings:
- Open Microsoft Outlook and navigate to the “File” tab in the top menu bar.
- Select “Options” from the drop-down menu.
- In the Outlook Options window, click on the “Mail” tab.
- Scroll down to the “Message format” section.
- Under the “Message format” section, you will find options for auto downloading attachments.
- Choose whether you want to automatically download attachments for all messages or only for specific senders or domains.
- If you select the option to download attachments for specific senders or domains, you can add the desired senders or domains to the list.
- To prevent large files from being automatically downloaded, you can set size limits for automatic downloads.
- Click on “OK” to save the changes and exit the Outlook Options window.
By customizing the download settings, you can have more control over the automatic download process in Outlook. This allows you to specify which attachments should be downloaded automatically based on sender, domain, or file size.
If you consistently receive attachments from specific senders or domains that you trust, you can choose to automatically download attachments from only those sources. This option streamlines the process by eliminating the need to manually download attachments from trusted sources every time.
On the other hand, if you want to be more selective about the attachments you automatically download, you can choose the option to download attachments only from specific senders or domains. This ensures that you have control over which attachments are automatically saved to your system.
Additionally, setting size limits for automatic downloads can help you avoid downloading large files that may occupy unnecessary disk space or hinder email performance. By specifying a maximum file size, you can ensure that only attachments within the defined size limit are automatically downloaded.
With these customizable download settings, you can optimize the automatic download process in Outlook according to your specific needs and preferences. Once you have customized the settings, you can proceed to the next step of creating a rule to trigger the automatic download of attachments.
Step 3: Creating a Rule for Auto Download
After enabling auto download and customizing the download settings in Outlook, the next step is to create a rule that triggers the automatic download of attachments. Follow these steps to create a rule for auto download:
- Open Microsoft Outlook and navigate to the “File” tab in the top menu bar.
- Select “Manage Rules & Alerts” from the drop-down menu.
- In the Rules and Alerts window, click on the “New Rule” button.
- Choose the option “Apply rule on messages I receive” and click on “Next.”
- Specify the conditions that will trigger the automatic download of attachments. This can include criteria such as messages from a specific sender, with specific keywords in the subject, or meeting certain conditions.
- Once you have defined the conditions, click on “Next.”
- Select the action “Download the attachment to the specified folder.”
- Click on the “Specified” hyperlink to choose the folder where you want the attachments to be automatically saved.
- After selecting the folder, click on “Finish” to create the rule.
With the rule created, any incoming email that meets the specified conditions will trigger the automatic download of attachments. The attachments will be saved to the designated folder that you have chosen during the rule creation process.
Creating rules for auto download gives you more control over which attachments are automatically saved. By setting specific conditions, you can ensure that attachments from important senders, with specific keywords, or meeting certain criteria are automatically downloaded. This allows you to stay organized and saves you the hassle of manually downloading each attachment.
Remember to carefully define the conditions for the rule to avoid unnecessary downloads or false positives. Regularly review and update your rules as needed to ensure that they align with your changing preferences and workflow.
Now that you have successfully created a rule for auto download, you can proceed to the final step of testing the rule to ensure its functionality and make any necessary adjustments.
Step 4: Testing the Auto Download Rule
After creating a rule for auto download in Outlook, it’s important to test the rule to ensure that it functions as intended. Follow these steps to test the auto download rule:
- Send yourself an email that meets the conditions defined in the rule, such as from a specific sender or with specific keywords in the subject.
- Check your email inbox and wait for the message to arrive.
- If the rule is functioning correctly, the attachment should be automatically downloaded and saved to the folder you specified during the rule creation process.
- Navigate to the designated folder and confirm that the attachment is present.
- If the attachment is successfully downloaded and saved to the correct folder, the rule is working as intended.
- If the attachment is not downloaded or saved to the expected folder, review the rule settings to ensure they are configured correctly. Make any necessary adjustments and repeat the testing process until the rule functions as desired.
By testing the auto download rule, you can verify that it is working in accordance with your defined conditions. This step helps ensure that the rule is accurately identifying and downloading the attachments you want to be saved automatically.
Testing is particularly important when creating complex rules or rules with multiple conditions. It allows you to catch any potential issues or unexpected behaviors early on, making it easier to troubleshoot and refine the rule if necessary.
Remember to regularly review and update your rules as needed. Over time, your email communication patterns may change, and you may need to adjust the rule conditions to align with your evolving workflow.
With the auto download rule successfully tested and verified, you can now enjoy the convenience of having attachments automatically downloaded and organized in Outlook. This automation simplifies the process of managing attachments, saves you time, and enhances your overall productivity.
Troubleshooting Auto Download Issues
While setting up auto download for attachments in Outlook is generally a seamless process, you may encounter some issues along the way. Here are some common problems that you may encounter and troubleshooting tips to help resolve them:
- Attachments not downloading: If attachments are not being automatically downloaded, first verify that the auto download feature is enabled in Outlook. Double-check the settings under the “Options” menu and ensure that the “Automatic Download” checkbox is selected. If the issue persists, review the rule conditions to make sure they are accurately defined.
- Attachments downloading from unwanted sources: If you find that attachments are being automatically downloaded from sources you want to exclude, review and modify the rule conditions accordingly. Ensure that the rule is properly filtering out unwanted messages to prevent their attachments from being downloaded.
- Attachments not saving to the correct folder: If attachments are not being saved to the designated folder, check the rule settings to confirm that the correct folder path is specified. Ensure there are no typos or errors in the folder location. Additionally, confirm that you have the necessary permissions to save files in that particular folder.
- Attachments failing to download due to size limits: If attachments are not being automatically downloaded due to size limits, check the size limit settings in the Outlook Options. Ensure that the attachment sizes in the emails you are receiving are within the specified limit. If necessary, adjust the size limit to allow for larger attachments to be downloaded.
- Rules not applying correctly: If you notice that the auto download rule is not consistently applying to the desired messages, review the rule conditions. Check for any conflicts with other rules or conditions that may be interfering. Reorder the rules if necessary, giving priority to the rule for auto downloading attachments.
- Software or compatibility issues: If you are experiencing persistent issues with auto download, ensure that your version of Outlook is up-to-date. Updates often include bug fixes and compatibility improvements. If the problem persists, consult the Microsoft support resources or reach out to their support team for assistance.
If you encounter any issues while setting up and using auto download in Outlook, these troubleshooting tips should help you identify and resolve the problem. Remember to check your settings, review the rules, and make necessary adjustments based on the specific issues you are facing.
By troubleshooting and resolving any auto download issues, you can ensure a smooth and reliable experience with automatic attachment downloads in Outlook.
Conclusion
Automating the download of attachments in Microsoft Outlook can greatly improve your email workflow by saving time, enhancing organization, and minimizing the risk of missing important files. By following the steps outlined in this guide, you can set up auto download and customize the settings to fit your specific needs.
Enabling auto download in Outlook is the first step, ensuring that attachments are not automatically downloaded unless you explicitly allow it. Customizing the download settings allows you to specify which attachments should be downloaded automatically based on senders, domains, or file sizes.
Creating a rule for auto download further streamlines the process, allowing you to define conditions that trigger the automatic download of attachments. This rule-based approach provides flexibility and control over which attachments are automatically saved to your preferred folder.
Once the rule is set up, it’s important to test its functionality by sending yourself a test email that meets the defined conditions. By confirming that the attachments are downloading correctly and being saved to the designated folder, you can ensure that the auto download rule is working as intended.
If you encounter any issues during the setup or use of auto download, troubleshooting tips can help you identify and resolve common problems. By reviewing and adjusting settings, rules, and conditions, you can overcome challenges and streamline the auto download process.
By automating the download of attachments in Outlook, you can simplify your email management, improve productivity, and ensure that important files are readily accessible. Whether you are a busy professional, a student, or simply someone who wants to streamline their email workflow, auto download in Outlook can be a valuable tool.
Take advantage of the convenience and efficiency of automatic attachment downloads in Outlook to optimize your email management process and focus on the important tasks at hand.


