Introduction
Attaching an email in Microsoft Outlook is a straightforward process that allows you to share important files and documents with your recipients. Whether you need to send a report, a presentation, or any other type of file, Outlook provides a seamless way to include attachments in your emails. By following a few simple steps, you can ensure that your attachments are correctly and efficiently added to your outgoing emails.
With the ability to attach emails in Outlook, you can easily share conversations, important messages, or even forwarding a relevant thread to someone else. This feature comes in handy when you need to refer to specific information or provide context to your recipients. Plus, attaching emails can streamline communication by making it easier for multiple recipients to have access to the same conversation.
In this guide, I will walk you through the steps to attach an email in Microsoft Outlook. Whether you are a beginner or an experienced Outlook user, you will find this process simple and hassle-free. So let’s get started and learn how to make the most of this essential feature.
Step 1: Open Microsoft Outlook
The first step in attaching an email in Microsoft Outlook is to open the application on your computer. Locate the Outlook icon either on your desktop or in the Start menu and double-click to launch the program. If you don’t have Outlook installed, you can download it from the Microsoft website and follow the installation instructions.
Once Outlook has opened, you will be prompted to sign in with your email address and password. Enter your credentials and click “Sign In” to access your email account. If you have multiple accounts configured in Outlook, make sure to select the account from which you want to attach the email.
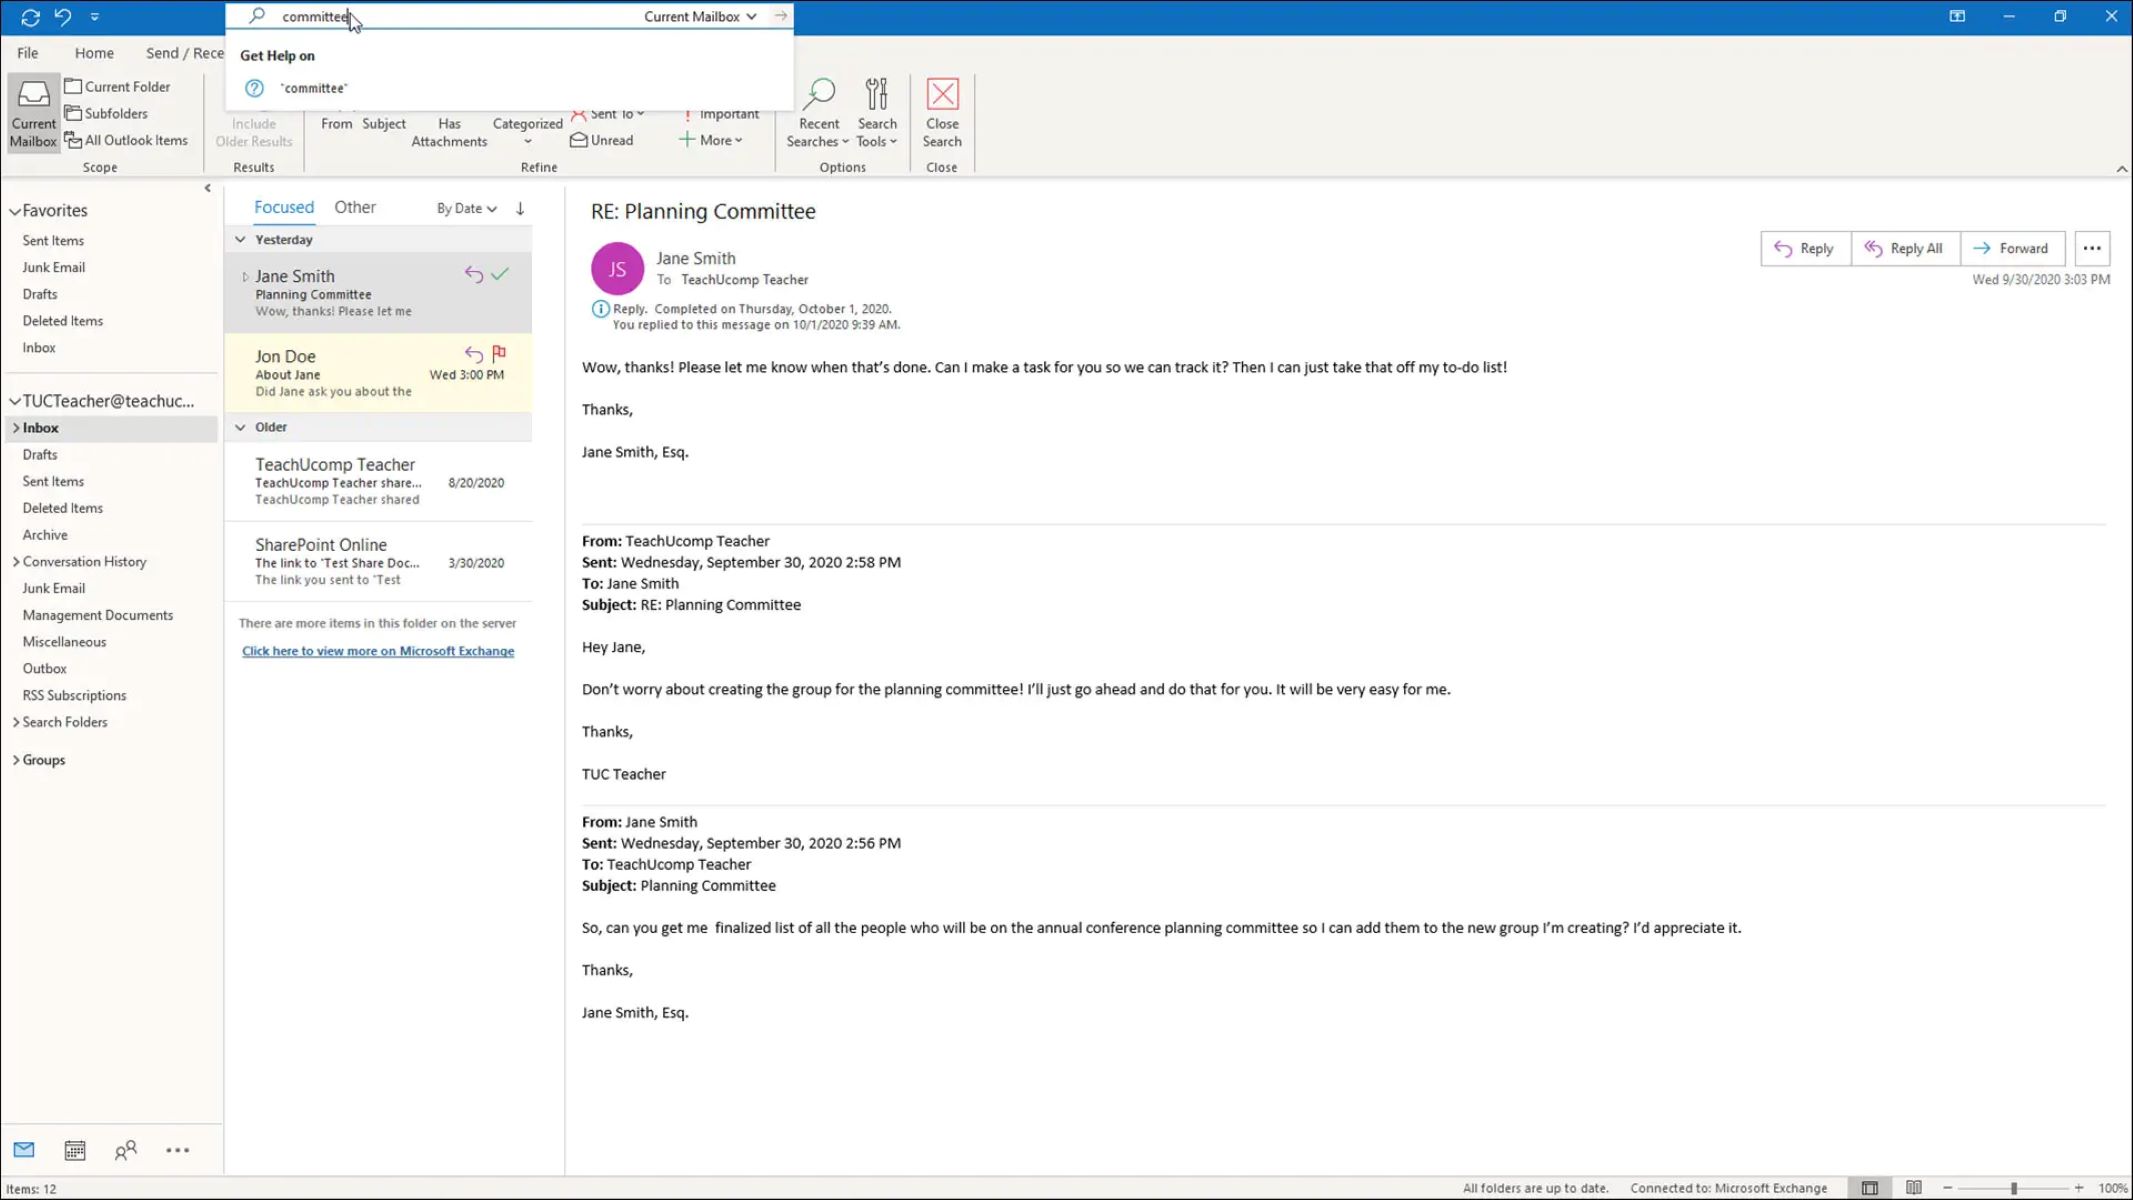
After signing in, Outlook will load your inbox and display your emails. Take a moment to familiarize yourself with the interface and navigation options. You will find the main toolbar at the top of the window, where you can access various features and tools.
If you have already composed the email that you want to attach, locate it in your “Sent” or “Drafts” folder. If not, proceed to the next step to create a new email.
Remember to keep your Outlook application up to date to ensure you have access to the latest features and security enhancements. Microsoft regularly releases updates, so it’s a good practice to check for updates periodically or enable automatic updates for your software.
Step 2: Open a New Email
After opening Microsoft Outlook and signing in to your email account, the next step is to create a new email. This will serve as the email that you want to attach to another email. To do this:
- Click on the “New Email” button located in the main toolbar at the top of the Outlook window. It is represented by a paper and pencil icon.
- A new email window will open, presenting you with a blank email template.
- Fill in the necessary information in the appropriate fields, including the recipient’s email address in the “To” field, a descriptive subject line, and the content of your email in the body section.
- You can also format the text, add images or hyperlinks, and customize the appearance of your email using the formatting options available in the toolbar.
- Take a moment to proofread your email for any errors or typos, ensuring that the content is clear, concise, and well-structured.
It is important to compose a clear and concise email to accompany the attached email, providing any necessary context or instructions for the recipient. This will help them understand the purpose of the attached email and how they should utilize its contents.
Remember to save your newly created email as a draft if you need to come back to it later or click on the “Send” button to immediately send the email along with the attachment. Now that you have opened a new email, let’s move on to the next step and learn how to attach a file to it.
Step 3: Attach a File
Attaching a file to your email is a crucial step in sharing important documents or information with your recipients. To attach a file in Microsoft Outlook, follow these simple steps:
- Ensure that you have the file you want to attach saved on your computer in a location that you can easily access.
- In the new email window, locate the toolbar at the top and click on the “Attach File” button. It is typically represented by a paperclip icon.
- Browse your computer’s folders and select the file you wish to attach. You can select single or multiple files by pressing the “Ctrl” key while clicking on each file.
- Once you have selected the file(s), click on the “Insert” or “Open” button, depending on your version of Outlook.
The attached file(s) will appear in the attachments section of your email, usually displayed below the “To” and “Subject” fields. Outlook also provides a visual indication of the attachment, typically showing the file name and file type next to the paperclip icon.
It is important to note that there are certain file size limits for attachments in Outlook. The exact limits may vary depending on your email provider and version of Outlook. If the file you want to attach exceeds the size limit, consider compressing it or using a file-sharing service to send the document.
Now that you have successfully attached the file to your email, let’s move on to the next step and choose the file from your computer.
Step 4: Choose a File from Your Computer
Once you have clicked on the “Attach File” button in the new email window, it’s time to choose the file you want to attach from your computer. Follow these steps to select the desired file:
- A file explorer window will open, allowing you to navigate through the folders on your computer.
- Use the file explorer window to locate the folder where your desired file is stored. You can click on different folders to navigate through your computer’s directory.
- Once you have found the file you want to attach, click on it to select it. If you want to attach multiple files, hold down the “Ctrl” key and click on each file you wish to attach.
- After selecting the file(s), click on the “Insert” or “Open” button, depending on your version of Outlook.
Outlook will then process the file(s) and attach them to your email. You will see the attached file(s) appear below the “To” and “Subject” fields in the email compose window.
It is important to verify that you have selected the correct file(s) before proceeding. Take a moment to double-check the file names and ensure that you haven’t accidentally attached any irrelevant files. This will help avoid any confusion or misunderstandings for the recipient.
If you need to remove an attachment, simply click on the “X” button next to the file name. This will detach the file from the email without deleting it from your computer.
Now that you have chosen the file(s) to attach, let’s move on to the next step and confirm the attachment before sending the email.
Step 5: Confirm the Attachment
Before sending your email with the attachment, it’s essential to confirm that the file has been attached correctly. Follow these steps to ensure that the attachment is included:
- Review the email compose window and locate the section where the attachment(s) are displayed. This is usually below the “To” and “Subject” fields.
- Verify that the file name(s) and file type(s) of the attached document(s) are visible. This will confirm that the correct file(s) have been attached.
- If you have attached multiple files, make sure all the intended documents are listed. If any files are missing or incorrect, you can click on the “X” button next to the file name to remove it and repeat the attachment process.
- Take a moment to click on each attached file to open and review it. This will ensure that the files are not corrupted and can be accessed by the recipient.
- If necessary, make any additional edits or additions to the body of the email or other elements of the message.
By thoroughly reviewing the attachment(s) and email content, you can increase the chances of delivering the correct information to your recipients and avoid any misunderstandings or confusion.
Additionally, it is recommended to perform a final proofread of the entire email, including the attachment(s), to check for any errors, inaccuracies, or formatting issues. This last check ensures that your email appears professional and polished.
Once you are satisfied that the attachment has been successfully included and the email is error-free, you are ready to proceed to the final step – sending the email with the attachment.
Step 6: Send the Email with Attachment
After confirming the attachment and reviewing the content of your email, it’s time to send it to your intended recipients. Follow these final steps to send the email:
- Double-check the recipient’s email address in the “To” field to ensure accuracy. You can add multiple recipients by separating their email addresses with commas.
- Verify that the subject line clearly represents the content of your email and provides a brief summary of the attachment(s).
- Review the body of the email one last time to ensure that it conveys your intended message clearly and professionally.
- If you wish to keep a copy of the email in your “Sent” folder, ensure that the “Save a copy of this message in the Sent Items folder” option is selected. This allows you to refer back to the email later if needed.
- When you are ready to send the email, click on the “Send” button located in the toolbar at the top of the email compose window.
Once you click “Send,” Outlook will initiate the sending process, and the email, along with the attached file(s), will be delivered to the recipient(s). Depending on the size of the attachment(s) and the speed of your internet connection, the sending process may take a few moments to complete.
After the email has been sent, Outlook will typically move it to the “Sent” folder, where you can locate it later if needed. Additionally, you may receive a notification or confirmation message indicating that the email has been successfully sent. This can provide peace of mind and let you know that your attachment has been delivered to the recipient(s).
It is always a good practice to save a copy of the emailed attachment(s) on your computer or in a designated folder for future reference. This ensures that you have access to the original file(s) even after sending them via email.
Congratulations! You have successfully attached an email in Microsoft Outlook and sent it along with the attachment(s). By following these steps, you can efficiently share documents, files, or important conversations with your recipients, enhancing communication and collaboration.
Conclusion
Attaching an email in Microsoft Outlook is a valuable feature that allows you to share conversations, important messages, and documents with ease. By following the simple steps outlined in this guide, you can confidently attach files to your emails and ensure that the intended recipients receive the necessary information.
Opening Microsoft Outlook and signing in to your email account is the first step in the process. From there, you can open a new email and compose your message, providing any necessary context or instructions for the recipient. Then, you can attach the file(s) by selecting them from your computer and confirming their inclusion in the email.
Before sending the email, it is crucial to confirm that the attachment has been added correctly. Take the time to review the attachment and the content of the email to ensure accuracy and professionalism. Finally, click the “Send” button to deliver the email and its attachment(s) to the recipient(s).
By mastering the process of attaching emails in Outlook, you can streamline communication, share important information efficiently, and collaborate effectively with colleagues, clients, and partners. Remember to pay attention to file size limits, verify recipient addresses, and proofread your emails before sending them.
Utilizing the attachment feature in Outlook empowers you to share vital information, keep conversations organized, and enhance productivity and collaboration. Whether you are sending a document or forwarding a relevant conversation, attaching emails in Outlook simplifies the sharing process.
Now that you have a clear understanding of how to attach an email in Microsoft Outlook, put this knowledge into practice and make the most of this valuable feature. Start attaching emails and files today to enhance your communication and share important information effectively.