Introduction
Welcome to this guide on how to download your Outlook inbox! If you’re someone who relies heavily on your Outlook email account for work or personal use, being able to download and access your emails offline can be incredibly convenient. Whether you need to reference important messages while on a flight or simply want to have a backup of your inbox on your computer, downloading your Outlook inbox provides a versatile and accessible solution.
In this article, we will walk you through the steps to effectively download your Outlook inbox, ensuring that you can access your emails offline whenever you need them. With just a few simple steps, you can save your emails and attachments as email files on your computer, allowing you to view and manage them without an internet connection.
We understand that everyone’s requirements and preferences may differ, so we will provide you with step-by-step instructions that are applicable to both the Outlook web version and the desktop application. No matter which platform you use, you’ll be able to follow along with this guide to download your Outlook inbox effortlessly.
Let’s get started on this journey to empower you with the ability to download and access your Outlook inbox offline. Whether you’re a professional or a busy individual who needs access to important emails on the go, this guide will equip you with the necessary knowledge to make your Outlook inbox easily accessible at all times.
Step 1: Sign in to your Outlook account
The first step in downloading your Outlook inbox is to sign in to your Outlook account. Make sure you have a reliable internet connection before proceeding.
If you are using the Outlook web version, open your preferred web browser and navigate to the Outlook website. Enter your email address and password in the respective fields and click on the “Sign In” button. You will be redirected to your Outlook inbox.
Alternatively, if you are using the desktop application, locate and open the Outlook program on your computer. Upon opening the application, you will be prompted to sign in. Enter your email address and password in the provided fields and click on the “Sign In” button. The Outlook application will authenticate your credentials and open your inbox.
It is important to ensure that you have the correct login credentials to access your Outlook account. Double-check that you are entering your email address and password accurately to avoid any login issues. If you are unsure of your password or have trouble accessing your account, consider resetting your password or reaching out to Outlook support for assistance.
Once you have signed in to your Outlook account successfully, you are ready to proceed to the next step in downloading your inbox. Keep your login details safe and secure, as they are essential for accessing your emails and personal information.
Step 2: Access your inbox
After signing in to your Outlook account, the next step is to access your inbox. This is where all your emails are stored and where you’ll be able to select the specific emails you want to download.
If you are using the Outlook web version, you will be automatically directed to your inbox upon signing in. The inbox is typically located in the left sidebar of the Outlook interface. Click on the “Inbox” folder to open it and view your received emails.
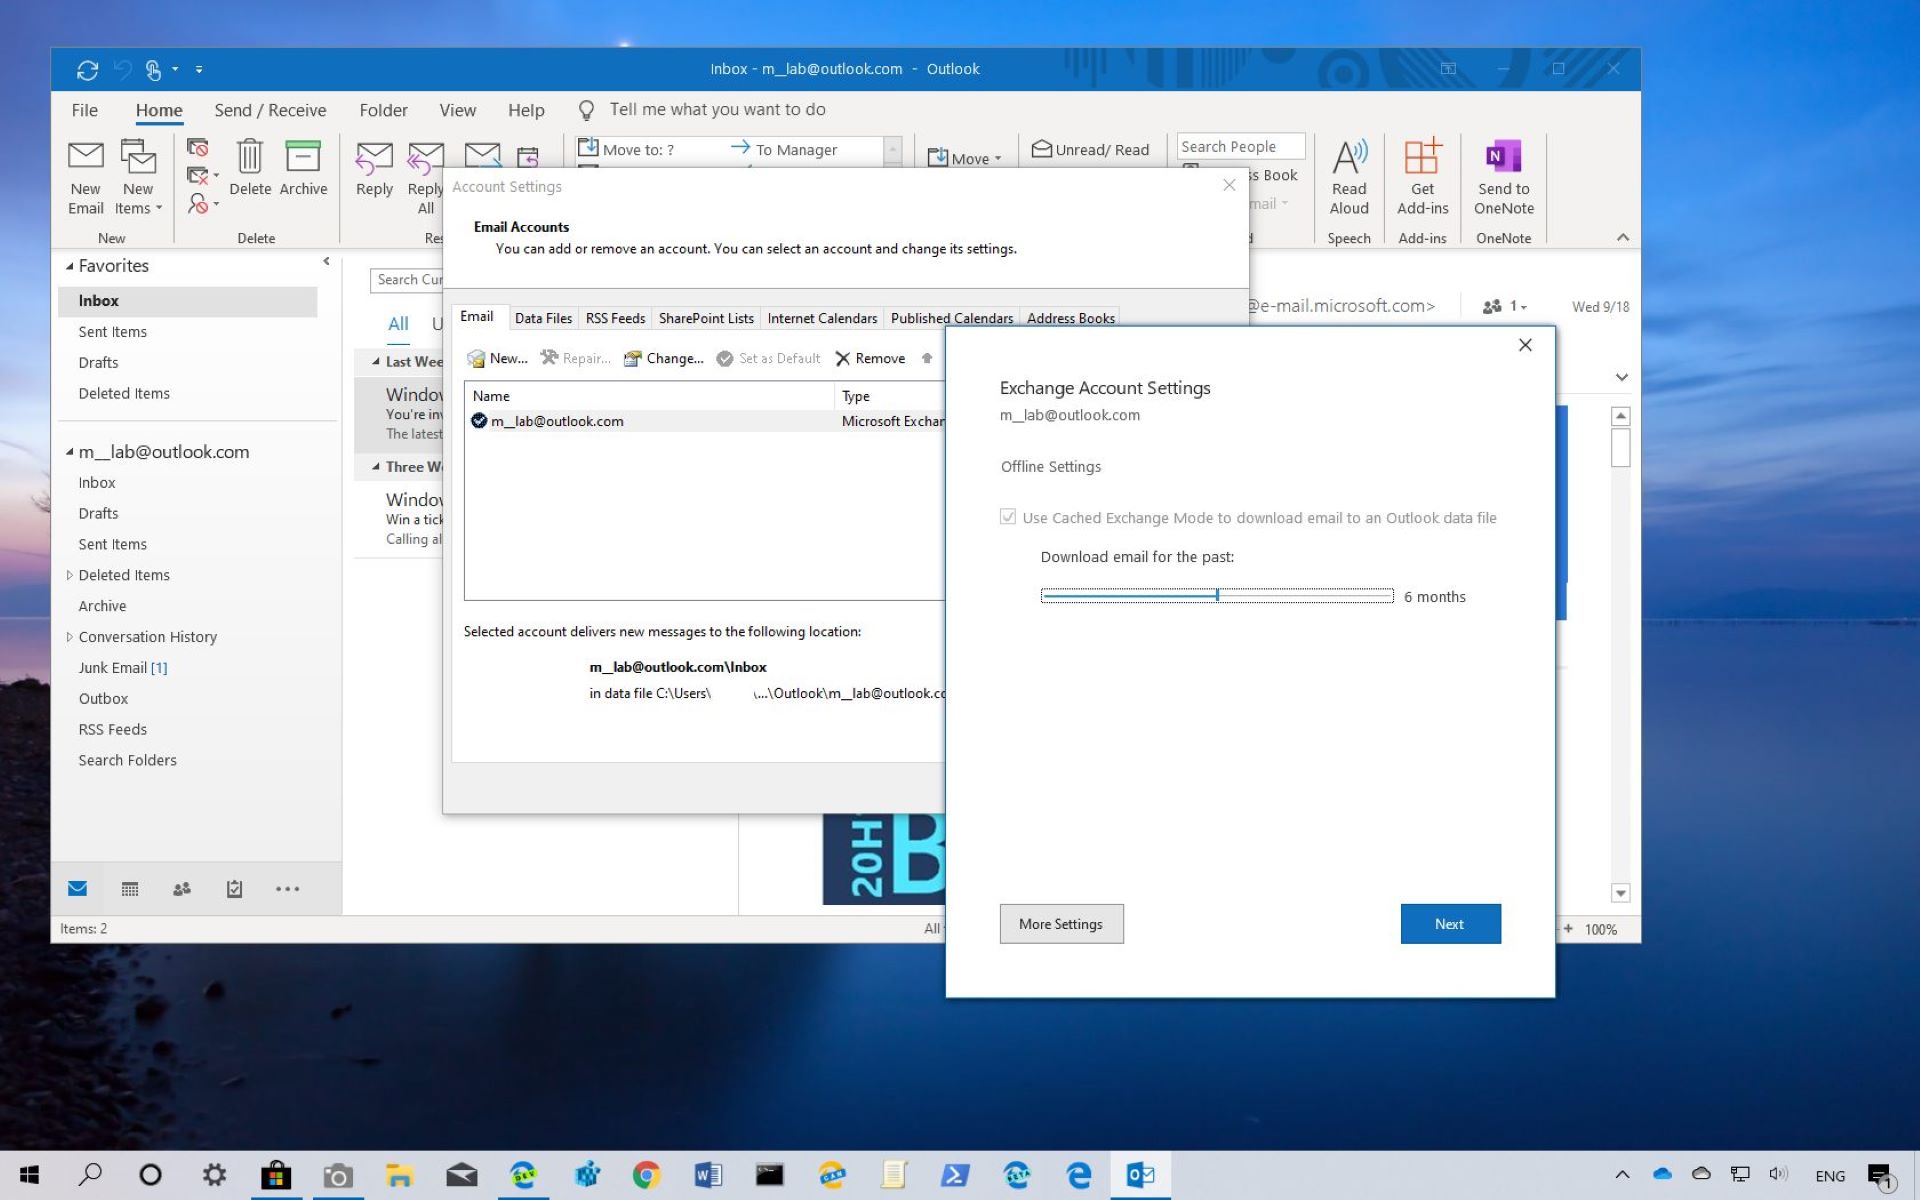
In the desktop application, the inbox is also easily accessible. Once you sign in, you will be greeted by the main Outlook window, which displays your folders. The “Inbox” folder is usually located at the top or under the “Favorites” section. Click on the “Inbox” folder to access it.
Once you have accessed your inbox, take a moment to familiarize yourself with the Outlook interface. You will see a list of your received emails, typically displayed in chronological order, with the most recent emails appearing at the top. The emails will contain information such as the sender, subject, and a brief preview of the content.
Browsing through your inbox allows you to review your emails and choose which ones you want to download. You can navigate through pages of emails if you have a large inbox by using the pagination options available at the bottom or top of the email list.
Being able to access your inbox is crucial for downloading specific emails or a selection of emails later on. Now that you have successfully accessed your inbox, you are ready to proceed to the next step for downloading the emails you desire.
Step 3: Select the emails you want to download
Once you have accessed your Outlook inbox, you can now proceed to select the specific emails that you want to download. This step allows you to choose the emails that are important to you or those that you need to have offline access to.
In both the Outlook web version and the desktop application, you can select individual emails by clicking on the checkbox next to each email. By doing so, a checkmark will appear, indicating that the email has been selected for download.
If you want to select multiple emails at once, you can make use of the shift or control/command key on your keyboard. Holding down the shift key allows you to select a range of emails, while holding down the control/command key enables you to select multiple non-consecutive emails.
To select all the emails in your inbox, you can use the “Select All” option, usually located at the top or bottom of the email list. This will automatically select every email present in your inbox, making it easier to download your entire inbox in one go.
While selecting the emails, you may also notice additional options available for organizing your emails, such as creating folders, archiving, or moving emails to different folders. Take advantage of these features to keep your inbox well-organized and easily manageable.
Remember to choose the emails that are essential to you or that you anticipate needing offline access to. Selecting too many emails can lead to unnecessary clutter and a larger file size during the download process. By being selective, you can ensure a smoother and more efficient downloading experience.
Now that you have selected the emails you want to download, you are ready to move on to the next step, where we will guide you through the process of downloading the selected emails as email files.
Step 4: Download the emails as an email file
Once you have selected the specific emails you want to download from your Outlook inbox, the next step is to download them as email files. Outlook provides the option to save your emails in a file format that can be accessed and viewed offline.
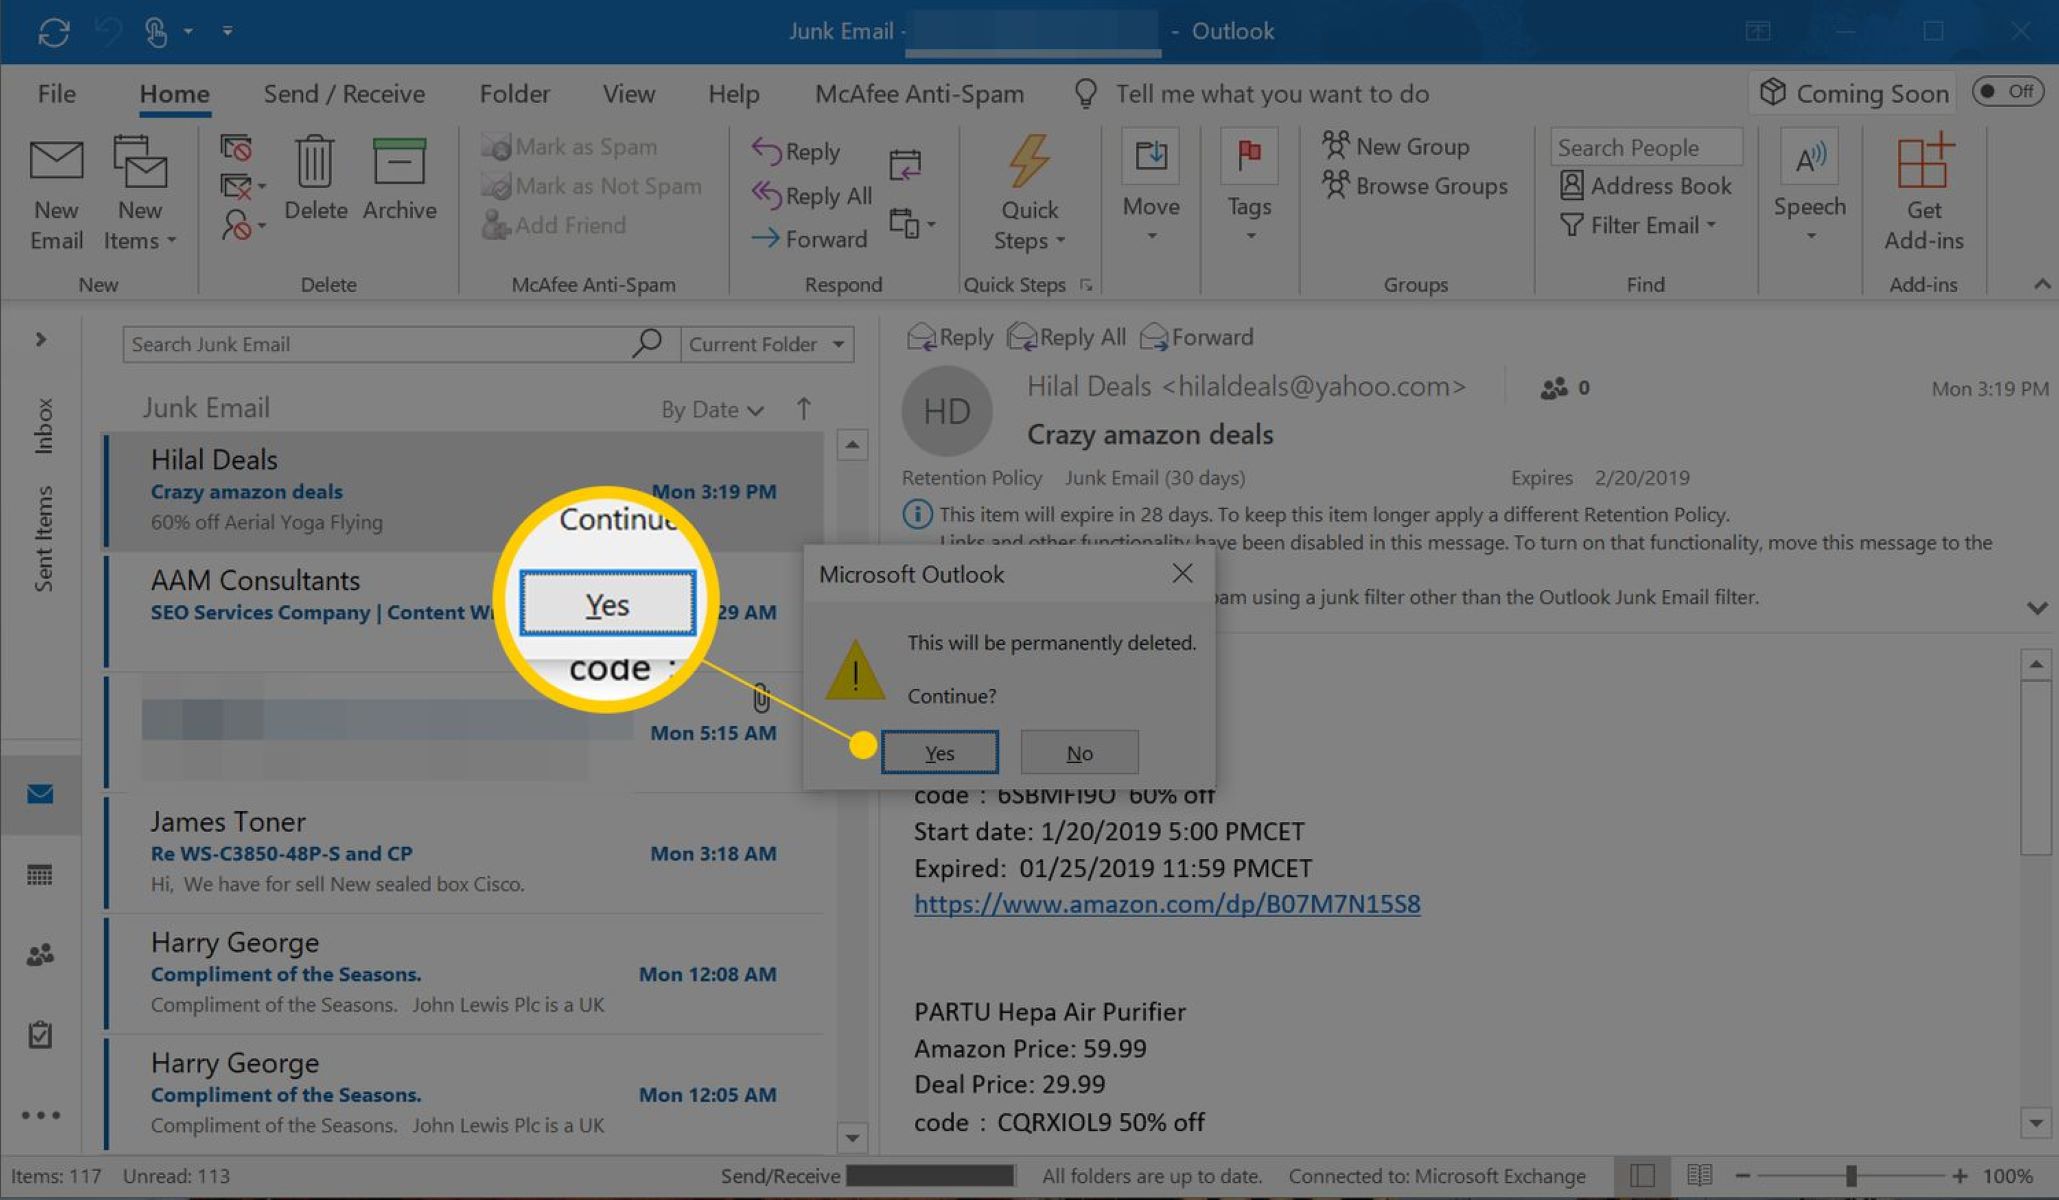
In the Outlook web version, you can download the selected emails by clicking on the “More actions” button, represented by three dots or a gear icon, usually located at the top or bottom of the email list. From the dropdown menu, select the option to “Save As” or “Download”. This will initiate the download process, and a file will be saved to your computer containing the selected emails.
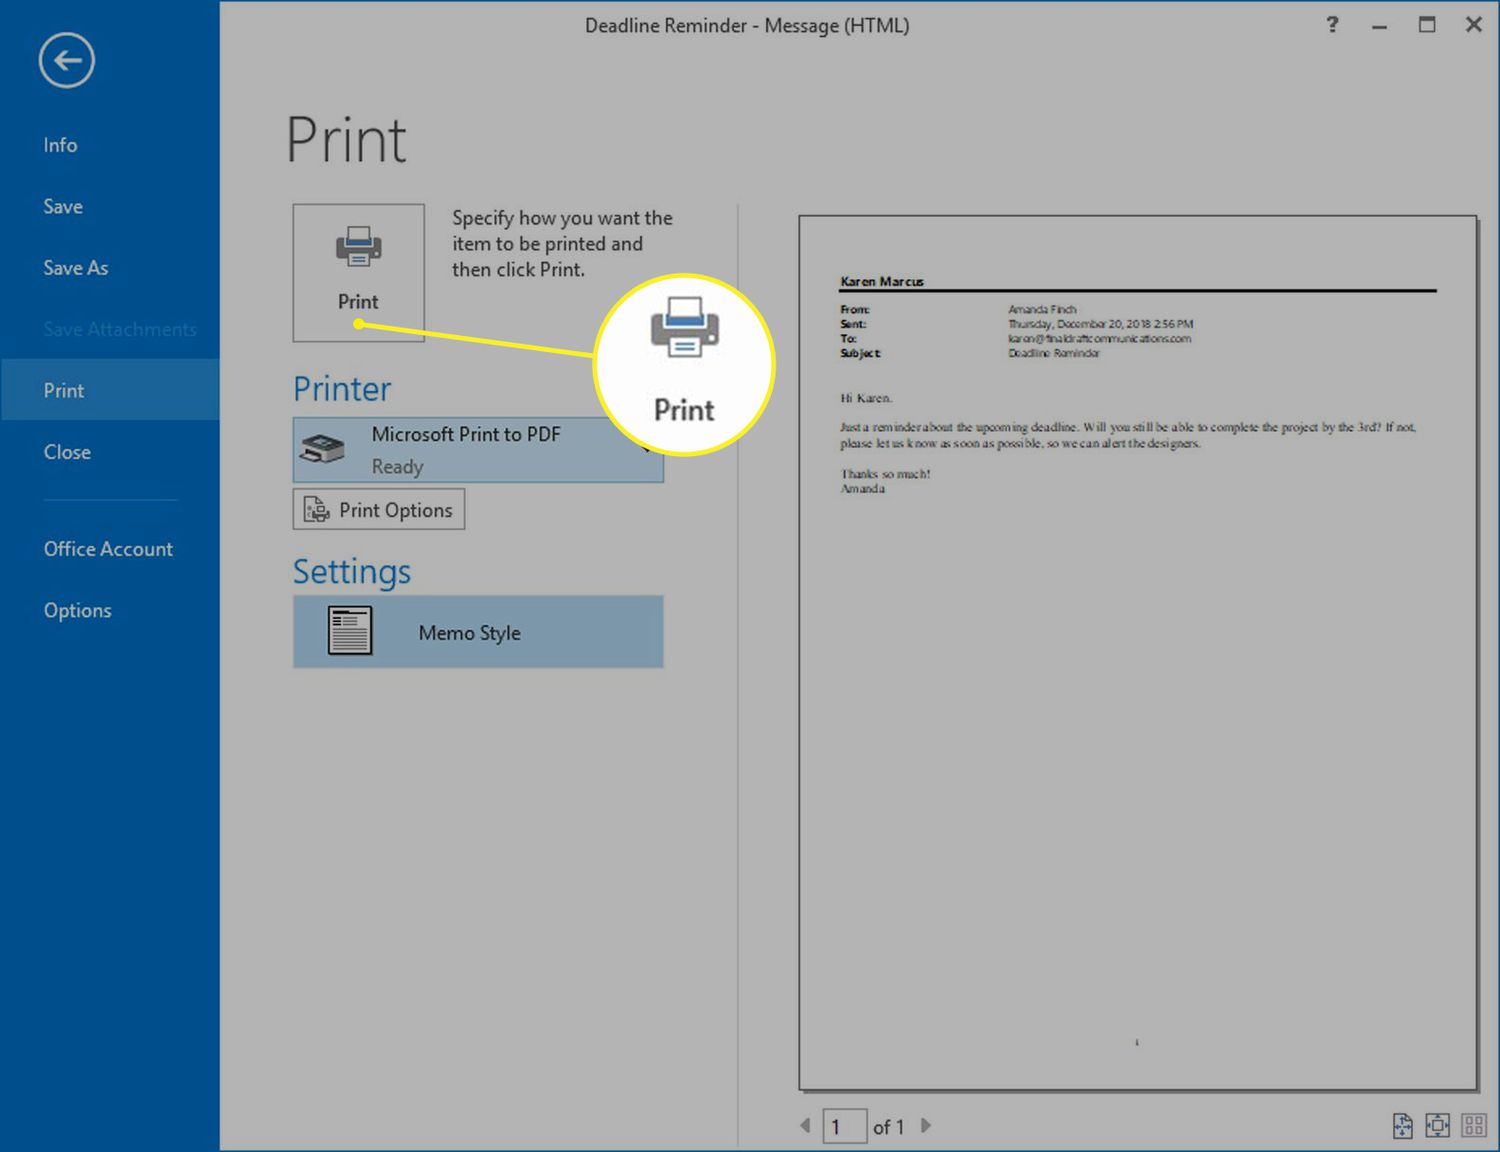
In the desktop application, the process is slightly different. With the selected emails still highlighted, navigate to the top menu and click on the “File” tab. From the dropdown menu, choose the option to “Save As” or “Save Selected Items”. A dialog box will appear, allowing you to specify the file name and location where you want to save the email file.
When saving the emails as a file, you will usually have multiple file format options to choose from, such as .msg or .eml. These file formats are widely supported and can be opened by various email clients and applications. Select the format that is most compatible with your needs and the applications you have installed on your computer.
It’s important to note that the download time will depend on the number and size of the selected emails. If you have a large number of emails or emails with large attachments, the download process may take longer. Be patient and ensure that you have a stable internet connection throughout the download to avoid any interruptions.
By downloading the emails as email files, you are creating a backup copy of the selected emails on your computer. This allows you to access and view these emails even without an internet connection, providing convenience and flexibility in managing your Outlook inbox.
With the selected emails successfully downloaded as email files, you are ready to proceed to the next step: saving the downloaded file to your computer for offline access.
Step 5: Save the downloaded file to your computer
Once you have successfully downloaded the emails as an email file from your Outlook account, the next step is to save the downloaded file to your computer. This will ensure that you have a local copy of the emails that can be accessed offline whenever you need them.
When saving the downloaded file, you will typically be prompted to choose a location on your computer where you want to save it. You can either opt for the default download location or select a specific folder or directory of your choice.
In most cases, a file explorer or save dialog box will appear after the download is complete. From this window, navigate to the desired location on your computer where you want to save the file. You can create a new folder if needed or choose an existing one.
It is a good practice to create a separate folder specifically for your downloaded Outlook emails. This will help you keep them organized and easy to find when you need to access them offline in the future.
When choosing the file name for the downloaded email file, make it descriptive and meaningful. This will make it easier for you to identify the content of the file without having to open it. Consider using a naming convention that includes the date, sender, or subject of the emails for added clarity.
Once you have selected the location and specified the file name, click on the “Save” or “OK” button to complete the saving process. The downloaded email file will now be stored on your computer, ready to be accessed offline whenever necessary.
It is a good practice to regularly back up your downloaded email files to an external storage device or cloud storage service. This will provide an extra layer of protection and ensure that you have copies of your important emails in case of any unexpected computer issues or data loss.
By saving the downloaded file to your computer, you have successfully completed this step and are now ready to access the downloaded emails offline whenever needed.
Step 6: Access the downloaded emails offline
Now that you have successfully saved the downloaded email file from your Outlook account to your computer, you can conveniently access your emails offline whenever you need them. This step allows you to open and view the downloaded emails without requiring an internet connection.
To access the downloaded emails offline, you will need an email client or application that is compatible with the file format in which you saved the emails, such as .msg or .eml.
If you have a supported email client already installed on your computer, you can simply double-click on the downloaded email file. This will open the email client and load the selected emails, allowing you to read, reply, forward, and manage them offline.
If you do not have an email client installed, there are several options available for opening and viewing the downloaded emails. You can use web-based email clients or email viewer applications that support the file format of the downloaded emails. Simply launch the email client or viewer, navigate to the location where you saved the downloaded email file, and open it.
Once you have opened the downloaded email file, you will be able to view the emails, including any attachments, just as you would in your Outlook inbox when connected to the internet. You can click on individual emails to read their content, access attachments, and even reply or forward them if the email client or viewer supports those functionalities.
Keep in mind that while you can access and manage the downloaded emails offline, any changes made, such as replying or deleting emails, will not synchronize with your original Outlook account. These changes will only apply within the email client or viewer you are using. If you want to update your Outlook account with any changes made offline, you will need to do so manually once you have an internet connection.
By accessing and viewing the downloaded emails offline, you can conveniently refer to important messages, review attachments, and stay productive even when you don’t have an internet connection.
Congratulations! You have successfully completed all the steps to download and access your Outlook inbox offline. Enjoy the flexibility and convenience of having your emails readily available on your computer, no matter where you are or whether you have an internet connection.
Conclusion
Downloading your Outlook inbox and accessing your emails offline provides flexibility and convenience in managing your important messages. With just a few simple steps, you can save selected emails as email files on your computer, allowing you to access and view them even without an internet connection.
In this guide, we walked you through the process of downloading your Outlook inbox. We started by signing in to your Outlook account and accessing your inbox. Then, we guided you on selecting the specific emails you want to download. Next, we explained how to download the emails as email files and save them to your computer. Finally, we discussed how you can access the downloaded emails offline using email clients or viewer applications.
By opting to download your Outlook inbox, you gain the ability to refer to important messages, review attachments, and stay organized even when you are unable to connect to the internet. This can be incredibly beneficial for professionals who travel frequently or individuals who need offline access to their emails for various reasons.
Remember to regularly backup your downloaded email files to ensure their safety and accessibility. It’s also a good practice to keep your Outlook account login details secure and up to date.
We hope that this guide has provided you with a clear understanding of how to download your Outlook inbox and access your emails offline. By following these steps, you can streamline your workflow and stay productive in any situation.
Thank you for choosing this guide, and we wish you success in managing your Outlook inbox and staying connected even offline!