Introduction:
Welcome to our guide on how to change the default download location in Windows 10. By default, Windows 10 saves downloaded files to the “Downloads” folder located in the user’s profile. However, there may be instances when you would prefer to save your downloaded files to a different location, such as an external hard drive or a different partition of your computer’s storage.
Changing the default download location allows you to have more control over where your files are saved and helps you keep your downloads organized. Whether you want to free up space on your primary drive or simply want to have a dedicated location for specific types of files, modifying the default download location in Windows 10 is a simple process.
In this guide, we will explore three methods that you can use to change the default download location. We will cover how to do it through File Explorer, the Windows Settings app, and the Registry Editor. These methods are convenient and do not require advanced technical skills. So, let’s get started!
Method 1: Changing the default download location through File Explorer:
One of the easiest ways to change the default download location in Windows 10 is through File Explorer. Follow these steps:
- Open File Explorer by pressing the Windows key + E on your keyboard or by clicking on the File Explorer icon in the taskbar.
- In the left-hand sidebar, right-click on the “Downloads” folder and select “Properties” from the context menu.
- A Properties window will open. Navigate to the “Location” tab.
- Click on the “Move” button.
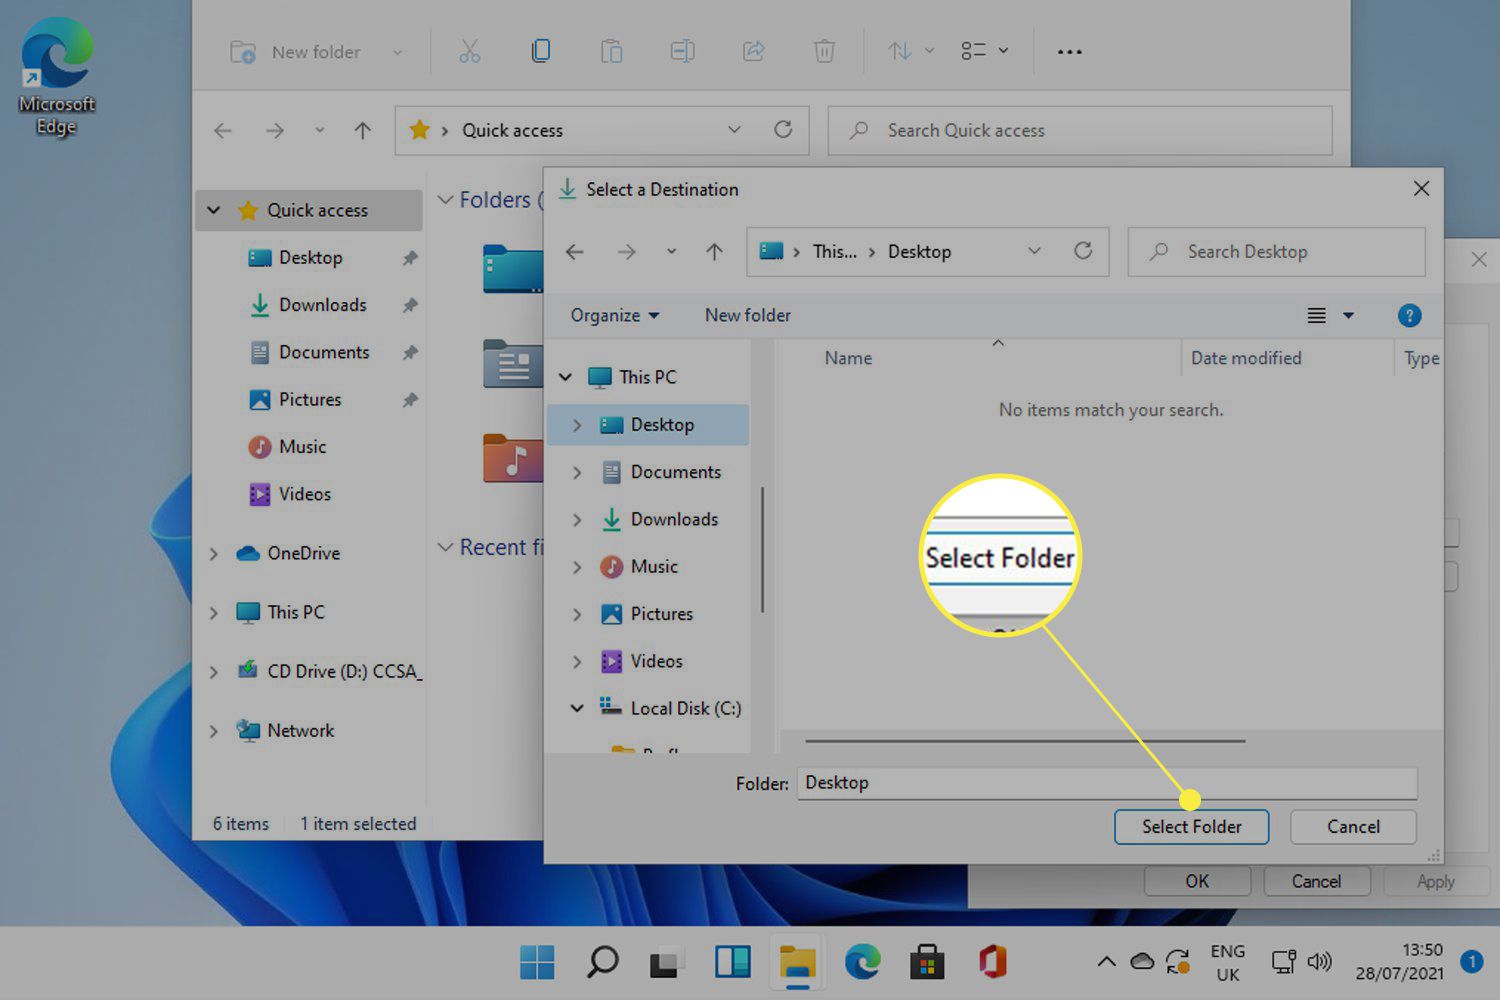
- Browse to the location where you want to set the new default download location and click “Select Folder.”
- Click “Apply” and then “OK” to save the changes.
Now, whenever you download a file, it will be saved to the new location you specified. Keep in mind that this method only changes the default download location for your user account. Other user accounts on the same computer will still have the default location set to the “Downloads” folder in their respective profiles.
This method is particularly useful if you want to save your downloads to an external storage device or a different partition on your computer’s hard drive, as it allows for more efficient storage management.
Now that we have covered changing the default download location through File Explorer, let’s move on to the next method, which involves using the Windows Settings app.
Method 2: Changing the default download location through Settings:
If you prefer a more streamlined approach, you can also change the default download location in Windows 10 through the Settings app. Here’s how:
- Open the Start menu and click on the gear icon to open the Settings app.
- In the Settings window, click on the “System” category.
- From the left-hand sidebar, select “Storage.”
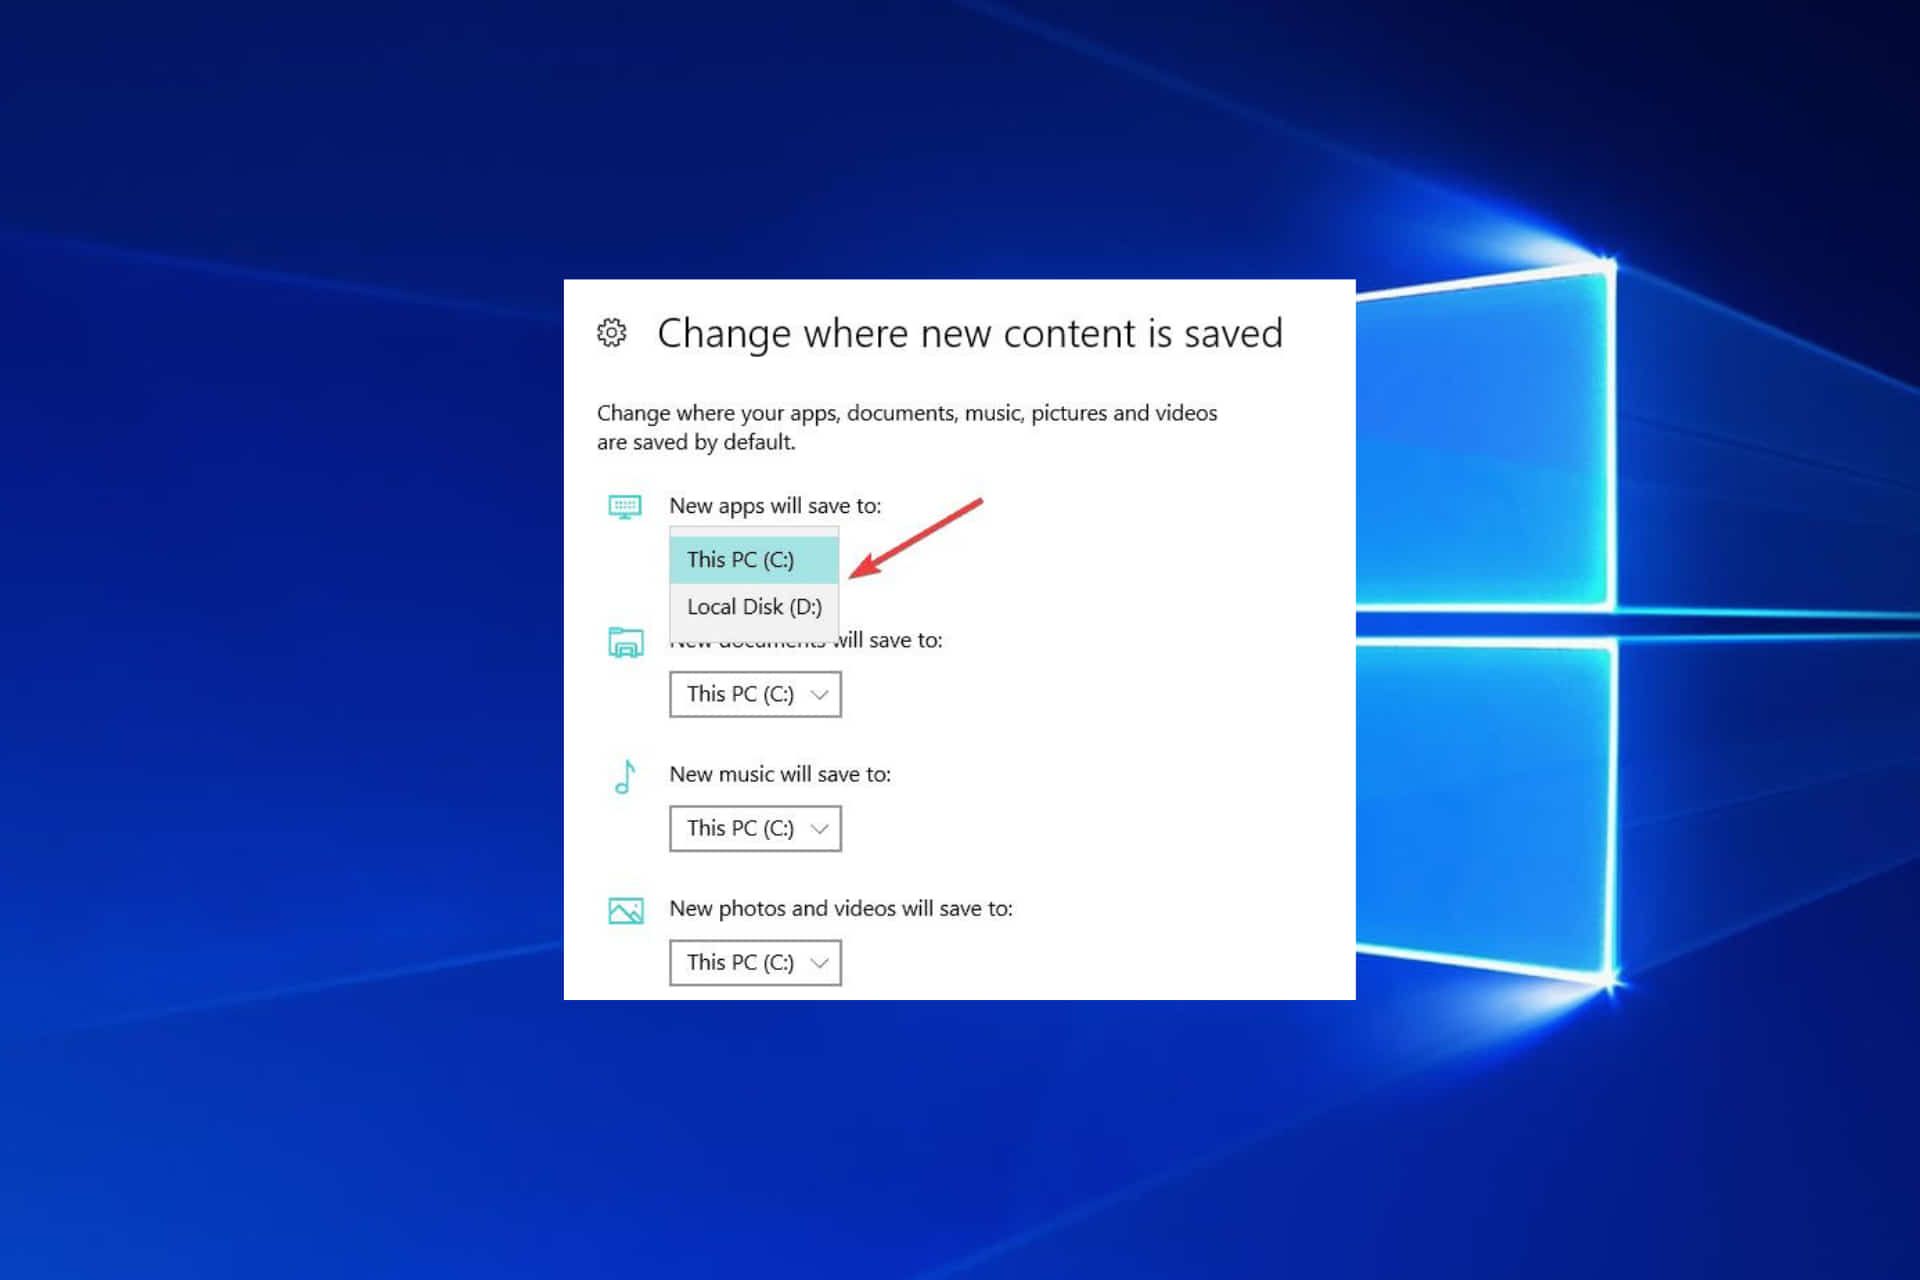
- Scroll down until you find the “More storage settings” section. Click on the “Change where new content is saved” link.
- Under the “New documents will save to” dropdown menu, select the desired location where you want your downloads to be saved.
- Click on the “Apply” button to save the changes.
With this method, you can easily change the default location for all types of content, including downloads, documents, pictures, music, videos, and apps. By selecting a new location for downloads, all the files you save will be automatically directed to that location.
This method offers a convenient way to manage your storage preferences without having to navigate through various settings menus. If you prefer a centralized approach to changing the default download location and other content saving locations, using the Settings app is the way to go.
Now that we have covered changing the default download location through the Settings app, let’s move on to the third method, which involves using the Registry Editor.
Method 3: Changing the default download location using the Registry Editor:
If you’re comfortable working with the Windows Registry, you can change the default download location by making a few edits. Here’s how:
- Press the Windows key + R on your keyboard to open the Run dialog box.
- Type “regedit” (without the quotes) and press Enter to open the Registry Editor.
- Navigate to the following key:
HKEY_CURRENT_USER\Software\Microsoft\Windows\CurrentVersion\Explorer\User Shell Folders. - In the right-hand pane, locate the entry named
Downloadsand double-click on it. - In the Edit String dialog box, change the value data to the full path of the desired location where you want your downloads to be saved. For example,
D:\Downloads. - Click “OK” to save the changes.
After making the necessary edits in the Registry Editor, Windows will automatically save your downloaded files to the new location you specified. Take caution when working with the Registry Editor, as making incorrect changes can cause system issues. Make sure to follow the instructions carefully and back up your registry before proceeding.
This method can be particularly useful if you want to change the default download location for all user accounts on your computer or if you prefer a more direct approach to modifying system settings.
Now that we have covered all three methods for changing the default download location in Windows 10, you can choose the one that best suits your preferences and technical expertise.
Conclusion:
Changing the default download location in Windows 10 can help you organize your files and make better use of your computer’s storage. Whether you want to save your downloads to an external drive, a different partition, or a custom folder, the process is straightforward and can be done through various methods.
In this guide, we explored three methods to change the default download location. Using File Explorer, you can easily modify the location by accessing the folder’s properties. The Settings app offers a more streamlined approach to change multiple content saving locations, including downloads. If you’re comfortable working with the Windows Registry, you can directly edit the relevant entry to set a new default download location.
Remember to choose the method that suits your needs and comfort level. It’s always a good practice to back up important files and make careful changes when modifying system settings.
By changing the default download location, you can have more control over where your files are saved and keep your computer organized. This can also be useful if you have limited space on your primary drive or if you want to separate specific types of files for easier access.
We hope this guide has been helpful in showing you how to change the default download location in Windows 10. Take advantage of these methods to personalize your download process and optimize your file management.


