Introduction
Changing the default download location in Windows 11 can be a practical solution for users who want to manage their downloaded files more efficiently. By customizing the download location, you can easily find and organize your files according to your preferences.
Windows 11 offers several methods to change the default download location, allowing you to choose the most convenient option based on your needs and preferences. In this article, we will explore four methods that you can use to modify the default download location on your Windows 11 system.
Whether you want to set a specific folder on your computer’s local drive or assign an external storage device as the default download location, these methods will provide you with the flexibility to personalize your file management experience.
From changing the default download location through the Windows 11 Settings menu to using the File Explorer Options, Registry Editor, or Group Policy Editor, we will guide you step-by-step on how to perform each method.
By following these instructions, you will be able to change the default download location in Windows 11 and ensure that all your downloaded files are saved in the location of your choice.
So let’s dive into the details of each method and discover how you can easily change the default download location on your Windows 11 system.
Method 1: Changing the Default Download Location from Settings
One of the simplest ways to change the default download location in Windows 11 is through the Settings menu. This method is straightforward and does not require any advanced technical skills.
Here’s how you can use the Settings menu to modify the default download location:
- Click on the Start button in the taskbar and select “Settings” from the menu. Alternatively, you can press the Windows key + I on your keyboard to open the Settings menu.
- In the Settings window, click on the “System” category.
- From the left sidebar, select “Storage”.
- Under the “Storage” section, click on the “Change where new content is saved” option.
- Scroll down to the “New apps will save to” section and click on the dropdown menu.
- Select the desired location where you want your downloads to be saved. You can choose any available drive or create a new folder in an existing drive.
- Optionally, you can also change the default save location for other types of content, such as documents, pictures, music, and videos.
- Once you’ve selected the download location, close the Settings window. From now on, any new downloads will be saved in the chosen location.
Changing the default download location from the Settings menu ensures that all future downloads will be automatically saved in the specified location. It provides convenience and helps keep your files organized based on your storage preferences.
Now that you’ve learned how to change the default download location through the Settings menu, let’s explore another method in the next section: changing the default download location through File Explorer Options.
Method 2: Changing the Default Download Location through File Explorer Options
If you prefer to use File Explorer to manage your files, you can change the default download location through the File Explorer Options. This method allows you to customize the default download folder and gives you more control over your file organization.
Here’s how to modify the default download location through File Explorer Options:
- Open File Explorer by clicking on the folder icon in the taskbar or by pressing Windows key + E on your keyboard.
- In File Explorer, click on the “View” tab at the top.
- From the toolbar, click on the “Options” button towards the right.
- A “Folder Options” dialog box will appear. Select the “General” tab if it’s not already selected.
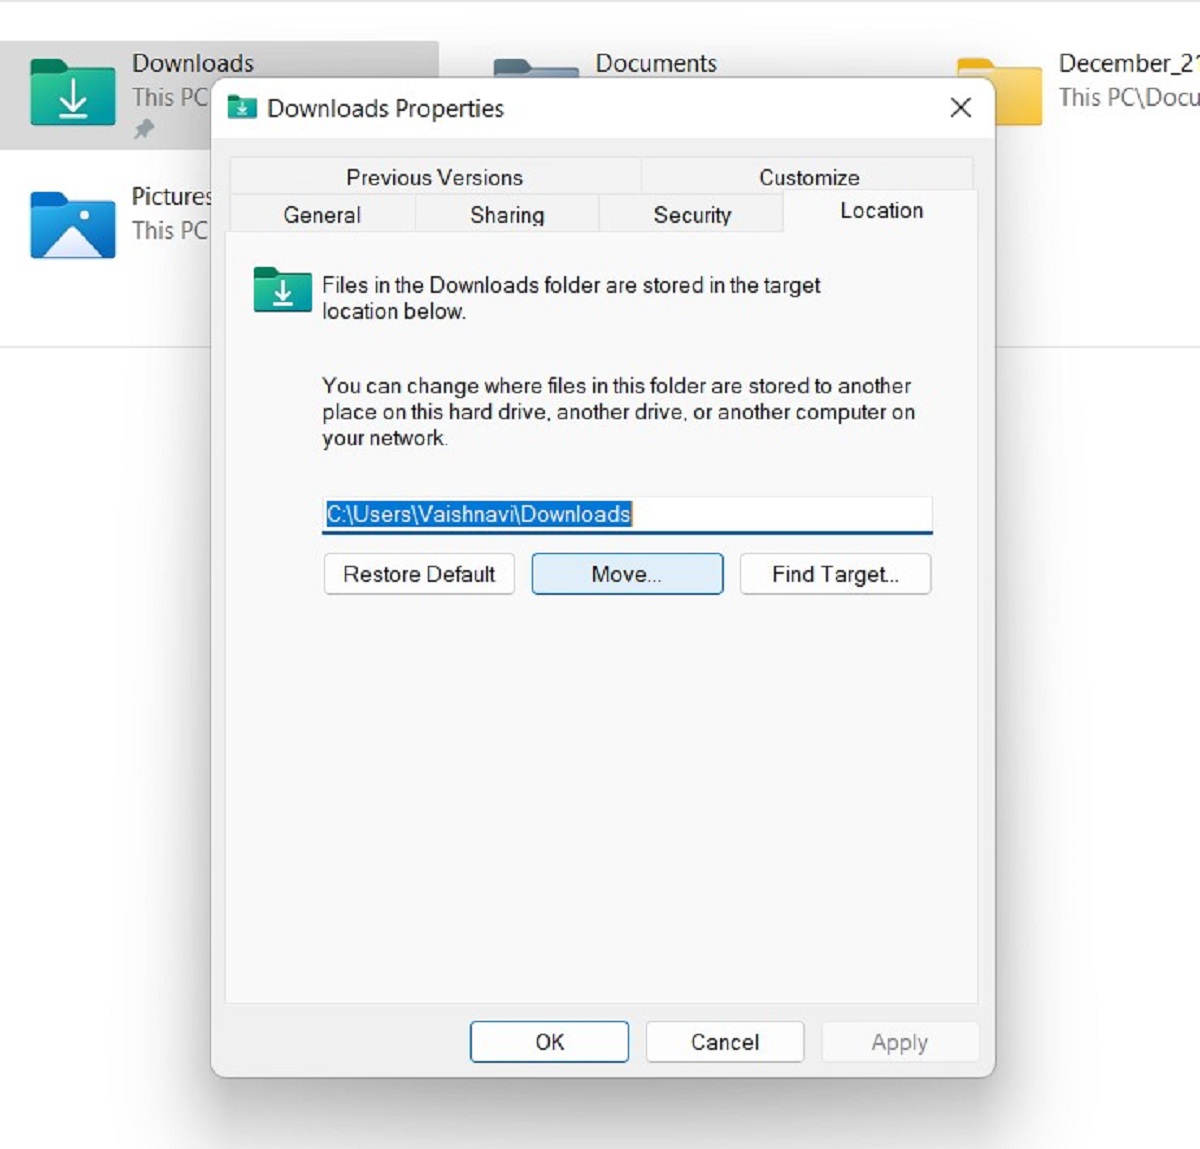
- In the “General” tab, locate the “Downloads” section.
- Click on the “Browse” button next to the “Downloads” field.
- Select the desired folder or drive where you want your downloads to be saved. You can also create a new folder by clicking on the “New Folder” button.
- Once you’ve selected the download location, click on the “Apply” button and then the “OK” button to save the changes.
After changing the default download location through File Explorer Options, any new downloads will be automatically saved in the specified folder or drive. This method provides you with more control over your file management, allowing you to easily access and organize your downloaded content.
Now that you’ve successfully changed the default download location through File Explorer Options, let’s move on to the next method: modifying the default download location through Registry Editor.
Method 3: Changing the Default Download Location through Registry Editor
If you are comfortable delving into the advanced settings of your Windows 11 system, you can modify the default download location through the Registry Editor. This method allows for precise customization of the download location by editing the system registry.
Please note that editing the registry can have serious consequences if done incorrectly. It is essential to follow the steps carefully and back up your registry before making any changes.
Follow these steps to change the default download location through the Registry Editor:
- Press the Windows key + R on your keyboard to open the Run dialog box.
- Type “regedit” in the Run dialog box and press Enter to open the Registry Editor.
- In the Registry Editor, navigate to the following key:
- On the right-hand side, locate the “Downloads” entry.
- Double-click on “Downloads” to modify its value.
- In the Edit String dialog box, enter the desired path for the new download location.
- Click on the “OK” button to save the changes.
- Close the Registry Editor.
HKEY_CURRENT_USER\Software\Microsoft\Windows\CurrentVersion\Explorer\User Shell Folders
After modifying the registry, any new downloads will be saved in the location specified by the edited “Downloads” entry. It is important to exercise caution while using this method to avoid any unintended changes to your system settings.
Now that you’ve learned how to change the default download location through the Registry Editor, let’s explore the final method: modifying the default download location through the Group Policy Editor.
Method 4: Changing the Default Download Location through Group Policy Editor
If you are using a Windows 11 version that includes the Group Policy Editor, you can change the default download location through this powerful tool. The Group Policy Editor allows system administrators to manage and configure various settings in Windows.
Please note that the Group Policy Editor is not available in all Windows 11 editions. It is primarily found in Windows 11 Pro, Enterprise, and Education editions.
Follow these steps to modify the default download location through the Group Policy Editor:
- Press the Windows key + R on your keyboard to open the Run dialog box.
- Type “gpedit.msc” in the Run dialog box and press Enter to open the Group Policy Editor.
- In the Group Policy Editor, navigate to the following path:
- On the right-hand side, locate the “Set a default associations configuration file” entry.
- Double-click on “Set a default associations configuration file” to edit its properties.
- Select the “Enabled” option.
- In the “Options” field, enter the desired path for the new download location.
- Click on the “Apply” button and then the “OK” button to save the changes.
- Close the Group Policy Editor.
User Configuration > Administrative Templates > Windows Components > File Explorer
After modifying the default download location through the Group Policy Editor, any new downloads will be automatically saved in the specified folder or drive. This method is particularly useful for system administrators who need to manage multiple devices and enforce consistent settings across a network.
Note that changes made through the Group Policy Editor may not take effect immediately and could require a system restart to apply.
Now that you’ve learned how to change the default download location through the Group Policy Editor, you have explored all four methods available in Windows 11. Choose the method that suits your preference and enjoy a customized download location for your files.
Conclusion
Changing the default download location in Windows 11 can greatly enhance your file management and organization capabilities. With the flexibility to choose where your downloaded files are saved, you can easily locate and access them whenever needed.
In this article, we explored four methods to change the default download location on your Windows 11 system. Each method offers its own advantages and can be chosen based on your technical expertise and preferences.
If you prefer a simple and user-friendly approach, using the Settings menu is a great option. You can easily modify the default download location by following a few simple steps.
For those who prefer using File Explorer for file management, the File Explorer Options method offers more control and customization. You can specify the exact folder or drive where your downloads will be saved.
If you are comfortable with advanced settings and have the knowledge to modify the system registry, changing the default download location through the Registry Editor provides precise control over the download folder.
Lastly, system administrators or users with access to the Group Policy Editor can utilize its power to enforce consistent settings across a network of devices.
Whichever method you choose, always exercise caution when making changes to your system settings. Before making any modifications, it is advisable to back up your files and create a system restore point to ensure the safety of your data.
By following the instructions in this article, you can successfully change the default download location in Windows 11 and personalize your file management experience to suit your needs.
Now, go ahead and implement the method of your choice to ensure that your downloads are saved in a convenient and organized location on your Windows 11 system.