Introduction
Welcome to this guide on how to add the Downloads folder to your Dock. The Dock is a powerful and convenient feature on macOS that allows quick access to frequently used applications and folders. By adding the Downloads folder to your Dock, you can easily access and manage your downloaded files with just a single click.
By default, the Downloads folder is located in your user directory, accessible through the Finder. However, having quick access to it directly from the Dock can help save you time and effort in locating and managing your downloaded files.
In this step-by-step guide, we will walk you through the process of adding the Downloads folder to your Dock, making it easily accessible at all times. Whether you are a seasoned macOS user or new to the platform, this guide is designed to help you efficiently navigate and organize your files.
Ready to get started? Let’s dive in and learn how to add the Downloads folder to your Dock!
Step 1: Open Finder
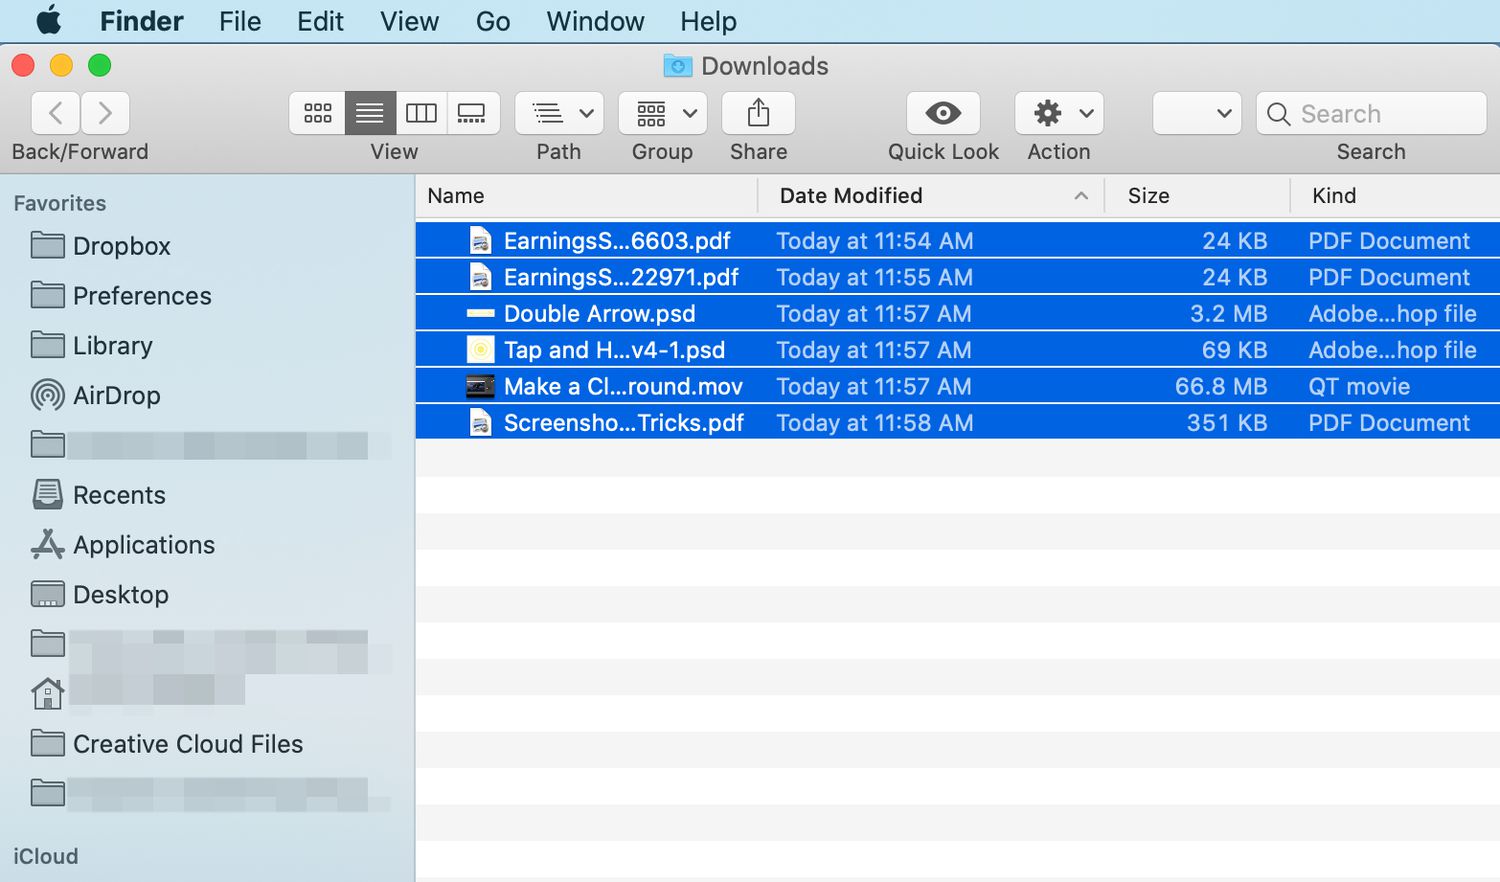
To begin, we need to open the Finder application. The Finder is the default file manager on macOS, and it allows you to explore and navigate through your files and folders.
You can easily open Finder by either clicking on the Finder icon in the Dock, which looks like a smiling blue face, or by clicking on the Finder menu in the top left corner of your screen and selecting “New Finder Window”. You can also use the shortcut Command + N to open a new Finder window.
Once you have opened Finder, a new window will appear on your screen, displaying the contents of your user directory by default. The user directory contains various sub-folders, including the Documents, Music, Pictures, and Downloads folders.
Finder is a versatile tool that allows you to perform various file management tasks, such as copying, moving, and deleting files. It also provides quick access to different locations on your Mac, including connected external drives and network locations.
Now that we have opened Finder, we are ready to move on to the next step: going to Preferences, where we can customize the Dock settings to include the Downloads folder. Let’s proceed to the next section.
Step 2: Go to Preferences
Once you have opened Finder, the next step is to access the Preferences menu. The Preferences menu allows you to customize various settings and options in Finder and other macOS applications.
To open the Preferences menu, click on the “Finder” option in the menu bar at the top of your screen. From the drop-down menu, select “Preferences” (or use the shortcut Command + ,).
A new window will appear, displaying the various settings and options available for customizing Finder. You will see a series of tabs at the top of the window, including “General,” “Sidebar,” “Advanced,” and more.
For the purpose of adding the Downloads folder to the Dock, we will focus on the “Sidebar” tab in the Preferences window. This tab allows you to select which folders and locations are displayed in the Finder sidebar for easy access.
Now that we have accessed the Preferences menu, it’s time to move on to the next step: selecting the Sidebar tab and proceeding with adding the Downloads folder to the Dock. Let’s continue to the next section.
Step 3: Select the Sidebar tab
After opening the Preferences menu in Finder, the next step is to select the “Sidebar” tab. This tab is where you can customize the folders and locations that appear in the sidebar of the Finder window.
In the Preferences window, you will see a row of tabs at the top. Click on the “Sidebar” tab to access the settings related to the Finder sidebar.
Once you have selected the Sidebar tab, you will be presented with a list of options for adding or removing folders from the sidebar. The sidebar provides quick access to commonly used folders and locations, making it a convenient feature for navigating through your files.
By default, the Downloads folder may not be visible in the sidebar. However, we can easily add it to the sidebar with just a few clicks.
Now that you have selected the Sidebar tab, let’s move on to the next step: adding the Downloads folder to the list of folders displayed in the Finder sidebar. The Downloads folder will then be easily accessible from the sidebar, allowing for quick and convenient access to your downloaded files.
Step 4: Add the Downloads folder
Now that you are on the Sidebar tab in the Finder Preferences window, it’s time to add the Downloads folder to the list of folders displayed in the Finder sidebar.
To add the Downloads folder, simply locate the checkbox next to “Downloads” in the list of folders on the Sidebar tab. By default, this checkbox may be unchecked if the Downloads folder is not currently displayed in the sidebar.
To add the Downloads folder, click on the checkbox next to “Downloads” to enable it. Once enabled, you will notice that the Downloads folder instantly appears in the list of folders in the sidebar. This means that it is now accessible directly from the sidebar in Finder.
Adding the Downloads folder to the sidebar provides quick and easy access to your downloaded files. Instead of navigating through your user directory to locate the Downloads folder, you can now simply click on the Downloads folder in the sidebar to immediately view its contents.
With the Downloads folder successfully added to the sidebar, you have completed the fourth step in this process. Now, in the next section, we will proceed with closing the Preferences window before moving on to viewing the Downloads folder in the Dock.
Step 5: Close Preferences
After adding the Downloads folder to the Finder sidebar, the next step is to close the Preferences window. This will save the changes you made and allow you to proceed with viewing the Downloads folder in the Dock.
To close the Preferences window, you can simply click on the red “X” button in the top-left corner of the window. Alternatively, you can use the keyboard shortcut Command + W to close the window.
Once the Preferences window is closed, you will be returned to the Finder window that was previously open. From here, you are now ready to proceed with the final step of this process: viewing the Downloads folder in the Dock.
Closing the Preferences window ensures that the changes you made in selecting the Downloads folder for the sidebar are saved. This means that the Downloads folder will remain visible in the sidebar even after you quit and relaunch Finder.
With the Preferences window closed, let’s move on to the next and final step: opening the Downloads folder from the Dock. This will allow you to easily access your downloaded files with just a single click on the Downloads folder icon in the Dock.
Step 6: View the Downloads folder in the Dock
Now that you have successfully added the Downloads folder to the sidebar in Finder, it’s time to view the folder directly in the Dock for easy access to your downloaded files.
If the Downloads folder is not already present in your Dock, don’t worry – we can easily add it. To do this, follow the steps below:
- Locate the Downloads folder in the Finder sidebar. You can find it by clicking on the sidebar icon in the top-left corner of the Finder window (shown as a set of three horizontal lines).
- Click and hold on the Downloads folder in the sidebar, then drag it to the Dock. You can choose any space in the Dock where you want the Downloads folder to be located.
- Release the mouse button to drop the Downloads folder onto the Dock. The Downloads folder icon will now appear in the Dock, ready for easy access.
With the Downloads folder now visible in the Dock, you can access it by simply clicking on the Downloads folder icon. This will open a new Finder window, displaying the contents of your Downloads folder.
From here, you can easily manage and organize your downloaded files. Whether you want to open, delete, or move a file, it can all be done conveniently from within the Downloads folder in the Dock.
By adding the Downloads folder to the Dock, you eliminate the need to navigate through the Finder sidebar every time you want to access your downloaded files. It provides a quick and direct route to your Downloads folder, improving your overall workflow and productivity.
Congratulations! You have successfully viewed the Downloads folder in the Dock. Enjoy easy access to your downloaded files and make the most out of this convenient feature on macOS.
Conclusion
Adding the Downloads folder to your Dock in macOS is a simple yet effective way to conveniently access your downloaded files. By following the step-by-step guide outlined in this article, you have learned how to customize the Finder sidebar, add the Downloads folder, and view it directly in the Dock.
Having the Downloads folder readily available in the Dock offers several advantages. It saves you time and effort by eliminating the need to navigate through multiple folders in Finder to locate your downloaded files. With just a single click on the Downloads folder icon in the Dock, you can quickly access and manage your files.
Not only does this streamline your workflow, but it also helps in keeping your workspace organized. You can easily drag and drop files into the Downloads folder from other applications or move files to different locations within the Downloads folder itself.
Remember, customizing your Dock is not limited to just the Downloads folder. You can add other frequently used folders or applications to the Dock as well, tailoring it to your specific needs and preferences.
Now that you have mastered the process of adding the Downloads folder to your Dock, feel free to explore and experiment with other ways to enhance your macOS experience. Discover more features and shortcuts that can boost your productivity and make your daily tasks more efficient.
We hope this guide has proven helpful and that you now have a better understanding of how to add the Downloads folder to your Dock. Enjoy the convenience and accessibility it provides as you manage your downloaded files on macOS.