Introduction
Downloading files from the internet has become an integral part of our daily lives. Whether you’re downloading documents, images, music, or software, the process is usually smooth and hassle-free. However, there may be times when you need to cancel a download for various reasons. It could be that you accidentally started a download or changed your mind about the file you’re downloading. Whatever the reason, knowing how to cancel a download can save you time and frustration.
In this article, we will explore different methods to cancel a download on your computer. These methods are applicable to both Windows and Mac operating systems, so regardless of the device you’re using, you’ll find a solution that works for you.
We’ll start by discussing the reasons why you might want to cancel a download. Understanding these reasons can help you assess which method to use and ensure that you’re making the right choice. Then, we’ll go through various methods, ranging from using the built-in download manager to utilizing third-party software. Each method will be explained step-by-step, making it easy for you to follow along.
It’s essential to note that canceling a download may vary depending on the application or browser you’re using. However, the methods we’ll share are generic enough that they can be adapted to most download scenarios. We recommend trying the methods in the order they are presented, as some may be more effective than others depending on the circumstances.
By the end of this article, you’ll have a comprehensive understanding of how to cancel a download and be equipped with the knowledge to prevent any unwanted files from cluttering your storage space. So let’s get started and take control of your downloading experience!
Reasons to Cancel a Download
While downloading files is generally a straightforward process, there are several reasons why you might find yourself needing to cancel a download. Understanding these reasons will help you make an informed decision and determine the most appropriate method to cancel the download. Here are a few common scenarios:
- Mistaken download: Sometimes, in the haste of navigating through websites or applications, we may click on a download link accidentally. In such cases, canceling the download is necessary to avoid cluttering your device’s storage with unwanted files.
- Change of mind: It’s not uncommon to change your mind after initiating a download. You might find a better alternative or realize that you don’t need the file after all. Canceling the download promptly saves time and ensures that your device’s storage is used more efficiently.
- Slow or interrupted connection: In instances where your internet connection becomes slow or intermittent, continuing a download may be a frustrating experience. Canceling the download allows you to start fresh when the connection stabilizes, ensuring a smoother and more successful download.
- Incorrect file selection: Occasionally, you may realize that you’ve selected the wrong file for download. This can happen when multiple files have similar names or when you accidentally click on the wrong option. To rectify this, canceling the download enables you to select the correct file and prevent any confusion or inconvenience.
- Security concerns: In rare cases, you may come across a download that triggers a security warning or raises suspicions about the file’s integrity. Canceling the download is a sensible precautionary measure to protect your device from potential malware or viruses that could harm your system.
These are just a few examples of why you might want to cancel a download. It’s important to assess the specific circumstances surrounding each download and make a decision based on your individual needs and preferences. Now that we’ve explored the common reasons, let’s delve into the different methods to cancel a download and regain control of your downloading experience.
Method 1: Using the Download Manager
One of the simplest and most effective methods to cancel a download is by utilizing the built-in download manager in your browser or application. This method allows you to easily track and manage all your ongoing downloads. Here’s how:
- Open your preferred browser or application and navigate to the download manager. The download manager is usually accessible through a menu or toolbar icon labeled “Downloads” or something similar.
- Once you’ve accessed the download manager, you’ll see a list of all your active and completed downloads. Locate the specific download you wish to cancel in the list.
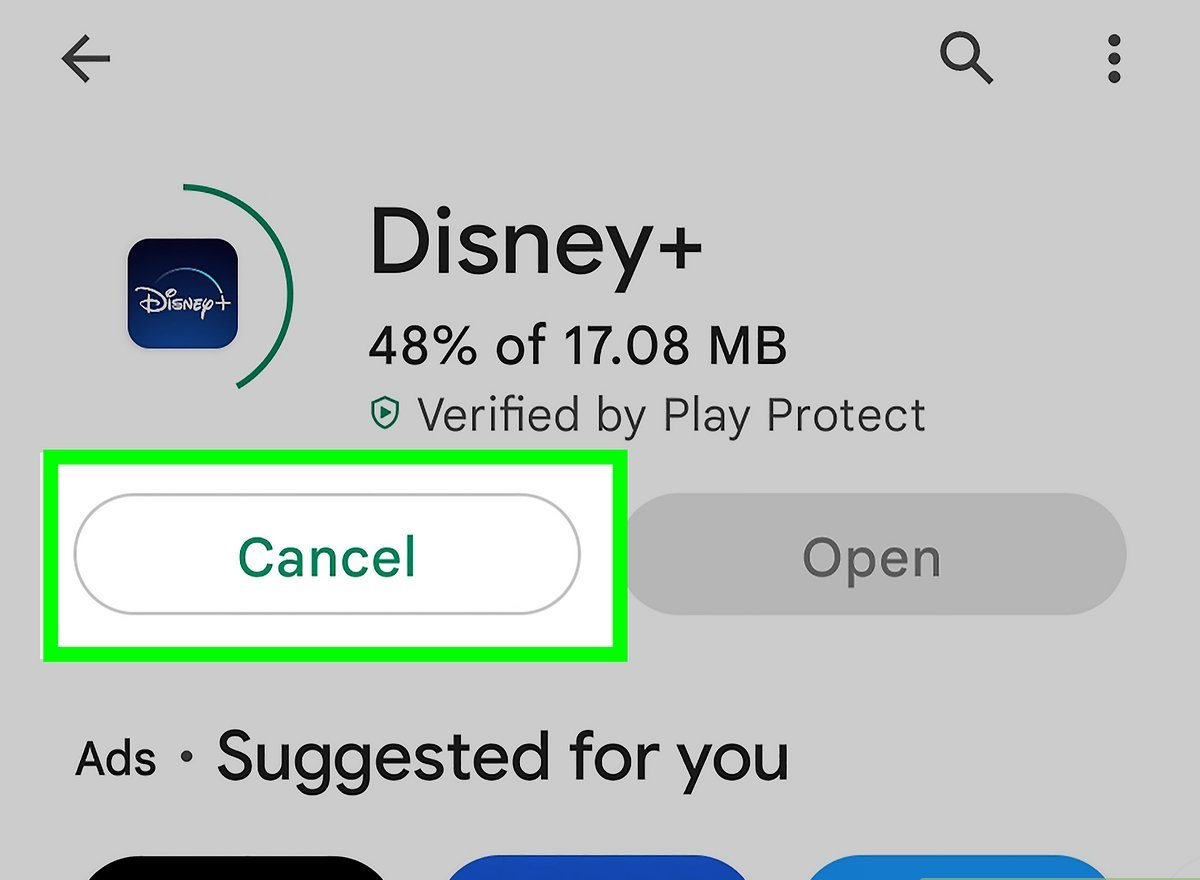
- Depending on the download manager, you may have different options available. Look for a “Cancel” or “Stop” button next to the download you want to cancel and click on it.
- The download manager will immediately halt the download process, and the file will be removed from the list. You’ve successfully canceled the download!
It’s important to note that some download managers may not provide a dedicated “Cancel” or “Stop” button. In such cases, you can try right-clicking on the download and selecting the appropriate option from the context menu.
Using the download manager is a reliable and straightforward method to cancel downloads, as it gives you direct control over the files you’re downloading. If for any reason this method doesn’t work or you’re unable to locate the download manager, don’t worry! There are alternative methods we’ll explore in the following sections.
Method 2: Using the Taskbar or Dock
If you’re unable to find a download manager or prefer a quicker method, you can try canceling a download using the taskbar on Windows or the dock on Mac. This method allows you to directly interact with the download progress and cancel it with ease. Here’s how:
- Look for the taskbar at the bottom of your Windows screen or the dock at the bottom of your Mac screen.
- Locate the download progress indicator or icon for the file you want to cancel. Usually, this is represented by a small icon showing the download progress and may include the file name or a related symbol.
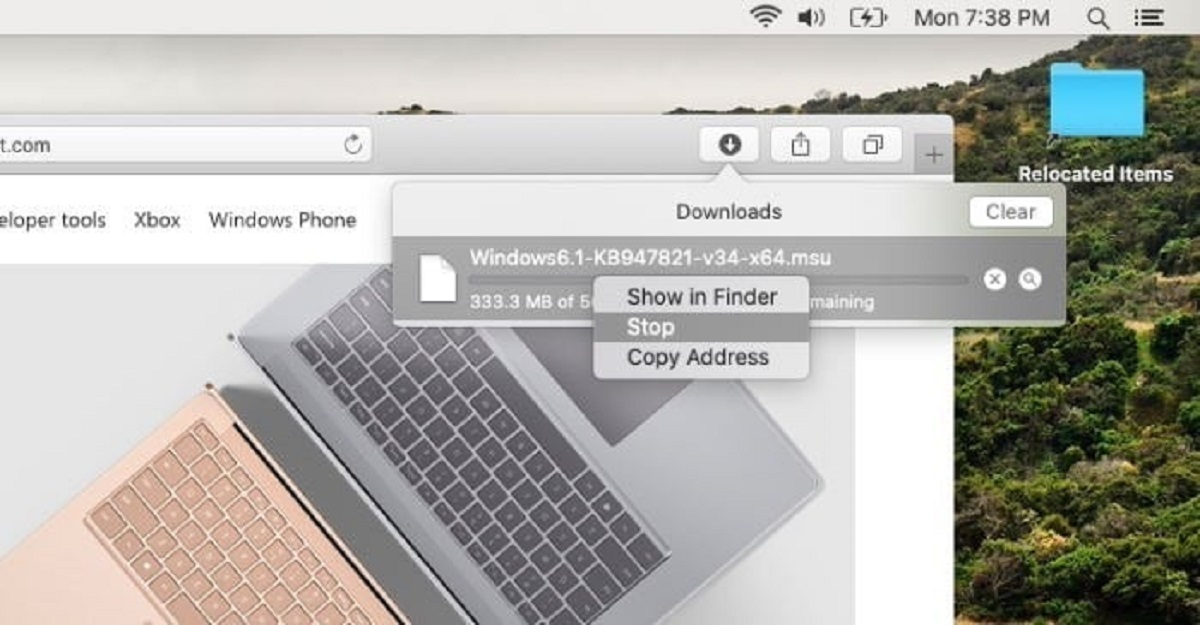
- Right-click (Windows) or control-click (Mac) on the download progress indicator or icon. This will open a context menu with a list of options related to the download.
- In the context menu, look for an option that allows you to cancel or stop the download. The specific wording may vary depending on your operating system or the application you’re using. Click on this option to cancel the download.
Once you’ve canceled the download, the progress indicator or icon will disappear, and the file will no longer continue to download. This method is convenient and accessible, as it allows you to cancel a download directly from your taskbar or dock without having to navigate through menus or download managers.
If the download progress indicator or icon does not provide an option to cancel, try right-clicking (Windows) or control-clicking (Mac) and selecting “Close” or “Exit” to terminate the application responsible for the download. This will effectively stop the download.
Using the taskbar or dock to cancel a download is a handy alternative when a dedicated download manager is not available or if you prefer a more intuitive and direct approach. However, if you’re still unable to cancel the download using this method, don’t worry! We have more solutions to explore in the upcoming sections.
Method 3: Closing the Application
If you’re unable to cancel a download using the download manager or the taskbar/dock, you can try a simple yet effective method: closing the application responsible for the download. This method works well when the application itself manages the download process. Here’s how you can do it:
- Identify the application that initiated the download. It could be a web browser, a download manager software, or any other application that you were using to download the file.
- Once you’ve identified the application, locate its window or tab and click on the “X” button in the top-right corner (Windows) or the red “Close” button in the top-left corner (Mac) to close the application.
- Closing the application will not only terminate the download but also halt any other ongoing processes within the application. This action effectively cancels the download and prevents the file from being saved on your device’s storage.
It’s important to note that closing the application may also result in the loss of any unsaved data or work in progress within the application. Therefore, use this method with caution and make sure you don’t have any important files or information open in the application before closing it.
If you’re using a web browser for the download and closing the browser itself is not desirable, you can try closing only the specific tab or window related to the download. This way, you can cancel the download without affecting any other browsing activities.
Closing the application is an effective method to cancel a download when other options are not readily available. It provides a quick and direct solution that prevents the file from being downloaded and saves your device’s storage space. If this method doesn’t work for any reason or is not applicable in your specific scenario, don’t worry! We have more methods to explore in the following sections.
Method 4: Force-Quitting the Application
In some cases, closing the application through the regular means may not effectively cancel a download, especially if the application is unresponsive or frozen. In such situations, you can resort to force-quitting the application. This method forcibly terminates the application and stops any ongoing processes, including the download. Here’s how you can force-quit an application:
- On Windows, press Ctrl + Alt + Delete simultaneously to open the Task Manager. Alternatively, you can right-click on the taskbar and select “Task Manager” from the menu.
- On Mac, press Command + Option + Esc simultaneously to bring up the Force Quit Applications window.
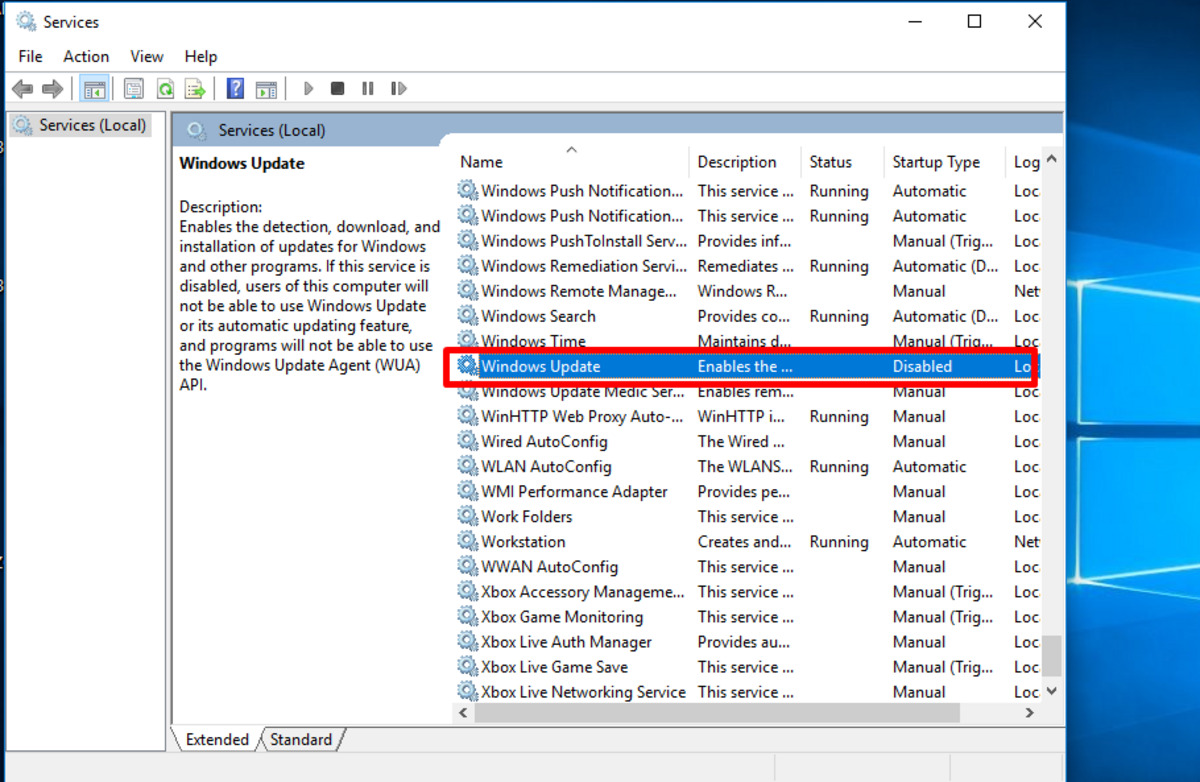
- Within the Task Manager or Force Quit Applications window, look for the application that is responsible for the download. This might be a web browser, a download manager, or any other software that you were using for the download.
- Select the application and click on the “End Task” or “Force Quit” button in the Task Manager (Windows) or the “Force Quit” button in the Force Quit Applications window (Mac).
- The application will forcefully close, terminating the download process and preventing any further progress. Once the application is force-quit, the download will be canceled, and the file will not be saved on your device.
It’s important to note that force-quitting an application may result in the loss of any unsaved data or work in progress within that application. Therefore, make sure to save any important files or information before force-quitting.
Force-quitting the application provides a robust solution to cancel a download when other methods fail to work. It ensures that the download process is forcefully halted, preventing any unnecessary use of storage space on your device. If you’re still unable to cancel the download or force-quit the application, don’t worry! There are additional methods to explore in the following sections.
Method 5: Clearing the Downloads Folder
If you’re unable to cancel a download using the previous methods or you’re dealing with multiple incomplete or unwanted downloads, clearing the Downloads folder can be an effective solution. This method allows you to remove all the downloaded files in one go and start with a fresh slate. Here’s how you can clear the Downloads folder:
- Open the file explorer or finder on your computer.
- Navigate to the Downloads folder. This folder is typically located in the user directory or home folder.
- Once you’ve opened the Downloads folder, you’ll see a list of all the downloaded files. Select all the files you want to delete. You can do this by pressing Ctrl + A (Windows) or Command + A (Mac) to select all the files, or manually select the specific files you want to remove.
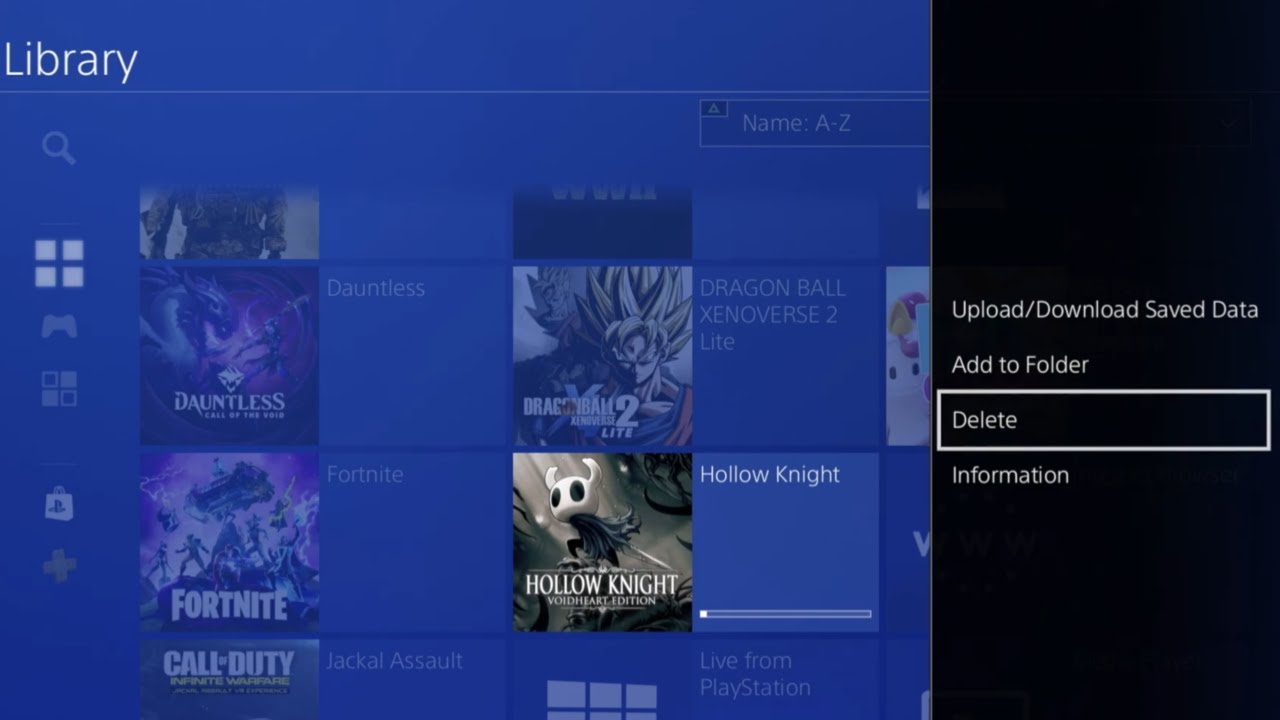
- Right-click on the selected files and choose the “Delete” or “Move to Trash” option. Alternatively, you can press the Delete key on your keyboard.
- Confirm the deletion when prompted to permanently remove the files from your computer.
By clearing the Downloads folder, you effectively cancel any ongoing downloads and remove the downloaded files from your storage. This method is especially useful when you have multiple unwanted downloads cluttering your Downloads folder and want to free up space.
It’s important to note that clearing the Downloads folder will delete the files permanently from your computer. Therefore, make sure to double-check the files you’re deleting and ensure that you don’t accidentally delete any important files.
Clearing the Downloads folder provides a comprehensive solution to cancel and remove multiple downloads quickly. It allows you to start fresh and ensures that your Downloads folder remains organized and clutter-free. If you’re still unable to cancel a download or want to explore alternative methods, continue reading the next section.
Method 6: Using a Third-Party Download Manager
If you’re still facing difficulties canceling a download using the previous methods, or you want more advanced control over your downloads, utilizing a third-party download manager can be an effective solution. Third-party download managers offer additional features and flexibility, allowing you to easily cancel and manage your downloads. Here’s how you can use a third-party download manager:
- Search for a reputable third-party download manager that suits your needs. There are various options available, such as Internet Download Manager (IDM), Free Download Manager (FDM), or JDownloader, among others.
- Download and install the chosen download manager on your computer. Follow the instructions provided by the software to complete the installation process.
- Once the download manager is installed, open it and configure it according to your preferences. This may include setting the default download location, download speed limits, file categorization, and more.
- To cancel a download using the third-party download manager, simply open the manager, locate the download in the list of active downloads, and look for a cancel or stop button associated with the specific download. Click on that button to cancel the download.
- The third-party download manager will promptly halt the download process and eliminate the file from the active download list.
Using a third-party download manager provides an additional layer of control and advanced features to enhance your downloading experience. These managers often offer convenient options like download scheduling, pause and resume functionality, and the ability to prioritize and queue downloads. They can also provide better stability and download speed in comparison to built-in browser download managers.
Ensure that you download the third-party software from a trusted source to avoid potential security risks. Also, be mindful of any additional features, such as bundled software or browser extensions, that may be installed alongside the download manager. Make sure to review and deselect any unwanted components during the installation process.
Utilizing a third-party download manager gives you greater control and flexibility over your downloads. If other methods have been unsuccessful or you’re seeking a more comprehensive solution, a third-party download manager can be a valuable tool to cancel downloads effectively and efficiently.
Conclusion
Canceling a download is a common need when it comes to managing files on your computer. Whether you accidentally initiated a download, changed your mind about a file, or encountered connectivity issues, knowing how to cancel a download can save you time and keep your device’s storage organized. In this article, we explored several methods to help you cancel downloads effectively.
We started by discussing the various reasons why you might want to cancel a download, such as mistaken downloads, change of mind, slow or interrupted connections, incorrect file selections, and security concerns. Understanding these reasons allows you to assess which method to use and make an informed decision.
We then explored six different methods to cancel a download. These methods included using the built-in download manager, utilizing the taskbar or dock, closing the application responsible for the download, force-quitting the application, clearing the Downloads folder, and using a third-party download manager. Each method offers a unique approach to canceling downloads, providing you with a range of options to fit your specific scenario.
Whether you prefer a user-friendly approach by using the download manager or a more hands-on method like force-quitting an application, the choice ultimately depends on your personal preferences and the circumstances surrounding the download cancellation.
By employing these methods, you can regain control over your downloads, prevent unnecessary clutter in your storage, and ensure a smoother downloading experience. Remember to always double-check the files you’re canceling and take caution to avoid accidentally deleting important files.
Now that you’re equipped with these methods, you can confidently cancel your downloads whenever needed and optimize your use of digital resources. Enjoy a streamlined and efficient downloading process!