Introduction
Are you tired of waiting for ages for your Battle.net games to download? Slow download speeds can be frustrating, especially when you’re eager to jump into a new game or start an exciting multiplayer session. Fortunately, there are several methods you can try to increase your Battle.net download speed and get you in the game faster.
Whether you’re dealing with slow internet speeds, a crowded network, or other factors impacting your download speed, we’ve got you covered. In this guide, we’ll walk you through various techniques to optimize your Battle.net download speed and minimize the waiting time. From clearing the Battle.net cache to adjusting your DNS settings, we’ll explore different approaches that can significantly enhance your download experience.
Before we dive into the solutions, it’s important to understand that your internet connection plays a vital role in your download speed. If you have a slow or unstable internet connection, implementing these solutions may still result in a subpar download speed. However, if your internet connection is reasonably stable, following these steps should help you maximize your download speed on Battle.net.
So, if you’re ready to say goodbye to sluggish game downloads and start enjoying your favorite Battle.net games without the frustrating wait, let’s get started with some tried and tested methods to boost your Battle.net download speed.
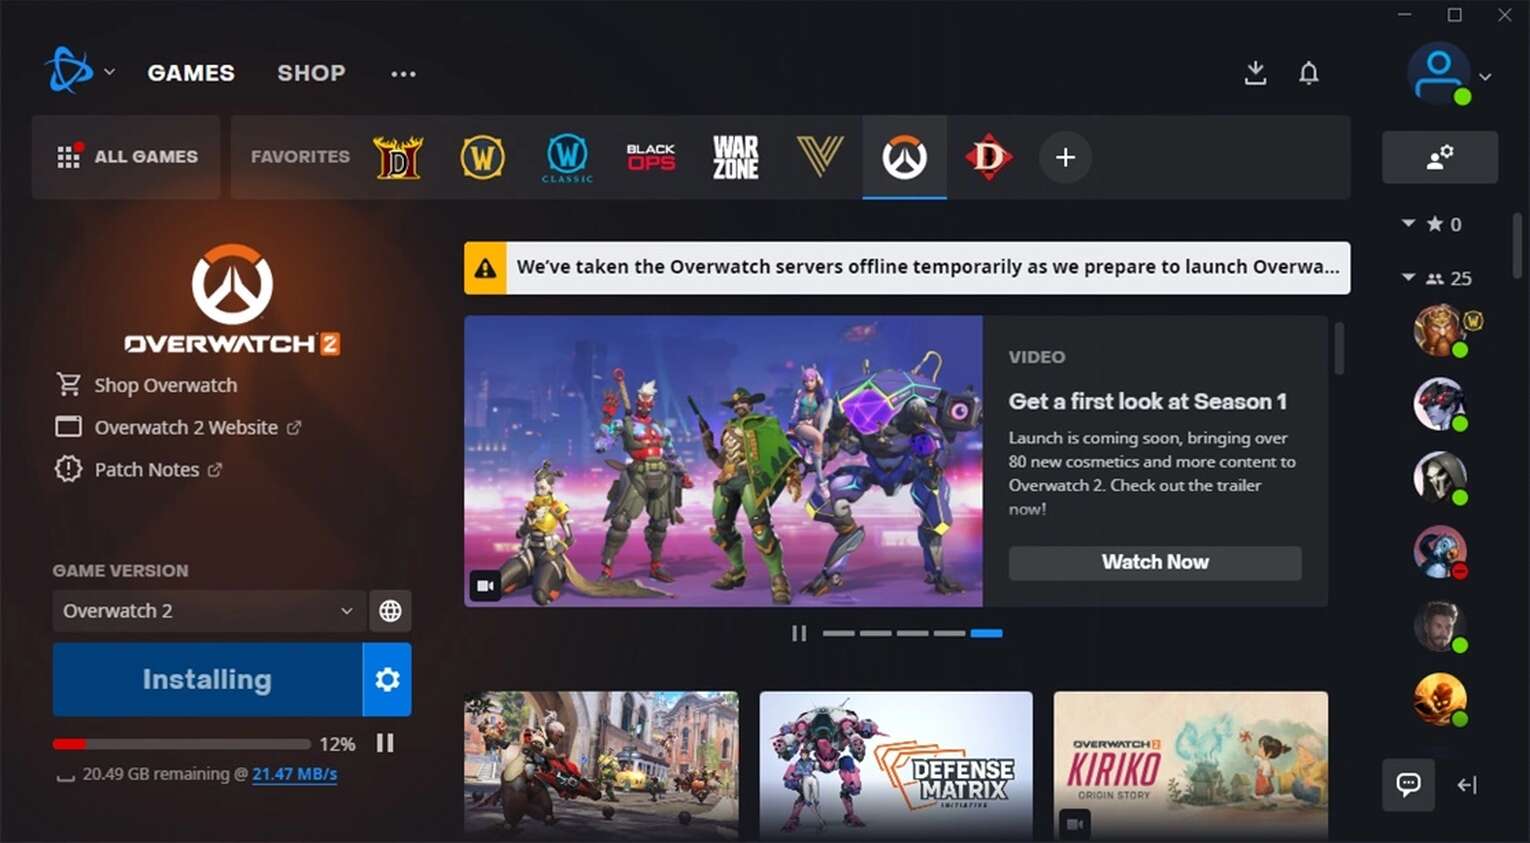
Method 1: Clearing the Battle.net Cache
One of the most effective ways to improve your Battle.net download speed is by clearing the Battle.net cache. The cache stores temporary files related to your game downloads, and over time, these files can become corrupted or outdated, causing slow download speeds. By clearing the cache, you can get rid of any unnecessary files and potentially improve your download speed.
To clear the Battle.net cache, follow these simple steps:
- Exit the Battle.net app.
- Press the Windows key + R on your keyboard to open the Run dialogue box.
- Type “
%ProgramData%” (without quotes) and press Enter. - Locate the “Battle.net” folder and delete it.
- Open the Run dialogue box again and type “
%AppData%” (without quotes), then press Enter. - Locate the “Battle.net” folder here as well and delete it.
- Once you’ve deleted both folders, restart your computer.
- Launch the Battle.net app and check if the download speed has improved.
Clearing the Battle.net cache can help resolve any issues related to outdated files or corrupted data that may be impacting your download speed. By following these steps, you’ll start with a fresh cache, potentially leading to faster and smoother downloads.
Note: Clearing the Battle.net cache will not affect any of your game installations or save files. It only removes temporary files stored on your computer.
Now that we’ve cleared the cache, let’s move on to the next method to further optimize your Battle.net download speed.
Method 2: Adjusting the DNS Settings
Another technique that can potentially improve your Battle.net download speed is adjusting your DNS (Domain Name System) settings. The DNS is responsible for translating domain names (like battle.net) into IP addresses that your computer can understand. By switching to a faster DNS server, you may experience faster connection speeds and hence, faster download speeds on Battle.net.
To adjust your DNS settings, follow these steps:
- Open the Control Panel on your computer.
- Select “Network and Internet” and then click on “Network and Sharing Center.”
- Click on “Change adapter settings.”
- Right-click on your active network connection and select “Properties.”
- In the Properties dialog box, scroll down and select “Internet Protocol Version 4 (TCP/IPv4)” and click on “Properties.”
- Select the option “Use the following DNS server addresses.”
- Enter the preferred DNS server address. You can use popular public DNS servers like Google DNS (8.8.8.8) or OpenDNS (208.67.222.222).
- Click “OK” to save the changes.
- Restart your computer and launch the Battle.net app to check if the download speed has improved.
By switching to a faster DNS server, you can potentially reduce the time it takes for your computer to establish a connection with the Battle.net servers, resulting in faster download speeds. Experiment with different DNS servers to find the one that works best for you and your location.
Now that you’ve adjusted your DNS settings, let’s move on to the next method in our quest to optimize your Battle.net download speed.
Method 3: Changing the Region
Changing the region in the Battle.net app is another method you can try to potentially improve your download speed. Sometimes, certain regions may have higher server loads or network congestion, leading to slower download speeds. By switching to a different region, you may be able to find a server with less traffic and enjoy faster downloads.
Follow these steps to change the region in the Battle.net app:
- Open the Battle.net app on your computer.
- Click on the “Options” menu (represented by three dots) in the top-right corner of the app.
- Select “Settings” from the drop-down menu.
- In the Settings window, navigate to the “Game Install/Update” tab.
- Under the “Region” section, click on the drop-down menu.
- Select a different region from the available options.
- Click on “Done” to save the changes.
By changing the region, you’re essentially connecting to a different set of servers, which may have faster download speeds due to lower traffic or better infrastructure. Try different regions to find the one that provides the best download speed for you.
Keep in mind that changing the region may impact other aspects of your Battle.net experience, such as matchmaking or latency in multiplayer games. If you primarily play with friends from a specific region, consider discussing the region change with them to ensure a seamless gaming experience.
Now that you’ve explored the method of changing regions, let’s move on to the next technique to optimize your Battle.net download speed.
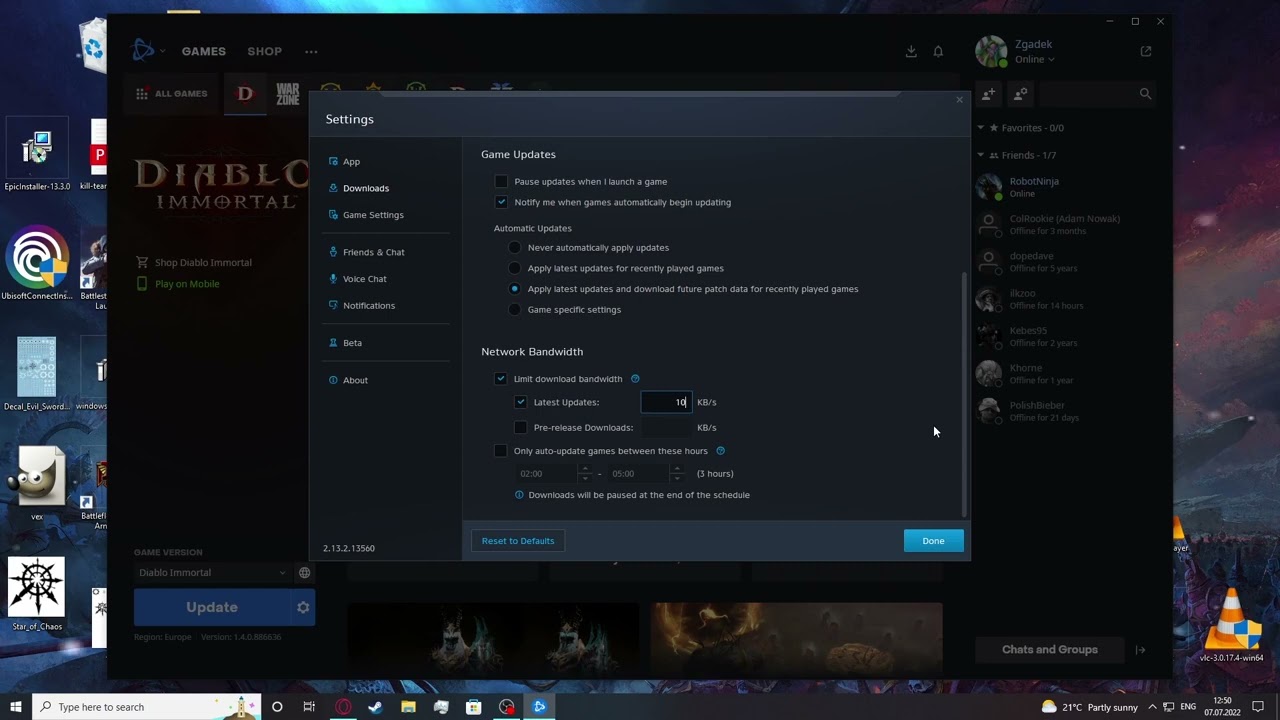
Method 4: Changing the Download Speed
Adjusting the download speed settings within the Battle.net app can also help improve your overall download speed. By controlling the maximum download speed, you can allocate more bandwidth specifically for Battle.net downloads, ensuring a faster and smoother experience.
To change the download speed settings in the Battle.net app, follow these steps:
- Open the Battle.net app on your computer.
- Click on the “Options” menu (represented by three dots) in the top-right corner of the app.
- Select “Settings” from the drop-down menu.
- In the Settings window, navigate to the “Game Install/Update” tab.
- Under the “Download Speed” section, you’ll find the option to adjust the “Limit bandwidth to” setting.
- By default, this setting is set to “Automatic,” but you can change it to a specific speed value. Try setting it to a higher value to maximize your download speed.
- Click on “Done” to save the changes.
By increasing the download speed limit, Battle.net will utilize more of your available bandwidth for downloads, potentially resulting in faster download speeds. Experiment with different speed values to find the optimal setting for your internet connection.
Keep in mind that setting the download speed limit too high may affect other applications or devices on your network, especially if you have limited bandwidth. It’s important to find a balance that allows for fast Battle.net downloads without causing network congestion.
Now that you’ve learned how to adjust the download speed settings in the Battle.net app, let’s move on to the next method to further enhance your download experience.
Method 5: Disabling Background Applications
Having multiple applications running in the background while downloading games on Battle.net can consume valuable system resources and potentially impact your download speed. By temporarily disabling unnecessary background applications, you can free up system resources and allow Battle.net to utilize them fully, resulting in faster downloads.
Here’s how you can disable background applications:
- Open the Task Manager on your computer by pressing Ctrl + Shift + Esc.
- Click on the “Processes” tab to view the running applications.
- Identify any applications that are running in the background and are not necessary while downloading games.
- Right-click on any such application and select “End Task” to close it.
- Repeat this process for other unnecessary background applications.
Disabling background applications will free up system resources such as CPU and RAM, allowing Battle.net to use them more effectively. This can lead to better download speed and overall performance during game installations.
It’s important to note that some applications may be essential for the proper functioning of your computer. Therefore, exercise caution when closing apps in the Task Manager and only close those that are not critical to your system’s operation.
Now that you’ve disabled unnecessary background applications, let’s move on to the next method that can potentially optimize your Battle.net download speed.
Method 6: Using a Wired Ethernet Connection
While Wi-Fi is convenient, it may not always provide the most stable and fastest connection for downloading games on Battle.net. Interference, signal loss, and distance from the router can all impact your download speed. One effective way to overcome these issues and optimize your download speed is by using a wired Ethernet connection.
Here’s how you can switch to a wired Ethernet connection:
- Locate the Ethernet port on your computer or laptop.
- Connect one end of the Ethernet cable to the Ethernet port of your computer.
- Connect the other end of the Ethernet cable to the router or modem.
- Ensure a stable and secure connection between your computer and the router/modem.
Using a wired Ethernet connection offers several advantages, including faster and more reliable download speeds. Unlike Wi-Fi, Ethernet connections are not susceptible to signal interference or coverage limitations, providing a more consistent and uninterrupted connection.
If you’re unable to connect your computer directly to the router or modem due to distance or other constraints, consider using a powerline adapter. A powerline adapter allows you to transmit the internet signal through your electrical wiring, providing a wired connection to your computer even if it’s located in a different room.
By opting for a wired Ethernet connection or a powerline adapter, you can ensure the most stable and efficient connection for downloading games on Battle.net, ultimately leading to faster download speeds.
Now that you’ve explored the method of using a wired Ethernet connection, let’s wrap up our guide to optimizing Battle.net download speeds.
Conclusion
Waiting for game downloads on Battle.net can be a test of patience, but by implementing the methods mentioned in this guide, you can significantly improve your download speed and get into your games faster. From clearing the Battle.net cache to adjusting DNS settings, changing regions, and optimizing your network connection, these techniques can help you optimize your Battle.net download experience.
Clearing the Battle.net cache ensures that you start with a fresh slate, eliminating any corrupt or outdated files that may be slowing down your downloads. Adjusting the DNS settings allows you to connect to faster DNS servers, potentially reducing the time it takes to establish a connection with Battle.net servers. Changing regions can help you find less crowded servers and achieve faster download speeds, while adjusting the download speed settings in the Battle.net app dedicatedly allocates bandwidth for a smoother download experience.
Disabling unnecessary background applications and using a wired Ethernet connection eliminate potential sources of interference and provide a more stable and reliable connection for downloading games on Battle.net. By combining these methods or experimenting with different combinations, you can find the optimal configuration that suits your specific circumstances and maximizes your download speed.
Remember to consider your overall internet connection quality when trying to improve your download speed. If you have a slow or unstable internet connection, these methods may offer limited benefits. In such cases, it’s recommended to reach out to your internet service provider for assistance.
So, say goodbye to long wait times and hello to fast and efficient downloads on Battle.net. Implement these methods, and you’ll be enjoying your favorite games in no time!