Introduction
Welcome to this helpful guide on how to delete a download on Mac. We all know that our computers can quickly become cluttered with files and documents, especially when it comes to downloads. Whether it’s a random file you no longer need or a large file that is taking up precious space on your hard drive, deleting unwanted downloads can help keep your Mac organized and running smoothly.
Deleting downloads is a straightforward process on a Mac, and in this article, we will guide you through the steps to efficiently remove any unwanted files from your Downloads folder. By following our instructions, you can make sure your Mac stays clutter-free and only keeps the files that are actually important to you.
Before we dive into the steps, it’s essential to note that deleting a file permanently removes it from your Mac, so make sure you double-check if you genuinely want to get rid of it. If you are unsure, it might be a good idea to move the file to an external storage device or backup before deleting it.
Now, let’s explore the step-by-step process of deleting downloads on your Mac. Grab your mouse or trackpad, and let’s get started!
Step 1: Open the Downloads folder
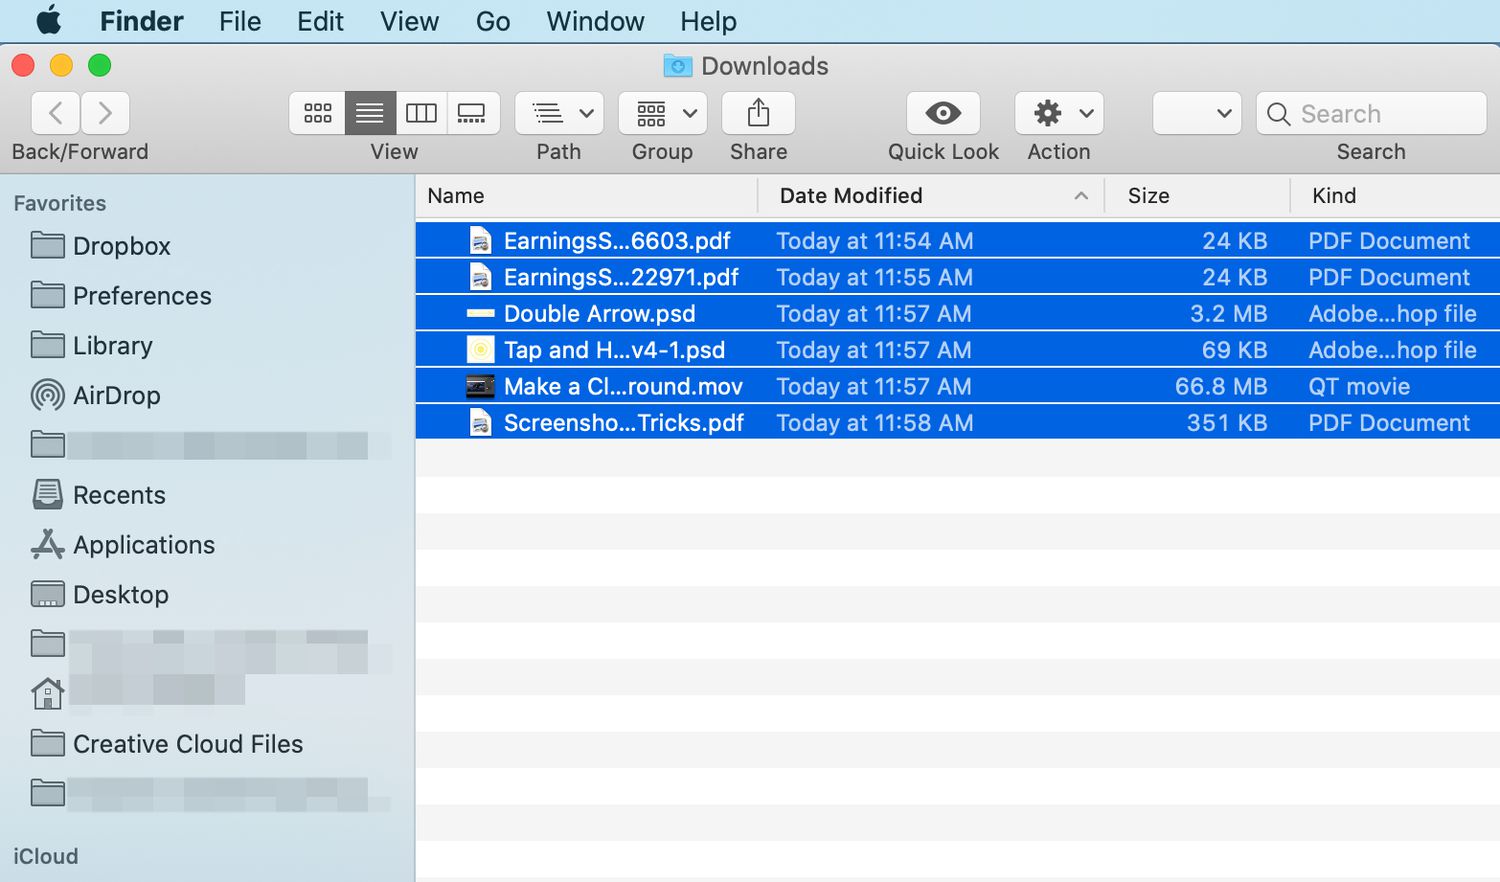
The first step in deleting a download on your Mac is to locate and open the Downloads folder. The Downloads folder is where all your downloaded files are stored by default. Here’s how you can easily access it:
- Click on the Finder icon in your Mac’s Dock. The Finder is the blue and white smiling face icon located at the far left end of the Dock.
- In the Finder window, you will find several options listed on the left-hand side. Look for “Downloads” under the “Favorites” section and click on it. Alternatively, you can also find the Downloads folder in the sidebar under “Locations.”
- Once you click on “Downloads,” a new window will open, displaying the contents of the folder. Here, you will see a list of all the files you have downloaded.
Now that you have successfully opened the Downloads folder, you can proceed to the next step to locate the specific file you want to delete.
Step 2: Locate the file you want to delete
Now that you have the Downloads folder open, it’s time to find the file you want to delete. This step is crucial to ensure that you remove the correct file without accidentally deleting something important. Follow these simple instructions to locate the file:
- Take a look at the list of files and folders in the Downloads folder. You may need to scroll through the list if there are many items.
- If you remember the file’s name or part of it, you can type it in the search bar at the top-right corner of the Finder window. This will help narrow down the list and quickly locate your desired file.
- If you are not sure about the file’s name, you can also sort the files by date modified, size, or kind by clicking on the corresponding column header at the top of the list. This can be helpful if you recently downloaded the file or know its approximate size or file type.
- As you browse through the list, look for the file you want to delete. You can identify it by its name, icon, or other details such as the file extension.
Once you have located the file you want to delete, it’s time to proceed to the next step and remove it from your Mac.
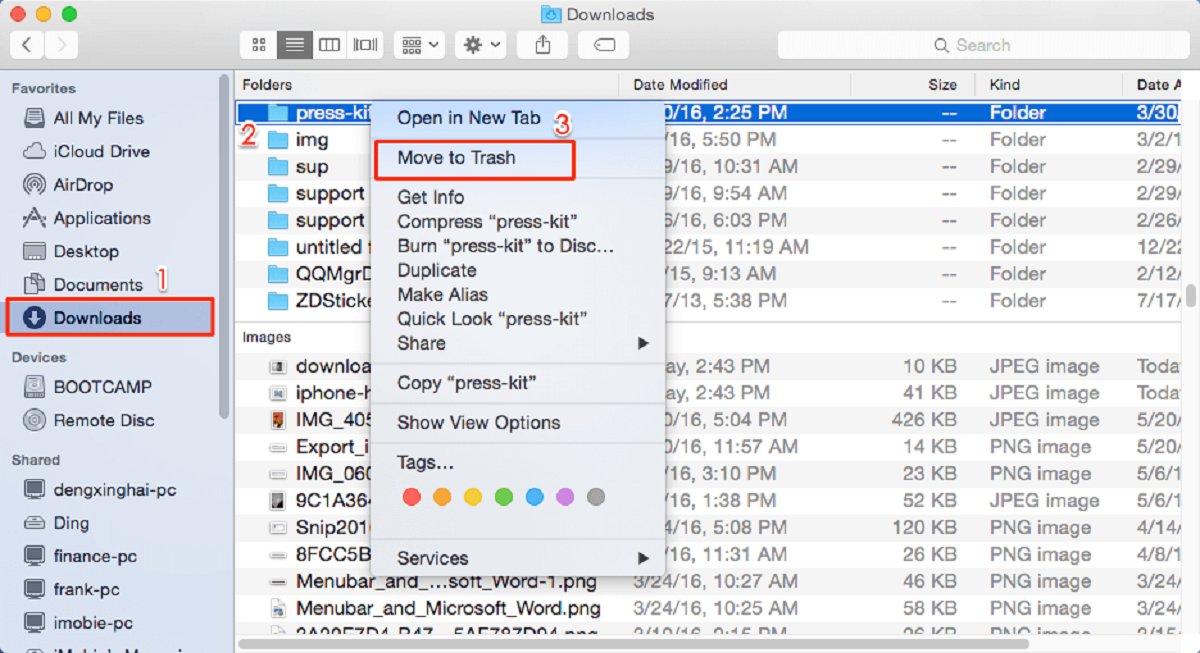
Step 3: Drag the file to the Trash
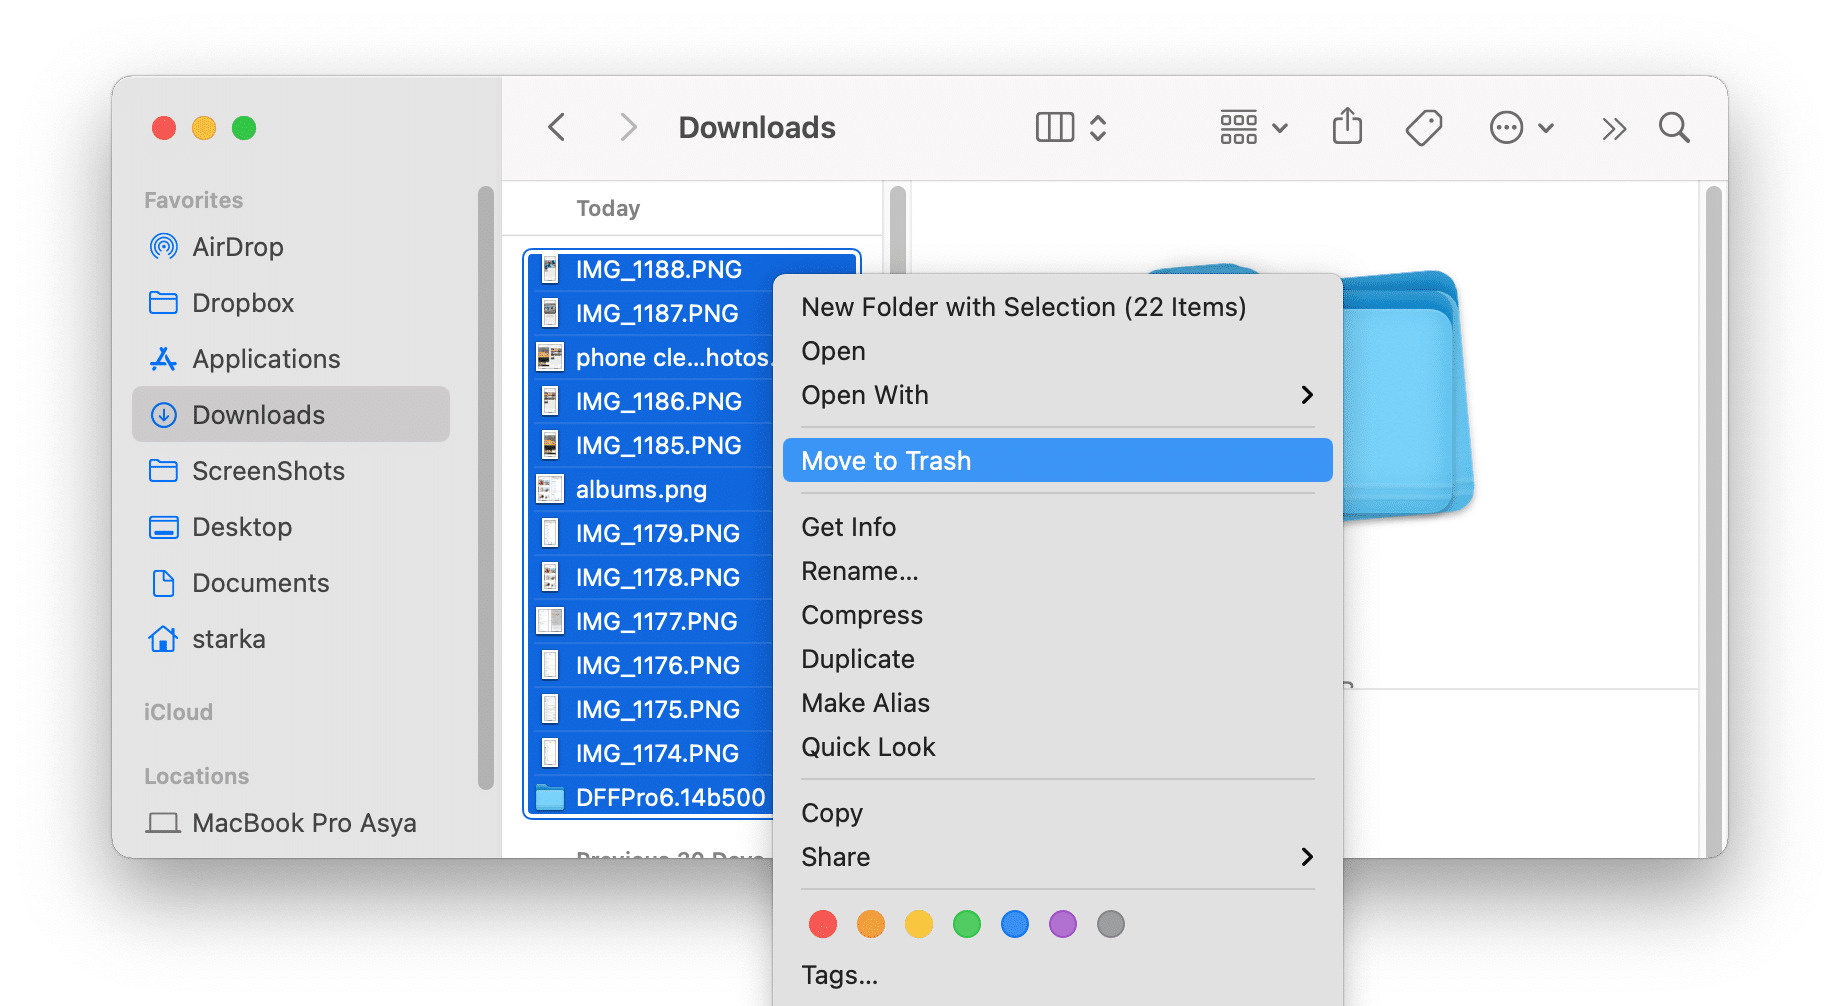
Now that you have located the file you want to delete, it’s time to move it to the Trash. This is a temporary storage area on your Mac where files are kept before they are permanently deleted. Follow these simple steps to drag the file to the Trash:
- Click and hold the file you want to delete.
- While holding the file, drag it across the screen and hover over the Trash icon located in the Dock. The Trash icon resembles a waste bin.
- Once you are hovering over the Trash icon, release the mouse or trackpad button to drop the file into the Trash.
After dropping the file into the Trash, you will notice that it disappears from the Downloads folder. However, please keep in mind that the file has not been permanently deleted yet and can still be restored if needed.
If you accidentally dragged the wrong file to the Trash or changed your mind about deleting it, you can retrieve it by double-clicking on the Trash icon to open the Trash folder. From there, you can select the file and choose “Put Back” to restore it to its original location.
Now that the file is in the Trash, it’s time to proceed to the final step of emptying the Trash to permanently delete the file from your Mac.
Step 4: Empty the Trash
Once you have moved the file to the Trash, it’s essential to empty the Trash to permanently delete it from your Mac. Emptying the Trash ensures that the file is removed from your storage, freeing up valuable disk space. Here are the steps to empty the Trash:
- Locate the Trash icon in the Dock, which resembles a waste bin.
- Click on the Trash icon to open the Trash folder.
- Inside the Trash folder, you will see a list of the files that are currently in the Trash.
- At the top of the Trash folder window, you will find an option to “Empty” the Trash. You can click on this option.
- A confirmation dialog box will appear, asking if you are sure you want to empty the Trash. Review the contents of the Trash folder to ensure you do not have any important files in it.
- If you are certain that you want to permanently delete all the files in the Trash, click on the “Empty Trash” button in the confirmation dialog box.
Once you click “Empty Trash,” all the files in the Trash will be permanently deleted. It’s important to note that this action cannot be undone, so make sure you have reviewed the contents of the Trash thoroughly before proceeding.
After emptying the Trash, you will notice that the file you wanted to delete will no longer be visible in the Downloads folder or the Trash folder. Congratulations! You have successfully deleted the download from your Mac.
It’s a good practice to regularly empty your Trash to keep your system clean and optimize storage space on your Mac.
Conclusion
Congratulations! You have now learned how to delete a download on your Mac. By following the step-by-step instructions outlined in this guide, you can effectively remove unwanted files from your Downloads folder, keeping your Mac organized and running smoothly.
Remember, deleting downloads is a simple process that involves opening the Downloads folder, locating the file you want to delete, dragging it to the Trash, and then emptying the Trash to permanently remove the file from your Mac.
It’s important to double-check and make sure you genuinely want to delete a file before proceeding. If you have any doubts or want to keep a backup of the file, consider moving it to an external storage device or creating a backup before deleting it.
Regularly deleting unnecessary downloads from your Mac not only declutters your system but also frees up valuable disk space, improving overall performance. Make it a habit to clean up your Downloads folder and empty the Trash from time to time to keep your Mac running efficiently.
We hope this guide has been helpful in assisting you with deleting your downloads on Mac. If you have any further questions or need additional assistance, feel free to consult the documentation provided by Apple or seek support from Apple’s customer service.
Happy organizing and optimizing your Mac!