Introduction
When using a Mac, you may often find yourself downloading files from the internet. These files can accumulate quickly and clutter up your storage space if not managed properly. Whether it’s a document, image, or software installer, there may come a time when you need to delete a download to free up space or simply remove unnecessary files.
In this article, we will guide you through the process of deleting a download on a Mac. You don’t need to be a tech-savvy guru to accomplish this task. With a few simple steps, you’ll be able to clear out those unwanted files and keep your Mac organized and running smoothly.
Before we dive into the steps, it’s important to note that deleting a download will permanently remove the file from your Mac. So, make sure you double-check that you no longer need the file before proceeding. Additionally, this guide is applicable to most versions of macOS, including Catalina, Mojave, and Big Sur.
So, let’s get started and learn how to delete a download on your Mac!
Step 1: Find the Downloads Folder
The first step in deleting a download on a Mac is locating the Downloads folder. This folder is where most files you download from the internet are automatically saved to.
To find the Downloads folder, follow these simple steps:
- Click on the Finder icon in the dock, which is usually located at the bottom of the screen.
- In the Finder window, you’ll find a sidebar on the left-hand side. Look for and click on “Downloads” under the “Favorites” section.
- Alternatively, you can also access the Downloads folder by opening a new Finder window (shortcut: Command + N) and selecting “Downloads” from the left-hand sidebar or the “Locations” section under “Favorites”.
Once you’ve successfully located the Downloads folder, you’ll see a list of all the files you’ve downloaded. This includes documents, images, videos, music, software installers, and more.
It’s worth mentioning that the Downloads folder can also be accessed through the Dock. If you have the Downloads folder shortcut enabled on your Dock, simply click on it to open the folder directly.
Now that you know how to find the Downloads folder on your Mac, let’s move on to the next step: selecting the file you want to delete.
Step 2: Select the File You Want to Delete
Once you’ve located the Downloads folder on your Mac, it’s time to select the specific file that you want to delete. This step will ensure that you are removing the right file and not accidentally deleting something else.
Follow these steps to select the file you want to delete:
- Open the Downloads folder by following the steps mentioned in the previous section.
- Take a look at the list of files in the Downloads folder. You can sort the files by name, date added, size, or kind by clicking on the respective column header.
- Scroll through the list and find the file you want to delete. You can also search for the file by typing its name in the search bar located at the top-right corner of the Finder window.
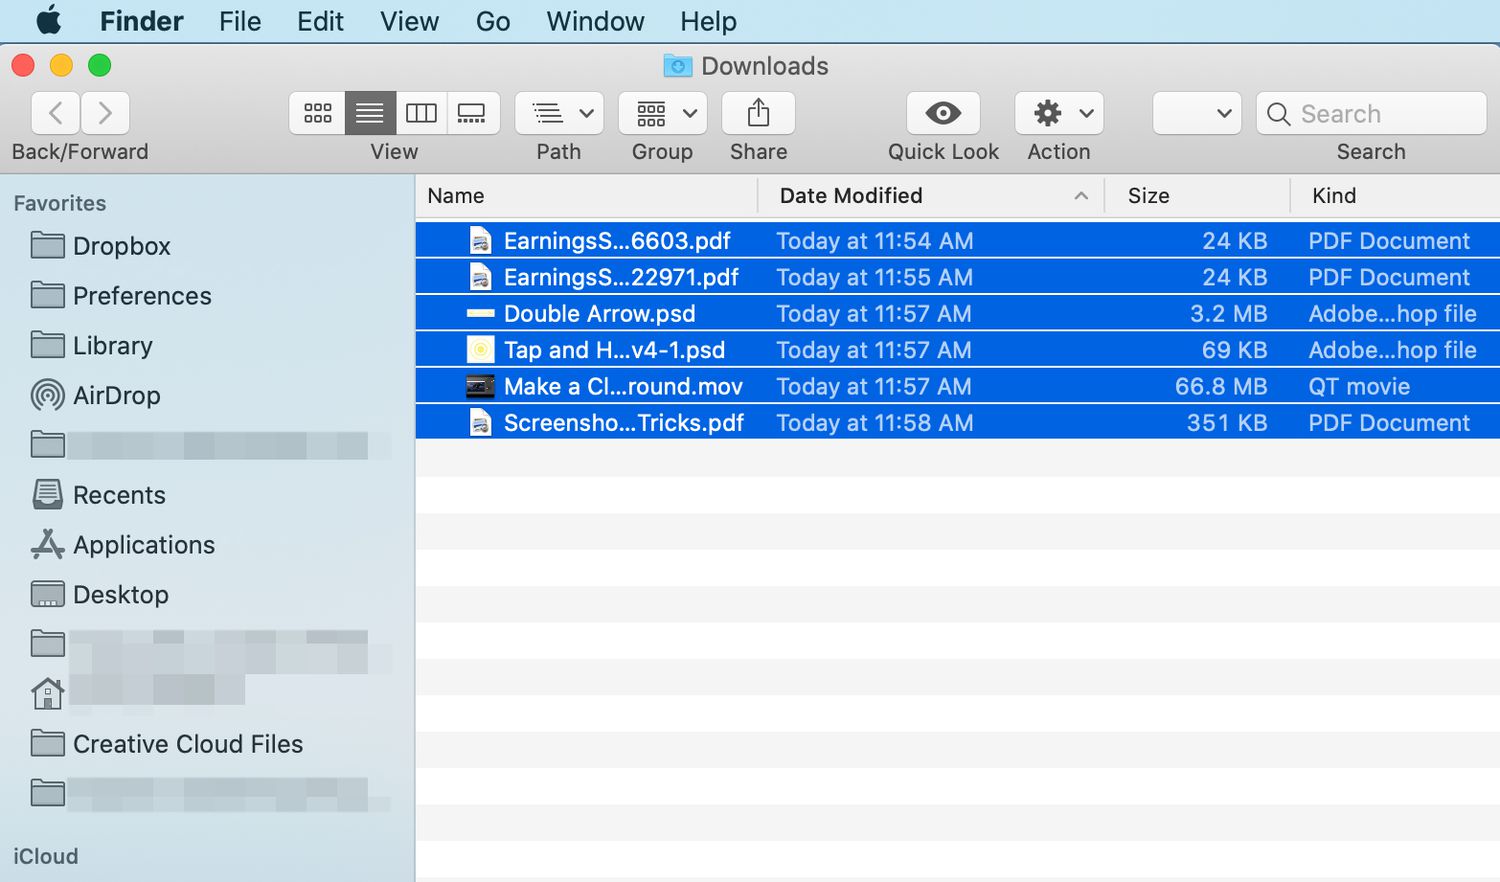
- Click on the file to select it. You can verify that the file is selected by its highlighting or by checking the checkbox next to the file’s name.
It’s important to be cautious while selecting the file to delete. Make sure you have chosen the correct file as this action cannot be undone once completed. Double-check the filename and file extension to ensure you are deleting the right file.
If you want to select multiple files to delete at once, you can hold down the Command key on your keyboard while clicking on the files. This will allow you to select multiple files simultaneously.
Now that you have selected the file or files to delete, let’s proceed to the next step: moving the file to the Trash.
Step 3: Move the File to the Trash
Once you have selected the specific file or files you want to delete from the Downloads folder, the next step is to move them to the Trash. The Trash acts as a temporary holding area for files before they are permanently deleted from your Mac.
Follow these simple steps to move the file to the Trash:
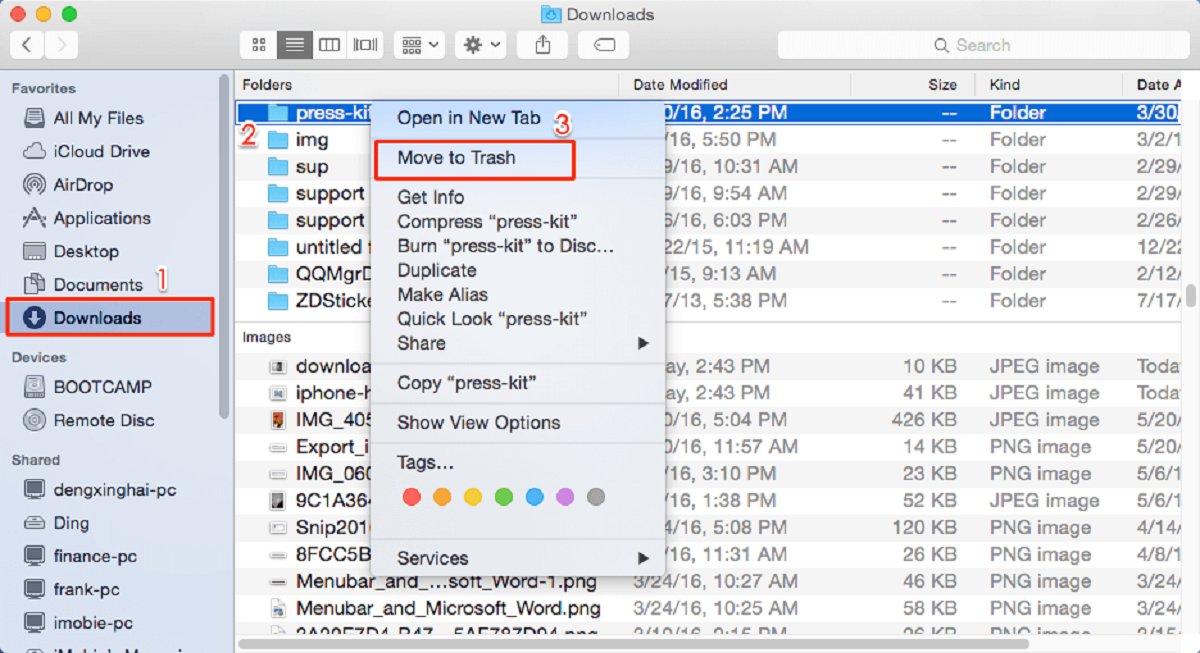
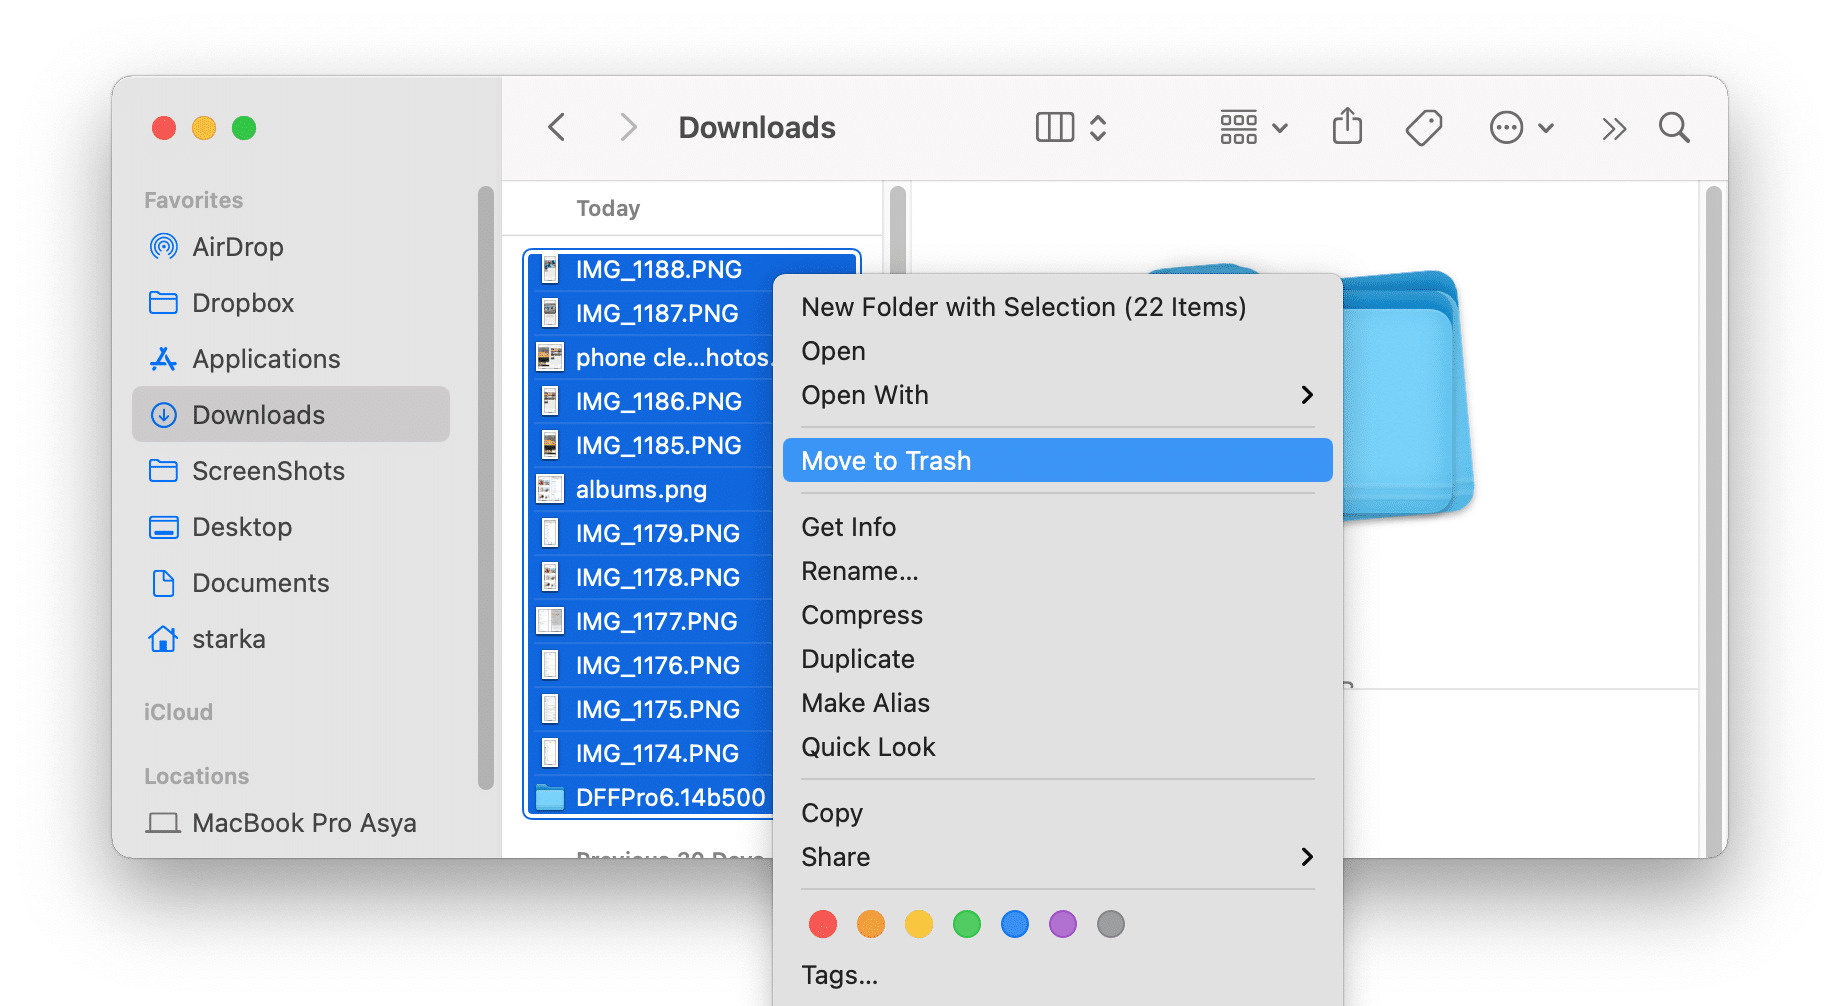
- With the selected file(s) still highlighted, right-click on the file(s) and choose “Move to Trash” from the contextual menu that appears. Alternatively, you can also drag and drop the file(s) onto the Trash icon located in the Dock.
- You can also use the keyboard shortcut Option + Command + Delete to move the selected file(s) to the Trash.
After moving the file(s) to the Trash, you will notice that the file(s) will disappear from the Downloads folder. However, please keep in mind that the file(s) are still taking up space on your Mac’s hard drive until you empty the Trash.
If you mistakenly moved a file to the Trash and want to retrieve it, you can simply open the Trash, select the file, right-click on it, and choose “Put Back” from the contextual menu. The file will be restored to its original location in the Downloads folder.
Now that you have successfully moved the file(s) to the Trash, let’s move on to the final step: emptying the Trash to permanently delete the file(s) from your Mac.
Step 4: Empty the Trash
Once you have moved the file(s) you want to delete to the Trash, it’s time to empty the Trash to permanently remove them from your Mac. Emptying the Trash will free up disk space and ensure that the files cannot be recovered.
Follow these steps to empty the Trash:
- Locate the Trash icon on your Mac’s Dock. It resembles a waste bin or trash can.
- Click once on the Trash icon to open it. You will see a list of the files that are currently in the Trash.
- In the top menu bar, click on the “Finder” menu and select “Empty Trash” from the dropdown. Alternatively, you can right-click on the Trash icon and choose “Empty Trash” from the contextual menu.
- A confirmation dialog box will appear, asking if you are sure you want to permanently delete the items in the Trash. Review the items to be deleted and click on the “Empty Trash” button to proceed.
Once you confirm the deletion, the files will be permanently removed from your Mac. It’s important to note that this action cannot be undone, so double-check that you have selected the correct file(s) for deletion.
After emptying the Trash, you will notice that the disk space previously occupied by the deleted files is now available. This can help improve the performance and storage capacity of your Mac.
Congratulations! You have successfully deleted the file(s) from your Mac by emptying the Trash. Your Downloads folder should now be free of unnecessary files, and your storage space should be optimized.
Remember that it’s a good practice to periodically clear out your Downloads folder and empty the Trash to keep your Mac clean and organized.
Conclusion
Deleting a download on a Mac is a simple process that allows you to free up storage space and keep your computer organized. By following the steps outlined in this guide, you can easily locate the Downloads folder, select the specific file(s) you want to delete, move them to the Trash, and then empty the Trash to permanently remove them from your Mac.
Remember to exercise caution when selecting files for deletion and double-check that you have chosen the correct ones. Once you empty the Trash, the files cannot be recovered, so it’s essential to make sure you no longer need them.
Regularly cleaning out your Downloads folder and emptying the Trash not only helps you maintain an organized system but also improves the overall performance of your Mac by freeing up valuable disk space.
Now that you know how to delete a download on your Mac, you can confidently manage your files and keep your computer running smoothly. Take the time to regularly review and delete unnecessary downloads to ensure optimal storage and efficiency.
We hope this guide has been helpful in assisting you with deleting downloads on your Mac. Enjoy a clutter-free system and make the most of your Mac’s capabilities!