Introduction:
Welcome to our guide on how to delete a download on MacBook. We all know that downloading files is an essential part of our digital lives. Whether it’s photos, videos, documents, or software updates, our MacBook is constantly accumulating files that we often need to remove to free up space or declutter our system.
Deleting downloads on a MacBook might seem like a simple task, but it’s important to follow the correct steps to ensure you’re removing the right files and not accidentally deleting something you still need. In this guide, we will walk you through the process, step by step, so you can confidently remove any unwanted downloads from your MacBook.
By regularly deleting unnecessary downloads, you can optimize the performance of your MacBook, streamline your file organization, and ensure that your storage space is utilized efficiently. Whether you’re a new MacBook user or a seasoned pro, this guide will provide you with the necessary knowledge to effectively delete downloads on your device.
So, let’s dive in and learn how to delete a download on MacBook!
Step 1: Accessing the Downloads folder:
The first step in deleting a download on MacBook is accessing the Downloads folder where all your downloaded files are stored. Follow these simple steps to locate the Downloads folder:
- Click on the desktop of your MacBook to ensure you’re in the Finder mode.
- In the menu bar at the top of the screen, click on the “Go” option.
- A dropdown menu will appear. From the dropdown menu, select “Downloads.”
- You will now see the Downloads folder window open, displaying all your recently downloaded files.
Alternatively, you can use the keyboard shortcut “Command + Shift + L” to directly access the Downloads folder without going through the menu bar. This shortcut can save you time if you frequently need to access your downloads.
Once inside the Downloads folder, you can browse through the list of files and locate the specific one that you want to delete.
Now that you know how to access the Downloads folder, let’s move on to the next step to find out how to locate the downloaded file that you want to delete.
Step 2: Locating the downloaded file:
After accessing the Downloads folder, the next step is to locate the specific downloaded file that you want to delete. Here’s how you can do it:
- Scan through the list of files in the Downloads folder. You can browse through the file names, check the date modified, or use the search bar at the top-right corner of the folder window to search for a specific file.
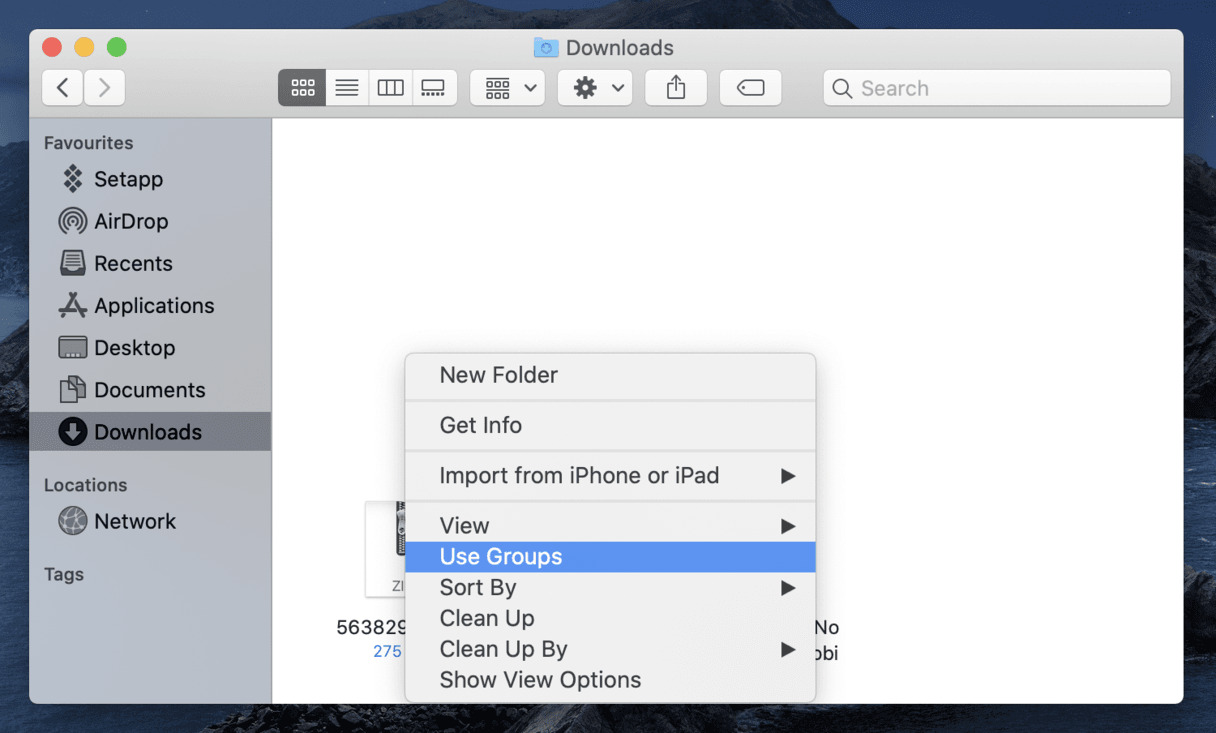
- If you’re unsure about the file name or want to identify it visually, you can utilize the “View” options at the top of the folder window. Click on the “View” button and choose your preferred display option, such as icons, list, or columns.
- Use the sorting options to rearrange the files in the Downloads folder based on name, date modified, or other criteria. This can make it easier for you to locate the downloaded file you want to delete.
- If you have downloaded the file recently, it may be located at the top of the list or within a subfolder labeled with the source or app from which it was downloaded.
Remember to double-check the file name and contents before deleting it to ensure you’re removing the right file. Once you have successfully located the downloaded file, proceed to the next step to learn how to delete it from your MacBook.
Step 3: Deleting the downloaded file:
Now that you have located the specific file you want to delete, it’s time to remove it from your MacBook. Follow these steps to delete the downloaded file:
- Click on the file once to select it. You will see that the file name is highlighted.
- Right-click on the selected file to open the context menu.
- In the context menu, click on the “Move to Trash” option. Alternatively, you can press the “Delete” key on your keyboard.
- Confirm your action by clicking on the “Move to Trash” button in the pop-up window that appears. This will move the file to the Trash folder of your MacBook.
It’s important to note that when you delete a file, it is not immediately removed from your MacBook. Instead, it is moved to the Trash folder, where it is stored temporarily until you empty the Trash.
If you want to delete multiple files at once, you can select multiple files by holding down the “Command” key on your keyboard while clicking on the files or by using the Shift key to select a range of files. Then, follow the same steps mentioned above to delete the selected files.
Now that the downloaded file has been successfully deleted from your system, let’s move on to the final step to ensure it is permanently removed.
Step 4: Emptying the Trash:
After deleting files, they are moved to the Trash folder on your MacBook. To ensure that the downloaded files are permanently removed from your system and to free up storage space, you need to empty the Trash. Here’s how you can do it:
- Locate the Trash icon on your desktop. It is usually represented by a small trash can.
- Click on the Trash icon to open the Trash folder.
- Review the files in the Trash folder to ensure that you no longer need any of them. Keep in mind that once you empty the Trash, the files cannot be recovered.
- In the menu bar at the top of the screen, click on the “Finder” option.
- From the dropdown menu, select “Empty Trash.” Alternatively, you can press the “Command + Shift + Delete” keys on your keyboard.
- A pop-up window will appear, asking you to confirm the action. Click on the “Empty Trash” button to permanently delete the files and free up storage space on your MacBook.
Emptying the Trash may take a few moments, depending on the number and size of files in the Trash folder. Once it is completed, the files are permanently deleted from your MacBook and cannot be recovered.
It’s important to note that if you have any doubts about the files in the Trash folder or need to retrieve something you accidentally deleted, it’s recommended to check the contents of the Trash folder before emptying it.
Congratulations! You have successfully deleted the downloaded files from your MacBook and emptied the Trash. Your storage space should now be freed up, and your system will run more smoothly.
Conclusion:
Deleting downloads on your MacBook is a simple yet essential task to keep your system organized and free up storage space. By following the steps outlined in this guide, you can confidently delete any unwanted files and ensure optimal performance of your MacBook.
We started by accessing the Downloads folder, where all downloaded files are stored. From there, we learned how to locate the specific file we wanted to delete by scanning through the list, using search options, and utilizing sorting features. Once we found the file, we proceeded to delete it by right-clicking and selecting “Move to Trash.”
However, it’s important to remember that deleting a file only moves it to the Trash folder and doesn’t remove it completely from your system. To permanently delete the files and free up storage space, we then walked through the process of emptying the Trash.
Regularly deleting unnecessary downloads not only declutters your MacBook but also improves its performance and ensures that your storage space is efficiently utilized. By implementing these steps into your routine, you can keep your system organized and avoid potential storage issues in the future.
We hope this guide has provided you with the necessary knowledge and confidence to delete downloads on your MacBook. Remember to always double-check the files before deleting them and to periodically empty the Trash to maintain a clean and efficient system.
Thank you for reading and happy downloading!


