Introduction
Are you tired of cluttering your MacBook Pro with unnecessary apps that take up valuable storage space? Do you want to uninstall an app that you no longer use or need? Well, you’re in luck! In this guide, we will show you how to delete an app on your MacBook Pro with just a few simple steps.
Deleting an app from your MacBook Pro not only helps you reclaim storage space but also helps improve the overall performance of your device. By removing unwanted apps, you can optimize your MacBook Pro’s resources and ensure that only the necessary applications are running.
Whether you’re uninstalling an app to free up space or getting rid of a program you’ve outgrown, the process is relatively straightforward. In this step-by-step guide, we will walk you through the process of deleting an app on your MacBook Pro, ensuring that you can do it with ease and confidence.
Before we dive into the steps, it’s important to note that removing an app from your MacBook Pro permanently deletes the application and its associated files. Therefore, make sure to double-check and ensure that you no longer need the app or any of its data.
Now that we’ve covered the basics, let’s move on to the first step: accessing the Applications folder on your MacBook Pro.
Accessing the Applications Folder
To delete an app on your MacBook Pro, you first need to access the Applications folder where all your installed applications are stored. Follow these simple steps to access the Applications folder:
- Click on the Finder icon in the Dock, which is usually located at the bottom of the screen. The Finder will open, displaying your files and folders.
- In the menu bar at the top of the screen, click on “Go”. A dropdown menu will appear.
- From the dropdown menu, select “Applications”. This will open the Applications folder, which contains all the installed apps on your MacBook Pro.
Alternatively, you can also access the Applications folder by pressing Command + Shift + A on your keyboard. This shortcut will instantly take you to the Applications folder, saving you a few clicks.
Once you have successfully accessed the Applications folder, you can move on to the next step of finding the app you want to delete.
Finding the App You Want to Delete
Now that you’re in the Applications folder, it’s time to locate the app that you want to delete. Here’s how you can find the app you’re looking for:
- Scroll through the list of applications and visually locate the one you want to delete. The applications are usually arranged in alphabetical order to make it easier for you to find the desired app.
- If you have a large number of apps installed and it’s difficult to find the one you’re looking for, you can use the search bar located at the top-right corner of the window. Simply type in the name of the app, and the list will be filtered to display the relevant results.
- Another way to quickly find the app is to use the “Sort By” option. Click on the “View” option in the menu bar at the top of the screen and select “Sort By”. You can choose to sort the applications by name, date modified, size, or other criteria. This can help you quickly locate the desired app based on your preferred sorting method.
Once you have successfully found the app you want to delete, you can proceed to the next step of actually deleting the app from your MacBook Pro.
Deleting the App
Now that you have located the app you want to delete, it’s time to remove it from your MacBook Pro. Follow these steps to delete the app:
- Click once on the app you want to delete to select it.
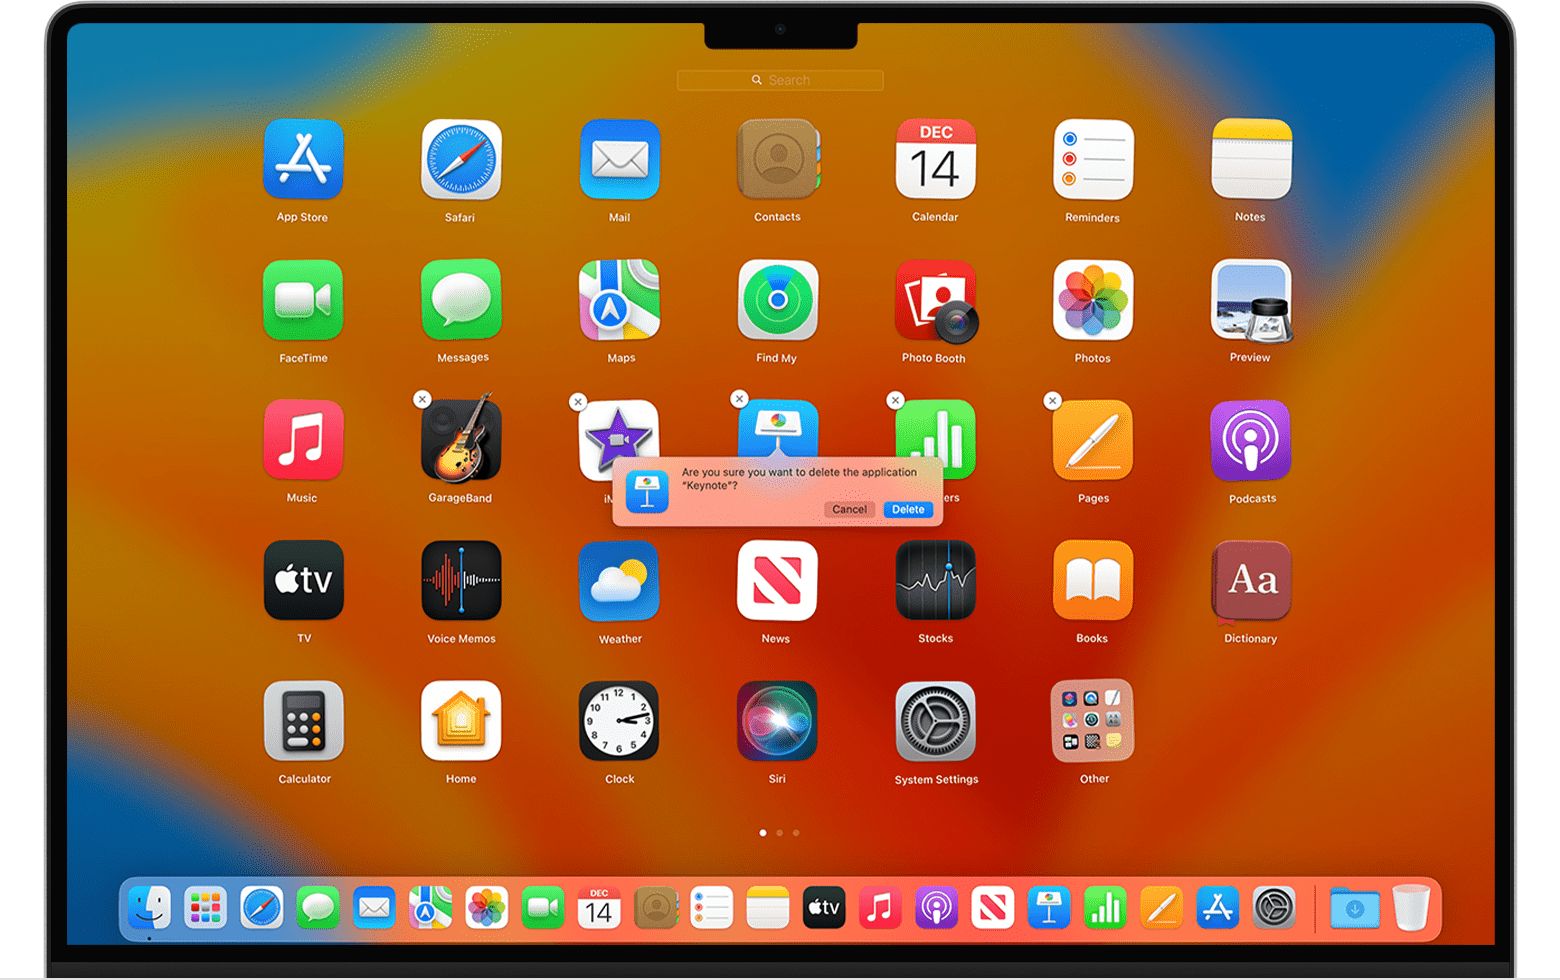
- With the app selected, press the “Command + Delete” keys on your keyboard. Alternatively, you can right-click on the app and select “Move to Trash” from the dropdown menu.
- A confirmation dialog box will appear, asking if you are sure you want to move the app to the Trash. Click on “Move to Trash” to confirm and proceed.
Once you have moved the app to the Trash, you have successfully deleted it from your MacBook Pro. However, the app is not completely removed from your device just yet. To completely get rid of the app and its associated files, you need to empty the Trash.
Before moving on to the next step, it’s important to note that deleting an app from your MacBook Pro removes it from the system but may not delete its preferences and support files. These files can take up unnecessary space on your device, so it’s recommended to use a dedicated app uninstaller like “AppCleaner” to thoroughly remove all traces of the app.
Now that you know how to delete an app from your MacBook Pro, let’s move on to the final step: emptying the Trash.
Emptying the Trash
After deleting the app and moving it to the Trash, the final step is to empty the Trash to permanently remove the app and its associated files from your MacBook Pro. Here’s how you can empty the Trash:
- Locate the Trash icon on your Dock, usually located at the bottom of the screen.
- Click once on the Trash icon to open it. This will display all the files and applications that have been moved to the Trash.
- Once you’re in the Trash folder, you can either right-click on any empty area within the folder and select “Empty Trash” from the dropdown menu, or you can click on “Finder” in the menu bar at the top of the screen and select “Empty Trash” from the dropdown menu.
- A confirmation dialog box will appear, asking if you are sure you want to permanently delete the items in the Trash. Click on “Empty Trash” to confirm and proceed.
Once you have emptied the Trash, the app and its associated files are permanently removed from your MacBook Pro. You have successfully deleted the app and freed up valuable storage space on your device.
It’s worth mentioning that once you empty the Trash, the deleted items cannot be recovered. So, make sure you have double-checked and confirmed that you no longer need the app or any of its files before emptying the Trash.
Congratulations! You have successfully learned how to delete an app from your MacBook Pro and empty the Trash. By regularly removing unused apps, you can keep your device clutter-free and running smoothly.
Conclusion
Deleting an app on your MacBook Pro is a simple process that allows you to free up storage space and optimize the performance of your device. We hope this guide has provided you with a clear understanding of how to delete an app on your MacBook Pro.
Remember, the first step is to access the Applications folder, where all your installed apps are stored. Then, you can easily find the app you want to delete by scrolling through the list or using the search bar. Once you have located the app, you can delete it by selecting it and pressing “Command + Delete” or right-clicking and choosing “Move to Trash.”
To completely remove the app and its associated files, you also need to empty the Trash. Locate the Trash icon on your Dock, open it, and then select “Empty Trash” to permanently delete the app.
By regularly deleting unnecessary apps, you can optimize the storage space on your MacBook Pro and ensure that only the essential applications are installed. This can result in improved performance and a more efficient workflow.
As a final note, make sure to double-check before deleting an app to ensure that you no longer need it or any of its associated files. Once you empty the Trash, the deleted items cannot be recovered.
We hope this guide has been helpful to you in learning how to delete an app on your MacBook Pro. If you have any further questions or need additional assistance, feel free to seek help from Apple support or consult the official MacBook Pro user guide.