Introduction
As a Mac user, having a reliable and fast web browser is essential for a seamless browsing experience. One popular option that many Mac users turn to is Google Chrome. Known for its speed, security, and user-friendly interface, Google Chrome offers a plethora of features and extensions that can enhance your browsing experience.
In this guide, we’ll walk you through the step-by-step process of downloading and installing Google Chrome on your Mac. Whether you’re a first-time Mac user or looking to switch from a different browser, this guide will help you get up and running with Google Chrome in no time.
Before we dive into the details, it’s important to note that Google Chrome is compatible with Mac computers running macOS 10.10 (Yosemite) or later. Make sure your Mac meets the system requirements before proceeding with the installation process.
Now, without further ado, let’s get started with the process of downloading Google Chrome on your Mac!
Step 1: Go to the Google Chrome website
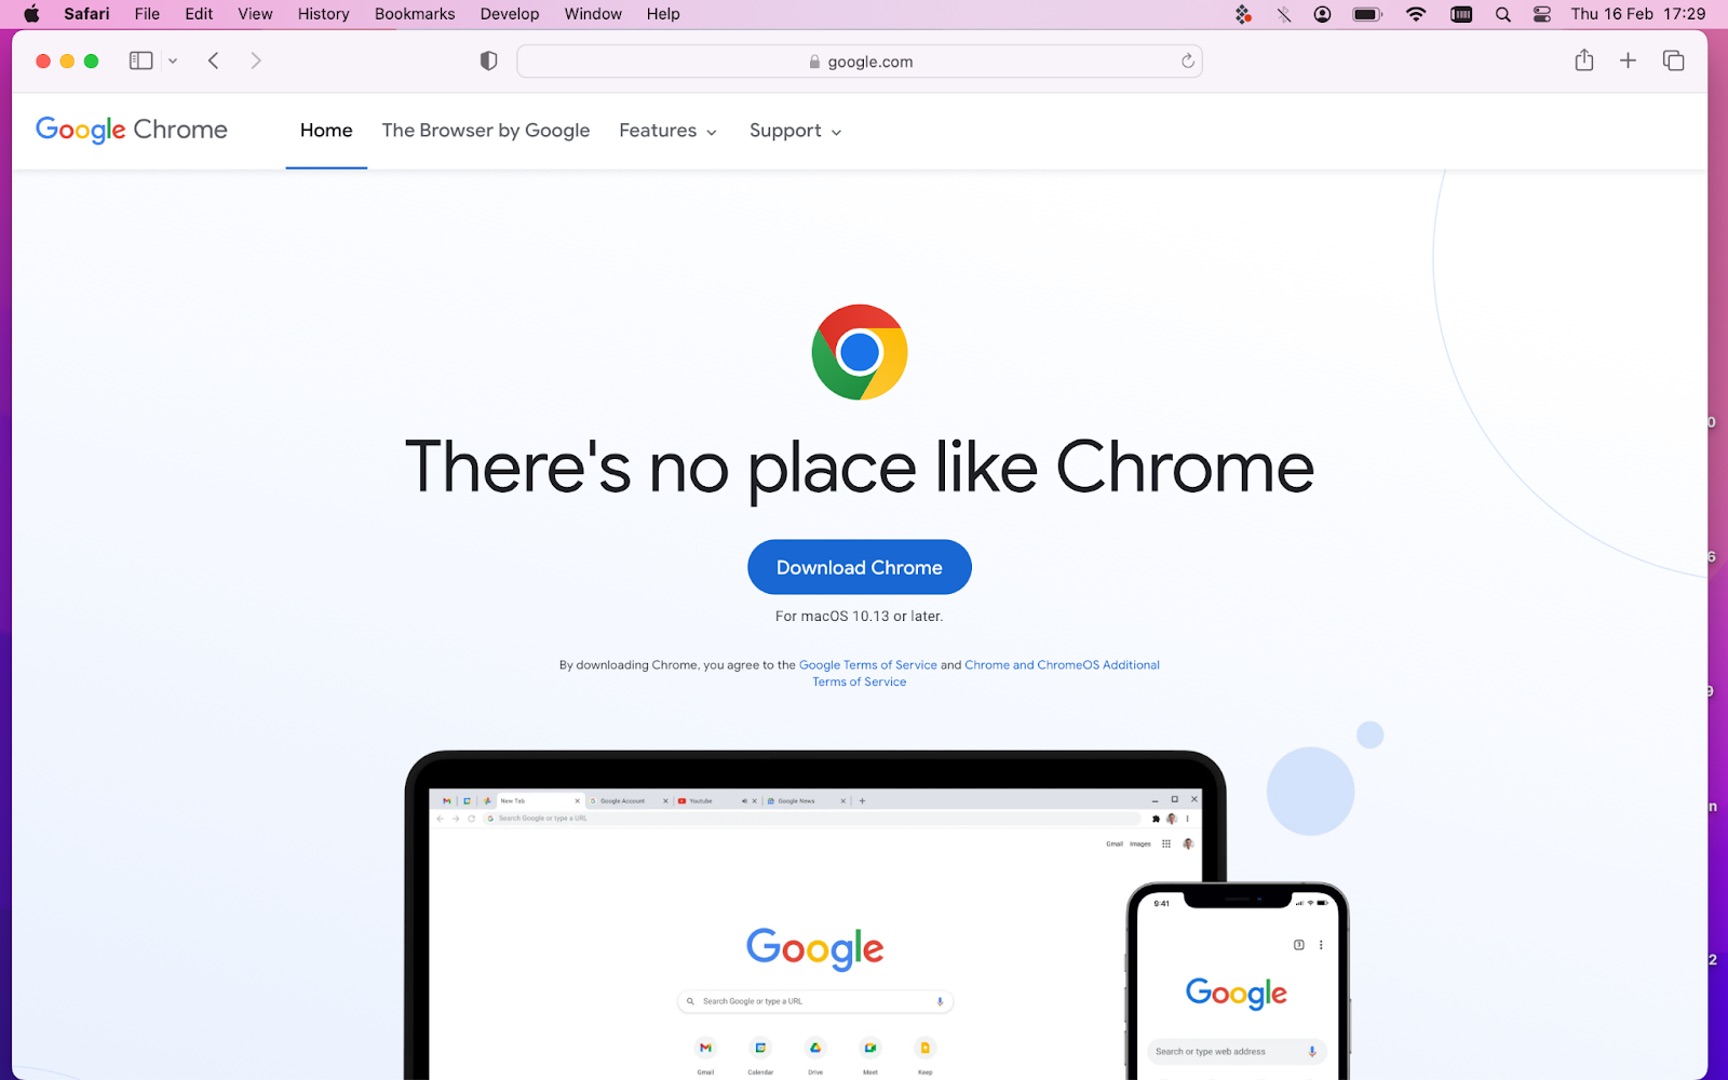
The first step to downloading Google Chrome on your Mac is to navigate to the official Google Chrome website. Open your preferred web browser (such as Safari or Firefox) and enter the URL “https://www.google.com/chrome” in the address bar.
Once you load the webpage, you’ll see the Google Chrome download page. This page provides information about the latest version of Chrome and its features. It also includes a link to download Chrome for Mac.
To ensure that you’re downloading Chrome from the official source, check that the URL starts with “https://www.google.com/chrome”. This ensures that you’re accessing the genuine Google Chrome website and not a third-party site.
Google Chrome’s website is designed to automatically detect the operating system you’re using. It will recognize that you’re using a Mac and display the appropriate download link. If the download doesn’t start automatically, look for the “Download Chrome for Mac” button on the page and click on it to initiate the download.
It’s important to note that Chrome is constantly updated to provide the latest security patches and new features. Therefore, it’s recommended to always download Chrome from the official website to ensure you have the most up-to-date version.
Now that you’re on the Google Chrome website and have started downloading the installer, let’s move on to the next step!
Step 2: Click on “Download Chrome”
Once you’re on the Google Chrome download page, the next step is to locate and click on the “Download Chrome” button. This button is typically prominently displayed on the page, and it may say “Download Chrome” or “Download Chrome for Mac.”
Clicking on the “Download Chrome” button will initiate the download of the Chrome installer file. The file size may vary depending on the version of Chrome you’re downloading, but it is usually around 80-100 MB.
During the download process, your browser may display a prompt asking for your permission to save the file. If prompted, click on “Save” or “Continue” to proceed with the download.
It’s important to note that the download speed may vary depending on your internet connection. If you have a fast internet connection, the download should complete within a few seconds or minutes. If your connection is slower, it may take longer. In any case, be patient and let the download complete.
Once the download is complete, you’re ready to move on to the next step, where we’ll cover how to accept the Terms of Service.
Step 3: Read and accept the Terms of Service
After you have downloaded the Chrome installer file, it’s important to read and accept the Terms of Service before proceeding with the installation. This step ensures that you understand and agree to the terms and conditions set by Google for the use of Google Chrome.
Locate the downloaded file on your Mac. This is usually located in the ‘Downloads’ folder, unless you have specified a different location. The filename should be something like “googlechrome.dmg”.
Double-click on the downloaded file to open it. Your Mac may display a security prompt asking for confirmation to open the file since it is not downloaded from the App Store. Click “Open” to continue.
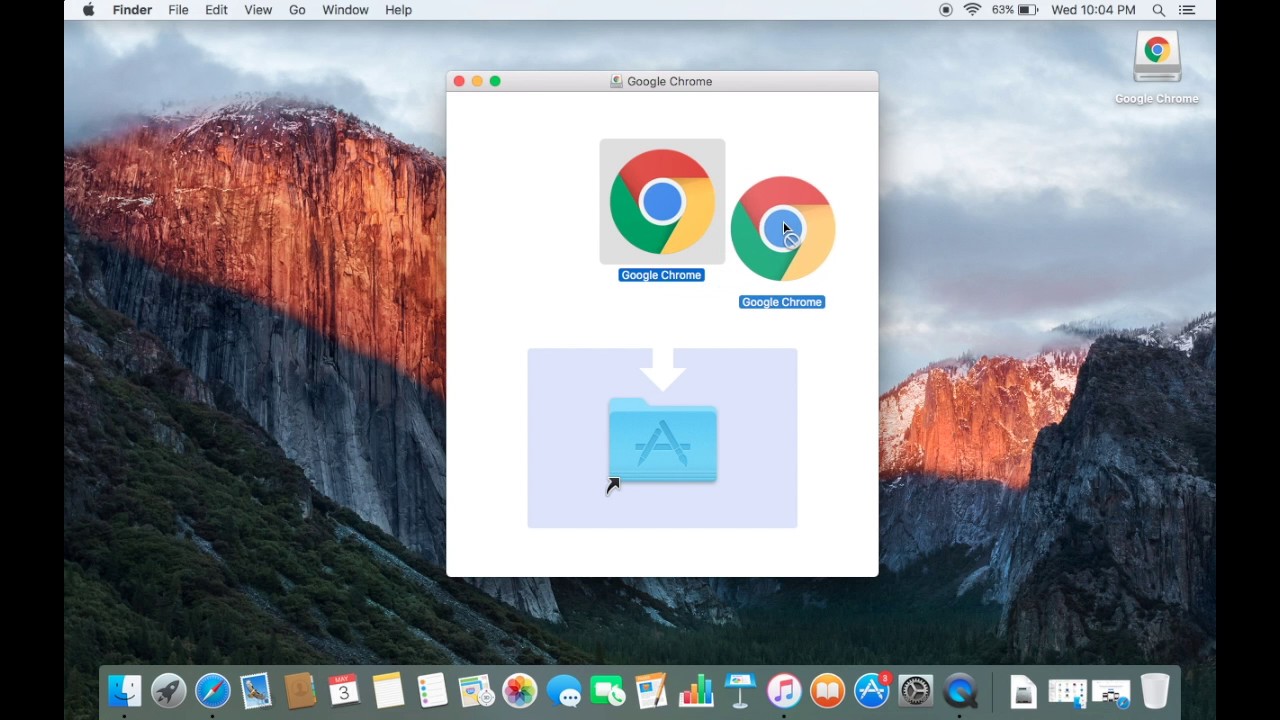
Once you open the file, a window will appear showing the Google Chrome icon along with a visual representation of dragging the icon to the Applications folder. This is the preferred method of installing Chrome on your Mac.
Before dragging and dropping, take a moment to scroll down and read the “Terms of Service” section. It is essential to review these terms to understand the responsibilities and conditions of using Google Chrome.
If you agree to the terms, go ahead and drag the Google Chrome icon to the Applications folder, as instructed. This will begin the installation process.
During the installation, you may be prompted to enter your Mac’s administrator password. This is a normal security measure to ensure that only authorized users can make changes to the Applications folder. Enter your password and click “OK” to proceed.
Once the installation is complete, you have successfully accepted the Terms of Service and installed Google Chrome on your Mac. Now, let’s move on to the next step to complete the installation process.
Step 4: Open the downloaded file
Now that you have successfully installed Google Chrome by dragging and dropping it into the Applications folder, the next step is to open the downloaded file and launch Chrome on your Mac.
Locate the Applications folder on your Mac. You can access it by clicking on the Finder icon in your dock, then selecting “Applications” from the left sidebar.
Scroll through the Applications folder, and you should see the Google Chrome icon. It is typically represented by a circular red, yellow, green, and blue icon.
Double-click on the Google Chrome icon to open it. Alternatively, you can also single-click on the icon and press the “Enter” key on your keyboard.
After clicking on the icon, Google Chrome will start running and launch on your Mac. You will see the Chrome window appear, displaying the Google search bar and other browser elements.
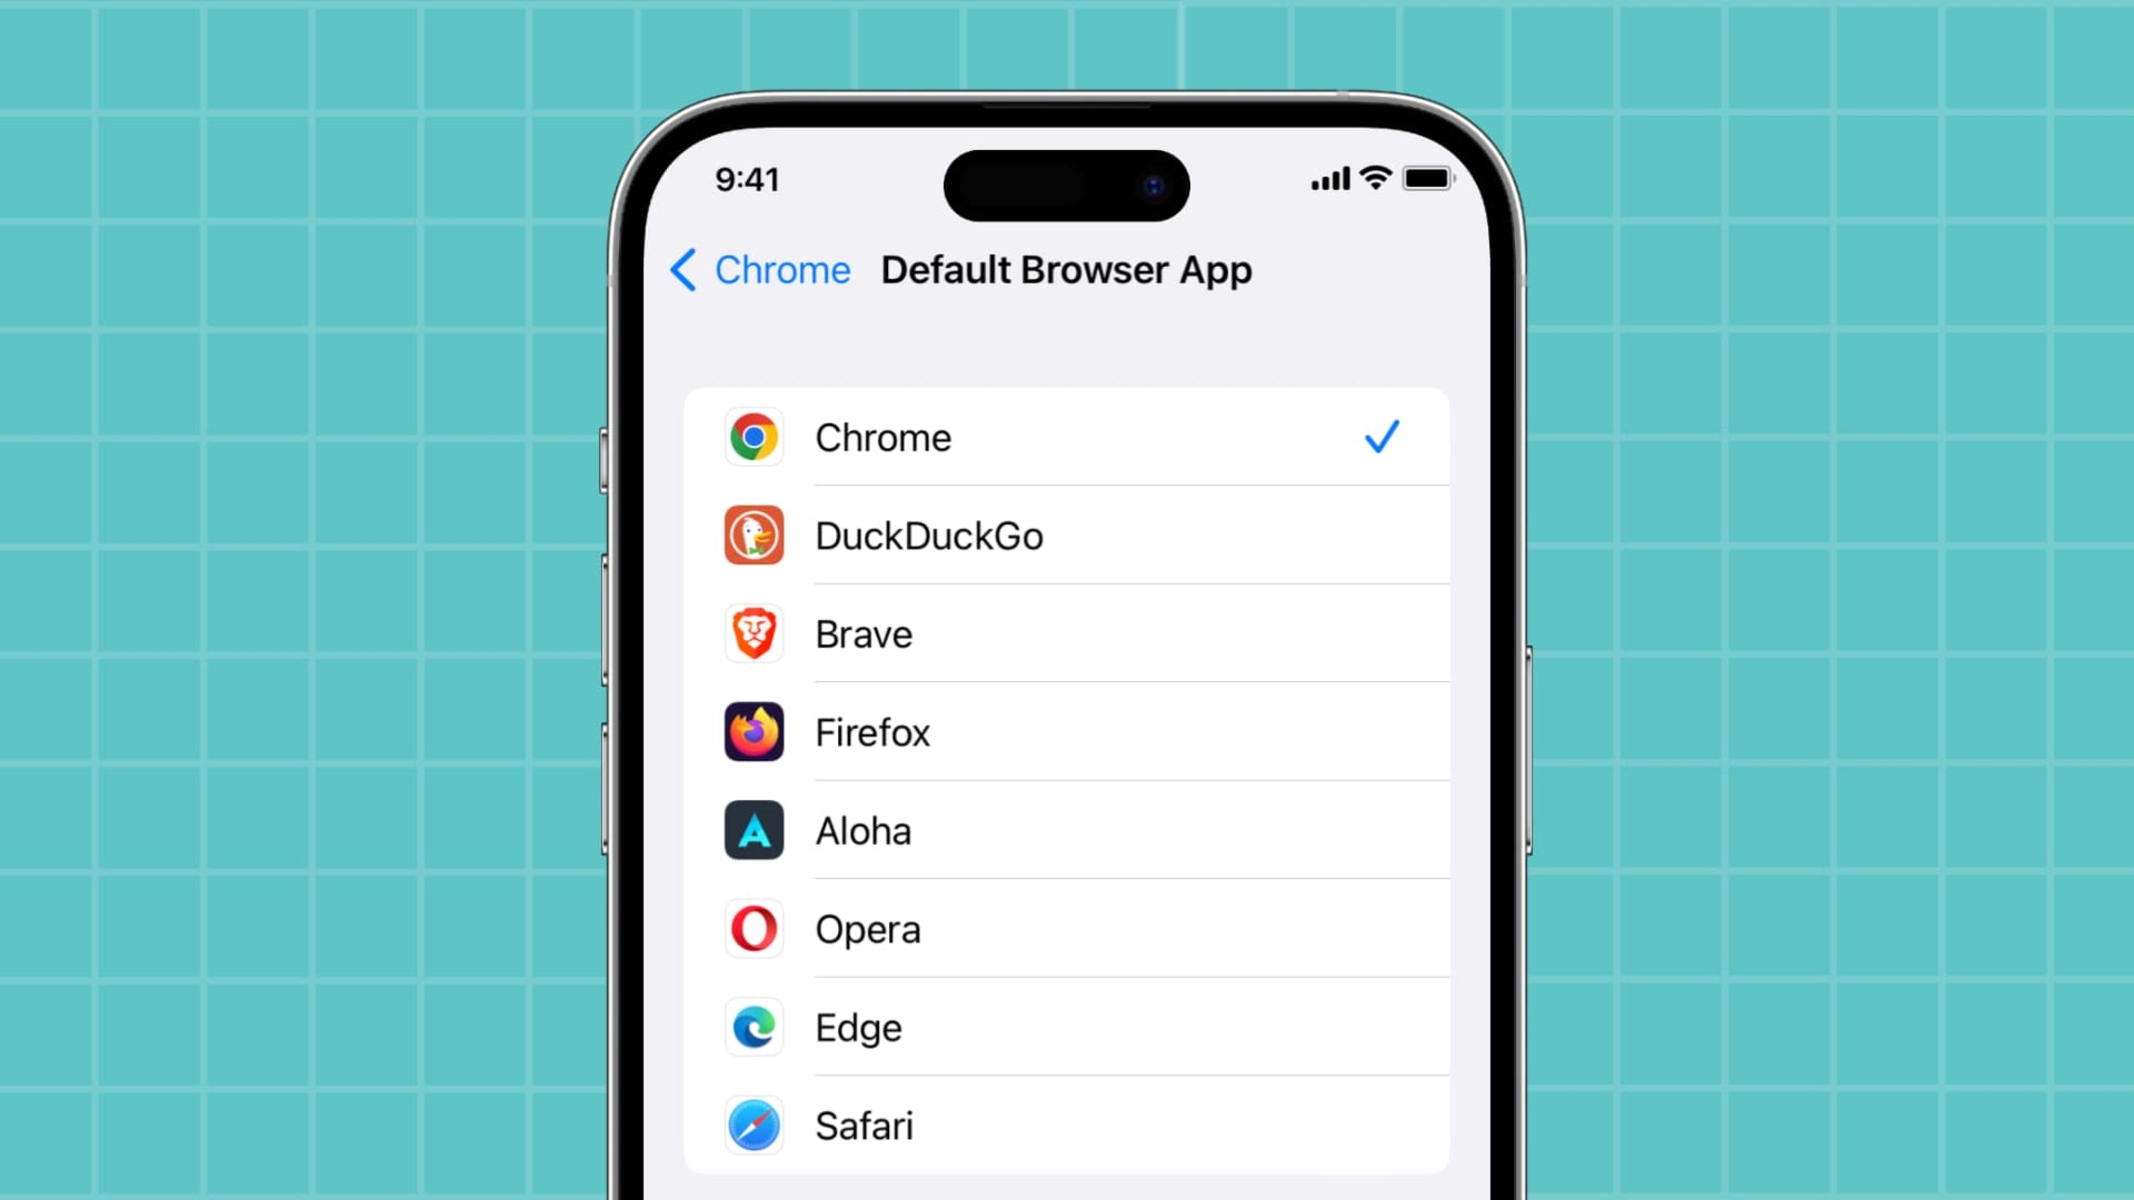
At this point, you have successfully opened Google Chrome on your Mac. However, since this is your first time launching it, Chrome may ask you if you want to make it your default browser. If you prefer to keep your current browser as the default, click on “Not Now” or select your preference from the options provided.
Congratulations! You have completed the process of opening the downloaded Google Chrome file. You are now ready to experience fast and secure browsing on your Mac using Google Chrome.
In the next step, we’ll explore some key features of Google Chrome and how you can personalize your browsing experience.
Step 5: Drag and drop Chrome into the Applications folder
After downloading the Google Chrome installer file, the next step is to move it to the Applications folder on your Mac. This is the standard location where applications are stored on macOS. By doing this, you ensure that Google Chrome is easily accessible and properly installed on your Mac.
Locate the downloaded file on your Mac. This is usually in the ‘Downloads’ folder unless you have specified a different location. The file should be named something like “googlechrome.dmg”.
Open a new Finder window on your Mac by clicking on the Finder icon in the dock. Navigate to the ‘Downloads’ folder or the folder where the Google Chrome installer file is located.
In the Finder window, you should see the Google Chrome installer file. Click and hold the file with your mouse or trackpad, then drag it across to the Applications folder in the sidebar of the Finder window.
While dragging the file, you will notice a green plus icon and a message that says “Copy” or “Move” depending on your macOS version. Release the mouse button to drop the file into the Applications folder.
Depending on your Mac’s settings, you may need to enter your administrator password to authorize the move or copy action. This is a security measure to ensure that only authorized users can install applications on your system.
Wait for the file transfer to complete. The time it takes will depend on the size of the Google Chrome installer file and the speed of your Mac.
Once the transfer is complete, you can close the Finder window. Google Chrome is now installed in your Applications folder and ready to be opened.
Congratulations! You have successfully dragged and dropped Google Chrome into the Applications folder, ensuring that it is properly installed and conveniently accessible on your Mac.
In the next step, we’ll guide you on how to open Google Chrome on your Mac for the first time.
Step 6: Open Google Chrome on your Mac
Now that you have successfully installed Google Chrome on your Mac, it’s time to open it and start browsing the web with the popular web browser. Opening Google Chrome is a simple process, and there are a few different ways you can do it in macOS.
One way to open Google Chrome is to locate the Applications folder on your Mac. You can do this by clicking on the Finder icon in the dock, then selecting “Applications” from the left sidebar. In the Applications folder, find the Google Chrome icon, which looks like a circular red, yellow, green, and blue icon. Double-click on the icon to launch Google Chrome.
Another quick way to open Google Chrome is to use Spotlight Search. To access Spotlight Search, press the “Command” key and the spacebar together on your keyboard. This will bring up the Spotlight Search bar. Start typing “Google Chrome” into the search bar, and as you type, you should see Google Chrome listed as a suggestion. Click on the suggestion to open Google Chrome.
If you frequently use Google Chrome, you might want to add it to your dock for easy access. To do this, find the Google Chrome icon in the Applications folder or through Spotlight Search. Once you locate the icon, click and hold on it, then drag it to the dock on your Mac. Release the mouse button to add Google Chrome to your dock.
Once you have opened Google Chrome, you will see a new window with the Google search bar and other browser elements. You are now ready to browse the internet using Google Chrome on your Mac.
Google Chrome offers many features and customization options to enhance your browsing experience. You can sign in with your Google account to sync your bookmarks, history, and other settings across devices. You can also install various extensions and add-ons to personalize and enhance Chrome’s functionality.
Congratulations! You have successfully opened Google Chrome on your Mac. Enjoy exploring the web with this fast, secure, and feature-rich web browser.
This concludes the process of opening Google Chrome on your Mac. Feel free to explore its various features and settings to make the most out of your browsing experience.
Conclusion
Congratulations! You have successfully downloaded and installed Google Chrome on your Mac. By following the step-by-step guide outlined in this article, you now have a fast and reliable web browser at your fingertips.
Google Chrome offers a multitude of features and benefits that can enhance your browsing experience. With its user-friendly interface, speed, and extensive range of extensions and add-ons, you can customize Chrome to fit your needs and preferences.
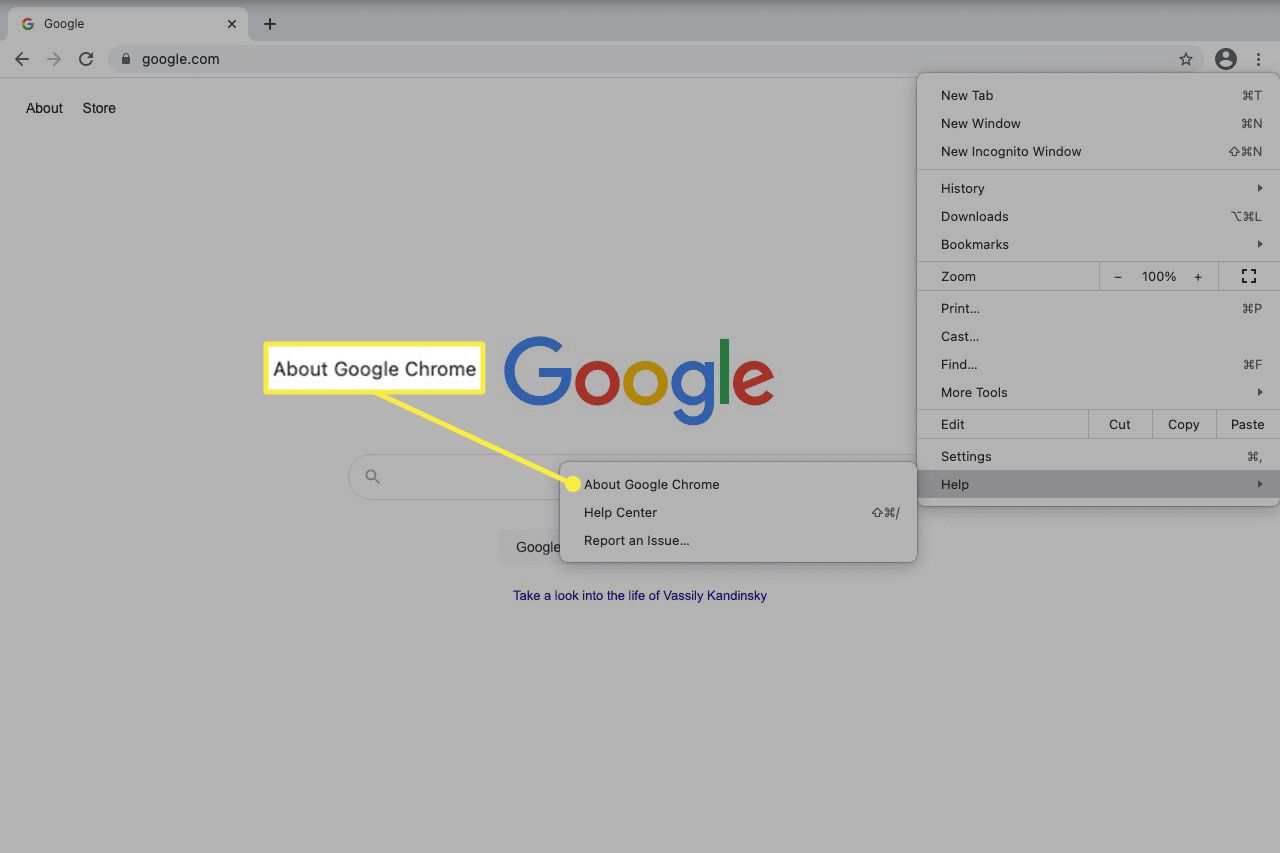
Remember to regularly update Google Chrome to ensure that you have the latest security patches and features. Chrome will automatically update by default, but you can also manually check for updates by clicking on the three dots in the top-right corner of the browser window and selecting “About Google Chrome.”
Whether you’re using Chrome for work, entertainment, or both, you can take advantage of its advanced features such as tab management, incognito browsing, and bookmark syncing across devices. Additionally, Chrome’s integration with other Google services, such as Gmail and Google Drive, makes it convenient for users who rely on Google’s ecosystem.
Now that you have Google Chrome installed and ready to use, feel free to explore the vast world of the internet, conduct research, stream videos, connect with friends on social media, or whatever else you enjoy doing online.
Thank you for following this guide on how to download and install Google Chrome for Mac. Enjoy your browsing experience with this powerful web browser!