Introduction
Clearing the cache in Google Chrome on a Mac can significantly improve the browser's performance and resolve various issues related to browsing data. The cache is a temporary storage location for files that are downloaded by your browser to display websites. Over time, this cache can become bloated, leading to slower browsing speeds and potential display errors on websites. By clearing the cache, you can ensure that your browser is running efficiently and displaying web content accurately.
In this comprehensive guide, we will walk you through the step-by-step process of clearing the cache in Google Chrome on your Mac. Whether you're experiencing sluggish browsing speeds, encountering website display issues, or simply want to optimize your browser's performance, clearing the cache is a simple yet effective solution. By following these instructions, you can easily clear the cache in Google Chrome and enjoy a smoother browsing experience on your Mac.
Let's dive into the details and explore the simple steps to clear the cache in Google Chrome on your Mac, ensuring that your browser operates at its optimal performance level.
Step 1: Open Chrome Settings
To begin the process of clearing the cache in Google Chrome on your Mac, you first need to access the browser's settings. Follow these simple steps to open Chrome settings:
-
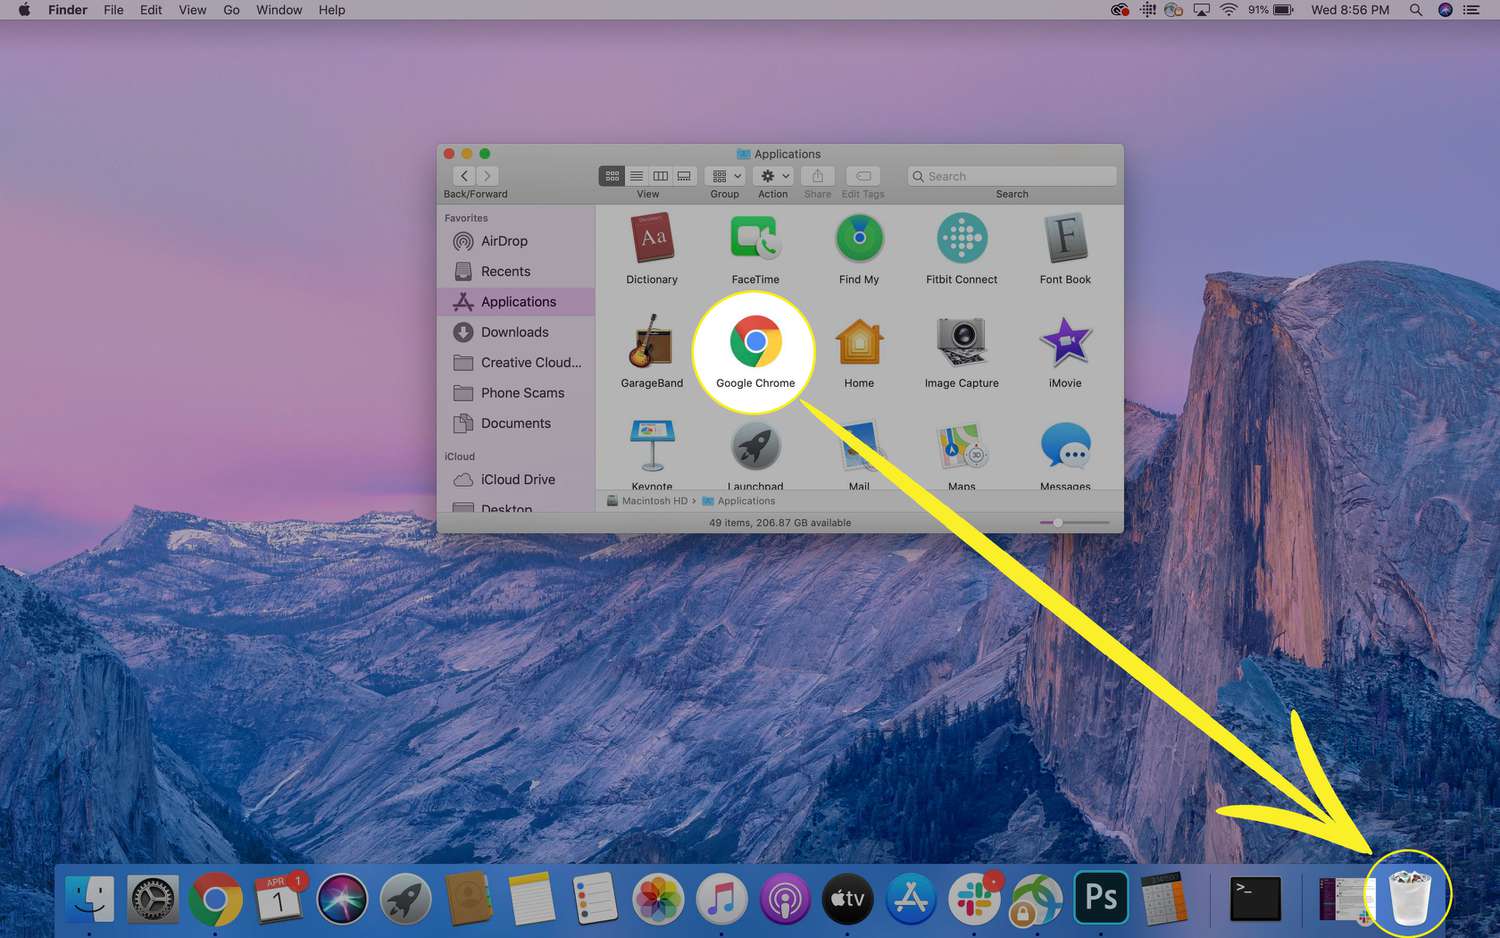
Launch Google Chrome: Locate the Chrome icon in your applications folder or on the dock and click to open the browser.
-
Access the Menu: Once Chrome is open, look to the top-right corner of the window for the three vertical dots, which represent the Chrome menu. Click on these dots to open the menu.
-
Navigate to Settings: From the menu, scroll down and select "Settings." This action will open a new tab in your Chrome browser, displaying various options and preferences for customizing your browsing experience.
By following these steps, you can easily access the settings within Google Chrome on your Mac. Opening the Chrome settings is the initial step in the process of clearing the cache, allowing you to proceed to the next steps and optimize your browsing experience.
Now that you have successfully accessed the Chrome settings, you are ready to move on to the next step in the cache-clearing process. This will involve navigating through the settings to locate the specific option for clearing the cache and effectively improving your browser's performance.
Step 2: Clear Browsing Data
Once you have accessed the settings in Google Chrome on your Mac, the next crucial step in clearing the cache involves clearing your browsing data. This process allows you to remove temporary files, cookies, and other site data that may be contributing to performance issues or display errors in the browser. Follow these detailed steps to effectively clear your browsing data in Google Chrome:
-
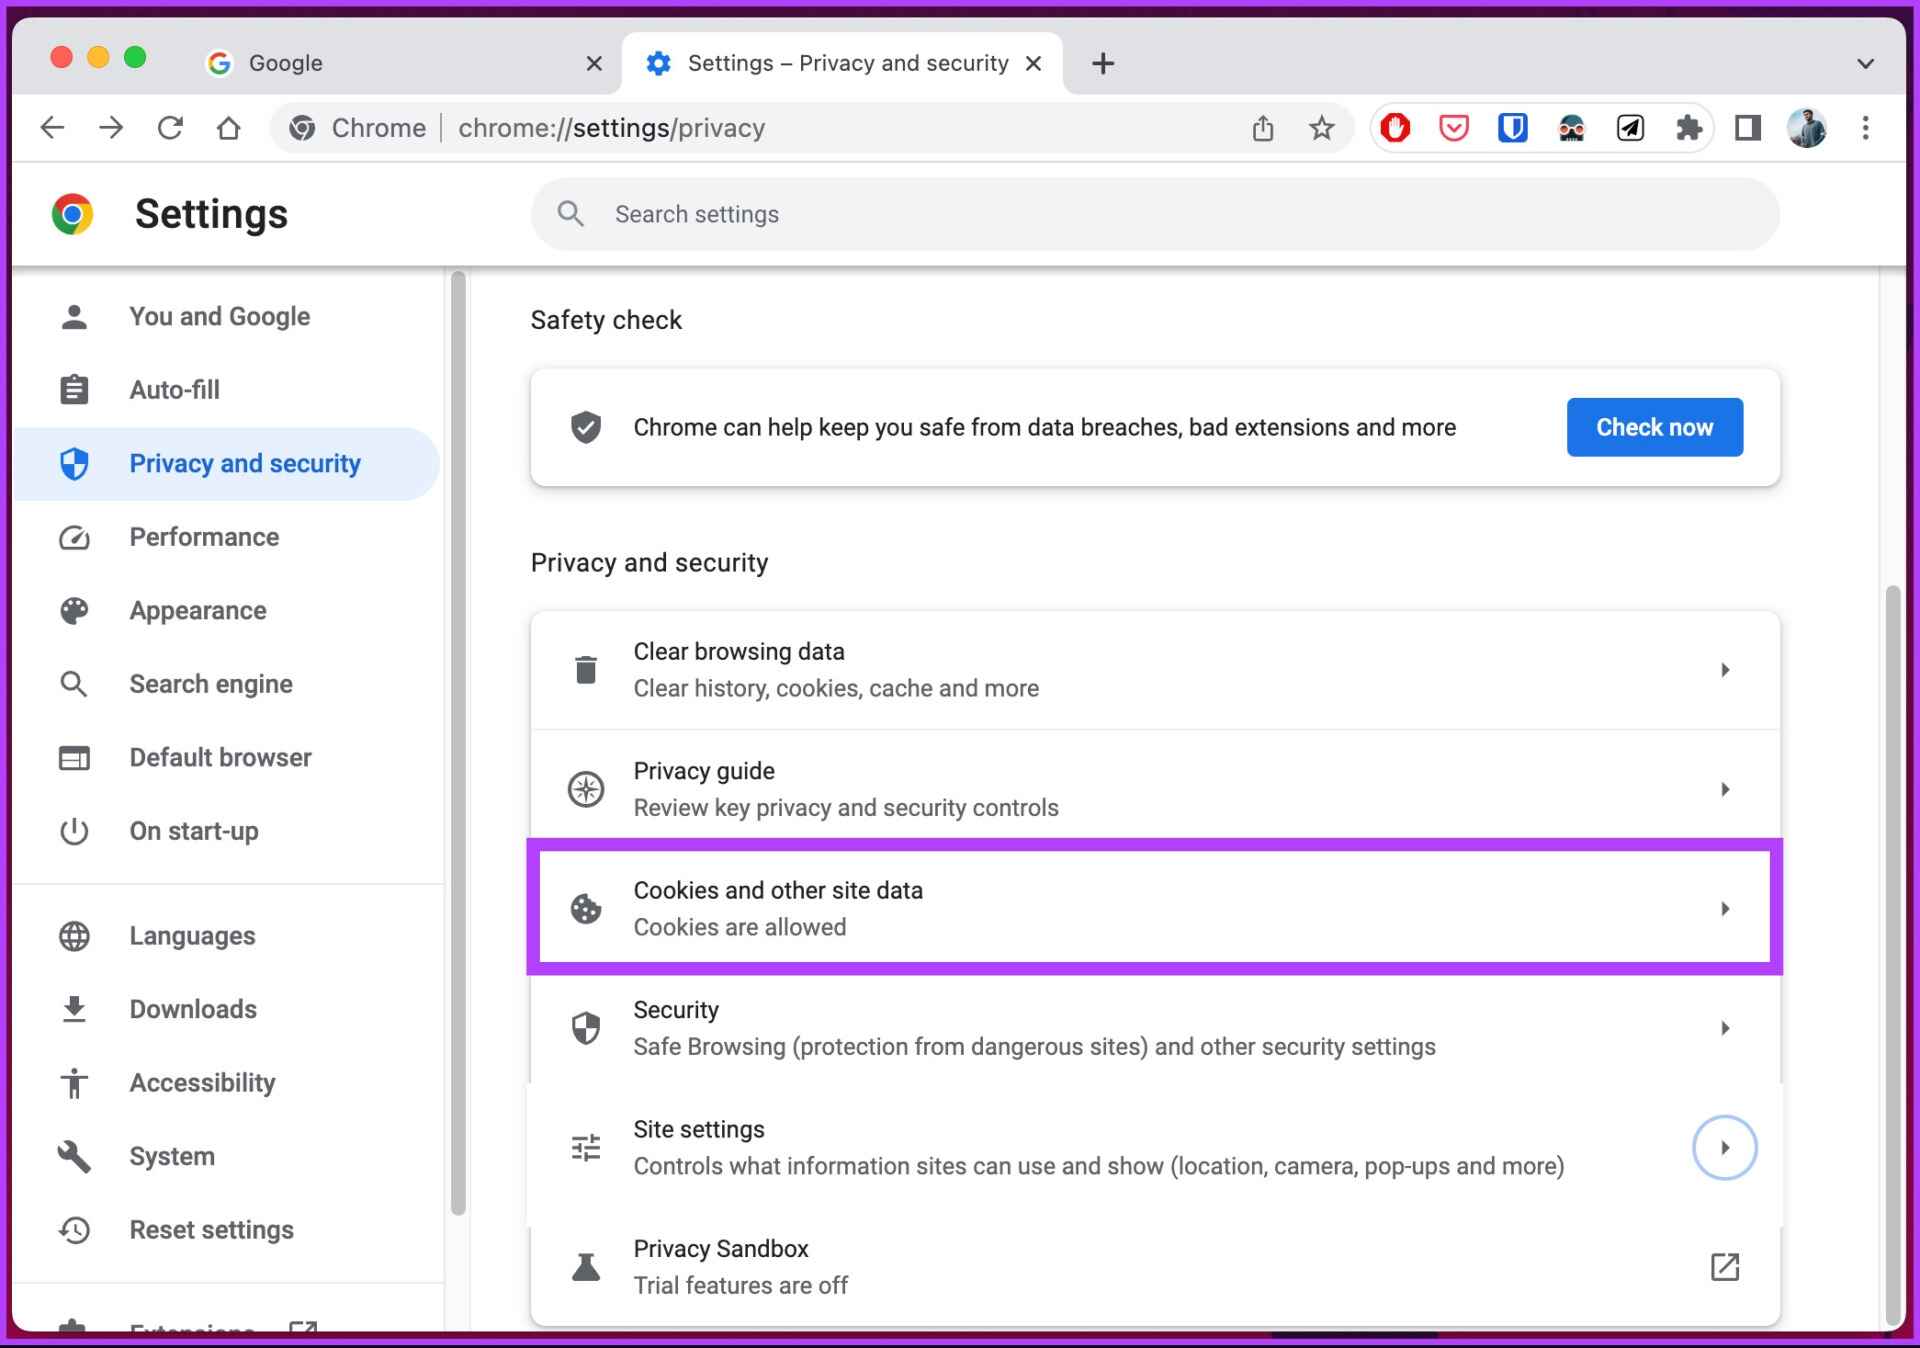
Navigate to the Privacy and Security Section: Within the Chrome settings tab, locate and click on the "Privacy and Security" option in the left-hand navigation panel. This will reveal a range of privacy and security settings that you can customize to enhance your browsing experience.
-
Select Browsing Data: Under the "Privacy and Security" section, find and click on the "Clear browsing data" option. This will open a new window where you can specify the types of browsing data you want to clear from your browser.
-
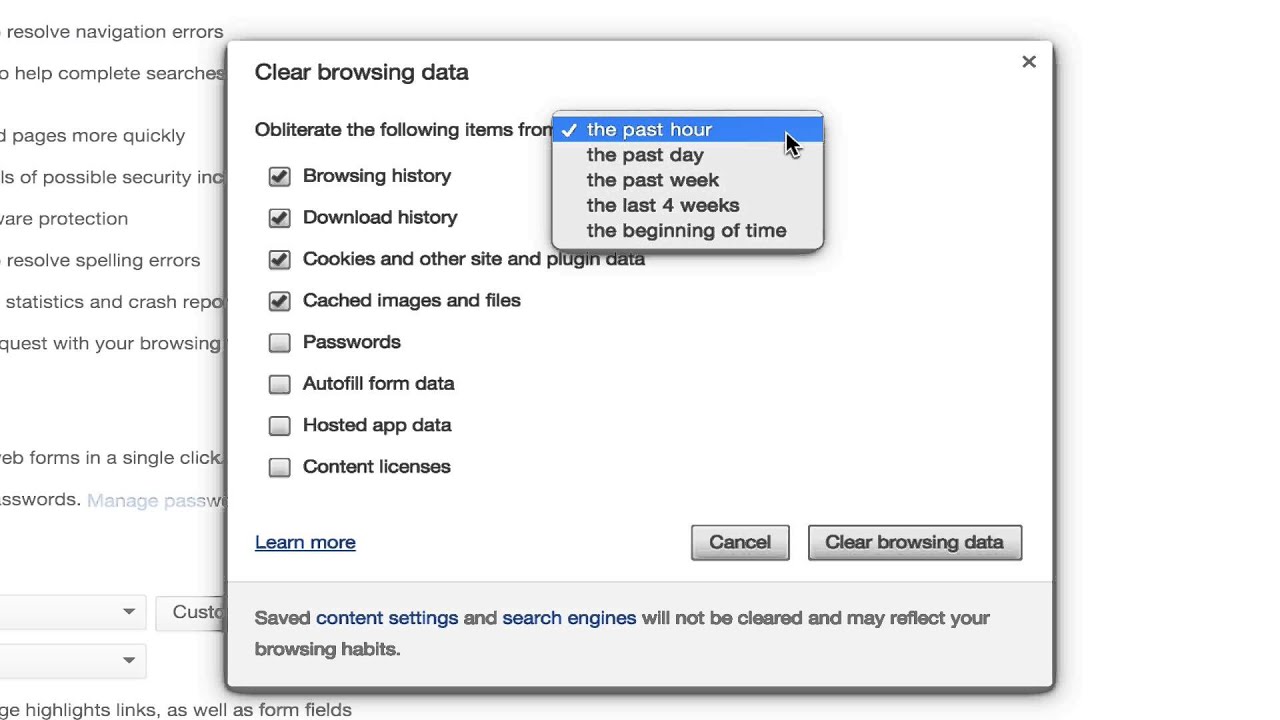
Choose Time Range: In the "Clear browsing data" window, you can select the time range for which you want to clear browsing data. You have the option to clear data from the past hour, day, week, month, or all time, depending on your preferences.
-
Select Data Types: Check the boxes next to the types of data you want to clear. These may include browsing history, download history, cookies and other site data, cached images and files, and more. For the purpose of clearing the cache, ensure that the "Cached images and files" option is selected.
-
Clear Data: Once you have chosen the time range and selected the types of data to clear, click on the "Clear data" button. Chrome will then proceed to remove the selected browsing data from your browser.
By following these detailed steps, you can effectively clear your browsing data in Google Chrome on your Mac. This process ensures that temporary files and other data that may be impacting your browsing experience are removed, allowing you to optimize the performance of your browser. With your browsing data cleared, you are now ready to proceed to the next step in the cache-clearing process, which involves specifically targeting cached images and files for removal.
Step 3: Select Cached Images and Files
After clearing your browsing data in Google Chrome on your Mac, the next crucial step in the cache-clearing process involves specifically targeting cached images and files for removal. Cached images and files are temporary data stored by the browser to enhance the loading speed of websites you frequently visit. However, over time, this cache can become bloated, leading to potential performance issues and display errors. By selecting and clearing cached images and files, you can ensure that your browser operates efficiently and displays web content accurately.
Follow these detailed steps to effectively select and clear cached images and files in Google Chrome:
-
Access the Clear Browsing Data Window: After clearing your browsing data in the previous step, ensure that you are still within the "Clear browsing data" window in Chrome settings. If not, navigate back to this window by following the steps outlined in the previous section.
-
Select Cached Images and Files: Within the "Clear browsing data" window, ensure that the "Cached images and files" option is checked. This specific option targets the temporary images and files stored by the browser to improve website loading times. By selecting this option, you are indicating that you want to clear the cached images and files from your browser.
-
Review Other Data Types: While focusing on cached images and files, you may also review and adjust the selection of other data types based on your preferences. These may include browsing history, download history, cookies and other site data, and more. However, for the purpose of clearing the cache, the primary focus is on the "Cached images and files" option.
-
Confirm and Clear Data: Once you have ensured that the "Cached images and files" option is selected, proceed to click on the "Clear data" button within the "Clear browsing data" window. This action will prompt Chrome to remove the selected cached images and files from your browser, further optimizing its performance.
By following these detailed steps, you can effectively select and clear cached images and files in Google Chrome on your Mac. This process ensures that temporary data stored to enhance website loading speeds is removed, allowing you to enjoy a smoother and more efficient browsing experience. With the cached images and files cleared, you have successfully completed the essential steps to clear the cache in Google Chrome on your Mac, optimizing the performance of your browser.
Step 4: Clear Data
After targeting and clearing the cached images and files in the previous step, the final crucial stage in the cache-clearing process involves the comprehensive clearing of data in Google Chrome on your Mac. This step ensures that any remaining temporary files, cookies, and site data are effectively removed from the browser, further optimizing its performance and resolving potential display issues on websites.
Follow these detailed steps to effectively clear data in Google Chrome on your Mac:
-
Access the Clear Browsing Data Window: Ensure that you are still within the "Clear browsing data" window in Chrome settings. If not, navigate back to this window by following the steps outlined in the previous sections.
-
Review Data Types: Within the "Clear browsing data" window, review the selection of data types to ensure that all relevant browsing data is targeted for removal. This may include browsing history, download history, cookies and other site data, cached images and files, and more.
-
Choose Time Range: If necessary, select the time range for which you want to clear browsing data. Chrome provides options to clear data from the past hour, day, week, month, or all time, allowing you to customize the scope of the data clearance based on your preferences.
-
Select Data Types: Check the boxes next to the types of data you want to clear. Ensure that all relevant data types are selected based on your browsing habits and the specific issues you aim to resolve. By targeting specific data types, you can effectively optimize your browser's performance.
-
Clear Data: Once you have reviewed and confirmed the selection of data types to clear, proceed to click on the "Clear data" button within the "Clear browsing data" window. This action prompts Chrome to comprehensively remove the selected data from your browser, ensuring that temporary files and site data are effectively cleared.
By following these detailed steps, you can effectively clear data in Google Chrome on your Mac, optimizing the browser's performance and resolving potential issues related to browsing data. With the cache thoroughly cleared and data effectively removed, you have successfully completed the essential steps to clear the cache in Google Chrome on your Mac, ensuring that your browser operates at its optimal performance level.
This comprehensive process not only enhances the efficiency of your browsing experience but also contributes to the overall maintenance and upkeep of your browser, allowing you to enjoy a seamless and reliable web browsing experience on your Mac.