Introduction
So, you've been using your trusty mechanical keyboard for a while now, and it's starting to show signs of wear and tear. Maybe the keys are sticking, or perhaps it's just in need of a good cleaning. Fear not, because disassembling a mechanical keyboard is a straightforward process that can breathe new life into your beloved typing companion.
Whether you're a gaming enthusiast, a programmer, or simply someone who appreciates the tactile feedback and durability of a mechanical keyboard, knowing how to disassemble it can be a valuable skill. By taking the keyboard apart, you can clean out any debris, replace worn-out components, or customize it to your liking.
In this guide, we'll walk you through the step-by-step process of disassembling a mechanical keyboard. From gathering the necessary tools to reassembling the keyboard, we've got you covered. By the end of this tutorial, you'll have the knowledge and confidence to tackle this task with ease.
So, roll up your sleeves, grab your tools, and let's dive into the world of mechanical keyboards. It's time to unleash the inner workings of your keyboard and give it the care and attention it deserves.
Step 1: Gather the Necessary Tools
Before embarking on the disassembly process, it’s essential to gather the appropriate tools to ensure a smooth and efficient experience. Here’s what you’ll need:
- Keycap Puller: This tool is crucial for safely removing the keycaps from the switches without causing damage.
- Screwdriver Set: Depending on the keyboard model, you may require a Phillips or Torx screwdriver to access the internal components.
- Tweezers: These come in handy for handling small components and reaching tight spaces within the keyboard.
- Compressed Air: A can of compressed air is useful for blowing away dust and debris from the keyboard’s interior.
- Brush or Cleaning Cloth: Utilize a soft brush or microfiber cloth to gently clean the keycaps and keyboard housing.
- Container or Ziplock Bags: Use these to store the keycaps and screws during the disassembly process to prevent loss.
- Workspace: Find a well-lit and spacious area to work on, preferably with a soft surface to prevent damage to the keyboard.
By ensuring you have these tools at your disposal, you’ll be well-prepared to tackle the disassembly process with confidence. With everything in place, you’re ready to move on to the next step: removing the keycaps.
Step 2: Remove the Keycaps
With the necessary tools at hand, it’s time to delve into the disassembly process by removing the keycaps. This step is essential for gaining access to the keyboard’s switches and underlying components. Here’s a systematic approach to accomplishing this:
- Use the Keycap Puller: Position the keycap puller over a keycap, ensuring that it latches onto the sides of the keycap. Gently pull upwards to detach the keycap from the switch stem. Repeat this process for all the keycaps, placing them in a safe container or ziplock bag to prevent misplacement.
- Inspect the Keycap Stabilizers: Some keyboards feature stabilizer bars beneath larger keys such as the spacebar and shift keys. Take note of their orientation and attachment mechanism for reassembly later.
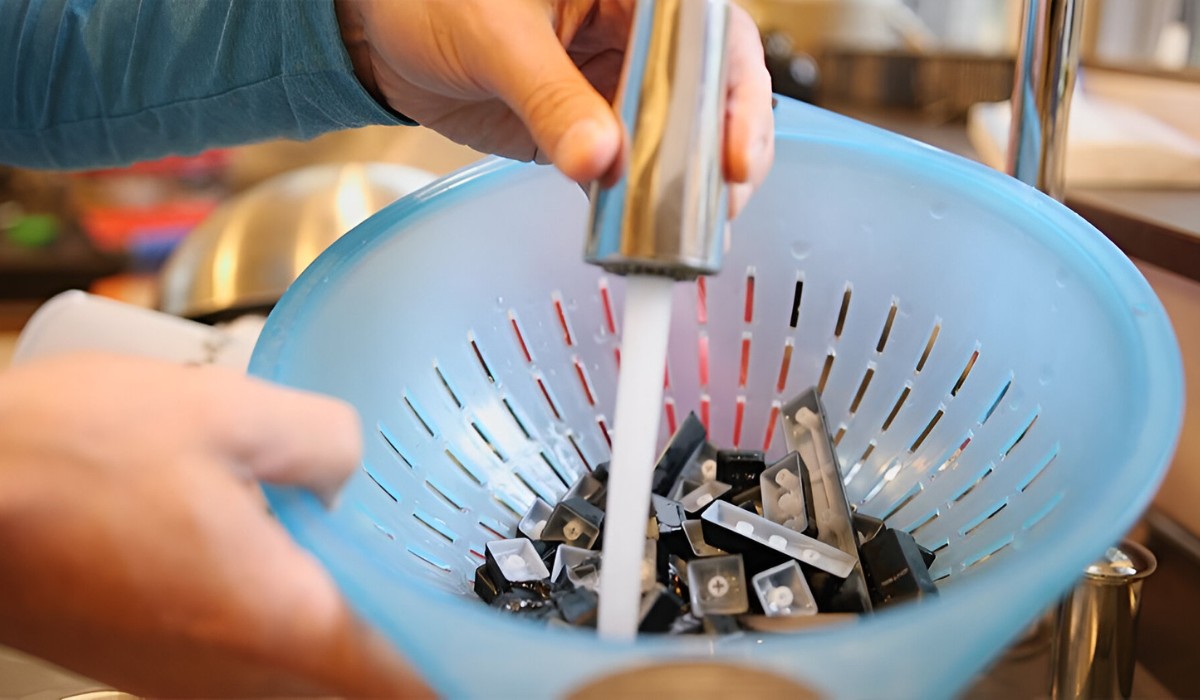
- Clean the Keycaps: Once the keycaps are removed, take the opportunity to clean them thoroughly. Use a mild cleaning solution and a soft brush or cloth to remove any accumulated grime or residue.
By carefully executing these steps, you’ll successfully free the keycaps from the switches, paving the way for the subsequent stages of the disassembly process. With the keycaps safely stowed away, you’re now ready to proceed to the next phase: unscrewing the keyboard’s housing.
Step 3: Unscrew the Keyboard
Now that the keycaps have been removed, the next phase involves accessing the internal components of the keyboard by unscrewing its housing. This step may vary slightly depending on the keyboard model, but the following general guidelines will help you navigate this process:
- Locate and Identify the Screws: Examine the back and underside of the keyboard to identify the screws holding the housing together. They are commonly found beneath rubber pads or stickers, requiring gentle removal to access the screws.
- Use the Appropriate Screwdriver: Select the suitable screwdriver from your set, whether it’s a Phillips or Torx screwdriver, to effectively remove the screws. Keep the screws organized and consider using a magnetic tray to prevent misplacement.
- Store the Screws Safely: As each screw is removed, place it in a designated container or an organized layout to facilitate easy retrieval during reassembly. This meticulous approach minimizes the risk of losing crucial components.
- Handle with Care: Exercise caution when unscrewing the housing to avoid applying excessive force, which could lead to damage. Take your time and ensure that all screws are fully disengaged before proceeding to the next step.
By meticulously following these steps, you’ll successfully dismantle the keyboard’s housing, granting access to the internal circuitry and switches. With the housing unscrewed and the screws safely stored, you’re now prepared to advance to the subsequent stage: disconnecting the keyboard’s cable.
Step 4: Disconnect the Cable
As the disassembly process progresses, the next crucial step involves disconnecting the cable that links the keyboard to the computer or other devices. This step is essential to ensure safe and unhindered access to the keyboard’s internal components. Here’s how to approach this phase:
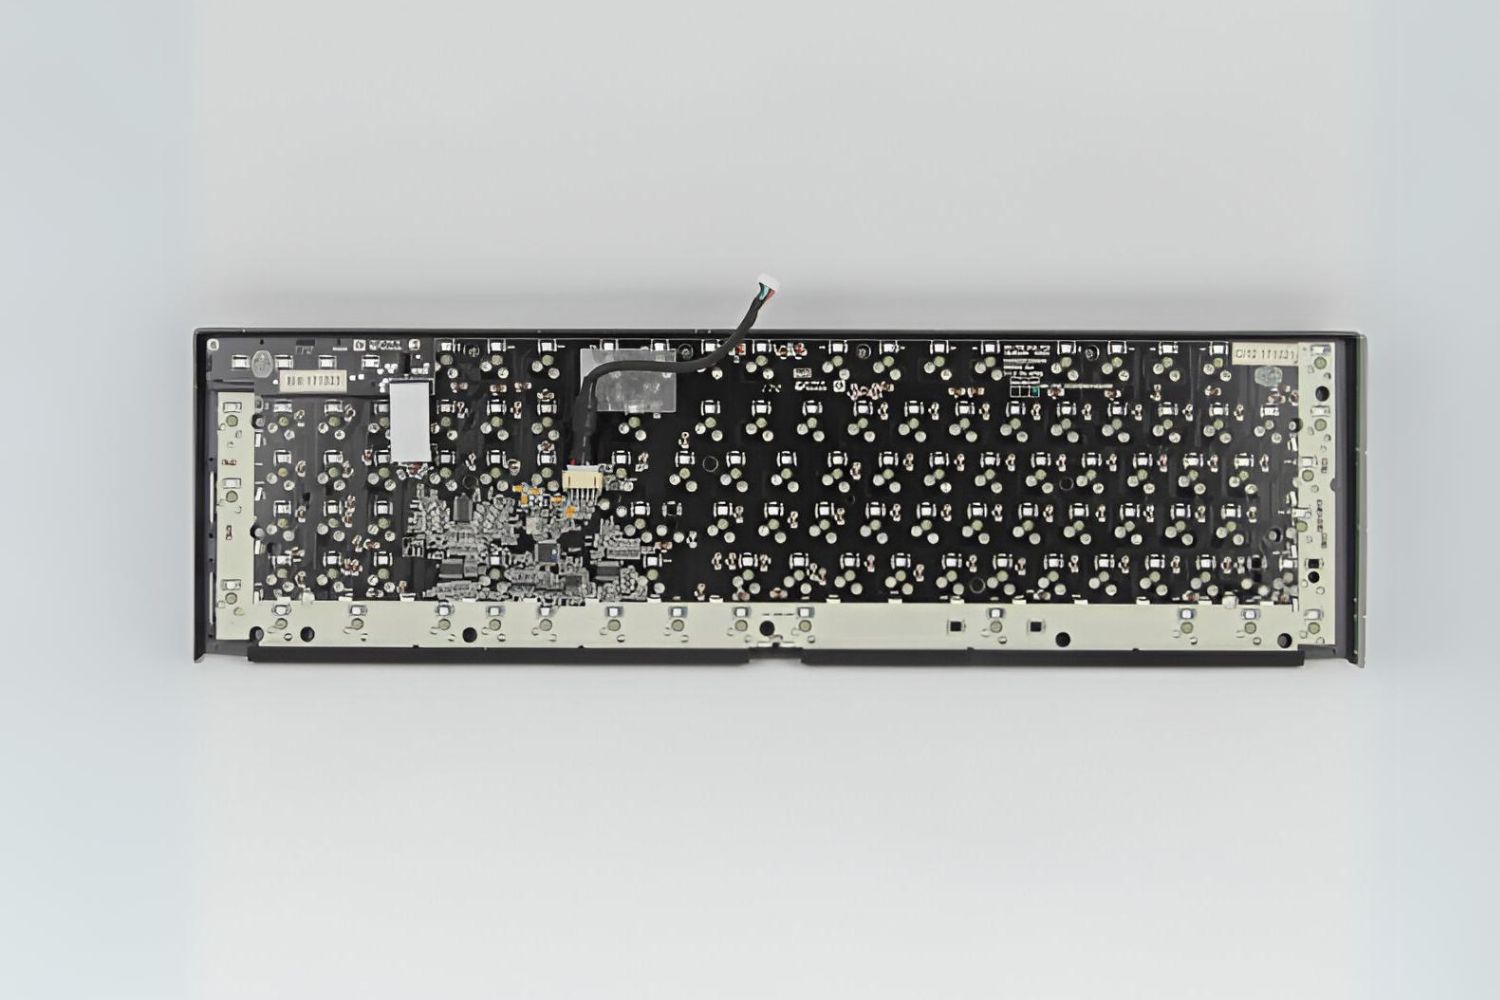
- Locate the Cable Connection: Identify the point where the cable connects to the keyboard. This is typically situated at the rear of the keyboard, near the center or to one side. Take note of how the cable is routed within the keyboard’s housing for reassembly later.
- Disconnect the Cable: Gently and firmly grasp the connector, ensuring a stable grip, and carefully detach it from the keyboard’s circuit board. Exercise caution to avoid applying excessive force or causing damage to the connector or the board.
- Secure the Cable: Once disconnected, secure the cable in a safe position to prevent it from interfering with the subsequent stages of the disassembly process. Avoid placing strain on the cable or subjecting it to sharp bends or twists.
By successfully completing this step, you’ll effectively isolate the keyboard from its external connections, allowing for unimpeded access to the internal components. With the cable safely disconnected and secured, you’re now ready to progress to the subsequent stage: removing the top cover of the keyboard.
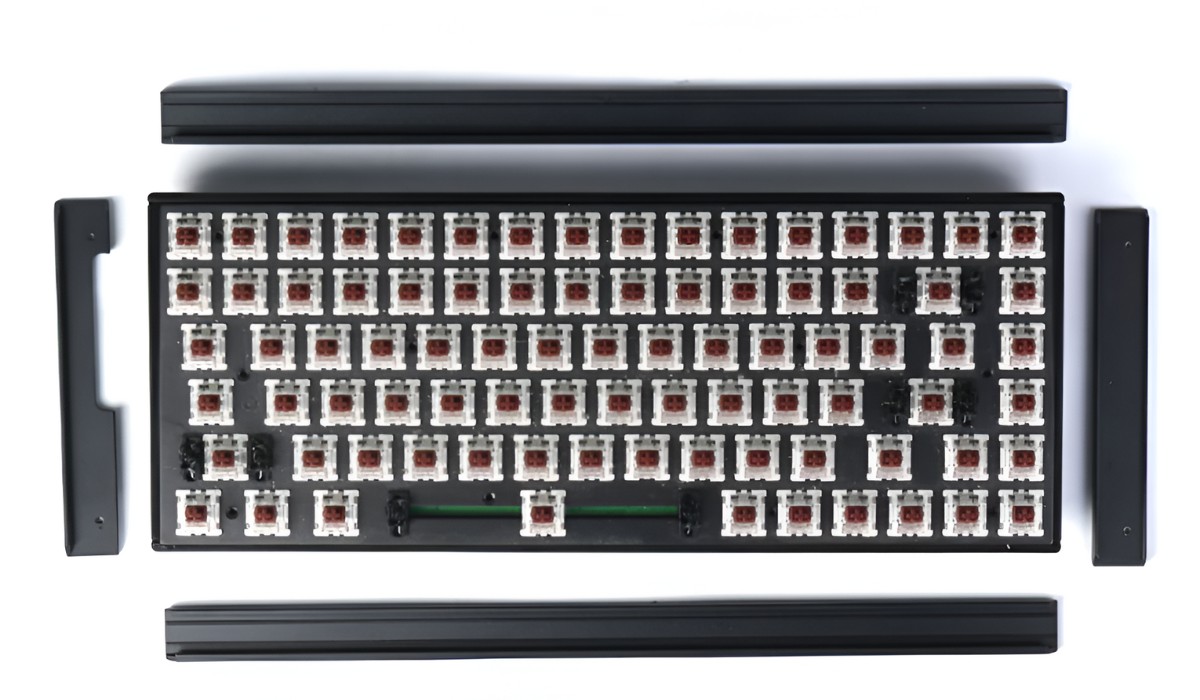
Step 5: Remove the Top Cover
With the cable safely disconnected, the next pivotal phase involves removing the top cover of the keyboard, granting access to the intricate components housed within. Here’s a systematic guide to accomplishing this essential step:
- Identify the Attachment Points: Examine the edges and underside of the keyboard to locate any clips, screws, or latches securing the top cover. These securing mechanisms may vary based on the keyboard model and design.
- Release the Securing Mechanisms: Employ the appropriate method to disengage the securing mechanisms, whether it involves unscrewing fasteners, releasing clips, or gently prying apart latches. Exercise care to avoid causing damage to the cover or the keyboard’s internal components.
- Lift Off the Top Cover: Once the securing mechanisms have been disengaged, carefully lift off the top cover, ensuring a steady and controlled motion to prevent any abrupt or forceful actions that could lead to damage.
- Set Aside the Top Cover: Place the removed top cover in a safe and designated location, ensuring that it is protected from accidental damage or contamination during the subsequent stages of the disassembly process.
By methodically executing these steps, you’ll successfully uncover the internal workings of the keyboard, setting the stage for the subsequent phases of the disassembly process. With the top cover removed and safely set aside, you’re now prepared to advance to the next stage: removing the switches from the keyboard.
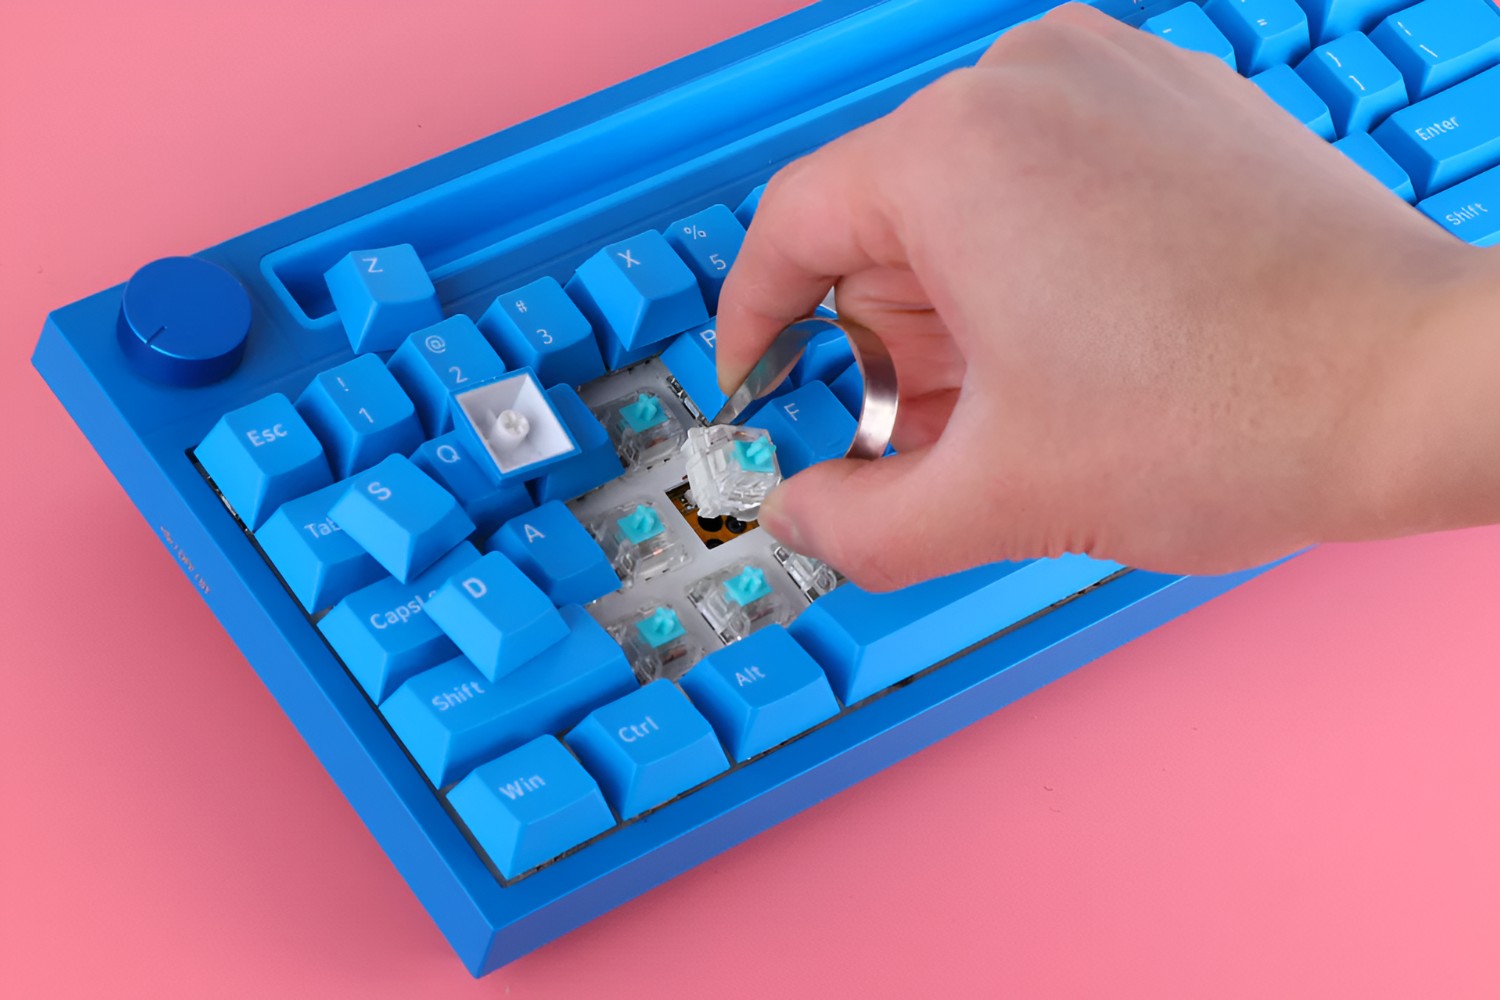
Step 6: Remove the Switches
As the disassembly process progresses, the pivotal next step involves removing the switches from the keyboard. This phase allows for thorough cleaning, switch replacement, or customization. Here’s a comprehensive guide to accomplishing this critical step:
- Evaluate the Switch Mounting: Assess how the switches are mounted within the keyboard. Depending on the keyboard model, they may be secured by clips, screws, or a plate. Take note of the mounting mechanism for reassembly purposes.
- Release the Switches: Depending on the mounting method, carefully disengage the switches from their housing. This may involve releasing clips, unscrewing fasteners, or desoldering if the switches are mounted directly to a PCB (printed circuit board).
- Handle with Care: Exercise caution when removing the switches to prevent damage to the delicate switch housings and the underlying circuitry. Ensure a steady and controlled approach to minimize the risk of mishaps.
- Organize the Removed Switches: Keep the removed switches organized and labeled if you plan to reinsert them or replace them with new ones. This systematic approach simplifies the reassembly process and prevents confusion.
By meticulously executing these steps, you’ll effectively free the switches from the keyboard, opening up opportunities for maintenance, customization, or replacement as needed. With the switches safely removed and organized, you’re now prepared to advance to the subsequent stage: cleaning the keyboard components.
Step 7: Clean the Keyboard Components
With the keyboard disassembled and the switches removed, it’s an opportune time to thoroughly clean the various components. Over time, dust, debris, and residues can accumulate within the keyboard, affecting its performance and longevity. Here’s a detailed guide to effectively clean the keyboard components:
- Clean the Top Cover and Housing: Utilize a soft brush, microfiber cloth, or compressed air to remove dust and debris from the top cover and housing. Pay attention to crevices and corners where contaminants may accumulate.
- Clean the Switches and Keycaps: Inspect the switches and keycaps for any debris or residues. Use compressed air to dislodge any particles and wipe the components with a mild cleaning solution and a soft cloth if necessary.
- Clean the PCB and Circuitry: Exercise caution when cleaning the PCB (printed circuit board) and other electronic components. Use a specialized electronics cleaning brush or compressed air to remove dust and ensure the components are free from contaminants.
- Inspect for Residues: Thoroughly inspect all components for any stubborn residues or spills. Address any persistent residues with a gentle cleaning solution and a lint-free cloth, ensuring that the components are completely dry before reassembly.
By diligently following these cleaning procedures, you’ll ensure that the keyboard components are free from dust, debris, and contaminants, thereby enhancing its performance and longevity. With the components meticulously cleaned and inspected, you’re now prepared to advance to the final stage: reassembling the keyboard.
Step 8: Reassemble the Keyboard
As the disassembly and cleaning processes are successfully completed, it’s time to reassemble the keyboard and restore it to its fully functional state. The reassembly phase requires meticulous attention to detail and a systematic approach to ensure that all components are securely and correctly reinstated. Here’s a comprehensive guide to effectively reassembling the keyboard:
- Position the Switches: If any switches were removed, carefully position and secure them back into their respective mounting points, ensuring that they are correctly aligned and fully seated.
- Reattach the Top Cover: Align the top cover with the keyboard housing, ensuring that any securing mechanisms such as clips or screws are engaged securely. Exercise caution to prevent damage to the cover or the underlying components.
- Reconnect the Keyboard Cable: Gently reconnect the keyboard’s cable to the appropriate connector on the circuit board, ensuring a secure and stable connection without applying excessive force.
- Secure the Housing Screws: Using the appropriate screwdriver, reinsert and tighten the housing screws, ensuring that they are snug but not over-tightened to avoid damaging the housing or the internal components.
- Reinstall the Keycaps: Carefully position and press the keycaps onto the switch stems, ensuring that they are aligned correctly and seated evenly. Take note of any keycap stabilizers and ensure they are correctly positioned.
- Test the Keyboard: Before fully securing the top cover, perform a quick functional test of the keyboard to ensure that all keys are registering correctly and that the keyboard is functioning as expected.
By methodically following these reassembly steps, you’ll successfully restore the keyboard to its fully assembled and operational state. With the keyboard components securely reinstated and tested, you’ve effectively completed the reassembly process, breathing new life into your mechanical keyboard.