Introduction
Introduction
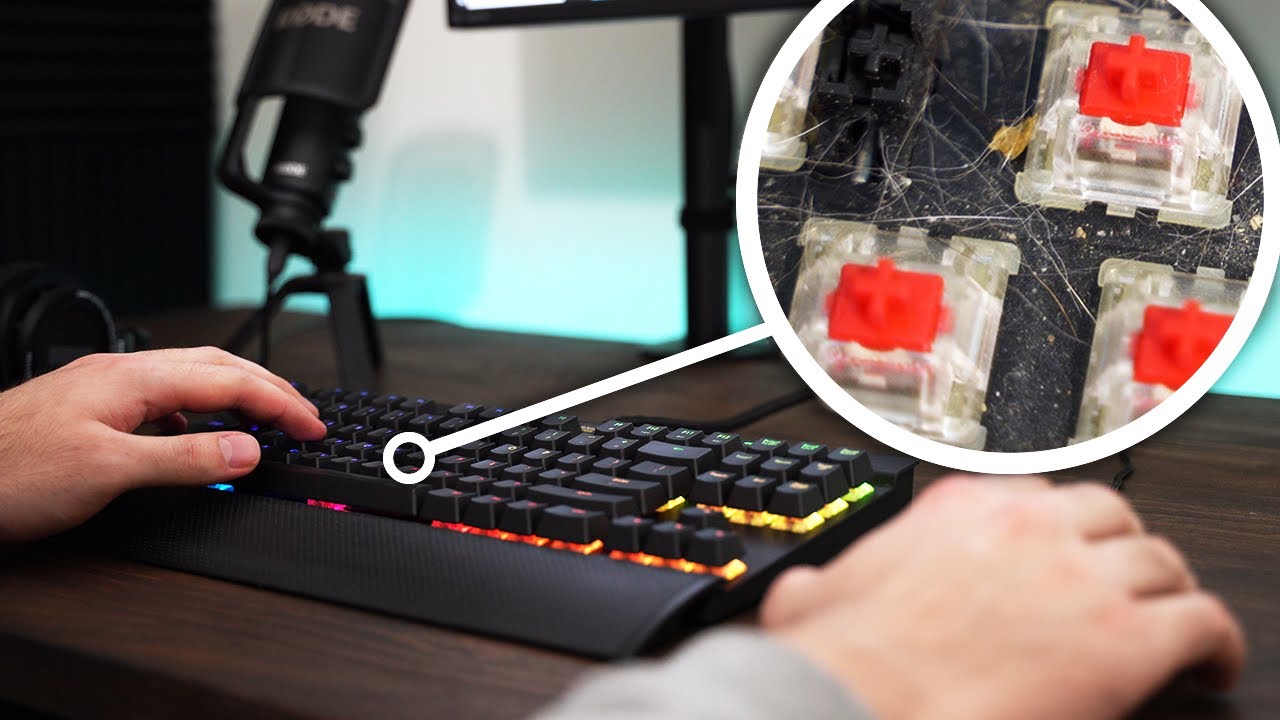
Cleaning under the keys of a mechanical keyboard is an essential maintenance task that can significantly extend the lifespan of your beloved input device. Over time, dust, crumbs, and other debris can accumulate under the keys, leading to a decline in performance and potential malfunctions. By regularly cleaning under the keycaps, you can ensure that your keyboard continues to function optimally and maintain its pristine appearance.
Mechanical keyboards are prized for their tactile feedback and durability, and proper maintenance is crucial to preserve these qualities. This article will guide you through the process of cleaning under the keys of a mechanical keyboard, providing step-by-step instructions and valuable tips to help you achieve a thorough and effective cleaning.
Whether you're an avid gamer, a programmer, or a professional who spends long hours typing, a clean keyboard not only enhances the user experience but also promotes a hygienic work environment. By investing a small amount of time and effort into cleaning your keyboard, you can prevent the accumulation of grime and ensure that each keystroke feels as satisfying as the first.
In the following sections, we will explore the tools and supplies needed for the cleaning process, the proper method for removing the keycaps without causing damage, the best practices for cleaning under the keycaps, and the reassembly of the keyboard. By the end of this guide, you will have the knowledge and confidence to maintain your mechanical keyboard in top condition, preserving its functionality and aesthetics for years to come.
Tools and Supplies Needed
Tools and Supplies Needed
Before embarking on the task of cleaning under the keys of your mechanical keyboard, it’s essential to gather the necessary tools and supplies to ensure a thorough and efficient cleaning process. Here’s a comprehensive list of items you’ll need:
- Keycap Puller: This specialized tool is designed to safely remove keycaps without causing damage to the switches or the keycaps themselves. Keycap pullers come in various designs, including wire-style and ring-style, and choosing the right one for your keyboard is crucial.
- Compressed Air Canister: A can of compressed air is indispensable for dislodging and removing dust, crumbs, and other debris from under the keycaps and within the keyboard housing. It provides a quick and effective method for cleaning without the need for physical contact.
- Microfiber Cloth: A soft, lint-free microfiber cloth is ideal for wiping down the keycaps and the keyboard’s surface. It’s gentle on the components and helps remove smudges, fingerprints, and light grime.
- Isopropyl Alcohol: A solution of isopropyl alcohol and water can be used to clean more stubborn stains or residue on the keycaps and the keyboard’s surface. It evaporates quickly and leaves no residue, making it suitable for electronic components.
- Cotton Swabs: These are useful for reaching tight spaces and corners, allowing for precise cleaning around the switches and underneath the keycaps.
- Tweezers: A pair of fine-point tweezers can assist in removing larger debris or foreign objects that may be trapped under the keycaps.
Having these tools and supplies at your disposal will ensure that you can effectively clean your mechanical keyboard with precision and care, maintaining its functionality and appearance. In the next section, we will delve into the process of removing the keycaps without causing damage to the keyboard.
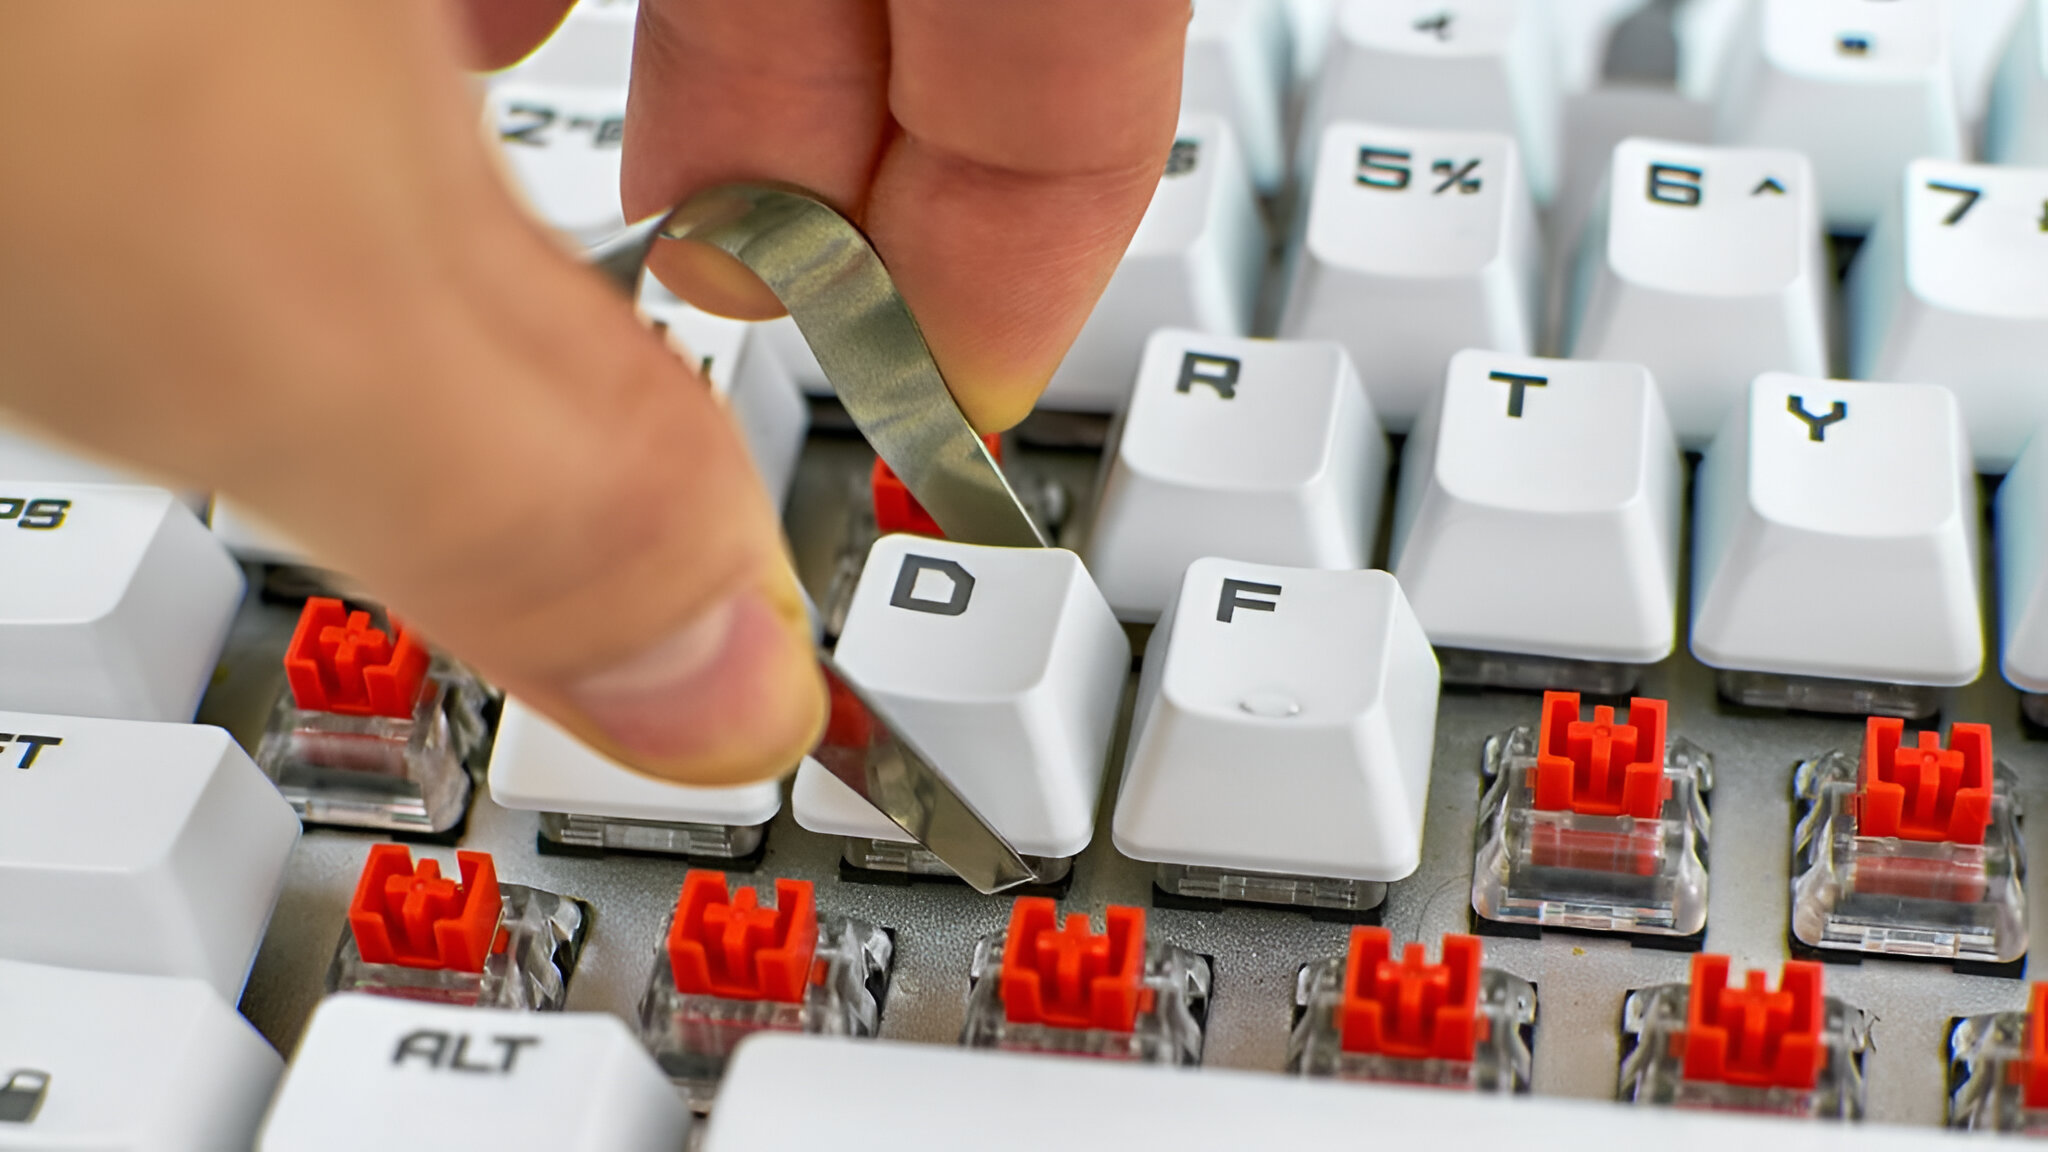
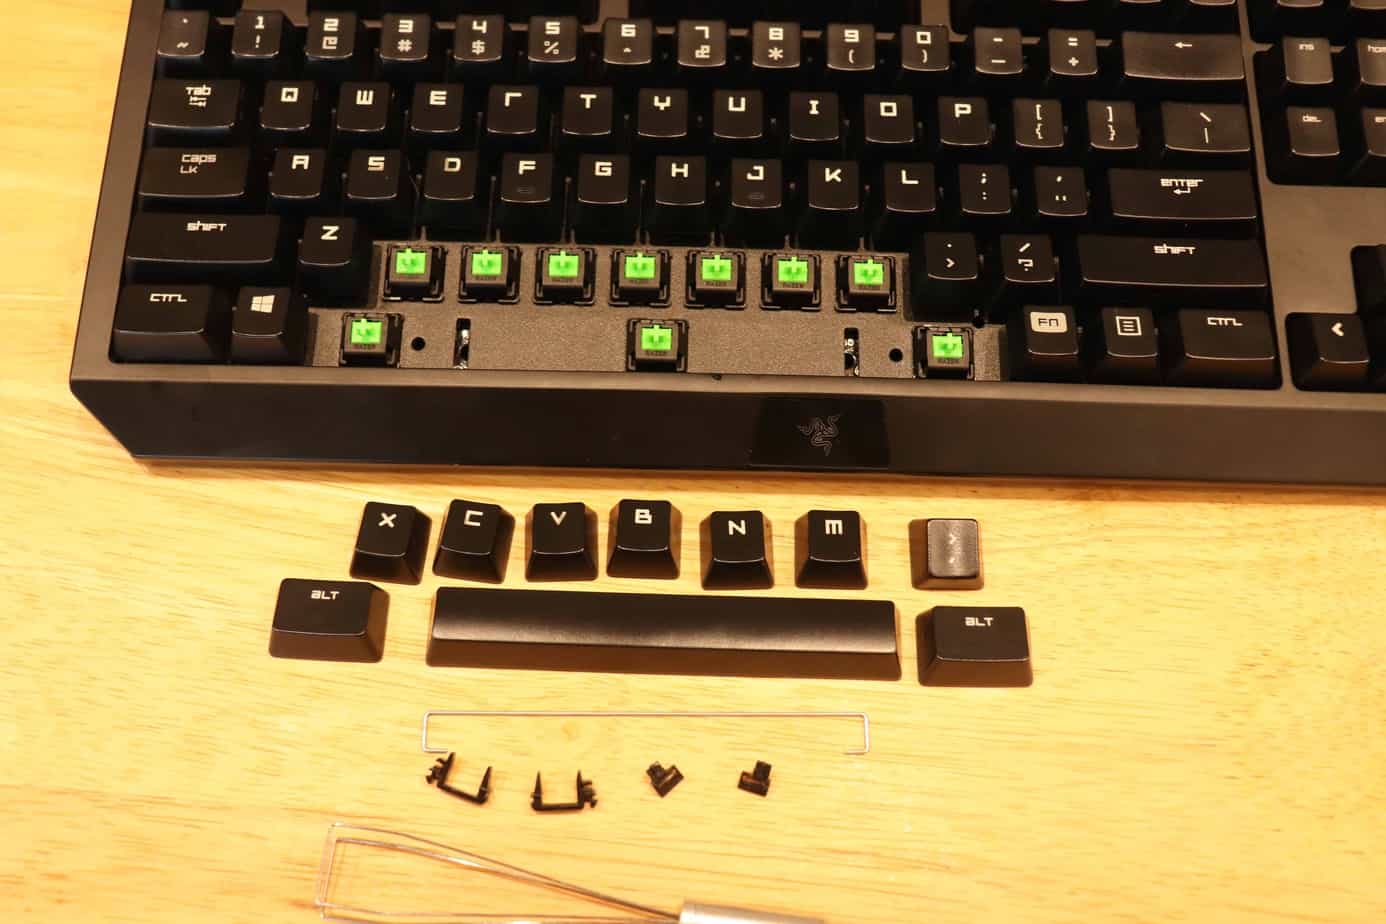
Removing the Keycaps
Removing the Keycaps
Before delving into the process of cleaning under the keycaps, it’s crucial to remove them carefully to avoid damaging the switches or the keycaps themselves. Here’s a step-by-step guide to safely removing the keycaps from your mechanical keyboard:
- Prepare Your Workspace: Find a clean and well-lit area to work on your keyboard. It’s advisable to perform this task on a flat surface to prevent the loss of small components.
- Use the Keycap Puller: Select the appropriate keycap puller for your keyboard. If you have a wire-style puller, position the wires under the keycap and gently squeeze the handles to grasp the sides of the keycap. For a ring-style puller, position the ring over the keycap and press down evenly to pull it off. It’s essential to exert even pressure to avoid bending or damaging the keycap.
- Start with the Outer Keys: Begin by removing the keycaps from the outer edges of the keyboard, such as the function keys or the numeric keypad. This approach allows for easier access to the inner keys as you progress.
- Work Methodically: Proceed to remove the keycaps in a systematic manner, working your way towards the center of the keyboard. Gently wiggle the keycap puller from side to side if the keycap feels resistant, but avoid excessive force to prevent any damage.
- Store the Keycaps Safely: As you remove the keycaps, place them in a secure container or a designated space to prevent them from getting lost or mixed up. Keeping them organized will make the reassembly process much smoother.
By following these steps, you can safely remove the keycaps from your mechanical keyboard without causing any harm to the switches or the keycaps themselves. With the keycaps successfully removed, you’re now ready to delve into the meticulous process of cleaning under the keycaps, which we’ll explore in the next section.
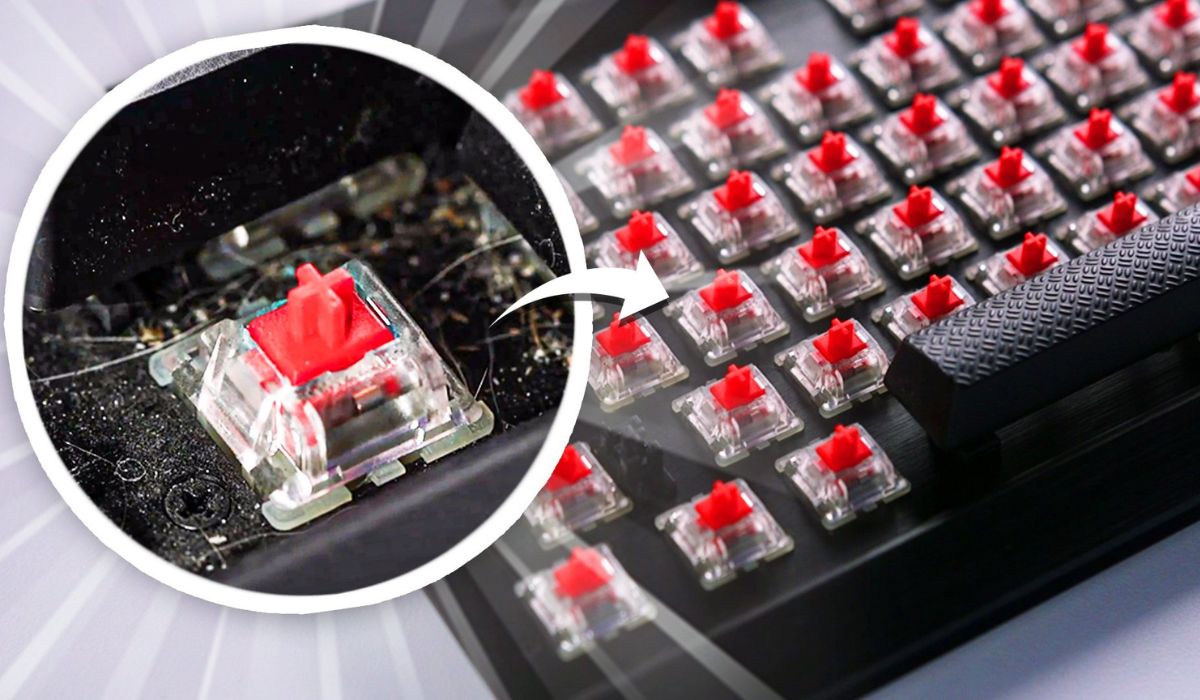
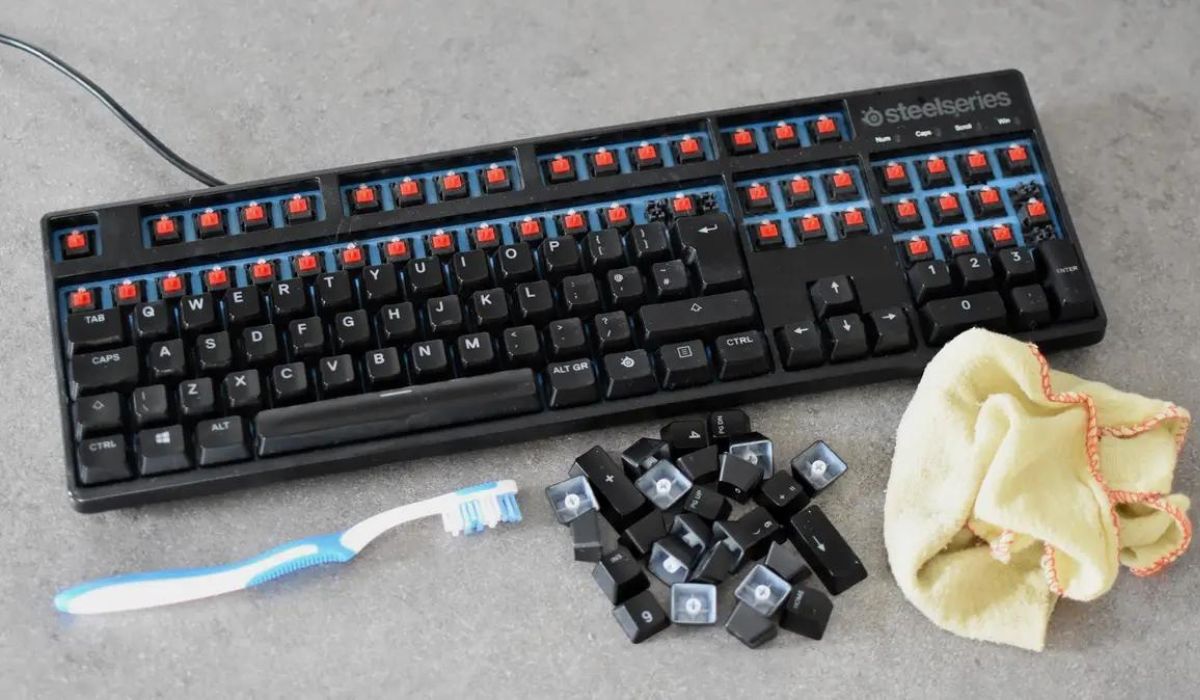
Cleaning Under the Keycaps
Cleaning Under the Keycaps
Once the keycaps have been carefully removed, you can proceed with the meticulous task of cleaning under the keycaps to rid your mechanical keyboard of accumulated debris and maintain its optimal performance. Here’s a detailed guide to effectively clean under the keycaps:
- Use Compressed Air: Holding the keyboard at a slight angle, use the compressed air canister to blow out any loose debris, dust, or crumbs from under the keycaps. Work methodically from one end of the keyboard to the other, ensuring that all areas are thoroughly cleaned.
- Inspect for Stubborn Debris: After using the compressed air, inspect the exposed areas under the keycaps for any stubborn debris that may still be present. Use a flashlight to illuminate the spaces and identify any remaining particles.
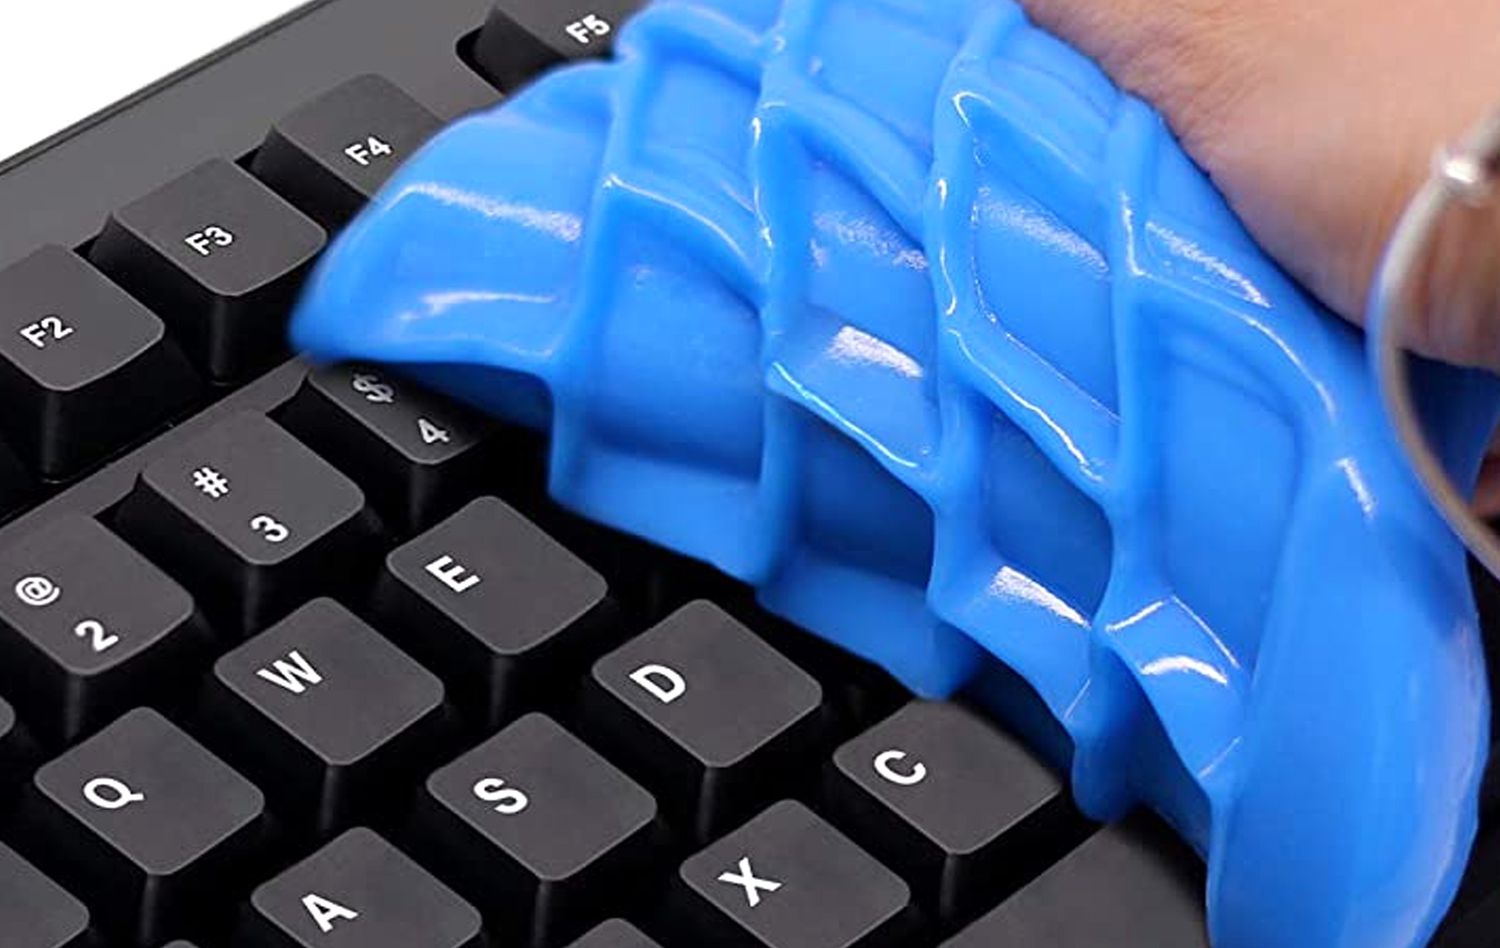
- Clean with a Microfiber Cloth: Gently wipe the exposed areas under the keycaps with a microfiber cloth to remove any remaining residue or particles. Ensure that the cloth is clean and free of abrasive materials that could scratch the keyboard’s surface.
- Address Persistent Stains: For more stubborn stains or residue, dampen a corner of the microfiber cloth with a small amount of isopropyl alcohol and carefully clean the affected areas. Exercise caution to prevent any liquid from seeping into the switches or electronic components.
- Reach Tight Spaces: Use a cotton swab to reach tight spaces and corners, ensuring that any lingering debris or residue is meticulously removed. The swab can be lightly moistened with isopropyl alcohol for targeted cleaning in hard-to-reach areas.
- Inspect and Re-Clean if Necessary: After cleaning under the keycaps, inspect the areas again to ensure that no debris or residue remains. If needed, repeat the cleaning process to achieve a thorough and pristine result.
By following these steps, you can effectively clean under the keycaps of your mechanical keyboard, ensuring that it remains free of debris and maintains its optimal functionality. With the cleaning process completed, you’re now ready to reassemble the keyboard, which we’ll cover in the following section.
Reassembling the Keyboard
Reassembling the Keyboard
After meticulously cleaning under the keycaps, reassembling your mechanical keyboard is the final step in the maintenance process. Proper reassembly ensures that the keycaps are securely in place and that the keyboard functions optimally. Here’s a step-by-step guide to reassembling your keyboard:
- Organize the Keycaps: Before reassembling, arrange the cleaned keycaps in a logical order, making it easier to identify each key’s placement. This organization minimizes the chances of misplacing or mixing up the keycaps during reassembly.
- Position the Keycaps: Starting from one end of the keyboard, gently press each keycap into its respective switch. Ensure that the keycap is aligned correctly and that it sits flush with the switch housing. Apply even pressure to seat the keycap securely without exerting excessive force.
- Check for Proper Alignment: As you progress, periodically check the alignment and placement of the keycaps to ensure that they are uniform and correctly positioned. This step helps prevent any keys from feeling uneven or misaligned during use.
- Test the Keys: Once all the keycaps are reattached, test each key to confirm that it registers keystrokes accurately and feels consistent with the surrounding keys. This testing phase ensures that no keycaps were inadvertently misaligned during reassembly.
- Wipe Down the Keyboard: After reassembling the keyboard, use a microfiber cloth to gently wipe down the entire surface, removing any smudges or fingerprints that may have accumulated during the reassembly process.
Following these steps will ensure that your mechanical keyboard is reassembled with precision and care, ready to deliver a satisfying typing experience. With the keys securely in place and the keyboard looking pristine, you can now enjoy the enhanced performance and aesthetic appeal of your meticulously cleaned mechanical keyboard.