Introduction
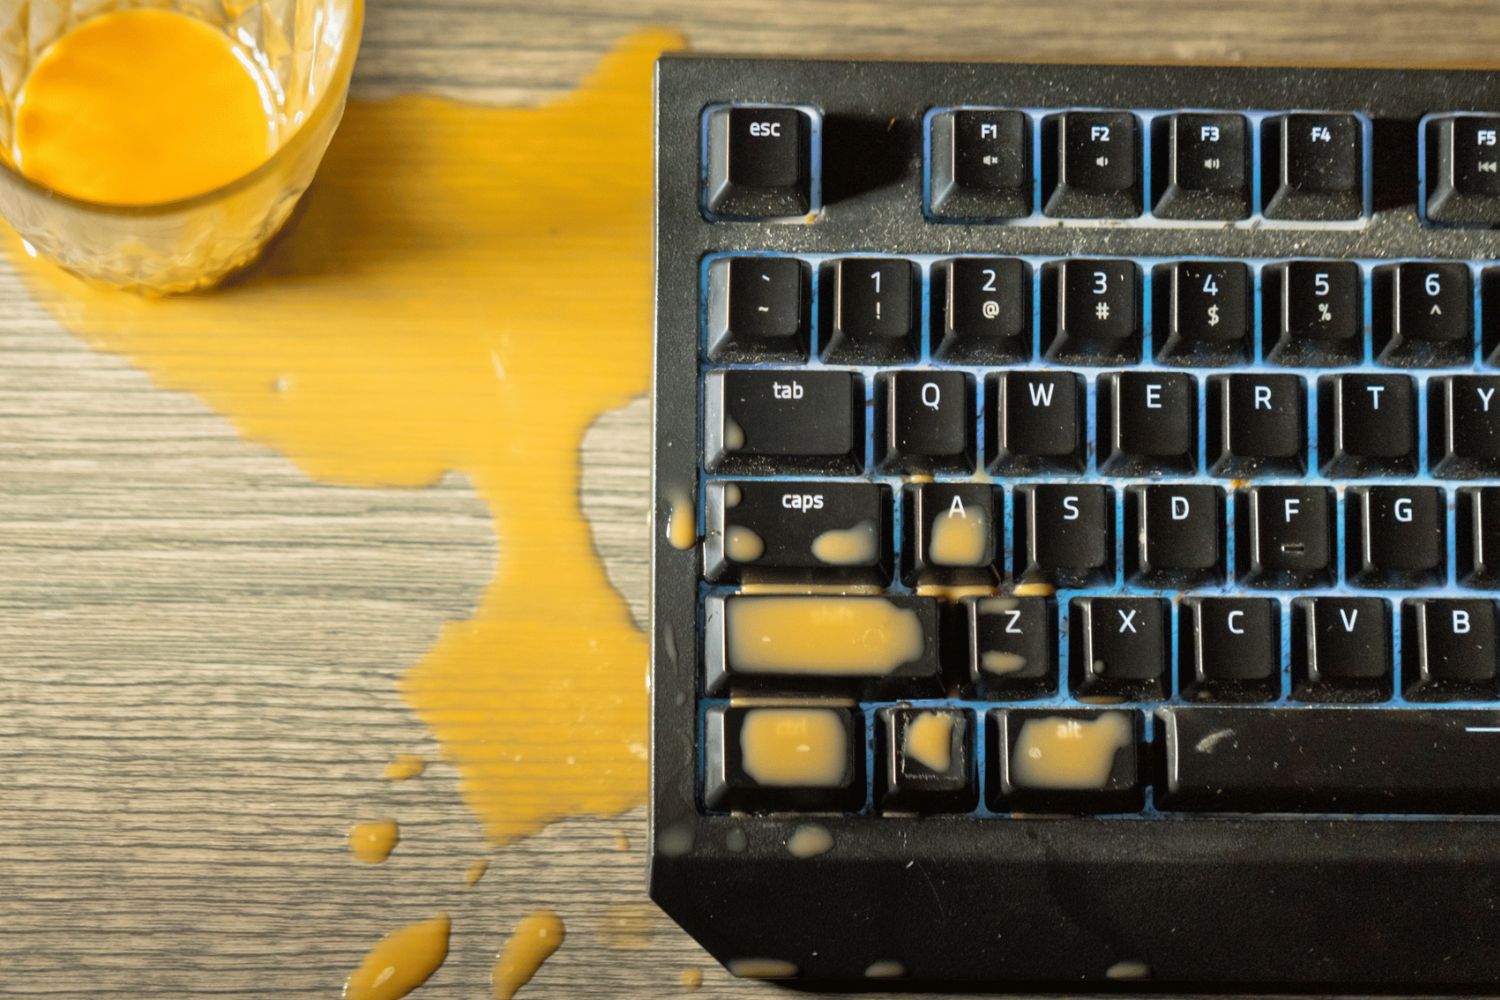
If you're an avid computer user or a passionate gamer, you know how crucial a mechanical keyboard is for a satisfying typing or gaming experience. However, over time, the keys on a mechanical keyboard can become sticky or unresponsive due to dust, debris, or accidental spills. When this happens, it's essential to know how to clean sticky mechanical keyboard keys effectively to restore the keyboard's functionality and maintain its longevity.
Cleaning your mechanical keyboard keys not only improves their responsiveness but also enhances the overall hygiene of your workspace. Additionally, regular maintenance can prevent the buildup of grime and extend the lifespan of your keyboard, saving you money in the long run.
In this comprehensive guide, we'll walk you through the step-by-step process of cleaning sticky mechanical keyboard keys, ensuring that you can tackle this task with confidence. From gathering the necessary supplies to safely removing and cleaning the keycaps and switches, we'll cover everything you need to know to restore your keyboard to its optimal condition.
By following the techniques outlined in this guide, you'll not only revitalize your keyboard but also gain valuable insight into its inner workings. So, roll up your sleeves and get ready to give your beloved mechanical keyboard the care and attention it deserves. Let's dive into the process of rejuvenating your keyboard and reclaiming that satisfying tactile feedback!
Gather Your Supplies
Before embarking on the journey of cleaning your sticky mechanical keyboard keys, it’s crucial to gather the necessary supplies to ensure a smooth and effective cleaning process. Here’s a list of items you’ll need:
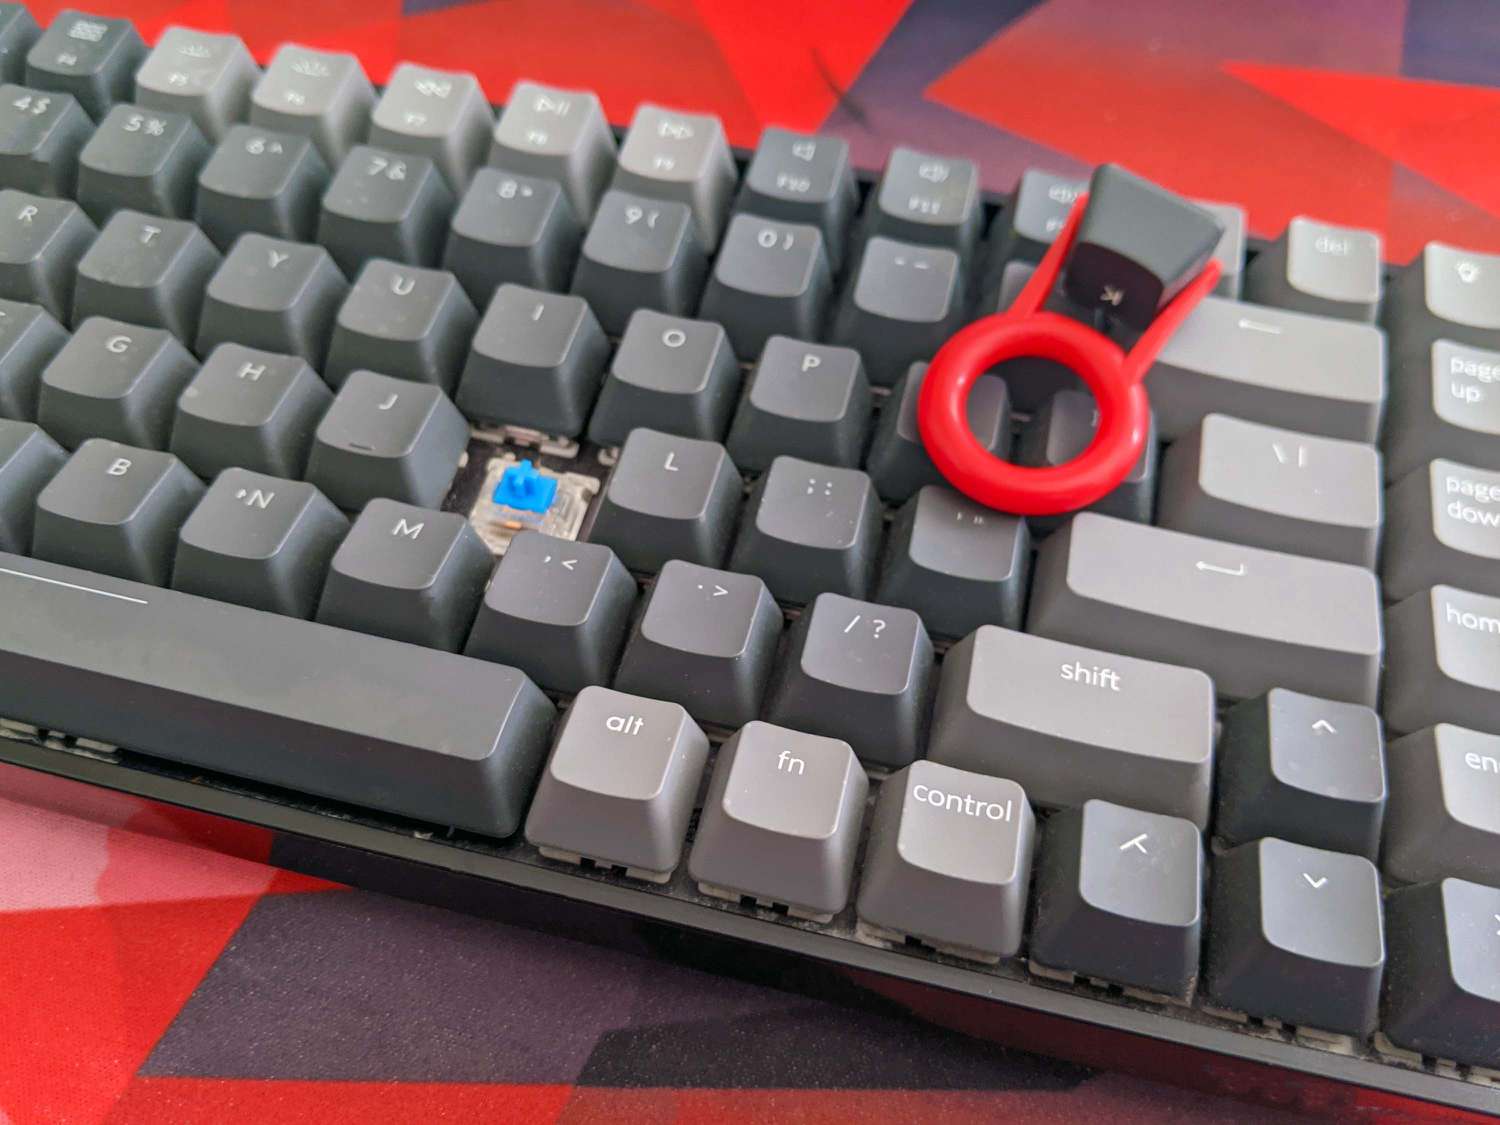
- Keycap puller: This tool is essential for safely removing the keycaps without causing any damage to the switches or the keycaps themselves.
- Isopropyl alcohol: A high-concentration isopropyl alcohol (at least 70%) is ideal for effectively removing grime and sticky residue from the keycaps and switches.
- Cotton swabs: These are perfect for applying the isopropyl alcohol to the keycaps and switches and for gently scrubbing away any stubborn residue.
- Microfiber cloth: Use a soft microfiber cloth to wipe down and dry the keycaps and switches after cleaning them.
- Bowl or container: You’ll need a container to soak the keycaps in isopropyl alcohol for thorough cleaning.
- Compressed air: This is useful for blowing away any loose debris and dust from the keyboard before and after removing the keycaps.
- Flat workspace: Ensure you have a clean and flat surface to work on, providing ample space to organize and clean the keycaps and switches.
By having these supplies at your disposal, you’ll be well-equipped to tackle the task of cleaning your mechanical keyboard keys effectively and efficiently. With the right tools in hand, you’ll set the stage for a successful cleaning process, ensuring that your keyboard will soon be restored to its optimal condition.
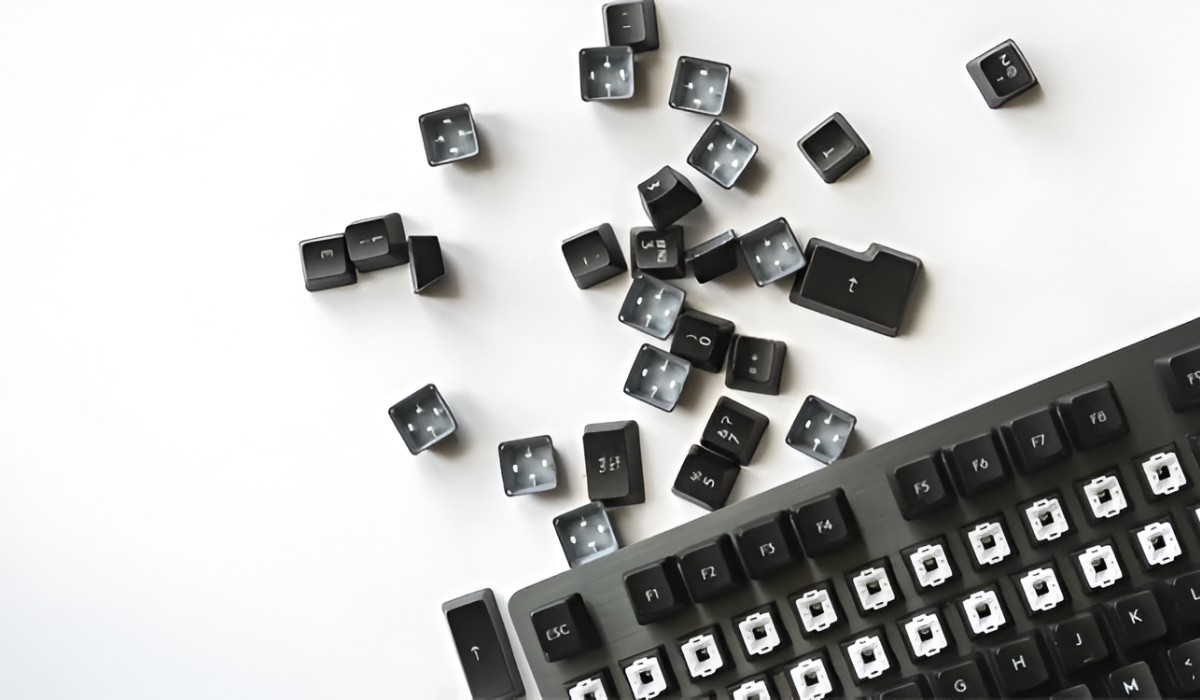
Remove the Keycaps
With your supplies gathered, it’s time to begin the process of removing the keycaps from your mechanical keyboard. This step is crucial for gaining access to the switches and ensuring a thorough cleaning of both the keycaps and the underlying components.
Using a keycap puller, gently and carefully remove the keycaps from the switches. Start from one end of the keyboard and work your way across, ensuring that you keep the keycaps organized as you remove them. It’s helpful to take a photo of the keyboard before removing the keycaps to serve as a reference for reassembly later.
As you remove the keycaps, handle them with care to avoid causing any damage. Place the removed keycaps in a bowl or container, as these will be soaked in isopropyl alcohol for cleaning. Once all the keycaps are removed, you’ll have clear access to the switches and the keyboard’s base.
It’s important to note that some keycaps, such as the spacebar and larger keys, may require a different approach for removal. For these keycaps, you may need to gently wiggle them from side to side while applying even pressure to detach them from the switches.
By taking your time and being gentle during the keycap removal process, you’ll ensure that the switches and keycaps remain undamaged, setting the stage for a successful cleaning process. With the keycaps safely removed, you’re ready to proceed to the next steps of cleaning and rejuvenating your mechanical keyboard.
Clean the Keycaps
Now that the keycaps are safely removed, it’s time to focus on cleaning them to remove any accumulated grime, oils, or stickiness. This step is essential for restoring the appearance and functionality of the keycaps, ensuring a satisfying tactile feel with each keystroke.
Begin by filling a bowl or container with isopropyl alcohol, ensuring that there’s enough to fully submerge the keycaps. Place the keycaps in the container and let them soak for a few minutes. The isopropyl alcohol will effectively break down and dissolve any dirt, oils, or residue that may have accumulated on the keycaps.
After soaking, use a soft-bristled brush or a clean, dampened microfiber cloth to gently scrub each keycap, ensuring that any stubborn residue is effectively removed. Pay close attention to the edges and crevices of the keycaps to ensure a thorough cleaning process.
Once the keycaps are clean, rinse them thoroughly with water to remove any remaining isopropyl alcohol. Then, carefully dry them with a clean microfiber cloth to ensure that they are completely free of moisture before reinstallation.
It’s important to handle the keycaps with care throughout the cleaning process to avoid causing any damage. Additionally, take note of the layout and orientation of the keycaps to ensure that they can be easily reassembled onto the keyboard without confusion.
By meticulously cleaning the keycaps, you’ll not only restore their appearance but also eliminate any stickiness or unresponsiveness that may have been affecting your typing or gaming experience. With the keycaps now clean and refreshed, you’re ready to proceed to the next crucial step: cleaning the switches themselves.
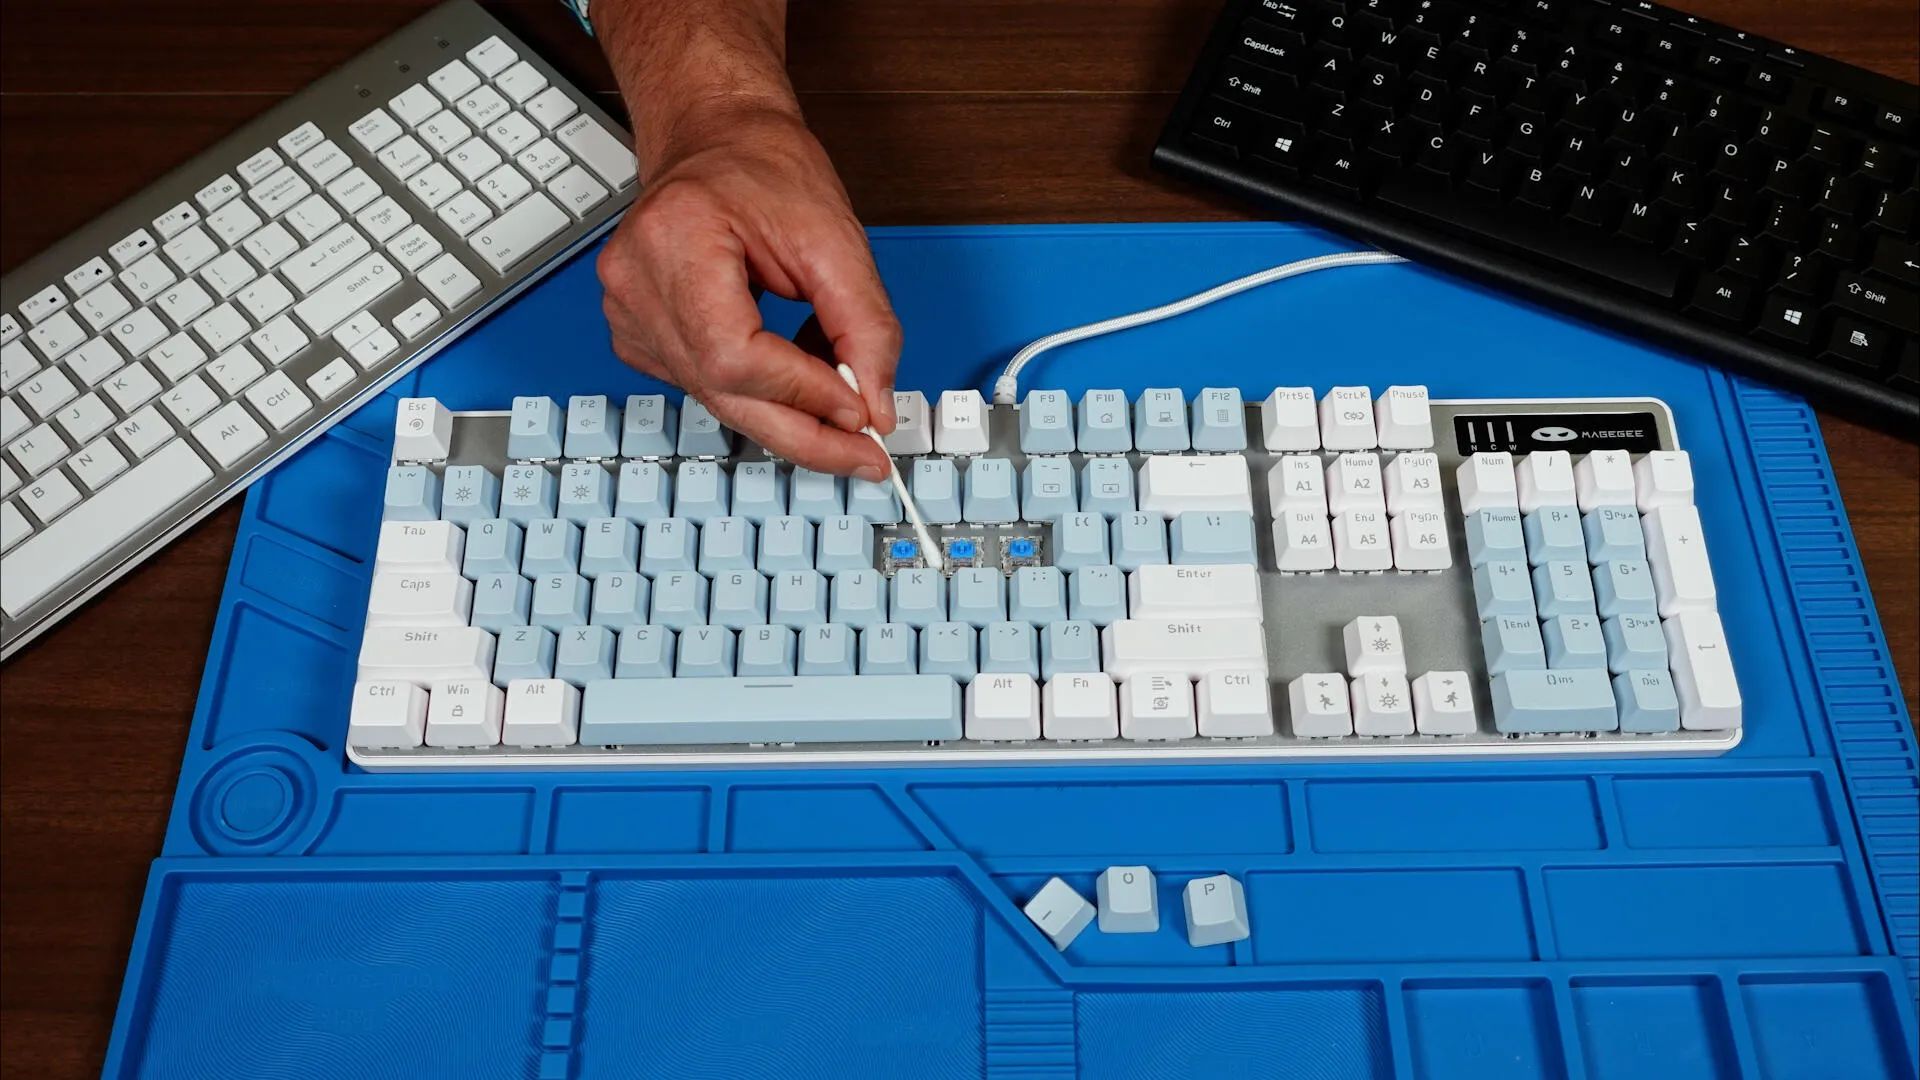
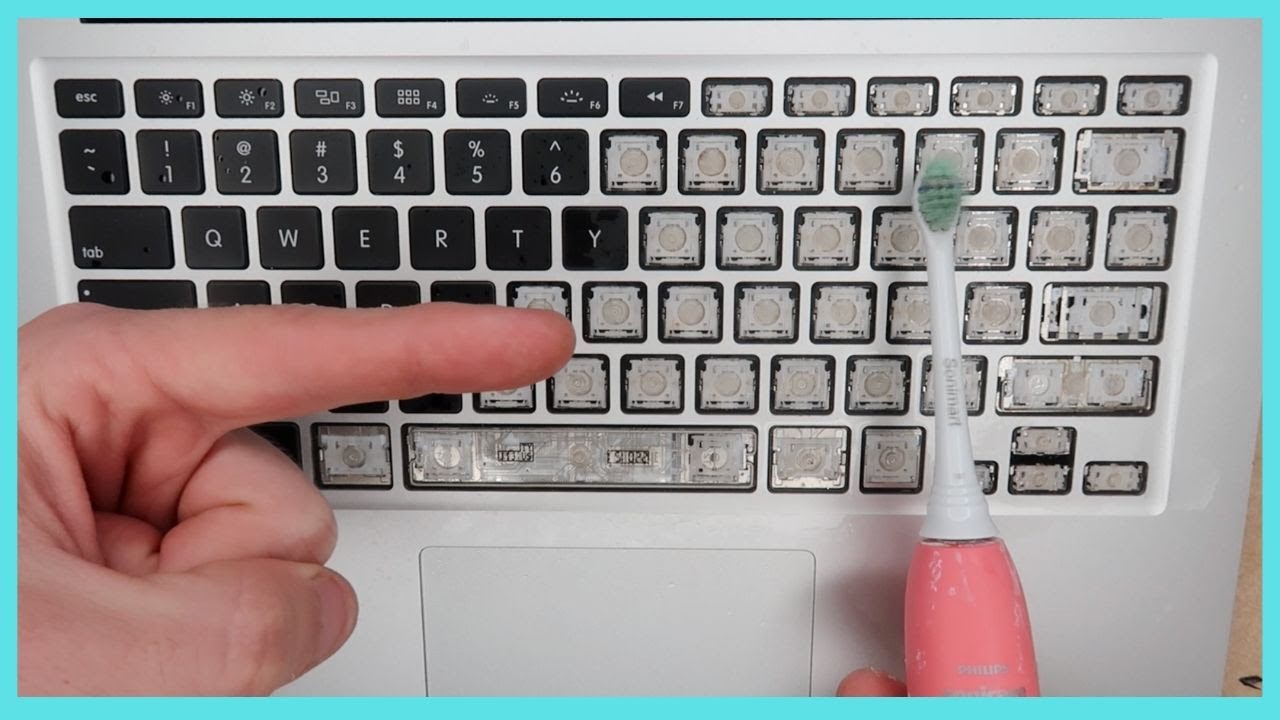
Clean the Switches
With the keycaps safely removed and cleaned, it’s time to direct our attention to the switches themselves. Ensuring that the switches are free of debris and grime is essential for maintaining the keyboard’s responsiveness and tactile feedback. Here’s how to effectively clean the switches of your mechanical keyboard:
Begin by using compressed air to gently blow away any loose debris and dust from the exposed switches. This step helps prepare the switches for a more thorough cleaning process and prevents any loose particles from interfering with their functionality.
Next, dampen a cotton swab with isopropyl alcohol, ensuring that it’s not excessively wet, and use it to carefully clean the exposed switches. Gently swab each switch, paying attention to any areas where dirt or residue may have accumulated. The isopropyl alcohol effectively dissolves grime and sticky residue, restoring the switches to their optimal condition.
If the switches are particularly dirty or sticky, you may need to repeat the process with a fresh cotton swab to ensure a thorough cleaning. Take your time and ensure that each switch is meticulously cleaned to guarantee optimal performance.
After cleaning the switches, use compressed air once again to blow away any remaining moisture or loose particles. This step helps ensure that the switches are completely dry and free of any lingering debris.
With the switches now clean and free of grime, you’ve taken a significant step toward rejuvenating your mechanical keyboard. The combination of clean keycaps and switches will not only enhance the keyboard’s aesthetics but also restore its functionality, providing a satisfying typing or gaming experience.
With the keycaps and switches now cleaned and refreshed, you’re ready to reassemble the keyboard and revel in the revitalized performance of your beloved mechanical keyboard.
Reassemble the Keyboard
With the keycaps and switches thoroughly cleaned, it’s time to reassemble your mechanical keyboard and restore it to its fully functional state. Follow these steps to ensure a successful reassembly process:
Begin by referring to the photo you took before removing the keycaps to guide you in placing the keycaps back in their correct positions. Take your time to ensure that each keycap is aligned properly and seated securely on its respective switch. The process may require a bit of patience, especially when reinstalling larger keycaps such as the spacebar, so approach it methodically and attentively.
As you reattach each keycap, apply gentle and even pressure to ensure that it is firmly secured to the switch without causing any damage. Double-check the alignment and positioning of each keycap to guarantee that they are all correctly installed.
Once all the keycaps are back in place, take a moment to inspect the keyboard and ensure that each keycap is sitting flush and level with the others. This visual check helps identify any keycaps that may need to be adjusted for a uniform appearance and optimal functionality.
After reassembling the keycaps, test each key to ensure that they are all functioning correctly and registering keystrokes accurately. This step allows you to identify any keycaps that may require further adjustment or cleaning to guarantee smooth and consistent performance.
With the keycaps successfully reinstalled and the keyboard fully functional, take a moment to appreciate the revitalized appearance and responsiveness of your mechanical keyboard. The effort invested in cleaning and reassembling the keyboard has not only restored its functionality but also extended its lifespan, ensuring that it continues to provide a satisfying typing or gaming experience for years to come.
By following these steps, you’ve successfully rejuvenated your mechanical keyboard and gained valuable insight into its maintenance and care. With regular cleaning and maintenance, you can ensure that your keyboard remains a reliable and enjoyable tool for all your computing needs.
Conclusion
Congratulations on successfully cleaning and rejuvenating your mechanical keyboard! By following the step-by-step process outlined in this guide, you’ve not only restored the functionality and responsiveness of your keyboard but also gained valuable insight into its maintenance and care.
Regular cleaning and maintenance are essential for preserving the longevity and performance of your mechanical keyboard. By investing time and effort into cleaning the keycaps and switches, you’ve taken proactive steps to prevent the buildup of grime and debris, ensuring that your keyboard continues to provide a satisfying typing or gaming experience for years to come.
Remember to incorporate keyboard cleaning into your regular maintenance routine, especially if you use your keyboard frequently or in environments prone to dust and debris. By doing so, you’ll maintain the pristine condition of your keyboard and minimize the risk of sticky or unresponsive keys in the future.
Additionally, the knowledge and skills you’ve gained from this cleaning process can be applied to other mechanical keyboards, allowing you to extend the lifespan and performance of multiple devices in your workspace or gaming setup.
As you reassemble your freshly cleaned keyboard and resume your computing activities, take a moment to appreciate the tactile feedback and smooth operation that come with a well-maintained mechanical keyboard. Your efforts have not only restored the functionality of the keyboard but also contributed to a cleaner and more hygienic workspace.
By maintaining a proactive approach to keyboard care and maintenance, you’ll continue to enjoy the reliable performance and satisfying tactile feel that mechanical keyboards are known for. Embrace the satisfaction of a job well done and the comfort of knowing that your keyboard is primed for peak performance.
With your newly refreshed mechanical keyboard at the center of your computing experience, you can confidently tackle tasks, embark on gaming adventures, and immerse yourself in the seamless and responsive typing experience that only a well-maintained mechanical keyboard can provide.
Here’s to a rejuvenated keyboard and many more hours of productive and enjoyable use!