Introduction
When it comes to mechanical keyboards, the tactile feedback and audible click of each keystroke can greatly enhance the typing experience. However, over time, these keyboards may develop an issue known as "sticky keys," where certain keys become unresponsive or do not spring back as they should. This can be frustrating for users and may hinder productivity. Fortunately, there are several methods to address this common problem and restore the keyboard to its optimal functionality.
In this comprehensive guide, we will explore the various causes of sticky keys on mechanical keyboards and provide practical solutions to remedy the issue. Whether it's a matter of cleaning the keys, lubricating the switches, or replacing faulty components, this guide will equip you with the knowledge and techniques needed to troubleshoot and resolve sticky key issues effectively.
So, if you're grappling with uncooperative keys on your mechanical keyboard, fear not! By the end of this guide, you will be well-versed in the art of restoring your keyboard to its former glory. Let's delve into the world of mechanical keyboards and unravel the mysteries of sticky keys.
Understanding Sticky Keys
Before delving into the solutions, it’s essential to understand the potential causes of sticky keys on a mechanical keyboard. The term "sticky keys" refers to keys that do not spring back as expected or feel unresponsive when pressed. This issue can arise from various factors, including dust and debris accumulation, inadequate lubrication, or worn-out key switches.
One common cause of sticky keys is the accumulation of dirt, dust, and other particles between the keycaps and the switches. Over time, these particles can interfere with the smooth movement of the keys, causing them to stick or feel sluggish when pressed. Additionally, the tactile feedback and audible click of the switches may diminish, impacting the overall typing experience.
Another potential cause of sticky keys is inadequate or deteriorated lubrication within the key switches. Mechanical keyboards rely on precise movement and smooth operation of the switches to deliver the satisfying tactile feedback and responsiveness users expect. When the lubrication dries out or becomes ineffective, the switches may exhibit sticky or inconsistent behavior, leading to a subpar typing experience.
Furthermore, worn-out or damaged key switches can contribute to the development of sticky keys. Over time, the internal mechanisms of the switches may degrade, resulting in reduced responsiveness and inconsistent key actuation. This can manifest as keys that feel mushy, fail to register keystrokes reliably, or exhibit uneven actuation force.
Understanding the underlying causes of sticky keys is crucial for implementing the appropriate solutions. By addressing the root issues, such as cleaning accumulated debris, lubricating the switches, or replacing faulty components, users can effectively restore the smooth and responsive functionality of their mechanical keyboards.
Cleaning the Keys
One of the primary methods for addressing sticky keys on a mechanical keyboard is thorough cleaning. Over time, dust, debris, and other particles can find their way into the spaces between the keycaps and the switches, impeding the smooth movement of the keys and causing them to feel sticky or unresponsive. To remedy this, a meticulous cleaning process can be employed to restore the keyboard’s optimal functionality.
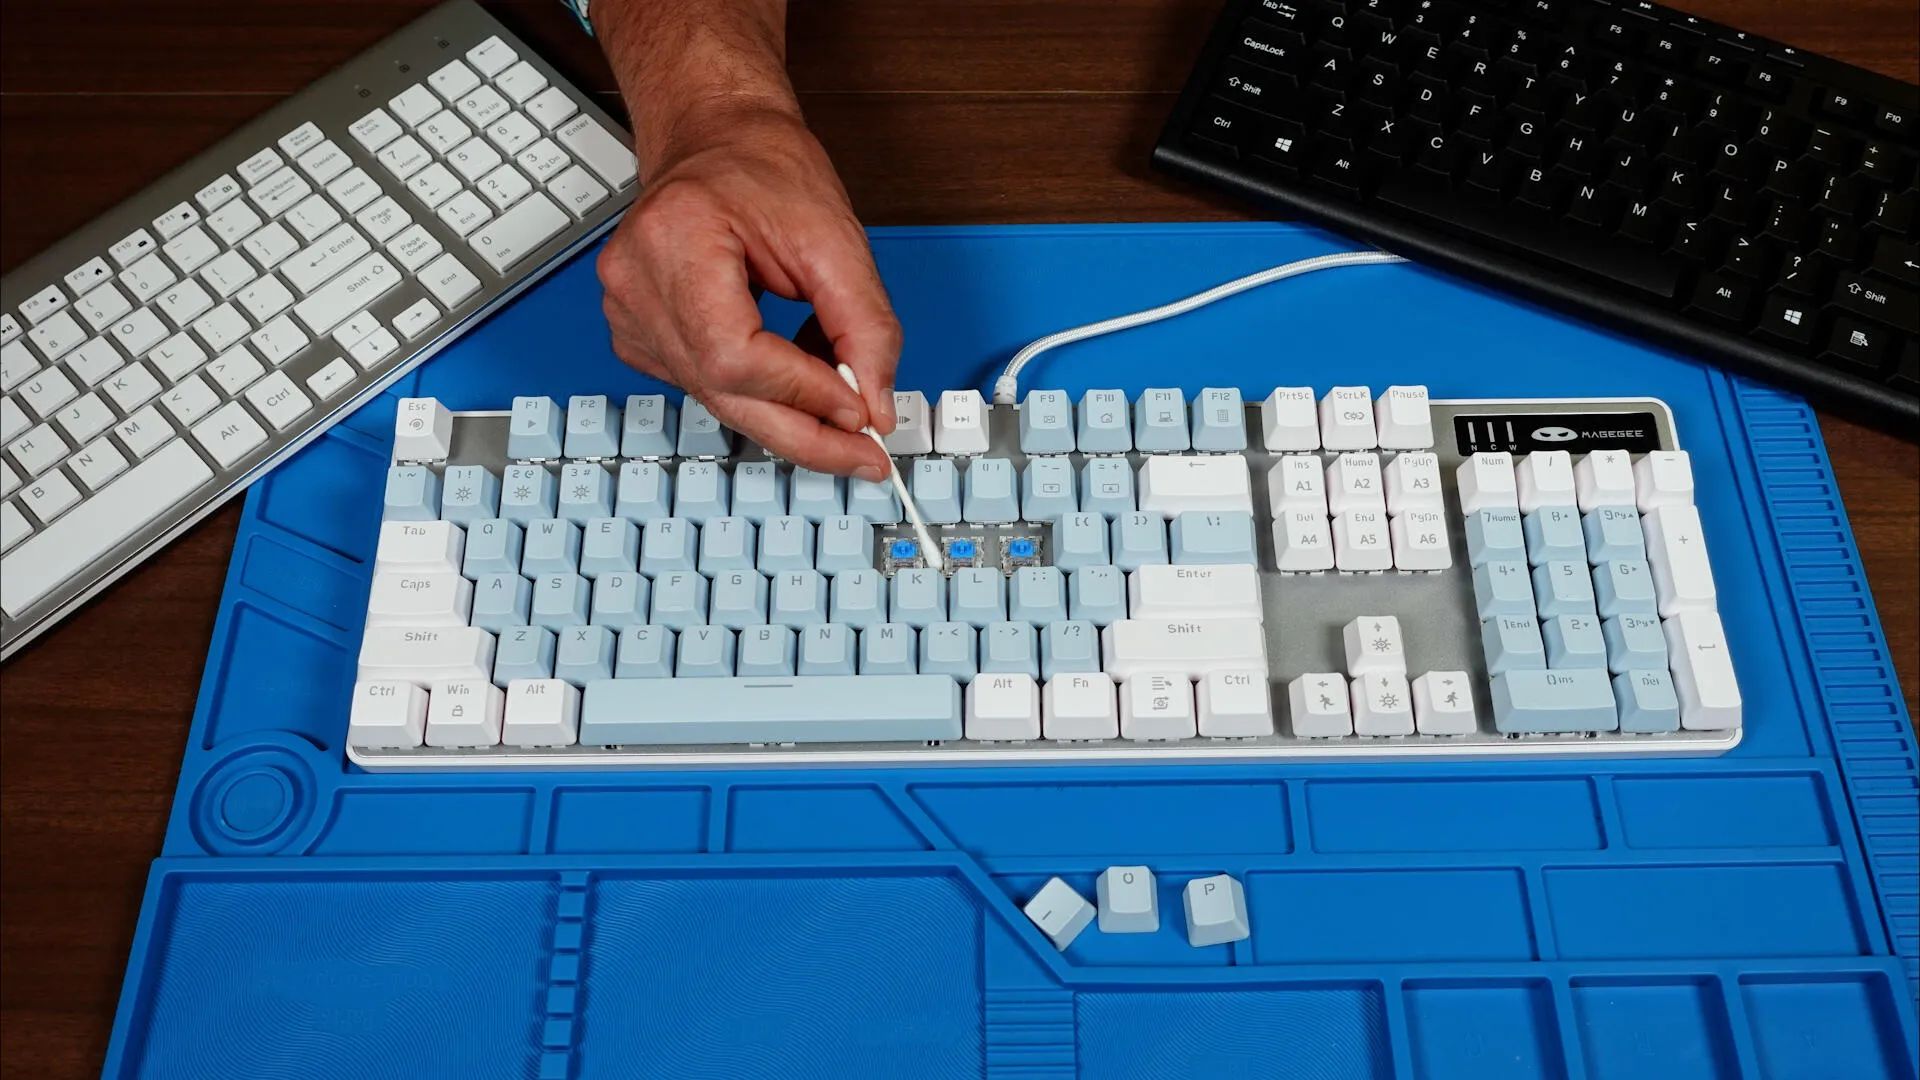
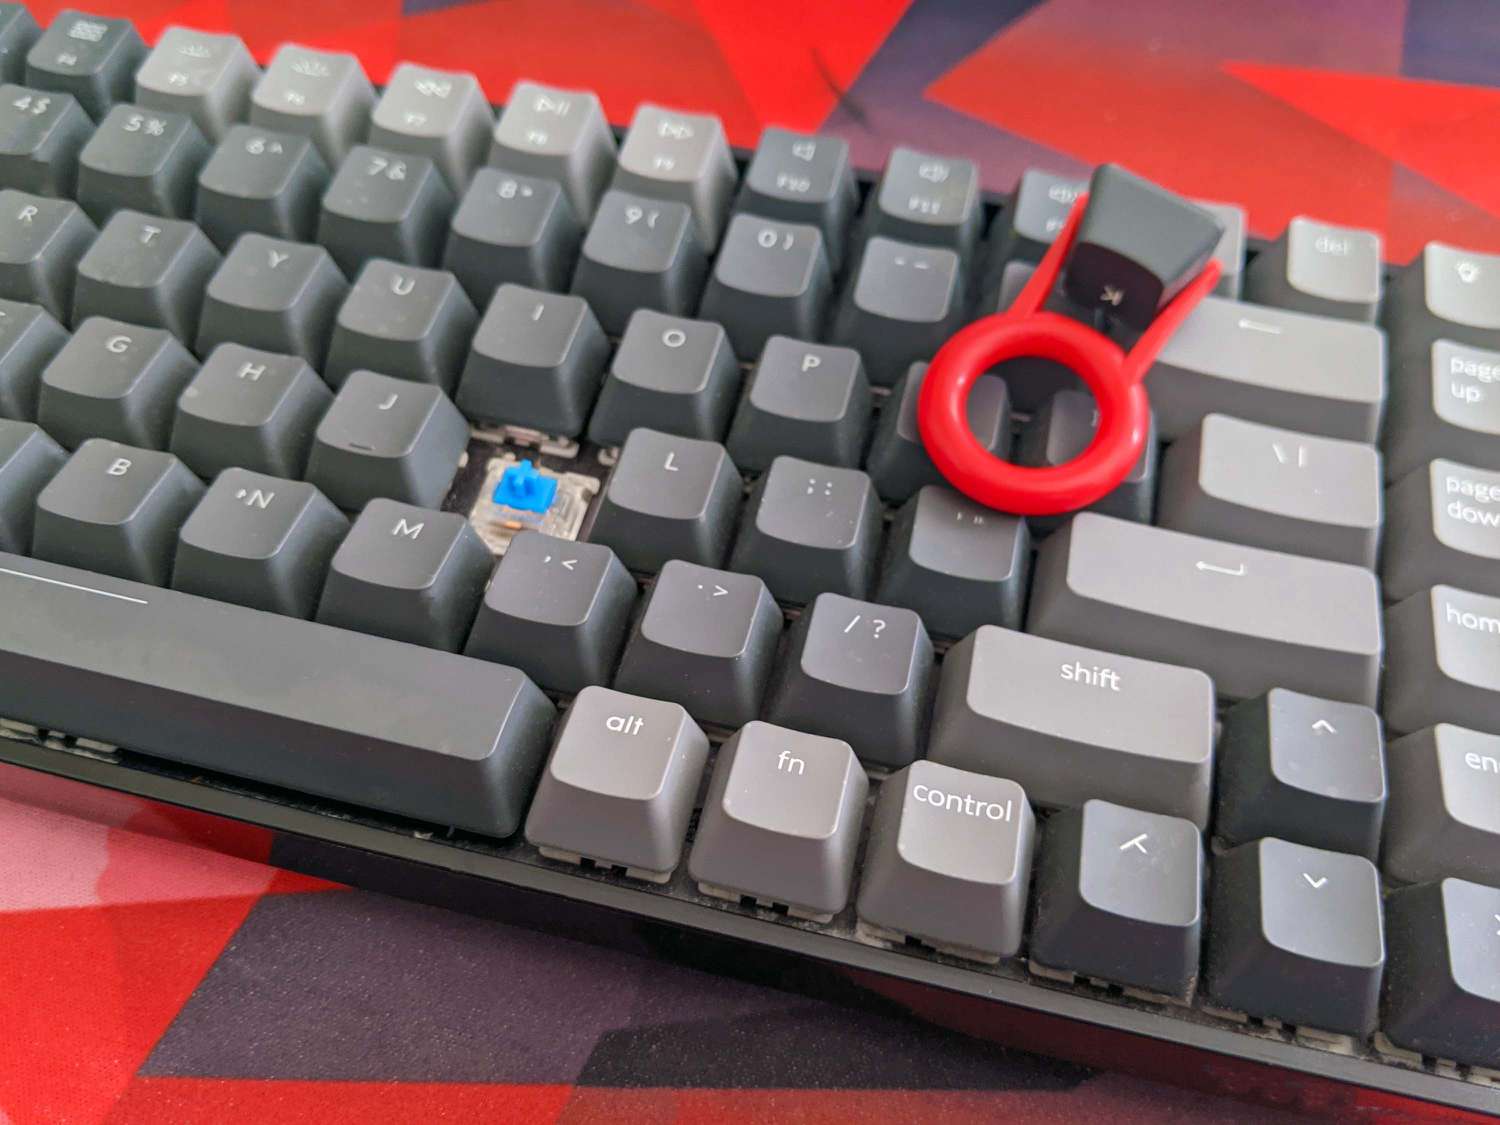
To begin the cleaning process, it is advisable to remove the keycaps from the keyboard. This can be done using a keycap puller tool, which allows for the safe and easy removal of individual keycaps without causing damage to the keyboard or the key switches. Once the keycaps are removed, the underlying switches and the exposed keyboard surface can be thoroughly cleaned using compressed air and a gentle, lint-free cloth. Care should be taken to remove any visible debris and dust from the key switches and the surrounding areas.
In addition to physical cleaning, the keycaps themselves can be soaked in a mild cleaning solution to remove any accumulated grime or residue. A mixture of warm water and gentle soap can be used for this purpose, and the keycaps should be allowed to soak for a brief period before being thoroughly rinsed and dried. This process can help eliminate stubborn residue and restore the keycaps to their original cleanliness.
Once the cleaning process is complete, the keycaps can be reinstalled onto the keyboard, ensuring that each keycap is properly aligned and securely seated on its respective switch. With the keys cleaned and reassembled, users can expect a noticeable improvement in the responsiveness and smooth operation of the keyboard, as the removal of accumulated debris and grime facilitates unhindered key movement and actuation.
By incorporating regular cleaning into the maintenance routine, users can prevent the buildup of debris and maintain the optimal performance of their mechanical keyboards, effectively mitigating the occurrence of sticky keys and preserving the tactile satisfaction of each keystroke.
Lubricating the Switches
Effective lubrication of the key switches is integral to ensuring the smooth and consistent operation of a mechanical keyboard. Over time, the original lubrication within the switches may degrade or become insufficient, leading to sticky or unresponsive keys. By applying the appropriate lubricant, users can rejuvenate the switches and restore their optimal functionality, thereby enhancing the overall typing experience.
Before initiating the lubrication process, it is essential to select a suitable lubricant specifically designed for mechanical keyboard switches. Silicone-based lubricants are commonly recommended for this purpose, as they offer excellent compatibility with the internal components of the switches and provide long-lasting lubrication without attracting dust or causing unwanted stickiness.
To begin the lubrication process, users can carefully remove the keycaps from the affected keys, exposing the individual switches that require attention. With the switches accessible, a small amount of the chosen lubricant can be applied to the moving parts and contact points within each switch. It is crucial to apply the lubricant sparingly and precisely, ensuring that it reaches the necessary areas without excess buildup that could impede the key’s movement.
Following the application of the lubricant, users can actuate the lubricated switches multiple times to facilitate the even distribution of the lubricant and ensure that it effectively coats the internal components. This process helps to restore the smooth and consistent movement of the switches, effectively mitigating any stickiness or resistance that was previously experienced.
Once the lubrication process is complete, the keycaps can be reinstalled onto the switches, and the keyboard can be tested to assess the improvement in key responsiveness and overall typing feel. Properly lubricated switches should exhibit enhanced smoothness, reduced friction, and consistent actuation, contributing to a more satisfying and reliable typing experience.
By incorporating periodic lubrication of the switches into the maintenance regimen, users can proactively prevent the onset of sticky keys and prolong the longevity of their mechanical keyboards. This simple yet effective maintenance practice can significantly enhance the overall performance and responsiveness of the keyboard, allowing users to enjoy a seamless and enjoyable typing experience.
Replacing the Switches
When addressing persistent issues of sticky keys on a mechanical keyboard, there may come a point where replacing the key switches becomes the most viable solution. Over time, the internal mechanisms of the switches can degrade, leading to inconsistent actuation, reduced responsiveness, and an overall unsatisfactory typing experience. By replacing the faulty switches with new, high-quality components, users can effectively restore the keyboard to its optimal functionality and enjoy a renewed typing sensation.
Before embarking on the switch replacement process, it is crucial to identify the specific keys exhibiting sticky or unresponsive behavior. Once the problematic keys have been identified, the next step involves procuring replacement switches that are compatible with the keyboard’s make and model. Various types of mechanical switches are available, each offering distinct characteristics such as actuation force, tactile feedback, and audible click, allowing users to customize their typing experience according to their preferences.
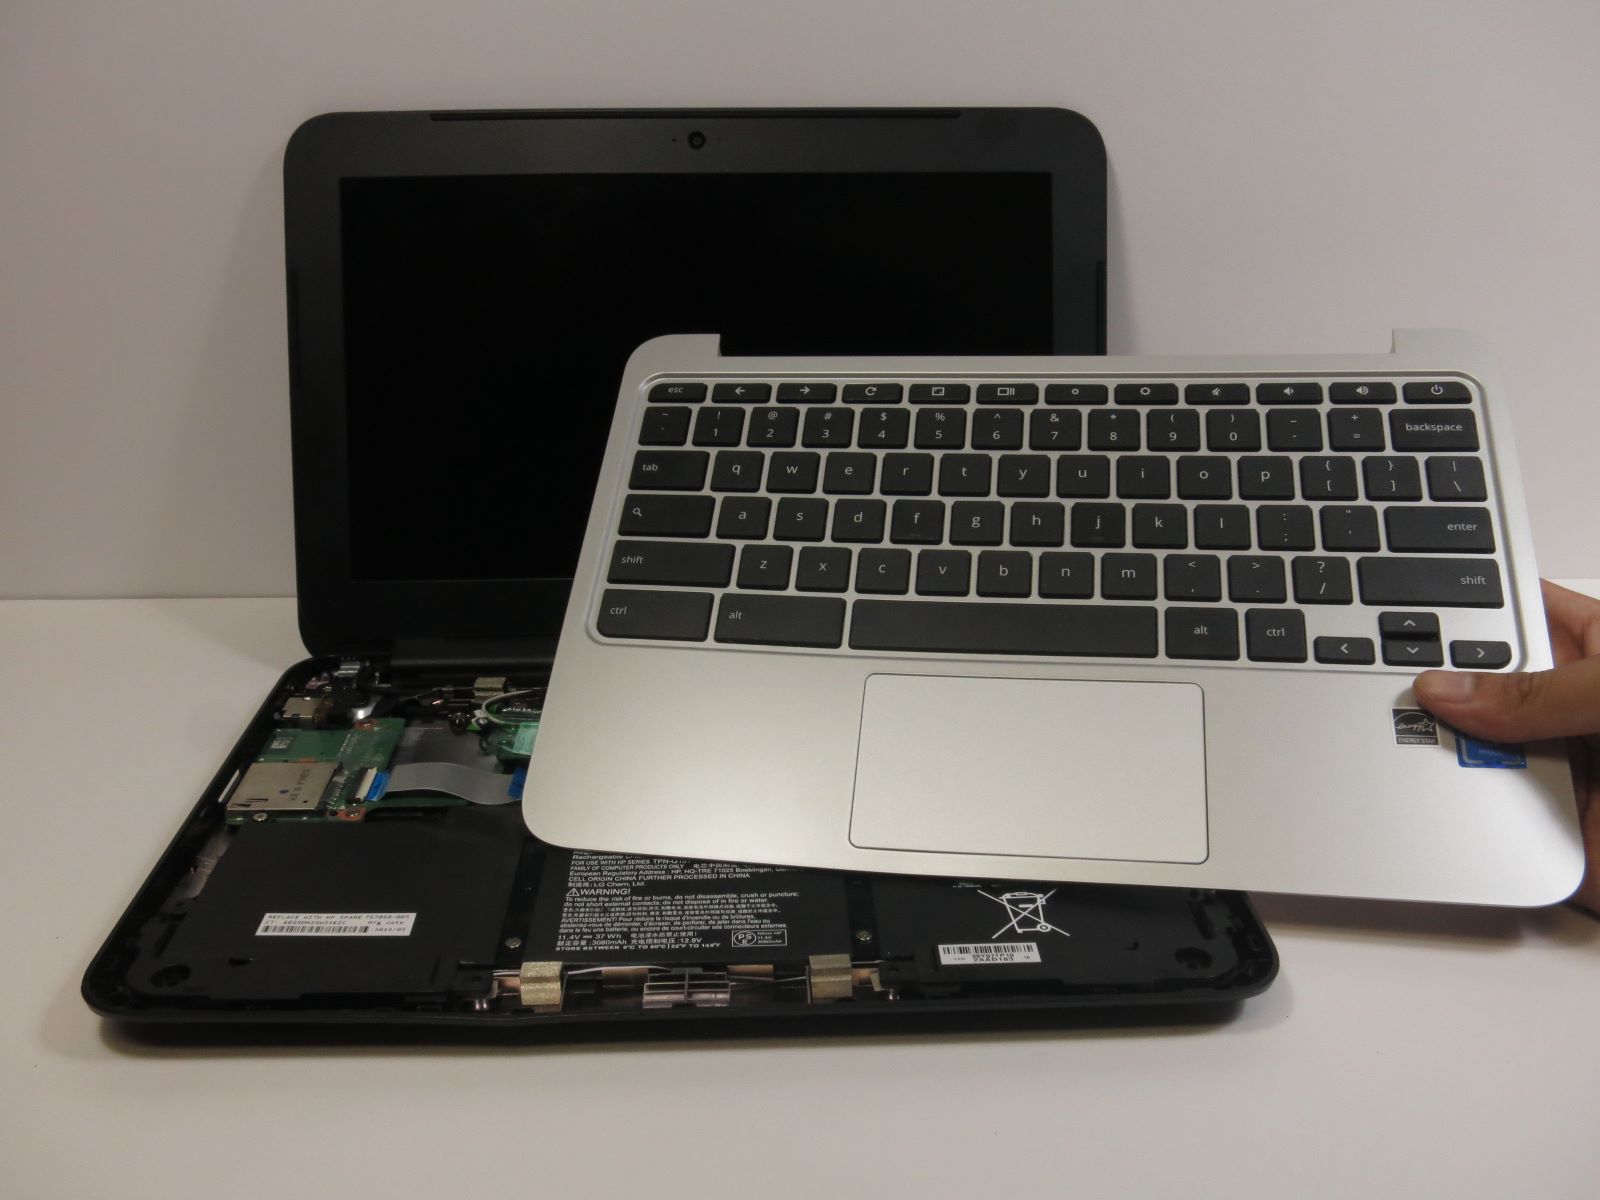
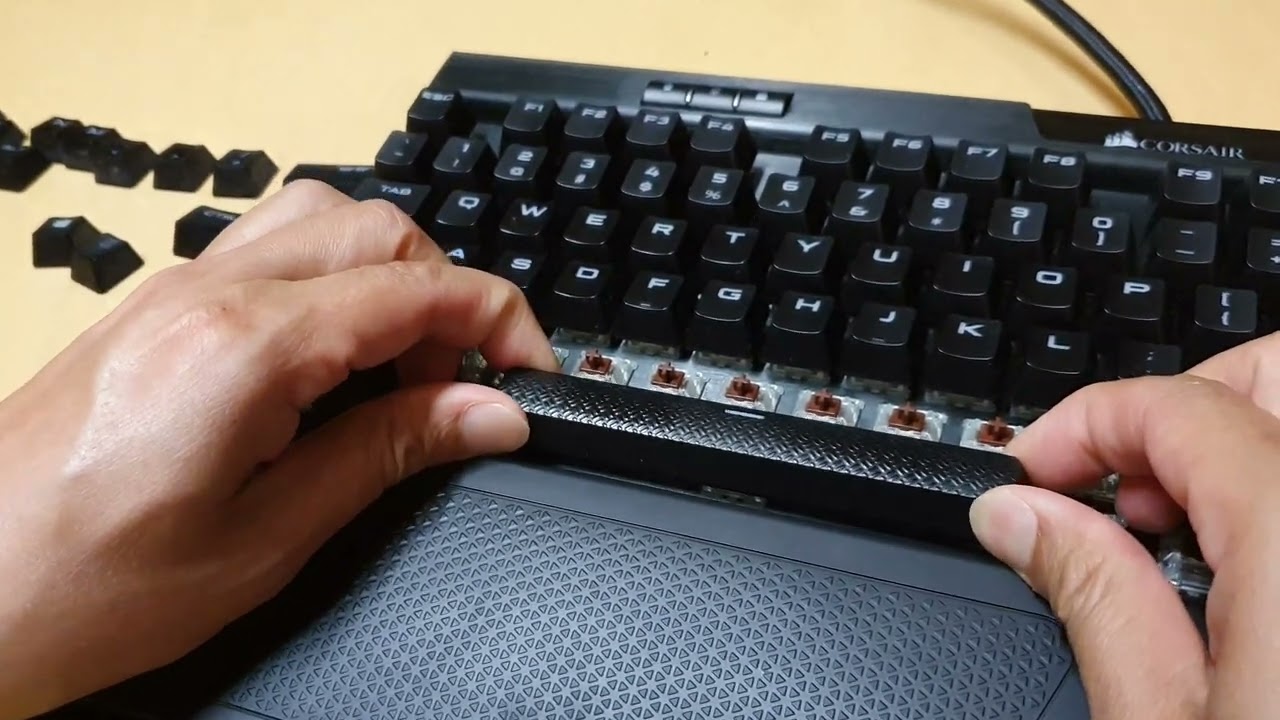
With the replacement switches in hand, users can proceed to disassemble the keyboard to access the internal circuitry and the existing switches. Care should be taken to document or photograph the disassembly process to ensure proper reassembly later. The existing switches can then be desoldered from the keyboard’s PCB using a soldering iron and desoldering pump or wick, allowing for the safe removal of the old switches without causing damage to the keyboard’s circuitry.
Once the old switches have been removed, the replacement switches can be carefully soldered into place, ensuring that each switch is aligned correctly and securely affixed to the PCB. Following the soldering process, the keyboard can be reassembled, and the replaced switches can be tested to ensure their proper functionality. This may involve actuating each replaced key multiple times to verify consistent and reliable performance.
Upon successful replacement of the switches, users can expect a significant improvement in the keyboard’s responsiveness, tactile feedback, and overall typing experience. The renewed switches should exhibit smooth and consistent actuation, effectively eliminating the previous issues of sticky or unresponsive keys and restoring the keyboard to its optimal state.
By embracing the process of switch replacement, users can breathe new life into their mechanical keyboards, customizing the typing feel to their liking and ensuring a satisfying and reliable experience with each keystroke. This approach offers a comprehensive solution to persistent issues of sticky keys, allowing users to fully enjoy the performance and tactile satisfaction of their mechanical keyboards.
Conclusion
In the realm of mechanical keyboards, the occurrence of sticky keys is a common and often frustrating issue that can hinder the typing experience. However, armed with the knowledge and techniques outlined in this guide, users can effectively address and resolve sticky key issues, restoring their keyboards to optimal functionality and enjoying a renewed typing sensation.
By understanding the potential causes of sticky keys, such as debris accumulation, inadequate lubrication, and worn-out switches, users can proactively implement targeted solutions to mitigate these issues. Whether through meticulous cleaning to remove accumulated debris, precise lubrication of the switches to restore smooth operation, or the strategic replacement of faulty switches, users have a range of effective options at their disposal to rejuvenate their mechanical keyboards.
Regular maintenance, including cleaning and lubrication, can prevent the buildup of debris and ensure the continued optimal performance of mechanical keyboards. Additionally, the option to replace switches offers a comprehensive solution for addressing persistent issues and customizing the typing experience to suit individual preferences.
With these solutions in mind, users can approach the challenge of sticky keys with confidence, knowing that they possess the expertise to troubleshoot and remedy the issue effectively. By incorporating these maintenance practices and solutions, users can uphold the performance and tactile satisfaction of their mechanical keyboards, ensuring a seamless and enjoyable typing experience for the long term.
So, if you find yourself grappling with sticky keys on your mechanical keyboard, remember that a comprehensive approach to maintenance and troubleshooting can lead to a gratifying resolution. Embrace the process, apply the appropriate solutions, and revel in the rejuvenated typing experience that awaits you.