Introduction
A sticky keyboard key can be an annoyance, making it difficult or even impossible to type certain letters or numbers. It can slow down your work, hinder your productivity, and frustrate you to no end. Fortunately, fixing a sticky keyboard key is not as difficult as it may seem.
Whether it’s caused by dust, dirt, or a spilled beverage, there are simple steps you can take to resolve this issue and get your keyboard working smoothly again. In this article, we will provide a step-by-step guide on how to fix a sticky keyboard key.
Before we begin, it’s important to note that different types of keyboards may have slightly different mechanisms, so the methods described may vary. However, the general principles outlined here should work for most standard keyboards.
So, without further ado, let’s dive into the process of fixing a sticky keyboard key and get your typing experience back on track!
Step 1: Assess the issue
Before you start the process of fixing a sticky keyboard key, it’s important to assess the extent of the problem. Determine whether the stickiness is limited to a single key or if it affects multiple keys on your keyboard.
Test the affected key(s) by pressing them and observing their responsiveness. Take note of any irregularities, such as keys that are completely unresponsive or keys that produce double characters when pressed.
If the stickiness is isolated to a single key, you can focus on fixing that specific key. However, if multiple keys are affected, it could indicate a broader issue with your keyboard that may require a different approach or professional help to resolve.
It’s also important to consider the cause of the stickiness. Was there a recent spill on your keyboard? Is there visible debris or lint in the key area? Understanding the cause will help you determine the appropriate cleaning method.
By carefully assessing the issue, you will have a clearer understanding of what needs to be done and can proceed confidently to the next step of fixing your sticky keyboard key.
Step 2: Prepare the necessary tools
Before you begin the process of fixing your sticky keyboard key, it’s important to gather the necessary tools to ensure a smooth and efficient repair. Here are the tools you’ll need:
- Clean cloth or microfiber cloth: This will be used to wipe down the key and surrounding area.
- Cotton swabs: These will help in reaching the smaller areas and crevices of the key.
- Isopropyl alcohol or electronic cleaning solution: This will be used to clean the sticky key and remove any grime or residue.
- Flathead screwdriver or plastic prying tool: This is needed to safely remove the key from the keyboard.
Make sure you have these tools readily available before proceeding to the next step. If you don’t have isopropyl alcohol or electronic cleaning solution, you can also use a mild household detergent diluted in water.
It’s important to note that using excessive force or sharp objects can damage the key or the keyboard, so it’s recommended to use a plastic prying tool or a flathead screwdriver with caution to avoid any unwanted mishaps.
By preparing the necessary tools beforehand, you’ll be well-equipped to effectively clean and fix your sticky keyboard key.
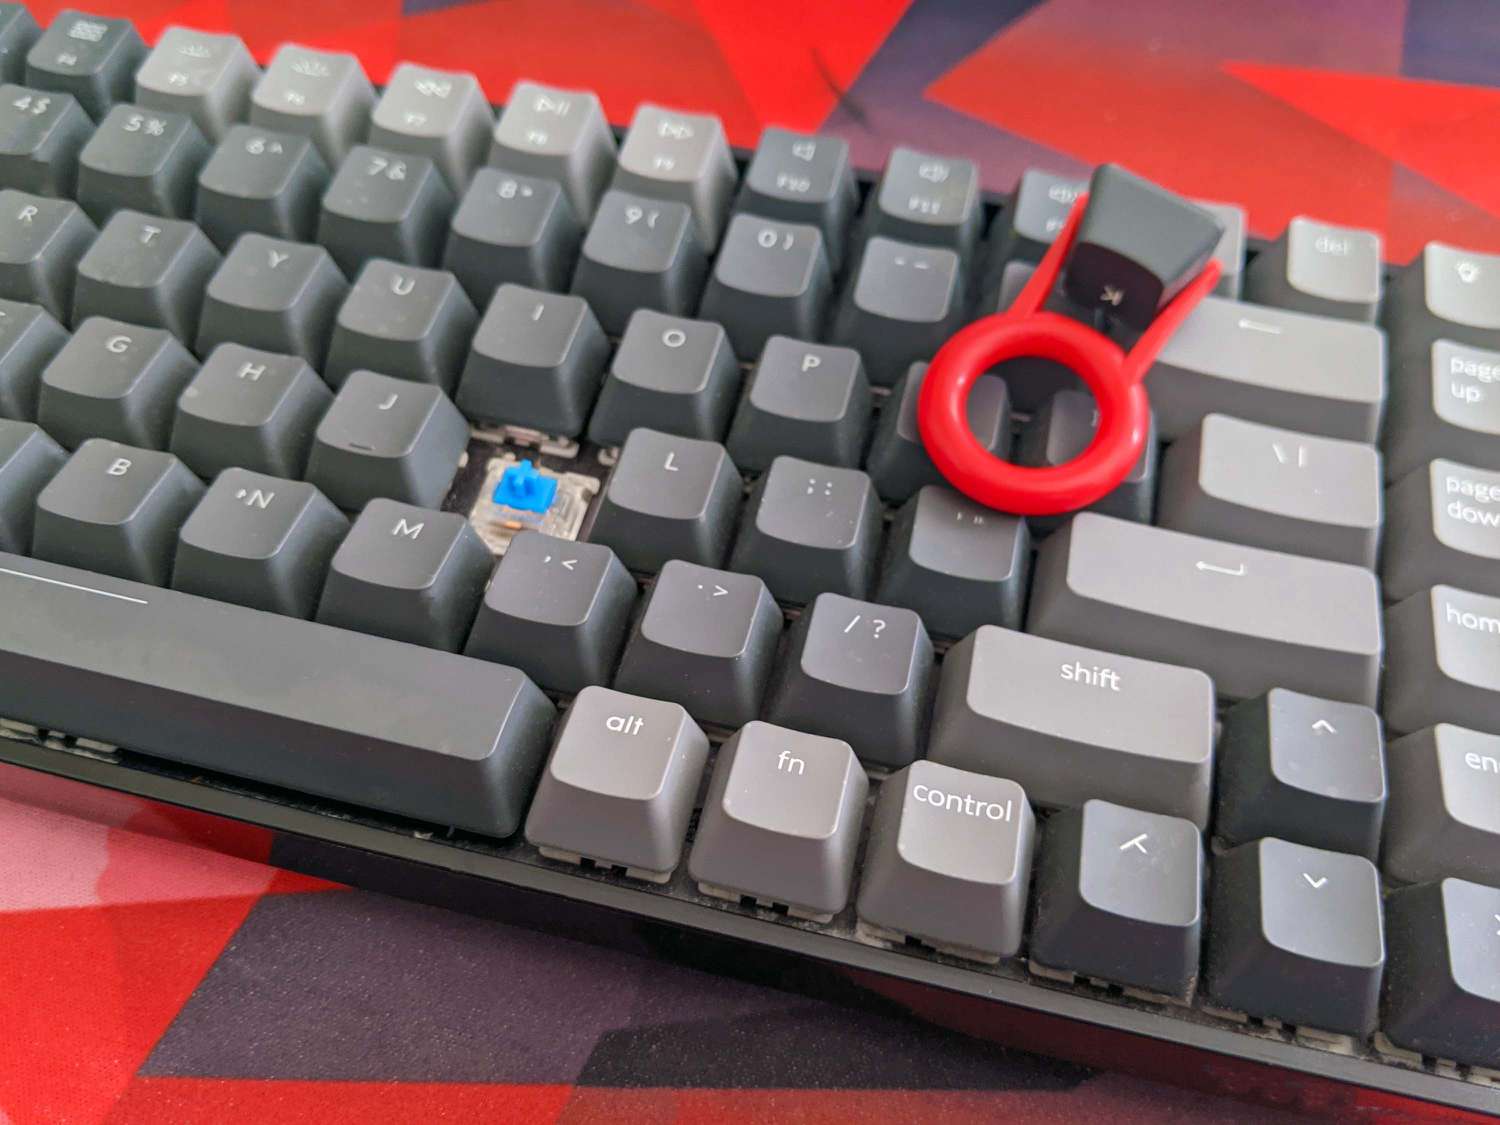
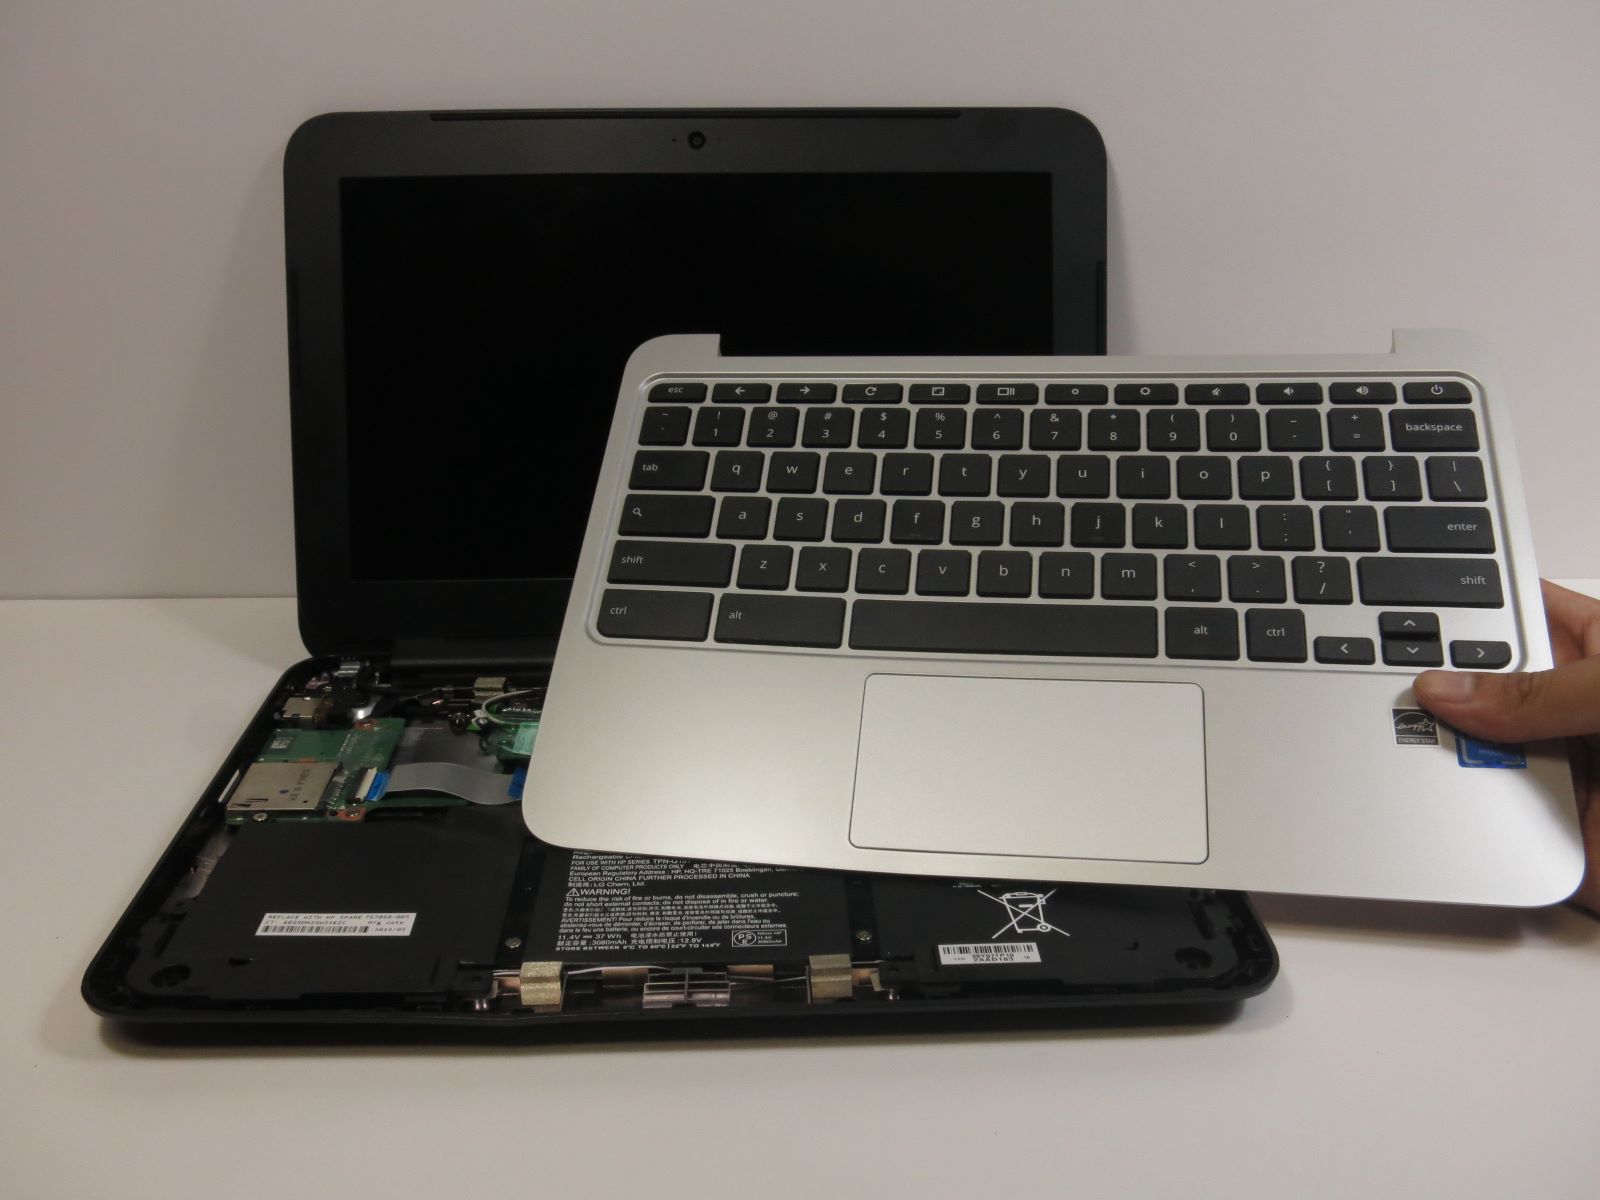
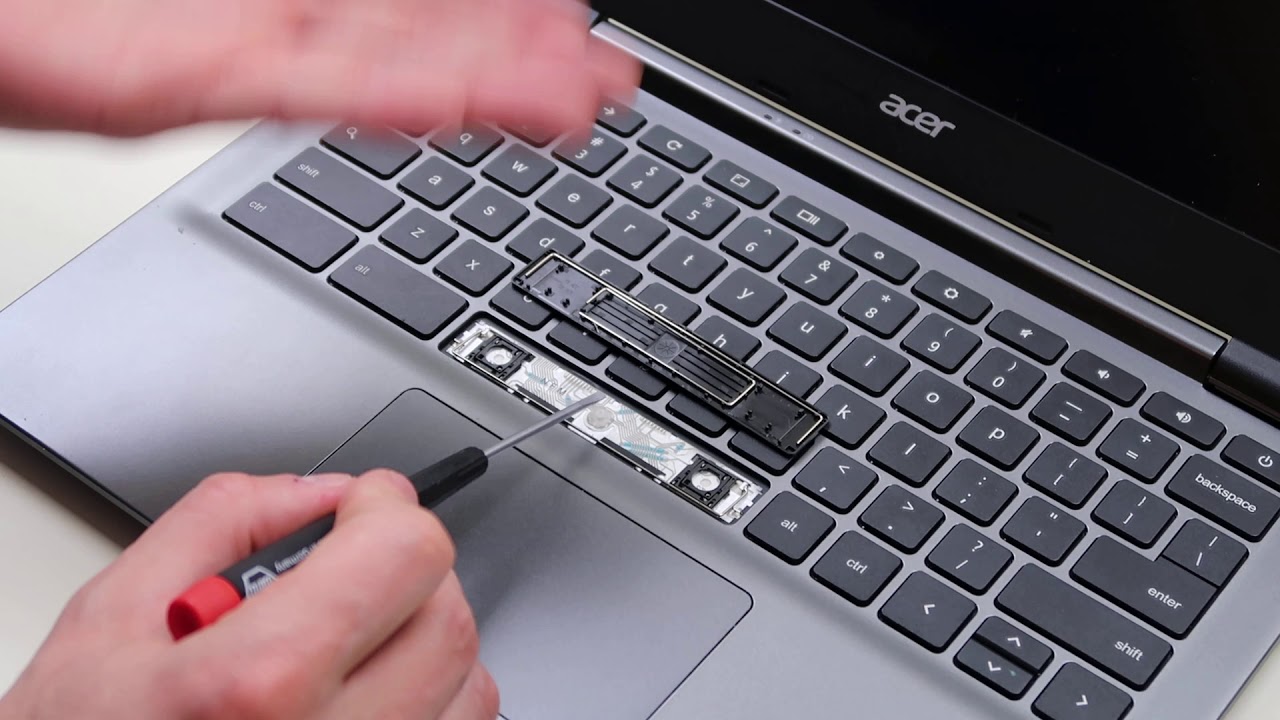
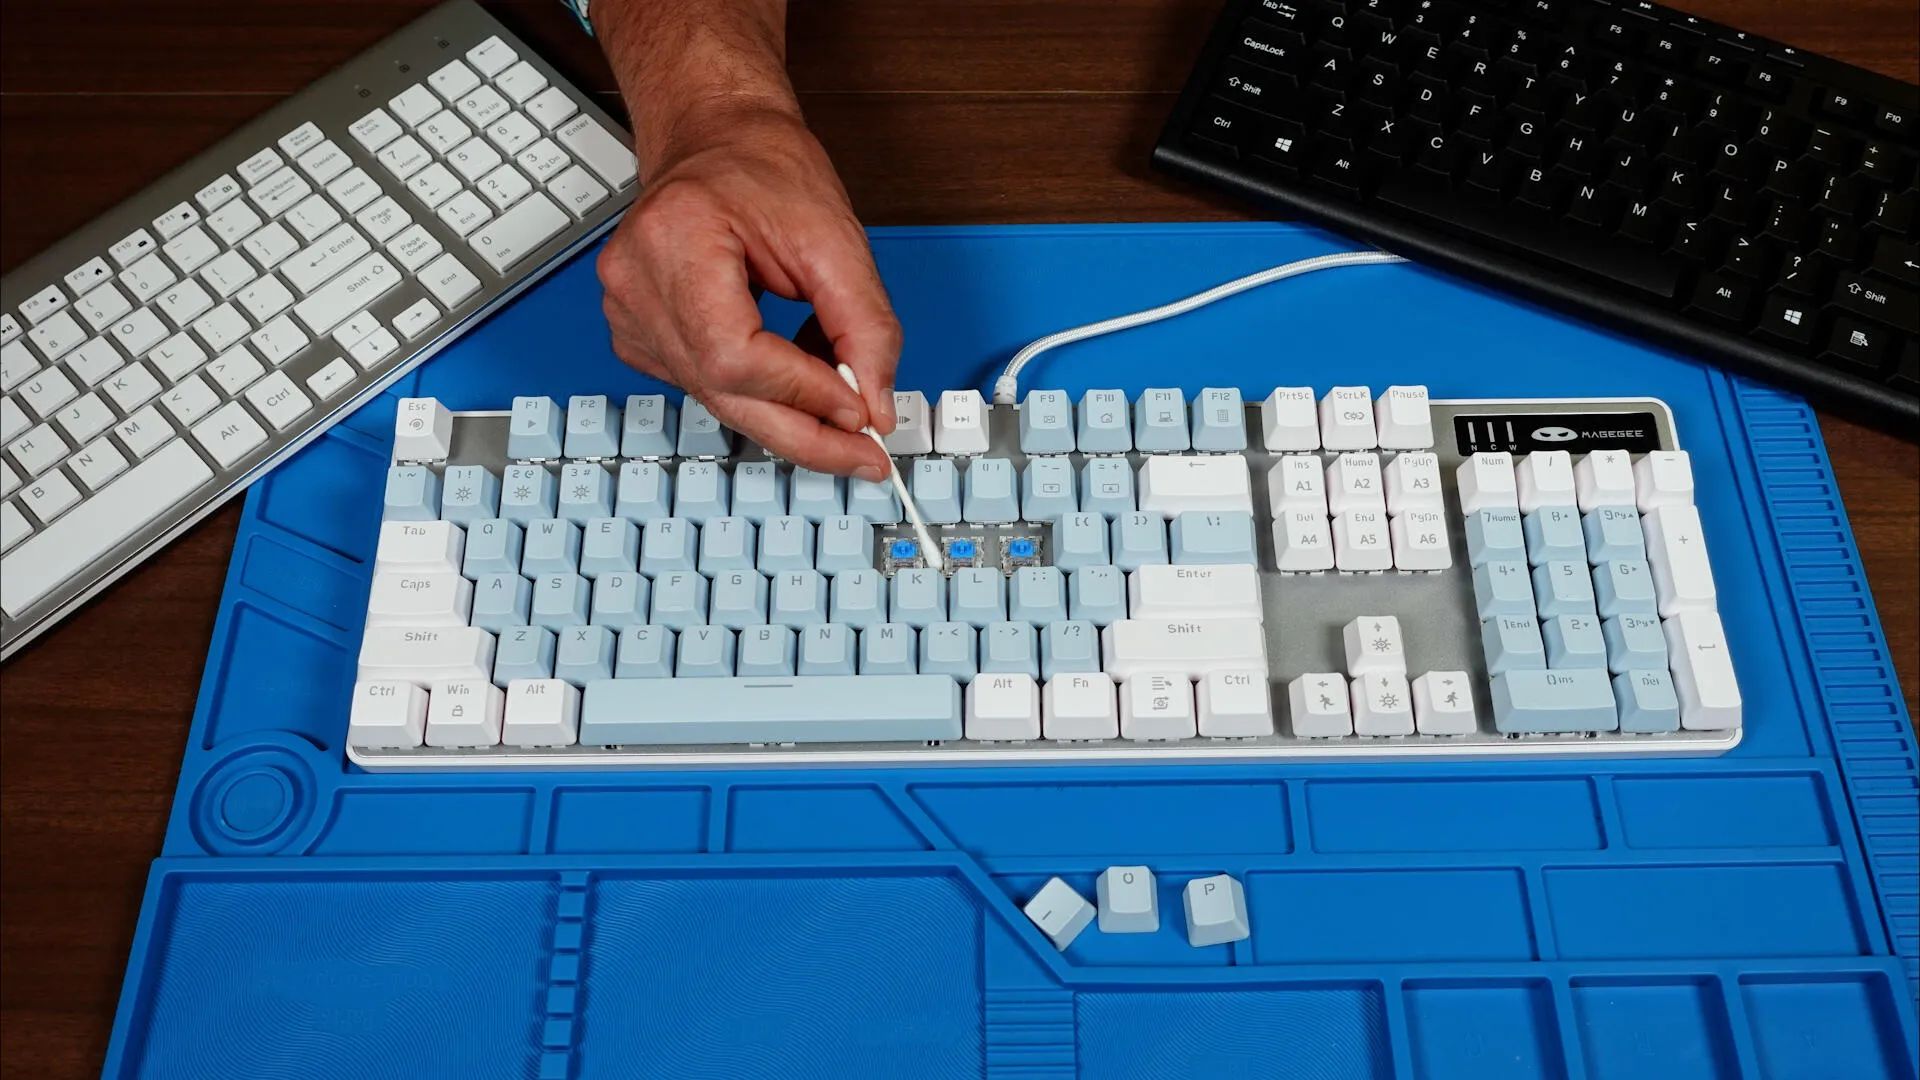
Step 3: Remove the sticky key
Once you have assessed the issue and gathered the necessary tools, it’s time to remove the sticky key. Removing the key will allow you to access the underlying mechanism for cleaning and fixing.
Follow these steps to safely remove the sticky key:
- Turn off your computer or unplug your keyboard if it is not a laptop keyboard.
- Position your keyboard in a way that allows you to easily access the sticky key. If needed, use a small box or support to prop up the keyboard.
- Locate the sticky key and identify the small plastic hinges or clips that attach it to the keyboard. These hinges or clips are usually positioned towards the bottom or sides of the key.
- Using a flathead screwdriver or a plastic prying tool, gently push or pry under the key’s edge to lift it up. Apply even pressure to avoid damaging the key.
- Lift the sticky key until it pops off the hinges or clips.
- Set the key aside in a safe place to avoid losing it.
Be careful not to use excessive force or twist the key while removing it, as it can lead to breakage. Take your time and handle the key with care.
By successfully removing the sticky key, you have cleared the way for the next steps in the repair process.
Step 4: Clean the key and surrounding area
Now that you have removed the sticky key, it’s time to clean it and the surrounding area. Dust, dirt, and residue are common causes of sticky keys, so a thorough cleaning can often resolve the issue.
Follow these steps to effectively clean the key and surrounding area:
- Dampen a clean cloth or microfiber cloth with isopropyl alcohol or electronic cleaning solution. If you don’t have these, you can use a mild detergent diluted in water.
- Gently wipe down the sticky key, removing any visible grime or residue. Pay attention to the edges and crevices of the key.
- For a more thorough clean, dip a cotton swab in the cleaning solution and carefully clean around the area where the key was attached. Remove any debris or dirt that may be affecting the key’s mechanism.
- Allow the key and surrounding area to dry completely before proceeding to the next step. This will prevent any moisture from interfering with the key’s functionality.
Remember to handle the key and cleaning solution with care, as excessive force or harsh chemicals can damage the key or keyboard mechanism.
By diligently cleaning the key and its surroundings, you are taking a crucial step towards fixing the sticking issue and restoring your keyboard’s functionality.
Step 5: Reattach the key
Now that you have cleaned the sticky key and the surrounding area, it’s time to reattach the key to its original position. Properly reattaching the key is crucial for ensuring its smooth functioning.
Follow these steps to reattach the key:
- Line up the key with the empty space where it was originally positioned on the keyboard.
- Position the key at a slight angle, with the bottom edge touching the keyboard surface first.
- Gently press down on the key until you hear or feel a click, indicating that it is securely attached.
- Give the key a gentle test press to verify that it is moving freely and not sticking.
Ensure that the key is aligned correctly and fully attached to the underlying mechanism. If it feels loose or does not click into place, remove it and reposition it until it securely snaps into place.
Take your time during this step to ensure the key is properly reattached, as an incorrect attachment can cause further issues with the key’s functionality.
By successfully reattaching the key, you are one step closer to resolving the sticky keyboard key problem.
Step 6: Test the key
After reattaching the key, it’s crucial to test its functionality to ensure that the sticky issue has been resolved. Testing the key will help you determine if any further adjustments or cleaning are needed.
Follow these steps to test the key:
- Ensure that your computer or keyboard is turned on.
- Position your fingers over the repaired key.
- Press the key down firmly and observe its response. It should register the keystroke without any sticking or inconsistencies.
- Repeat the test a few times to check for consistency.
If the key still feels sticky or shows any signs of sticking, you may need to repeat the cleaning process or consider seeking professional assistance if the issue persists.
Make sure to test other nearby keys as well to ensure that the repair has not affected their functionality.
By thoroughly testing the key, you can have confidence in the success of your repair and the smooth functioning of your keyboard.
Step 7: Additional troubleshooting tips
If you have followed the previous steps and are still experiencing issues with your sticky keyboard key, here are some additional troubleshooting tips that may help:
- Try using compressed air: Use a can of compressed air to remove any remaining debris or dust that may be causing the sticking issue. Direct short bursts of air around the key and in the surrounding area.
- Use a keyboard cleaning gel: Keyboard cleaning gels are sticky, jelly-like substances that can be pressed onto the keys and then peeled off to remove dust, dirt, and debris. Ensure you follow the manufacturer’s instructions when using such products.
- Consider keyboard software settings: Sometimes, the key sticking issue may be related to software settings rather than a physical problem. Check your computer’s keyboard settings to ensure there are no custom key assignments or sticky key settings enabled.
- Replace the key or keyboard: If all else fails, you may need to replace the sticky key or even the entire keyboard. Contact the manufacturer or a trusted technician for assistance in obtaining and installing a replacement key or keyboard.
Remember, troubleshooting methods may vary depending on the type and model of your keyboard, so consult the user manual or online resources specific to your keyboard if available.
By exploring these additional troubleshooting tips, you can give your sticky keyboard key one last chance before considering more drastic measures.
Conclusion
Dealing with a sticky keyboard key can be frustrating, but with the right steps and tools, you can easily fix the issue and restore your keyboard’s functionality. By assessing the problem, preparing the necessary tools, removing the sticky key, cleaning the key and surrounding area, reattaching the key, testing its functionality, and exploring additional troubleshooting options if needed, you can effectively resolve the sticky key problem.
Remember to approach the repair process with patience and caution, ensuring you handle the key and cleaning solutions gently to avoid any damage. It’s also important to test the key thoroughly to make sure the stickiness has been fully resolved.
If you encounter challenges or the problem persists, don’t hesitate to seek professional assistance or consider replacing the key or keyboard if necessary. Your typing experience is important, and a properly functioning keyboard enhances productivity and efficiency.
By following these steps and troubleshooting tips, you’ll be well on your way to fixing a sticky keyboard key and enjoying smooth, uninterrupted typing once again.