Introduction
Have you ever wondered why your GPU fan is making such a racket? The relentless whirring can be quite annoying, not to mention concerning. A loud GPU fan not only disrupts your work or gaming experience, but it can also be a sign of underlying issues with your graphics card.
A GPU, or graphics processing unit, is responsible for driving the visuals on your computer screen. As the GPU works, it generates heat, which needs to be dissipated to prevent overheating. The fan on the GPU is designed to cool down the graphics card by drawing in cool air and expelling hot air. However, when the fan starts to produce excessive noise, it’s an indication that something isn’t quite right.
In this article, we will explore the common reasons behind loud GPU fan noise and provide practical solutions to help you fix the issue. Whether you’re a seasoned gamer, a graphic designer, or a casual computer user, understanding why your GPU fan is so loud can help prolong the lifespan of your graphics card and improve your overall computing experience.
Why is my GPU fan so loud?
A loud GPU fan can be attributed to various factors, including dust and debris accumulation, high GPU temperature, faulty fan or fan speed settings, overclocking, insufficient airflow or improper case ventilation, and an aging or worn-out fan.
Dust and debris accumulation: Over time, dust and debris can accumulate on the GPU heatsink and fan blades. This buildup restricts airflow and causes the fan to work harder, resulting in increased noise.
High GPU temperature: If your GPU is running at a high temperature, the fan will spin faster to dissipate the heat. This can lead to a louder fan noise as it tries to cool down the graphics card.
Faulty fan or fan speed settings: Occasionally, the fan itself may be defective or experiencing issues. Additionally, incorrect fan speed settings in the system BIOS or GPU control software can cause the fan to operate at higher speeds, resulting in excessive noise.
Overclocking: Overclocking your GPU involves increasing its clock speed and voltage to achieve better performance. While this can enhance graphics capability, it also generates more heat and may require the fan to spin faster, leading to a louder noise output.
Insufficient airflow or improper case ventilation: A poorly ventilated computer case can restrict the airflow around the GPU, causing it to heat up. This puts more strain on the fan, resulting in increased noise. Insufficient airflow from clogged air intakes or blocked vents can also contribute to the issue.
Aging or worn-out fan: Like any mechanical component, GPU fans can wear out over time. The bearings may become loose or damaged, causing the fan to produce noise as it spins.
Understanding the reasons behind a loud GPU fan is the key to resolving the issue. In the following sections, we will delve into practical solutions to help you fix your loud GPU fan and restore peace and quiet to your computing experience.
Common reasons for loud GPU fan noise
A loud GPU fan noise can be caused by various factors. Let’s explore some of the common reasons behind this issue:
- Dust and debris accumulation: Over time, dust and debris can accumulate on the GPU heatsink and fan blades. This buildup restricts airflow and forces the fan to work harder, resulting in increased noise.
- High GPU temperature: When the GPU temperature rises, the fan speed increases to dissipate the heat. This can lead to a louder fan noise as it works harder to cool down the graphics card.
- Faulty fan or fan speed settings: Sometimes, the GPU fan itself may be faulty or experiencing issues. Additionally, incorrect fan speed settings in the system BIOS or GPU control software can cause the fan to operate at higher speeds, resulting in excessive noise.
- Overclocking: Overclocking your GPU can result in higher clock speeds and increased heat generation. To cope with this, the fan may need to spin faster, causing it to produce more noise.
- Insufficient airflow or improper case ventilation: Inadequate airflow within the computer case can lead to a buildup of heat around the GPU. This causes the fan to spin faster in an attempt to cool down the graphics card, resulting in a louder noise output. Poor case ventilation, such as clogged air intakes or blocked vents, can contribute to this problem as well.
- Aging or worn-out fan: GPU fans, like any mechanical component, can degrade with time and usage. The fan bearings may loosen or wear out, causing the fan to produce noise as it spins.
Identifying the root cause of the loud GPU fan noise is crucial in resolving the issue efficiently. In the following sections, we will discuss practical solutions to help you fix your loud GPU fan and restore a quieter and more enjoyable computing experience.
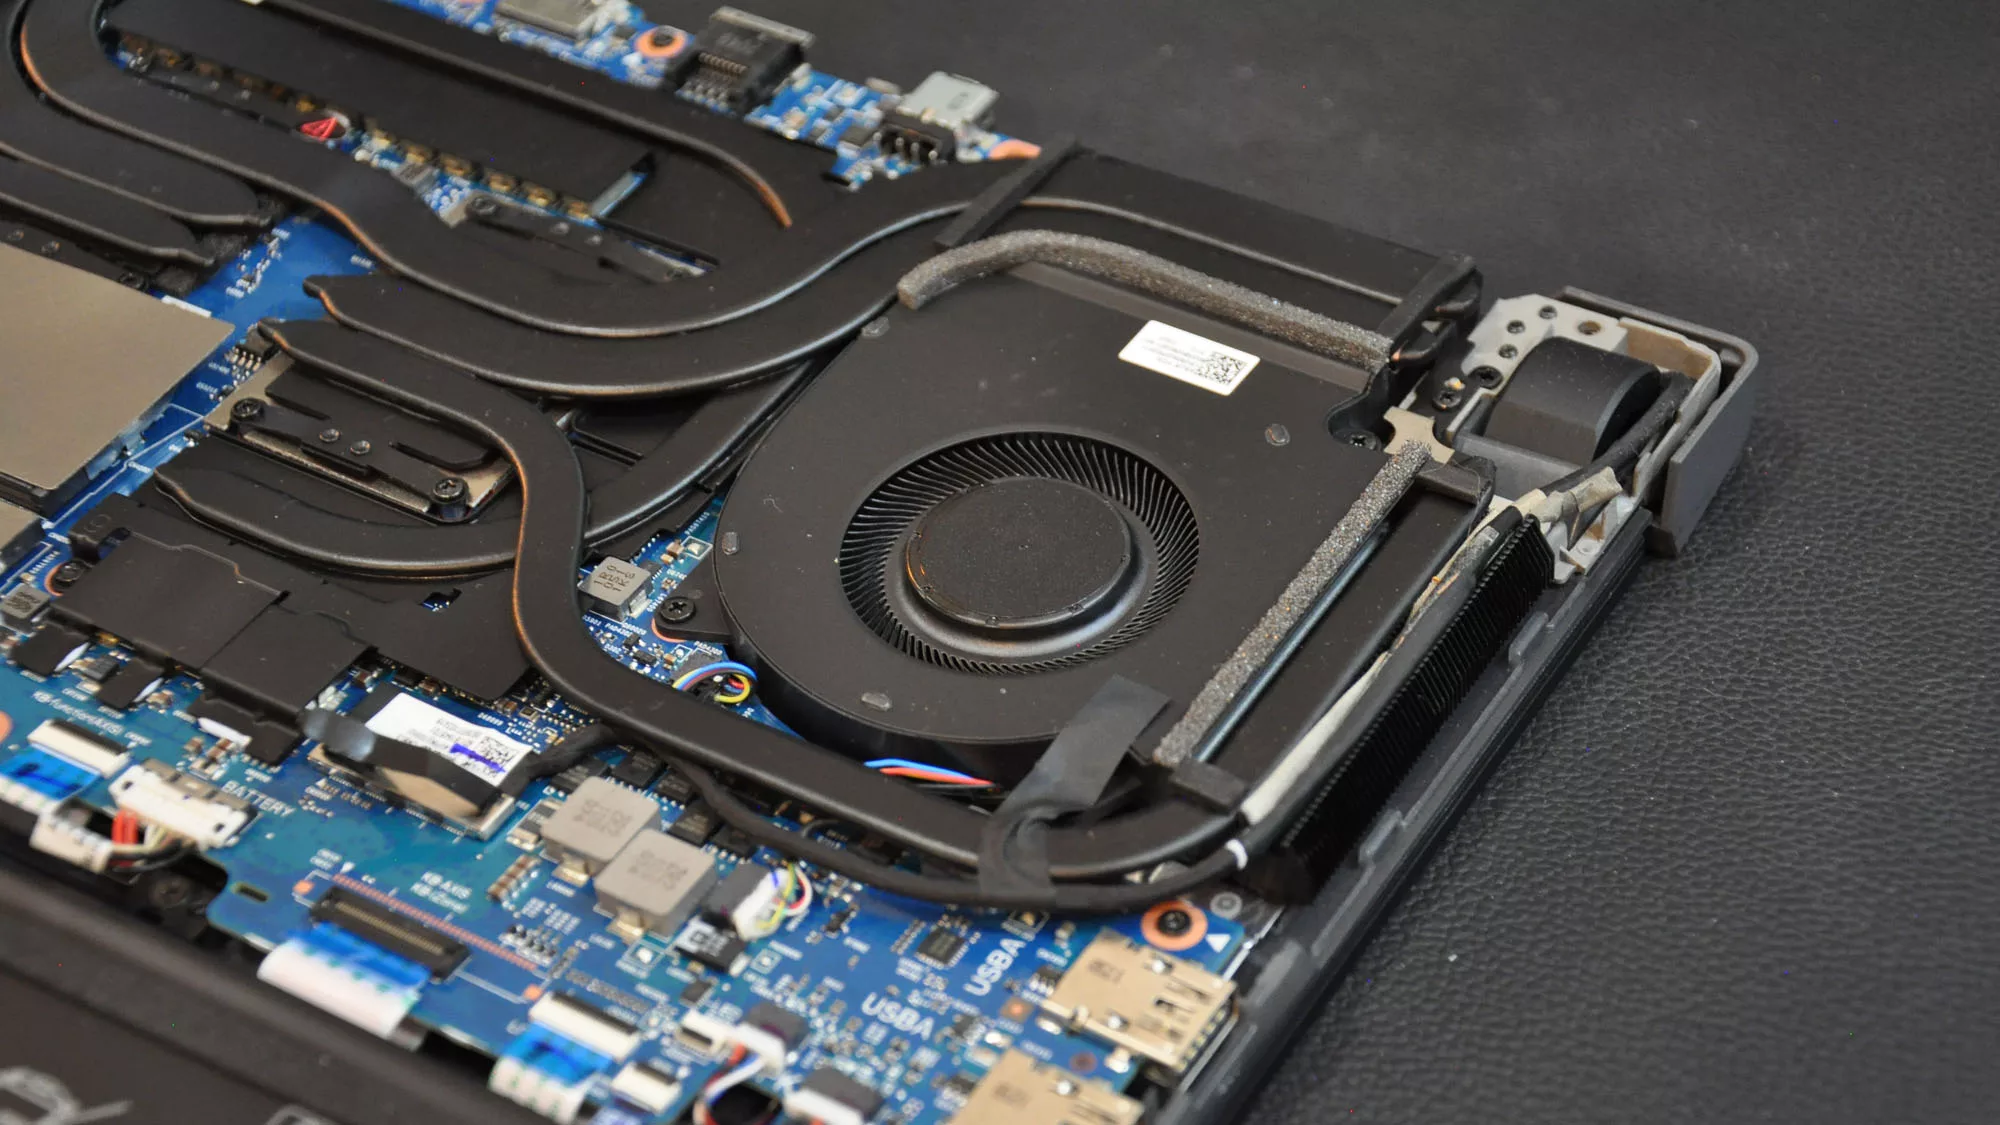
Dust and debris accumulation
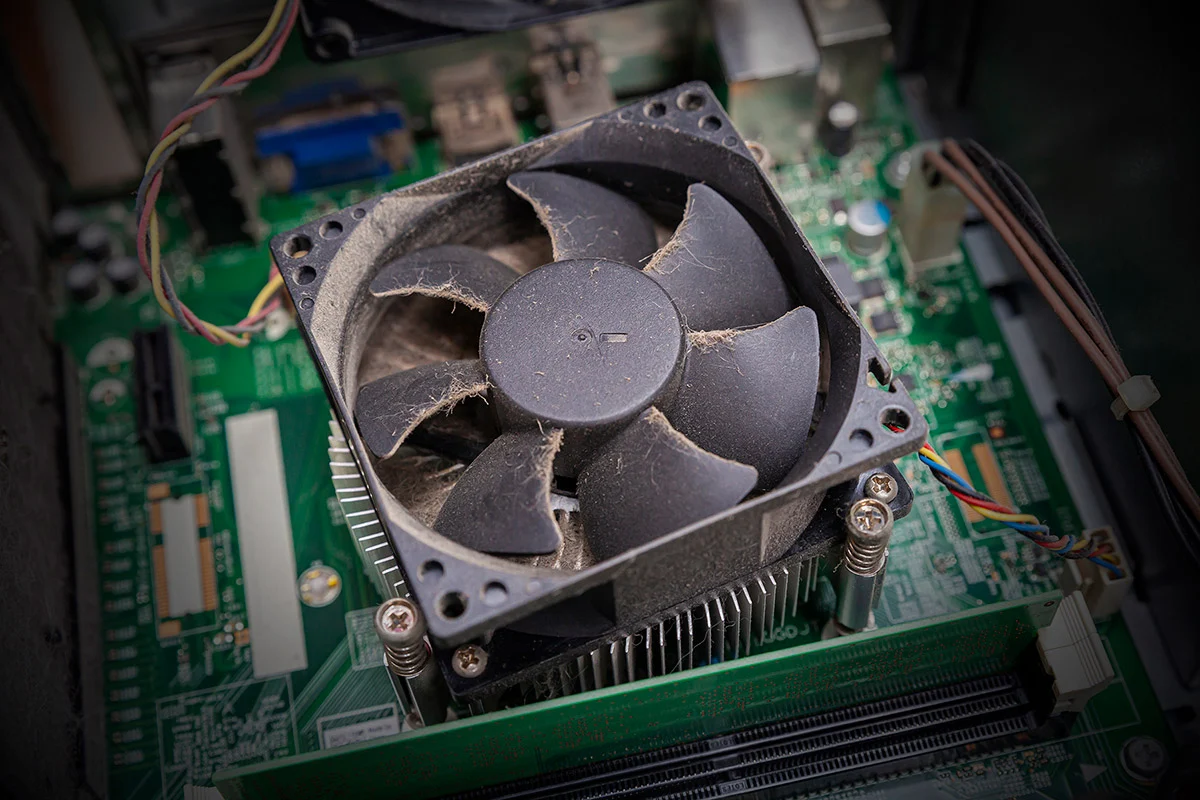
One of the common culprits behind a loud GPU fan noise is the accumulation of dust and debris on the GPU heatsink and fan blades. As your computer operates, it naturally attracts dust particles from the surrounding environment. Over time, this dust can build up and clog the airflow, hindering the cooling process.
When dust accumulates on the GPU heatsink and fan blades, it restricts the airflow and forces the fan to work harder to cool down the graphics card. This increased effort leads to a louder fan noise as the fan spins at higher speeds.
To resolve this issue, regular cleaning of your GPU is essential. Here’s how you can clean the GPU and reduce the loud fan noise:
- Power off and unplug your computer: Before cleaning the GPU, it’s crucial to ensure that your computer is turned off and unplugged. This prevents any electrical accidents and ensures your safety.
- Open your computer case: Carefully remove the side panel of your computer case to access the internal components. Take note of any screws or clips that may be holding the panel in place.
- Locate the GPU: Identify the GPU within your computer. It may be a separate card inserted into a PCIe slot or integrated into the motherboard.
- Remove the GPU: If necessary, remove the GPU from the PCIe slot by unscrewing any brackets or release clips. Take caution while handling the GPU to avoid damaging any delicate components.
- Clean the heatsink and fan: Use a can of compressed air or a soft brush to remove the dust and debris from the GPU heatsink and fan blades. Ensure that you remove any visible clumps of dust that may be blocking the airflow.
- Reinstall the GPU: Carefully reinsert the GPU into the PCIe slot, securing it with screws or clips as necessary.
- Close the computer case: Put the side panel back onto your computer case, ensuring that it is securely fastened.
By removing the dust and debris from your GPU, you can restore proper airflow and reduce the strain on the fan. This will help minimize the loud fan noise and improve the cooling efficiency of your graphics card.
High GPU temperature
Another factor that can contribute to a loud GPU fan noise is a high GPU temperature. The primary function of the GPU fan is to cool down the graphics card by expelling hot air and drawing in cool air. When the GPU temperature rises, the fan speeds up in an attempt to dissipate the excess heat and maintain optimal operating conditions.
If your GPU is running at a high temperature, the fan will spin faster to compensate for the increased heat generation. This can result in a louder fan noise as it works harder to cool down the graphics card.
To address the issue of high GPU temperature and reduce the associated fan noise, consider the following steps:
- Clean the GPU: Ensure that there is no dust or debris accumulation on the GPU heatsink and fan blades. Use a can of compressed air or a soft brush to remove any obstructive particles.
- Improve airflow in your computer case: Adequate airflow is essential to maintain low GPU temperatures. Make sure that the computer case has proper ventilation and that the intake and exhaust fans are functioning correctly. Consider adding extra fans or upgrading your computer case to improve overall airflow.
- Check thermal paste application: The thermal paste between the GPU and the heatsink helps to conduct heat effectively. If the thermal paste is old or improperly applied, it can impede heat transfer. Consider reapplying thermal paste to ensure proper thermal conductivity.
- Reduce GPU stress: Running demanding applications or games can put excessive stress on the GPU, leading to higher temperatures. Consider closing unnecessary applications and reducing graphics settings to lessen the load on the GPU.
- Monitor GPU temperature: Utilize software tools to monitor the GPU temperature in real-time. This will allow you to keep an eye on the temperature and take appropriate action if it exceeds safe limits.
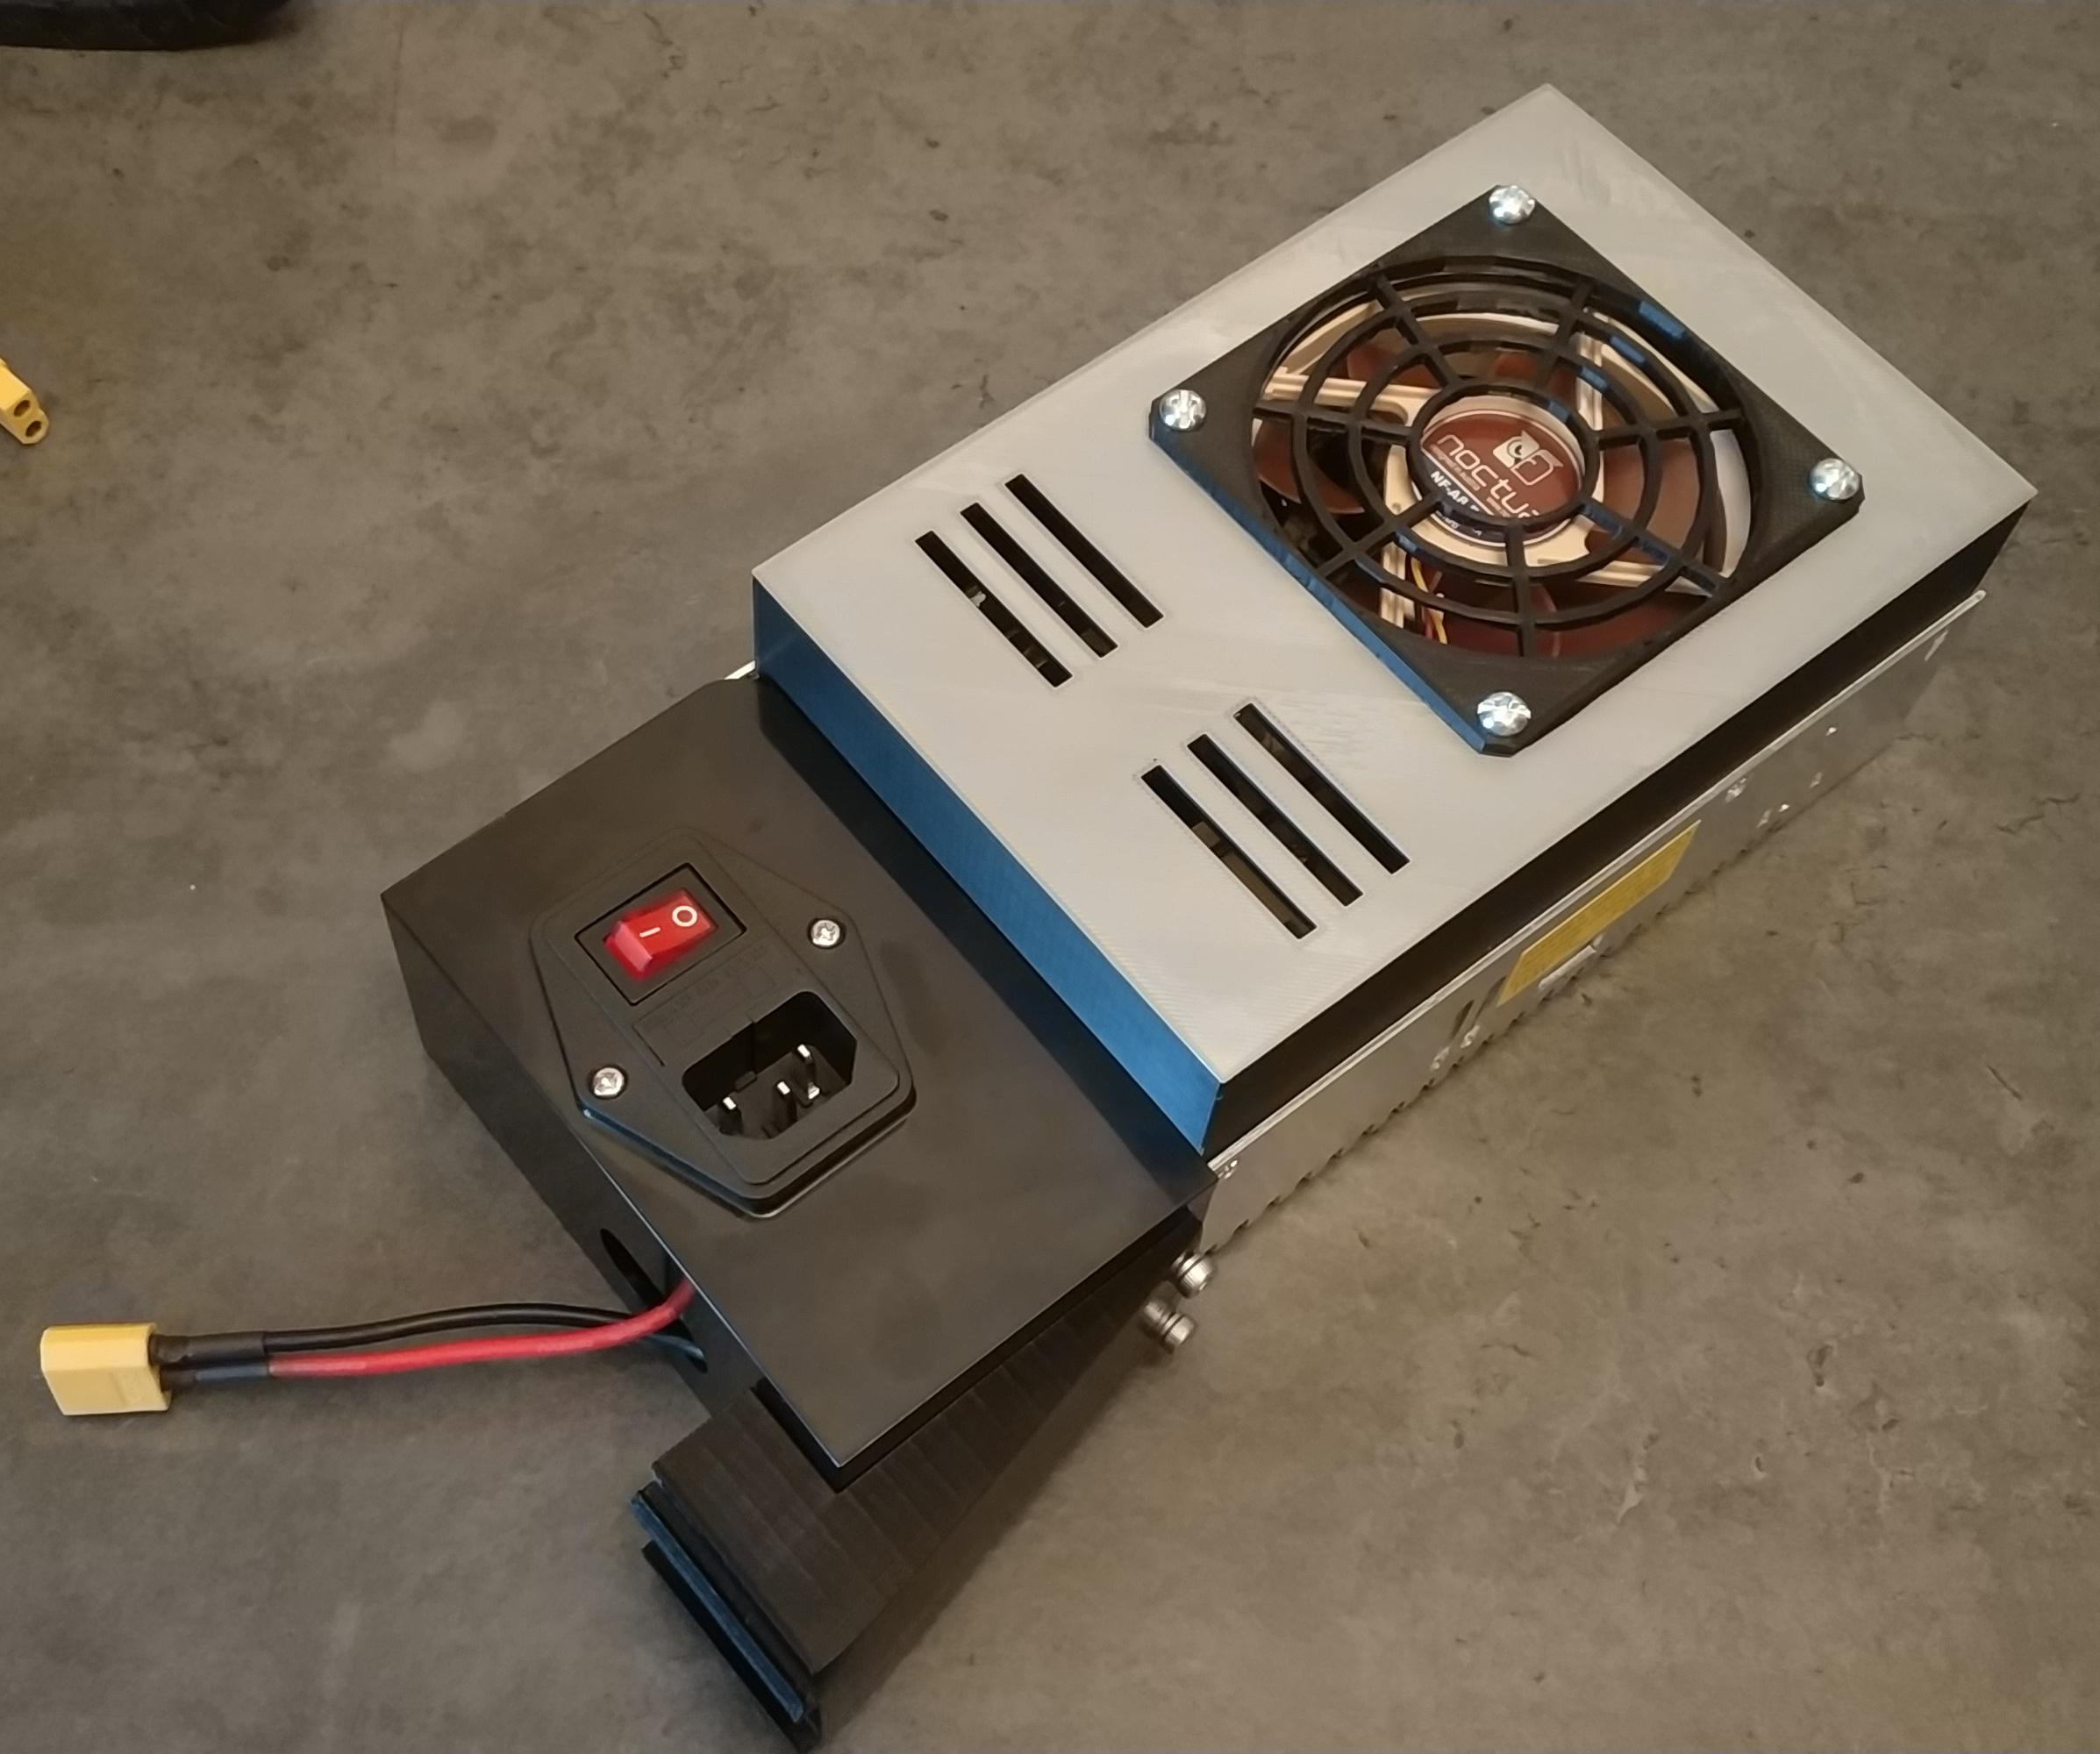
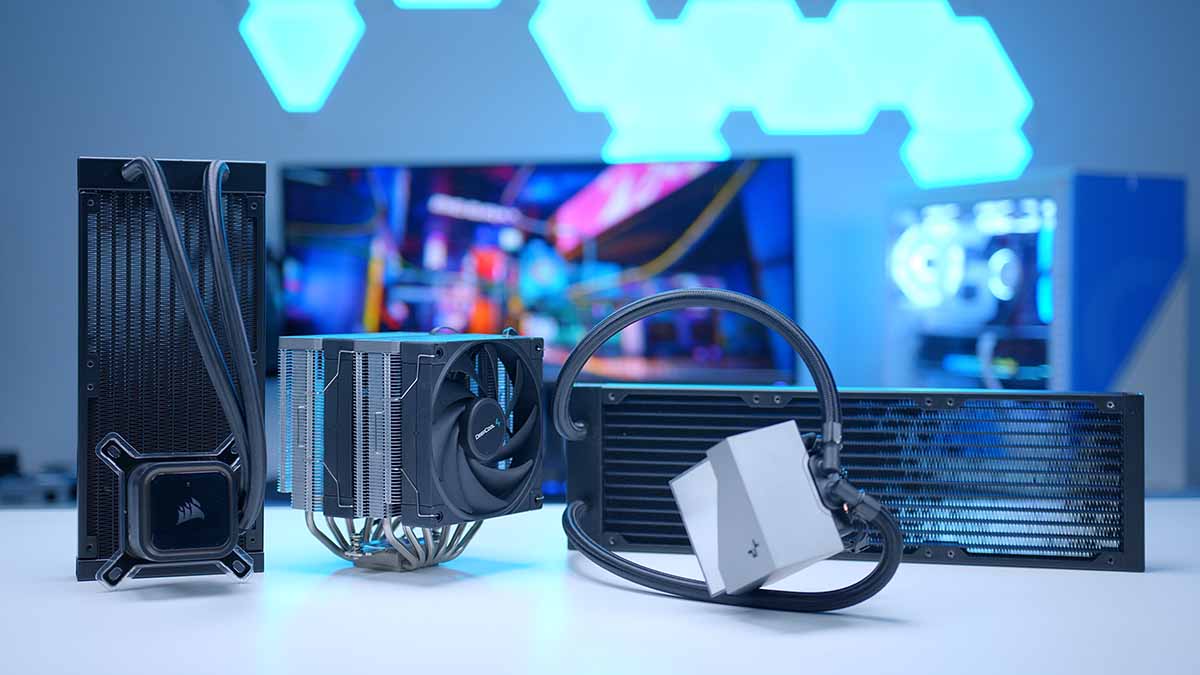
- Upgrade your cooling solution: If your GPU consistently runs hot and the fan noise is bothersome, you may want to consider upgrading to an aftermarket cooling solution. This can include installing a larger heatsink, using a liquid cooling system, or opting for a GPU with improved cooling capabilities.
By implementing these steps, you can help maintain lower GPU temperatures, resulting in reduced fan speeds and quieter operation. Keeping your GPU temperature in check not only helps to mitigate fan noise but also improves overall system performance and prolongs the lifespan of your graphics card.
Faulty fan or fan speed settings
If you’re experiencing a loud GPU fan noise, it’s important to consider the possibility of a faulty fan or incorrect fan speed settings as the underlying cause. Sometimes, the fan itself may be defective or experiencing issues, resulting in increased noise output.
Additionally, improper fan speed settings in the system BIOS or GPU control software can cause the fan to operate at higher speeds than necessary, leading to excessive noise. It’s essential to ensure that the fan speed is configured correctly to maintain a balance between cooling efficiency and noise levels.
To address the issue of a faulty fan or incorrect fan speed settings, consider the following steps:
- Check for physical damage: Inspect the fan for any visible signs of damage, such as bent blades or obstructions. If any damage is detected, it may be necessary to replace the fan.
- Update GPU drivers: Ensure that you have the latest GPU drivers installed. Sometimes, outdated or incompatible drivers can cause fan-related issues. Visit the manufacturer’s website or use automatic driver update software to install the latest driver version.
- Reset fan speed settings: Access the system BIOS or GPU control software and reset the fan speed settings to their default values. This will ensure that the fan operates at its intended speed and helps maintain an optimal balance between cooling and noise levels.
- Adjust fan curve: Some GPU control software allows you to customize the fan curve, which determines the fan speed based on GPU temperature. Experiment with adjusting the fan curve to find a balance between cooling performance and noise levels that suits your preference.
- Consider aftermarket GPU cooling: If your GPU fan noise remains excessively loud or cannot be resolved through software tweaks, you may want to explore aftermarket cooling solutions. Upgrading to an aftermarket GPU cooler can provide better heat dissipation and potentially quieter fan operation.
By examining the fan for physical damage, updating GPU drivers, resetting fan speed settings, and potentially adjusting the fan curve or upgrading the cooling solution, you can address potential issues related to a faulty fan or incorrect fan speed settings. Always remember to refer to the manufacturer’s guidelines and follow proper procedures when modifying fan settings or installing aftermarket cooling solutions.
Overclocking
Overclocking is a popular practice among enthusiasts and gamers, as it allows them to push their hardware to achieve higher performance levels. However, overclocking can also contribute to a loud GPU fan noise.
When you overclock your GPU, you increase its clock speed and voltage to obtain better performance. This boost in performance results in increased heat generation, which can lead to higher GPU temperatures. To counteract the additional heat, the GPU fan may need to spin faster to dissipate the increased thermal output, resulting in a louder fan noise.
If you have overclocked your GPU and are experiencing loud fan noise as a consequence, consider the following steps:
- Reset to default settings: If you are not prepared to deal with the louder fan noise or are experiencing stability issues, consider resetting your GPU settings to their default values. This will reduce the clock speed and voltage back to their stock levels, resulting in lower heat generation and potentially quieter fan operation.
- Monitor GPU temperatures: It’s crucial to monitor your GPU temperatures while overclocking to ensure they stay within safe limits. If temperatures are consistently high, you may need to adjust your overclocking settings or consider alternative cooling solutions.
- Improve overall system cooling: Overclocking puts additional stress on your GPU, which can generate more heat. Ensure that your computer case has adequate ventilation and that the airflow is optimized to maintain proper cooling. Consider installing additional fans or upgrading your cooling system if necessary.
- Test your overclocking settings: Use stress testing software to evaluate the stability and temperature levels of your overclocked GPU. This will help you determine if the fan noise is within an acceptable range and if further adjustments are necessary.
- Consider a custom cooling solution: If you are committed to overclocking and want to reduce fan noise while maintaining optimal performance, you may want to invest in a custom cooling solution such as an aftermarket GPU cooler or a liquid cooling system.
Keep in mind that overclocking can void warranties and may carry certain risks. It’s important to proceed with caution and educate yourself on proper overclocking techniques. Understanding the impact of overclocking on your GPU’s temperature and fan noise can help you make informed decisions and strike a balance between performance and quiet operation.
Insufficient airflow or improper case ventilation
Insufficient airflow and improper case ventilation can contribute to a loud GPU fan noise. When the computer case does not provide adequate ventilation, the airflow around the GPU becomes restricted, leading to higher temperatures. In an attempt to cool down the graphics card, the GPU fan needs to spin faster, resulting in increased noise output.
To address the issue of insufficient airflow or improper case ventilation, consider the following steps:
- Clean the computer case: Dust and debris can accumulate on the case fans, air intakes, and vents, blocking airflow. Regularly clean these areas using compressed air or a soft brush to remove any obstructions.
- Properly position the computer: Ensure that the computer is placed on a flat surface with sufficient clearance on all sides. Avoid placing it in enclosed spaces or against walls, as this can hinder proper airflow.
- Check the positioning of cables: Ensure that the cables inside the computer case are neatly organized and do not obstruct the airflow. Use cable management solutions to route cables away from critical airflow paths.
- Add additional case fans: If your computer case has available fan mounts, consider installing additional fans to improve overall airflow. Position the fans strategically to ensure proper intake and exhaust air circulation around the GPU.
- Upgrade the computer case: If your current computer case lacks proper airflow or ventilation options, consider upgrading to a case that offers better cooling capabilities. Look for cases with efficient fan placements, dust filters, and cable management options.
- Consider liquid cooling: Liquid cooling systems, such as all-in-one (AIO) coolers or custom loop setups, can provide more efficient cooling compared to air cooling. They can help eliminate noisy fans and maintain optimal GPU temperatures.
- Monitor GPU temperatures: Utilize software tools to monitor the GPU temperature. This will help you assess if the fan noise is caused by inadequate airflow or improper case ventilation. If the temperatures are consistently high, it may be necessary to take additional measures to improve cooling.
By addressing issues related to insufficient airflow and improper case ventilation, you can help create a more conducive environment for your GPU. This will promote better cooling, reduce the strain on the GPU fan, and ultimately result in quieter noise levels, enhancing your overall computing experience.
Aging or worn-out fan
As with any mechanical component, GPU fans can deteriorate over time due to wear and tear. Aging or worn-out fans can develop issues such as loose or damaged bearings, leading to increased noise output.
If your GPU fan has become loud and there are no evident issues with dust accumulation, high temperatures, or faulty fan settings, it is possible that the fan itself has reached the end of its lifespan. In such cases, replacing the fan may be necessary to restore optimal cooling and reduce fan noise.
Here are the steps to address the issue of an aging or worn-out GPU fan:
- Identify the fan model: Determine the specific fan model used by your GPU. This information is typically available in the GPU’s specifications or through the manufacturer’s website. Make a note of the fan’s size, connectors, and any other relevant details.
- Order a replacement fan: Purchase a new fan that matches the specifications of the original fan. You can find replacement fans through online retailers or by contacting the GPU manufacturer directly.
- Safely uninstall the old fan: Depending on your GPU model, removing the fan may involve unscrewing it from the heatsink or detaching it from the graphics card PCB. Follow the manufacturer’s instructions or refer to online tutorials specific to your GPU model to ensure a safe removal process.
- Install the new fan: Attach the replacement fan to the heatsink or graphics card PCB, using the appropriate screws or connectors. Ensure that it is securely fastened and properly aligned with the GPU’s cooling system.
- Test the new fan: Power on your computer and observe the behavior of the replacement fan. Confirm that it spins smoothly without any unusual noise or vibration. Monitor the GPU temperature to ensure that the fan is effectively cooling the graphics card.
Replacing an aging or worn-out GPU fan can effectively reduce fan noise and restore efficient cooling performance. However, if you are uncomfortable or unfamiliar with hardware installation, it is recommended to seek professional assistance from a knowledgeable technician or contact the GPU manufacturer for support.
How to fix a loud GPU fan
A loud GPU fan can be quite bothersome, but there are several steps you can take to address and fix the issue. By following these solutions, you can reduce the noise generated by your GPU fan and restore a quieter and more enjoyable computing experience.
- Clean the GPU and fans: Dust and debris accumulation can restrict airflow and cause the fan to work harder. Regularly clean the GPU heatsink and fan blades using compressed air or a soft brush to remove any obstructions.
- Ensure proper ventilation and airflow: Check your computer case for adequate ventilation and ensure that the airflow is optimized. Make sure there are no obstructions and that the intake and exhaust fans are functioning effectively.
- Adjust fan speed settings: Access the system BIOS or GPU control software to adjust the fan speed settings. Find a balance between cooling performance and noise levels that suits your requirements.
- Check GPU temperature and reduce stress: Monitor the GPU temperature using software tools and ensure it remains within safe limits. Close unnecessary applications and reduce graphics settings to lessen the stress on the GPU.
- Consider replacing the fan: If your GPU fan is aging or worn-out, replacing it with a new fan can effectively reduce fan noise and restore optimal cooling performance. Make sure to select a replacement fan that matches the specifications of the original fan.
- Upgrade cooling solutions: Consider upgrading your computer case, adding additional case fans, or even implementing liquid cooling systems to improve overall cooling efficiency and reduce excessive fan noise.
Implementing these solutions can help resolve the issue of a loud GPU fan. However, it’s important to note that improper handling or modifications can potentially damage your GPU or other components. If you are unsure or uncomfortable performing any of these steps, it is recommended to seek professional assistance from a knowledgeable technician.
Remember, the goal is to strike a balance between maintaining optimal GPU temperatures and achieving quieter fan operation. By effectively addressing the underlying causes of a loud GPU fan, you can create a more peaceful and efficient computing environment.
Clean the GPU and fans
One of the most common reasons for a loud GPU fan is the accumulation of dust and debris on the GPU and its fans. Over time, these particles can block the airflow, causing the fans to work harder and produce more noise as they try to maintain proper cooling. Cleaning the GPU and fans is a simple and effective solution to reduce the noise and restore optimal performance.
Here are the steps to clean your GPU and fans:
- Power off and unplug your computer: Before performing any cleaning, make sure to turn off your computer and unplug it from the power source. This will eliminate any risk of electrical shock or damage while working on the components.
- Open your computer case: Carefully remove the side panel of your computer case to expose the internal components. Refer to your computer’s manual or look for any screws or latches that hold the panel in place.
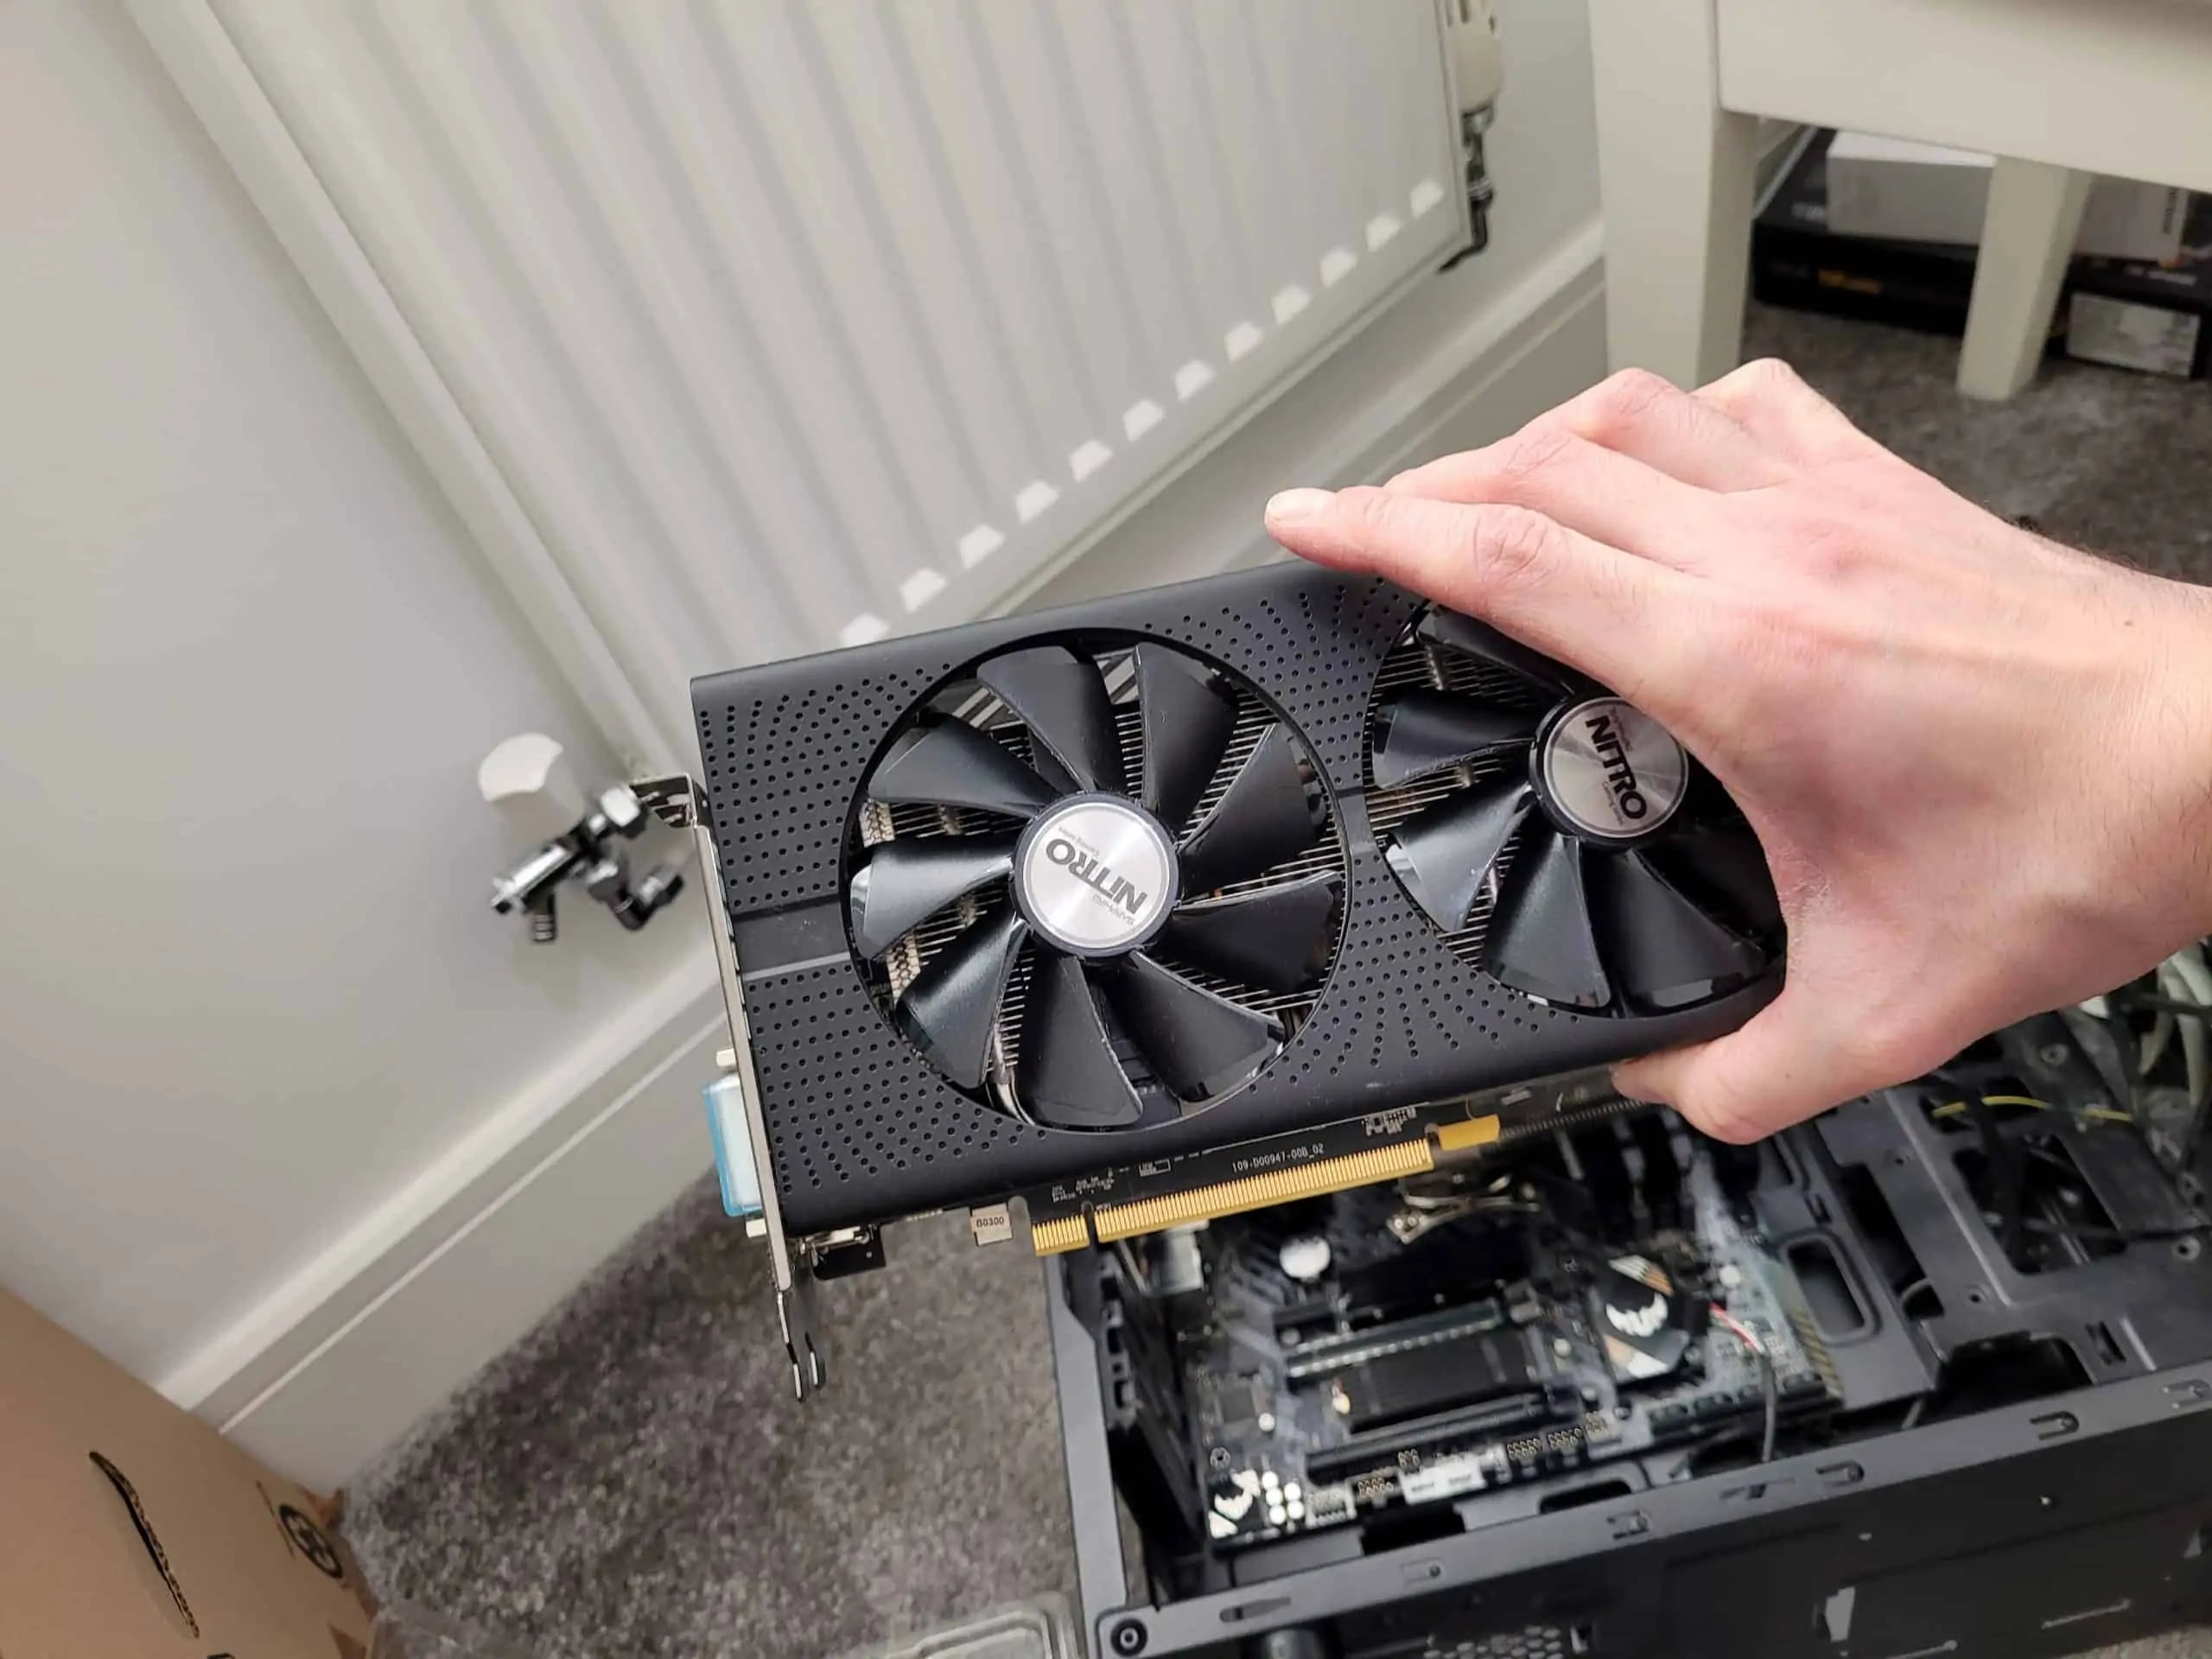
- Locate the GPU: Find your GPU, which is usually a separate card inserted into a PCIe slot on the motherboard. Take note of any cables connected to it that you may need to disconnect later.
- Clean the GPU: Use a can of compressed air or a soft brush to gently blow or brush away the dust and debris from the GPU. Pay close attention to the heatsink, fans, and surrounding areas where dust tends to accumulate the most. Avoid using excessive force or liquid cleaners that can damage the components.
- Clean the fans: If your GPU has removable fans, you can detach them for a more thorough cleaning. Use the compressed air or a brush to remove any dust on the fan blades and the area behind them. If the fans are not removable, carefully clean them as best as you can without putting too much pressure on the blades.
- Reinstall the GPU and close the case: Once you’ve cleaned the GPU and fans, reinsert the GPU into the PCIe slot and connect any cables you disconnected earlier. Ensure that it is firmly seated and secured. Finally, put the side panel back onto the computer case and securely fasten it.
Regularly cleaning your GPU and fans will help maintain proper airflow, reducing the strain on the fans and minimizing the noise they produce. Aim to clean your GPU every few months, or more frequently if you notice a significant buildup of dust. However, always exercise caution when working on computer components and follow proper safety procedures to avoid damaging any parts.
Ensure proper ventilation and airflow
Inadequate ventilation and poor airflow within your computer case can contribute to a loud GPU fan noise. When the airflow is restricted, the GPU heats up and the fan needs to work harder to dissipate the heat, resulting in increased noise levels. Ensuring proper ventilation and airflow is crucial to maintaining a cooler and quieter system.
Here are some steps to ensure proper ventilation and airflow within your computer case:
- Clean the air intakes and vents: Dust and debris can accumulate on the air intakes and vents of your computer case, hindering the airflow. Regularly clean these areas using compressed air or a soft brush to remove any obstructions that restrict the intake and exhaust of air.
- Check the positioning of your computer case: Ensure that your computer case is placed on a flat surface with sufficient clearance on all sides. Avoid placing it against walls or other objects that can block the airflow. This allows for better circulation of air around the components.
- Organize cables for better airflow: Proper cable management is essential for improving airflow. Arrange your cables neatly using cable ties or routing them behind the motherboard tray to ensure they do not obstruct the airflow path. This allows for better circulation of cool air throughout the case.
- Add case fans: If your computer case has available fan mounts, consider adding additional fans for improved airflow. Position these fans strategically to draw in cool air and expel hot air effectively. Intake fans should be placed at the front, while exhaust fans should be positioned at the rear or top of the case.
- Upgrade your computer case: If your current computer case does not provide adequate airflow, consider upgrading to a case with better ventilation options. Look for cases that have optimized airflow designs, such as mesh panels or vents, to ensure efficient cooling.
- Consider liquid cooling: Liquid cooling systems, such as all-in-one (AIO) coolers or custom loops, can provide superior cooling performance. These systems transfer heat away from the CPU and GPU more effectively, resulting in reduced fan noise as they do not need to work as hard.
- Monitor system temperatures: Utilize software tools to monitor the temperature of your GPU and other components. This will allow you to identify any temperature-related issues and take necessary steps to optimize airflow and cooling.
By implementing these measures, you can ensure proper ventilation and airflow within your computer case, which helps reduce the strain on the GPU fan and minimize noise levels. Regularly checking and optimizing your system’s airflow will not only improve cooling efficiency but also enhance the overall performance and lifespan of your components.
Adjust fan speed settings
Adjusting the fan speed settings is an effective way to reduce the noise generated by your GPU fan without compromising its cooling efficiency. By finding the right balance between fan speed and noise levels, you can maintain optimal GPU temperatures while minimizing the fan noise.
Here are some steps to adjust the fan speed settings:
- Access the system BIOS or GPU control software: To adjust the fan speed settings, you can typically access the system BIOS or use GPU control software provided by the manufacturer. Refer to the motherboard or GPU manual for instructions on how to access these settings.
- Reset to default settings: If you have manually adjusted the fan speed settings in the past, consider resetting them to their default values. This ensures that the fan operates within the manufacturer’s recommended specifications.
- Experiment with fan curve settings: Many GPU control applications allow you to customize the fan curve. The fan curve determines the fan speed based on GPU temperature. By adjusting the fan curve settings, you can tailor the fan speed to your preferences while maintaining appropriate cooling performance.
- Find a balance between cooling and noise: When adjusting the fan speed settings, aim to strike a balance between cooling efficiency and noise levels. You may need to experiment with different fan curve settings to find the optimal configuration that keeps your GPU temperatures within acceptable limits while keeping fan noise to a minimum.
- Monitor GPU temperatures: As you adjust the fan speed settings, monitor your GPU temperatures using software tools. Ensure that the temperatures remain within safe operating limits even with the adjusted fan speed. If necessary, make further adjustments to maintain an optimal temperature range.
- Consider using third-party GPU control software: There are various third-party GPU control software options available that offer more advanced features and customization options for fan speed settings. Research and choose a reliable and compatible software that suits your needs.
By adjusting the fan speed settings, you can find a configuration that provides effective cooling for your GPU while minimizing the noise generated by the fan. Keep in mind that excessively low fan speeds can lead to higher temperatures, so always monitor your GPU temperatures when making adjustments. Finding the optimal balance will result in a quieter and more comfortable computing experience.
Check GPU temperature and reduce stress
Monitoring and managing the GPU temperature is crucial in minimizing fan noise. When the GPU is under stress and operating at high temperatures, the fan needs to work harder to dissipate the heat, resulting in louder noise levels. By keeping the GPU temperature in check and reducing stress on the GPU, you can effectively reduce the noise produced by the fan.
Follow these steps to check the GPU temperature and reduce stress:
- Monitor GPU temperature: Utilize software tools such as GPU monitoring software or dedicated hardware monitoring utilities to keep track of the GPU temperature in real-time.
- Ensure proper case ventilation: Adequate ventilation is crucial for maintaining low GPU temperatures. Make sure your computer case has sufficient intake and exhaust fans, and that there are no obstructions blocking the airflow. Consider adding additional fans or upgrading your case to enhance the overall cooling efficiency.
- Close unnecessary applications: Running demanding applications or games can put a significant strain on the GPU, causing it to heat up. Close any unnecessary programs and background processes to reduce the workload on the GPU and subsequently lower its temperature.
- Reduce graphics settings: When playing games, consider lowering the graphics settings to reduce the GPU’s workload. By reducing the demand placed on the GPU, you can minimize heat generation and, in turn, decrease fan noise.
- Optimize airflow within the case: Ensure that cables are neatly organized and do not obstruct the airflow around the GPU. Proper cable management improves airflow, allowing the GPU to cool more efficiently.
- Apply thermal paste: If you are comfortable with hardware modifications, consider applying high-quality thermal paste between the GPU and the heatsink. This can improve the thermal transfer and help lower the GPU temperature.
- Consider undervolting: Undervolting is a technique used to lower the voltage supplied to the GPU. By reducing the voltage, you can lower the power consumption and subsequently decrease heat output. However, undervolting should be done with caution and may require advanced knowledge or the assistance of software tools.
By diligently monitoring the GPU temperature, reducing stress on the GPU by closing unnecessary applications, optimizing airflow, and considering undervolting or thermal paste application, you can effectively manage the GPU temperature and reduce the accompanying fan noise. Always refer to manufacturer guidelines and exercise caution when making any modifications or adjustments to your GPU.
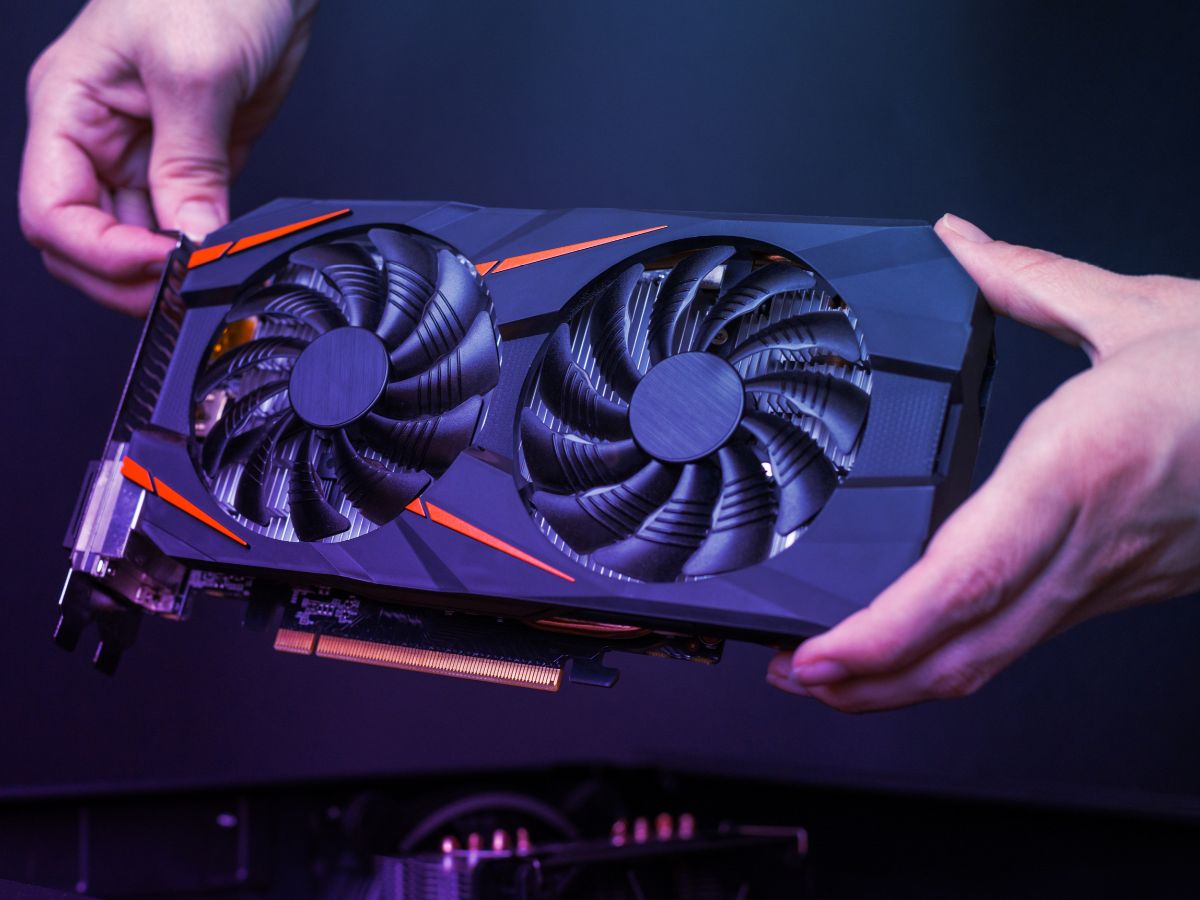
Consider replacing the fan
If you have tried various troubleshooting steps and your GPU fan continues to produce loud noise, despite proper cleaning and adjustment, it may be time to consider replacing the fan. Over time, GPU fans can wear out, resulting in increased noise levels. By replacing the fan, you can restore optimal cooling performance and mitigate the noise issue.
Here are the steps to consider when replacing the GPU fan:
- Identify the fan model: Find out the specific model of the fan that needs replacement. Look for the manufacturer’s information on the existing fan or check the GPU’s specifications. Make a note of the fan’s size, connectors, and other important details.
- Order a replacement fan: Purchase a new fan that matches the specifications and size of the existing fan. Ensure that it is compatible with your GPU model. You can find replacement fans from online retailers or by contacting the GPU manufacturer directly.
- Disconnect power and remove the old fan: Power off your computer and unplug it from the power source. Open the computer case and locate the GPU fan. Carefully disconnect any cables connected to the fan. Depending on the GPU model, you may need to unscrew the fan or release it from the mounting brackets or clips.
- Install the new fan: Attach the replacement fan to the GPU heatsink or graphics card PCB. Ensure that the fan is securely fastened and aligned correctly. Connect any necessary cables according to the manufacturer’s instructions.
- Test the new fan: After installing the new fan, close the computer case and plug the power back in. Power on your computer and observe the behavior of the new fan. Confirm that it spins smoothly without any unusual noise or vibration.
- Monitor GPU temperatures: With the replacement fan installed, monitor the GPU temperatures to ensure that the cooling performance has been improved. You should notice a decrease in fan noise as the new fan operates more efficiently.
Replacing the GPU fan can be a somewhat advanced task, so if you are uncomfortable or unsure about the process, it is recommended to seek assistance from a professional or consult the GPU manufacturer’s support resources for guidance.
By replacing the old and worn-out fan with a new one, you can restore effective cooling and significantly reduce fan noise, ensuring a quieter and improved computing experience.
Conclusion
A loud GPU fan can be a frustrating issue, but it is not a problem without solutions. By understanding the common reasons behind a loud GPU fan noise and implementing the appropriate fixes, you can effectively reduce the noise and restore a quieter computing experience.
Throughout this article, we discussed various factors that can contribute to a loud GPU fan, including dust and debris accumulation, high GPU temperature, faulty fan or fan speed settings, overclocking, insufficient airflow or improper case ventilation, and aging or worn-out fans.
To address these issues and fix a loud GPU fan, we explored several practical solutions:
- Cleaning the GPU and fans to remove dust and debris buildup
- Ensuring proper ventilation and airflow within the computer case
- Adjusting fan speed settings to find a balance between cooling and noise
- Checking GPU temperature and reducing stress on the GPU
- Considering replacing the fan with a new one
By correctly implementing these solutions, you can effectively reduce fan noise and maintain optimal GPU temperatures, resulting in a quieter and more efficient computing experience.
However, before making any hardware modifications or adjustments, it is important to prioritize your safety and follow manufacturer guidelines. If you are unsure or uncomfortable with any of the suggested steps, it is recommended to seek professional assistance.
Remember, maintaining a well-functioning and properly cooled GPU not only reduces noise levels but also prolongs the lifespan of your graphics card and ensures optimal performance for your gaming or computing needs.