Overview
External hard drives are a convenient and versatile storage solution for individuals and businesses alike. They offer ample capacity, portability, and compatibility across various devices. However, encountering a “read only” mode on your external hard drive can be frustrating and halt your productivity. This article will explore the possible causes of your external hard drive being in read-only mode and provide troubleshooting solutions to resolve the issue.
When an external hard drive is in read-only mode, it means that you can only view the files stored on the drive. You are unable to modify, delete, or add any new files. This can prevent you from being able to save new documents, edit existing files, or perform other essential operations.
Understanding the underlying reasons behind the read-only mode is crucial in finding an effective solution. There are several factors that can contribute to your external hard drive being in this mode, including file system issues, physical damage, virus or malware infection, and drive permissions.
File system issues, such as a corrupted file system or an error in the file allocation table, can cause your external hard drive to be read-only. This is usually the result of improper ejection, power outages, or other technical errors. Additionally, physical damage to the drive, such as a faulty USB port or a damaged storage medium, can trigger the read-only mode as a safety measure to prevent further harm to the data.
Viruses or malware infections can also lead to read-only mode, as they can modify the file permissions or alter system settings on the external hard drive. Lastly, incorrect drive permissions set by the operating system or user settings can unintentionally restrict write access to the drive.
To troubleshoot and resolve the read-only mode on your external hard drive, various steps can be taken. These include checking the drive for errors using built-in tools, updating or reinstalling drivers, changing drive permissions, or formatting the drive. Each of these solutions has its risks, so it is crucial to backup your important data before attempting any troubleshooting steps to avoid data loss.
This article will guide you through the process of troubleshooting these issues to help you regain full control over your external hard drive. Remember to follow the recommended steps carefully and seek professional assistance if needed.
Understanding the Read Only Mode
When your external hard drive is in read-only mode, it means that you can only view the files and folders stored on the drive, but you are unable to make any changes to them. This restriction can be frustrating, especially if you need to modify or add new files.
The read-only mode is a protective feature designed to safeguard your data by preventing unintentional or unauthorized modifications or deletions. It acts as a barrier against accidental data loss, ensuring the integrity and stability of your files.
Read-only mode can be implemented on both hardware and software levels. On the hardware side, some external hard drives have a physical switch or button that allows you to toggle between read-only and read-write modes. This can be helpful when you want to prevent any changes to the drive’s content.
On the software side, read-only mode can be enforced by the operating system or file system. This usually occurs when there are certain issues detected with the drive, such as file system errors or physical damage. By switching the drive to read-only mode, it prevents further damage to the data and allows you to retrieve the existing files safely.
In addition, read-only mode can also be triggered by malware or virus infections. These malicious programs can modify file permissions or change system settings, restricting write access to the external hard drive. By putting the drive in read-only mode, it prevents any unauthorized modifications by the malware and ensures the security of your data.
Understanding the read-only mode is important because it helps you realize that it is a protective mechanism rather than a limitation. It allows you to take appropriate actions to address the underlying issues causing the read-only mode and regain full control over your external hard drive.
However, it is important to note that read-only mode should not be considered as a permanent solution. It is crucial to identify and resolve the root cause of the read-only mode to ensure the long-term usability and functionality of your external hard drive.
Possible Causes of Read Only Mode
There are several potential causes that can lead to your external hard drive being in read-only mode. Understanding these causes can help you troubleshoot the issue effectively and find a suitable solution. Here are some common reasons:
- File System Issues: Corrupted file systems, errors in the file allocation table, or improper ejection can result in your external hard drive being read-only. When the file system encounters errors, it switches to read-only mode to prevent further damage and data loss.
- Physical Damage: Physical damage to the external hard drive, such as a faulty USB port, damaged storage medium, or other hardware issues, can trigger the read-only mode. This safeguard protects your data from being compromised or lost due to potential hardware failures.
- Virus or Malware Infection: Malicious programs can infect your external hard drive, modifying file permissions, and restricting write access. These infections often trigger read-only mode as a security measure to prevent any unauthorized changes to your data.
- Drive Permissions: Incorrect or limited drive permissions can also lead to read-only mode. Operating systems or user settings may unintentionally restrict write access to your external hard drive, resulting in the read-only status.
Identifying the specific cause of the read-only mode is crucial for resolving the issue effectively. By understanding these potential causes, you can narrow down the troubleshooting steps and find the most appropriate solution for your situation.
Next, we will explore various troubleshooting methods to help you fix the read-only mode on your external hard drive and regain full control over your stored data.
File System Issues
File system issues are a common cause of external hard drives being stuck in read-only mode. These problems can arise due to various factors, including improper ejection, power outages, software glitches, or physical damage to the drive. When file system errors occur, the operating system activates the read-only mode as a precautionary measure to prevent further data loss or corruption.
Corrupted file systems or errors in the file allocation table (FAT) can lead to read-only mode. A corrupted file system occurs when the structure that organizes and manages files on the drive becomes damaged or inconsistent. This can happen if the external hard drive is disconnected abruptly during read or write operations, or if there is a software malfunction.
The file allocation table is a critical component of the file system that keeps track of the location of each file and the space available on the drive. Any errors in the file allocation table can result in the operating system being unable to locate files properly or modify them, triggering the read-only mode.
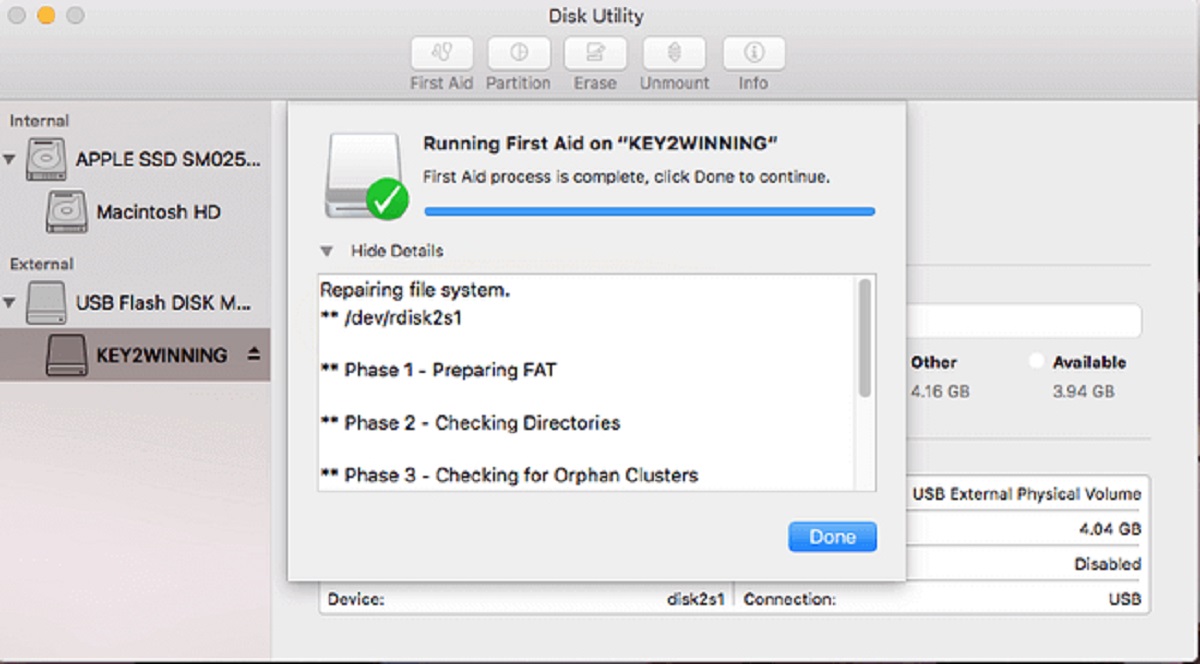
To resolve file system issues, you can use the built-in tools provided by the operating system. For Windows users, the “Check Disk” utility (chkdsk) can scan the drive for errors and attempt to fix them. On macOS, the Disk Utility application can perform a similar function.
Running a disk check allows the operating system to identify and repair any errors in the file system. By fixing these issues, the read-only mode should be lifted, and you will regain write access to your external hard drive.
If the built-in tools cannot resolve the file system issues, you can consider using third-party data recovery and repair software. These tools offer more advanced features and can often tackle more complex file system problems. However, it’s crucial to back up your data before using any third-party software to prevent further data loss.
By addressing file system issues, you can restore the read-write capabilities of your external hard drive and ensure the smooth functioning of your stored data.
Physical Damage
Physical damage to an external hard drive can lead to it being stuck in read-only mode. This type of damage can occur due to various reasons, such as mishandling, accidental drops, exposure to extreme temperatures, or electrical surges. When the drive experiences physical damage, it triggers the read-only mode as a safety measure to prevent further harm to the data stored on the drive.
There are several signs that can indicate physical damage to an external hard drive. These include a malfunctioning USB port, a clicking or grinding sound coming from the drive, or the drive not being recognized by the computer. If you observe any of these signs, it is essential to assess the extent of the damage and take appropriate action.
If the physical damage is limited to the external casing or cables, you can try replacing the USB cables or connecting the drive to a different USB port to see if it resolves the issue. Sometimes, a faulty or damaged cable can cause the drive to be read-only. However, if the drive continues to be in read-only mode, there might be deeper physical damage to the internal components.
In cases of severe physical damage, such as a damaged storage medium or a malfunctioning drive controller, it is recommended to consult a professional data recovery service. These experts have specialized tools and expertise to handle physically damaged drives and can attempt to retrieve your data while preserving its integrity.
It is crucial to note that attempting to repair a physically damaged drive yourself can further worsen the condition and possibly result in permanent data loss. Professional data recovery services have controlled environments and thorough procedures that minimize the risk of additional damage to the drive.
Remember to back up your critical data regularly to avoid potential loss caused by physical damage or other unforeseen circumstances. Regular backups ensure that even if the external hard drive becomes read-only due to physical damage, your most important files are safely stored elsewhere.
By assessing the physical condition of the external hard drive and seeking professional assistance when necessary, you can address the physical damage and potentially regain full control over your drive’s read-write capabilities.
Virus or Malware Infection
A virus or malware infection can also cause an external hard drive to be stuck in read-only mode. Malicious programs can modify file permissions, alter system settings, or encrypt files, restricting write access to the drive and triggering the read-only mode as a security measure.
There are several ways an external hard drive can become infected with viruses or malware. It can happen when you connect the drive to an infected computer, download infected files, or transfer files from an infected source. Additionally, opening suspicious email attachments or visiting malicious websites can also expose your external hard drive to the risk of infection.
When your external hard drive is infected, you might notice some symptoms such as unusual file extensions, files disappearing or getting renamed, or your antivirus software detecting malicious activities. In some cases, the read-only mode may be triggered after the infection to prevent further damage or unauthorized modifications to your files.
To address virus or malware infections, it is crucial to have reliable antivirus software installed and regularly update it to ensure protection against the latest threats. Run a full system scan on your computer and the external hard drive to detect and remove any malicious programs.
If the antivirus scan does not resolve the issue, you can try using dedicated malware removal tools. These tools are specifically designed to detect and remove advanced malware that standard antivirus software may miss.
In some cases, the infections may have damaged the file system or modified the file permissions on the external hard drive. To restore write access, you can manually change the file permissions. Right-click on the drive, go to “Properties,” then navigate to the “Security” tab. Ensure that the appropriate permissions are set for your user account to have write access to the drive.
If all else fails, you may need to consider formatting the external hard drive. Formatting erases all data on the drive, including any viruses or malware present. However, make sure to back up your important files before formatting, as the process will result in permanent data loss.
Regularly scanning your external hard drive with antivirus software, being cautious when downloading files or connecting the drive to infected devices, and keeping your operating system and security software up to date are essential measures to prevent virus or malware infections and maintain the read-write capabilities of your external hard drive.
Drive Permissions
Incorrect or limited drive permissions can be another cause of an external hard drive being stuck in read-only mode. Drive permissions determine who has access to the drive and what actions they can perform, such as read, write, delete, or modify files and folders. If the permissions are misconfigured or restricted, it can prevent you from having write access to the drive.
Drive permissions are usually set by the operating system or by user settings. In some cases, the permissions may get changed unintentionally, leading to the read-only mode on the external hard drive.
To check and modify drive permissions in Windows, right-click on the external hard drive, select “Properties,” and navigate to the “Security” tab. Here, you can view and modify the permissions for different user accounts. Make sure that your user account has the necessary permissions to write to the drive. If not, you can click on the “Edit” button and grant the appropriate permissions.
In macOS, you can check drive permissions by selecting the external hard drive and going to “File” > “Get Info.” In the “Sharing & Permissions” section, ensure that your user account has the necessary permission levels, such as “Read & Write” or “Read & Write & Execute.”
If you are unable to modify the drive permissions through these methods, you can try accessing the drive with an administrator account or using the “sudo” command in macOS or the “Run as administrator” option in Windows.
It is important to note that modifying drive permissions requires administrative privileges, so make sure that you have the necessary credentials to perform these actions.
If changing the drive permissions does not resolve the read-only mode, there may be underlying issues with the file system or potential malware infections. In such cases, it is recommended to follow the appropriate troubleshooting steps outlined earlier in this article to address these issues and regain full control over your external hard drive.
Regularly reviewing and managing drive permissions can help prevent issues with read-only mode caused by incorrect access restrictions. By ensuring the appropriate permissions are set for your user account, you can maintain the necessary write access to your external hard drive.
Troubleshooting Read Only Mode
Encountering read-only mode on your external hard drive can be frustrating, but there are several troubleshooting steps you can take to resolve the issue. These steps will help you identify and address the underlying cause of the read-only mode, allowing you to regain full control over your external hard drive. Here are some troubleshooting methods:
- Checking Drive for Errors: Use the built-in tools provided by the operating system, such as “Check Disk” on Windows or “Disk Utility” on macOS, to scan the external hard drive for any file system errors. Running a disk check can help identify and repair issues that may be causing the read-only mode.
- Updating or Reinstalling Drivers: Outdated or incompatible drivers can sometimes lead to read-only mode. Check for any available driver updates for your external hard drive, or consider reinstalling the drivers to ensure they are properly installed.
- Changing Drive Permissions: Incorrect or limited drive permissions can prevent write access to the external hard drive. Verify the drive permissions settings and make sure your user account has the necessary permissions to modify files on the drive.
- Formatting the Drive: If all else fails, formatting the external hard drive can be a last resort. However, this should only be done after backing up your important data, as formatting erases all the files on the drive.
It is essential to proceed with caution during the troubleshooting process to avoid any unintended data loss. Before attempting any troubleshooting steps, make sure to back up your important files to another storage device or location. This ensures that even if an irreversible action needs to be taken, your critical data remains intact.
If you are unsure about performing the troubleshooting steps yourself or if the read-only mode persists despite your efforts, it is recommended to seek professional assistance. Data recovery professionals or computer technicians have the expertise and tools to handle complex issues and recover data from inaccessible drives.
Remember that prevention is always better than cure. Regularly backing up your data, practicing safe browsing habits, and maintaining up-to-date security software can help mitigate the risks of encountering read-only mode or other drive-related issues.
By following the appropriate troubleshooting steps and taking necessary precautions, you can overcome read-only mode and restore the full functionality of your external hard drive.
Checking Drive for Errors
When your external hard drive is stuck in read-only mode, one of the first troubleshooting steps is to check the drive for any errors. File system errors or corruption can cause the drive to enter read-only mode as a protective measure to prevent further damage to the data stored on it.
Both Windows and macOS offer built-in tools that can scan and repair errors on external hard drives.
In Windows, you can use the “Check Disk” utility (chkdsk) to scan and fix errors on the drive. To access it, open the Command Prompt and enter the command “chkdsk /f X:”, replacing “X” with the drive letter assigned to your external hard drive. The utility will scan the drive for errors and attempt to repair them.
On macOS, you can use the Disk Utility application to check for errors on the external hard drive. To do this, open Disk Utility, select the external hard drive from the list, and click on the “First Aid” or “Repair Disk” button. The utility will scan the drive for any errors and repair them if possible.
During the scanning and repair process, it is important not to interrupt or disconnect the external hard drive to avoid further complications. The duration of the scan depends on the size of the drive and the number of errors detected. Once the scan and repair are complete, check if the read-only mode has been resolved.
If the built-in tools fail to fix the errors, you can consider using third-party disk repair or data recovery software specifically designed for this purpose. These tools provide more advanced features and can attempt to recover data from damaged sectors or repair complex file system issues. However, exercise caution and ensure you have a backup of your important data before using third-party tools to avoid any potential data loss.
Remember that checking the drive for errors is only one troubleshooting step. If the errors on the drive are not related to the read-only mode or if the problem persists after the scan and repair, you may need to explore other potential causes and solutions as outlined in earlier sections of this article.
Regularly checking your external hard drive for errors and promptly addressing them can help maintain its overall health and prevent read-only mode or other data-related issues.
Updating or Reinstalling Drivers
If your external hard drive is stuck in read-only mode, outdated or incompatible device drivers may be the culprit. Drivers allow your operating system to communicate with and control various hardware components, including external storage devices like your hard drive.
To begin troubleshooting, you can start by checking if there are any available updates for the drivers associated with your external hard drive. Manufacturers periodically release driver updates that address bugs, improve performance, and add compatibility with the latest operating systems.
In Windows, you can update drivers through the Device Manager. Right-click on the Start button, select Device Manager, and expand the Disk drives section. Right-click on your external hard drive, choose “Update driver,” and follow the prompts to search online for available updates.
On macOS, you can update drivers using the Software Update feature. Click on the Apple menu, go to System Preferences, and select Software Update. If updates are available for your external hard drive drivers, they will be listed along with other system updates.
If updating the drivers does not resolve the read-only mode issue, you can consider reinstalling the drivers. Reinstalling drivers can help resolve any corrupted or misconfigured driver files that might be causing compatibility issues.
In Windows, you can reinstall drivers through the Device Manager as well. Right-click on your external hard drive in the Device Manager, select “Uninstall device,” and then restart your computer. Upon reboot, Windows will automatically reinstall the drivers for your external hard drive.
In macOS, drivers are typically installed automatically, so reinstalling them may not be necessary. However, you can try disconnecting and reconnecting the external hard drive or restarting your computer to troubleshoot any temporary driver-related issues.
If updating or reinstalling the drivers does not resolve the read-only mode, it is recommended to try the other troubleshooting methods discussed in earlier sections to further investigate and address the issue.
By keeping your drivers up to date and ensuring that they are functioning properly, you can maintain the optimal performance and functionality of your external hard drive.
Changing Drive Permissions
Incorrect drive permissions can prevent you from having write access to your external hard drive, leading to the read-only mode. Drive permissions determine who can access the drive and what actions they can perform on it, such as reading, writing, modifying, or deleting files.
To check and modify drive permissions, you can access the properties of the external hard drive in both Windows and macOS.
In Windows, right-click on the external hard drive, select “Properties,” and navigate to the “Security” tab. Here, you will see a list of user accounts and their associated permissions. Ensure that your user account has the necessary permissions for write access. If not, click on the “Edit” button, select your user account, and grant the appropriate permissions, such as Full Control or Write access.
In macOS, you can view and modify drive permissions through the “Get Info” option. Select the external hard drive, press Command + I, and navigate to the “Sharing & Permissions” section. Here, you can check the permission levels assigned to your user account. Make sure that you have at least “Read & Write” access. If not, click on the lock icon, enter your administrator password, and change the permissions to the desired level.
Modifying drive permissions requires administrative privileges, so make sure you have the necessary credentials to perform these actions.
If you are unable to modify the drive permissions through the properties or “Get Info” options, you can try accessing the drive with an administrator account. In Windows, right-click on the external hard drive and select “Run as administrator” to elevate your privileges. In macOS, you can try using the “sudo” command in the Terminal to execute commands with administrative rights.
If changing the drive permissions does not resolve the read-only mode, you may need to explore other potential causes and troubleshooting methods as discussed in earlier sections of this article.
Regularly reviewing and managing drive permissions can help prevent read-only mode issues caused by incorrect access restrictions. By ensuring the appropriate permissions are set for your user account, you can maintain the necessary write access to your external hard drive.
Formatting the Drive
If all other troubleshooting methods fail to resolve the read-only mode on your external hard drive, you may need to consider formatting the drive. Formatting erases all data on the drive and reinstalls the file system, potentially resolving any underlying issues causing the read-only mode. However, it is important to note that formatting should be done as a last resort, as it will result in permanent data loss.
Before formatting the drive, it is crucial to back up any important files or documents stored on the external hard drive. Copy them to another storage device or cloud storage to ensure they are safely preserved.
In Windows, you can format the drive by right-clicking on it in File Explorer, selecting “Format,” and choosing the desired file system (such as NTFS or exFAT) and allocation unit size. Keep in mind that formatting will erase all data on the drive, so double-check that you have backed up any critical files before proceeding.
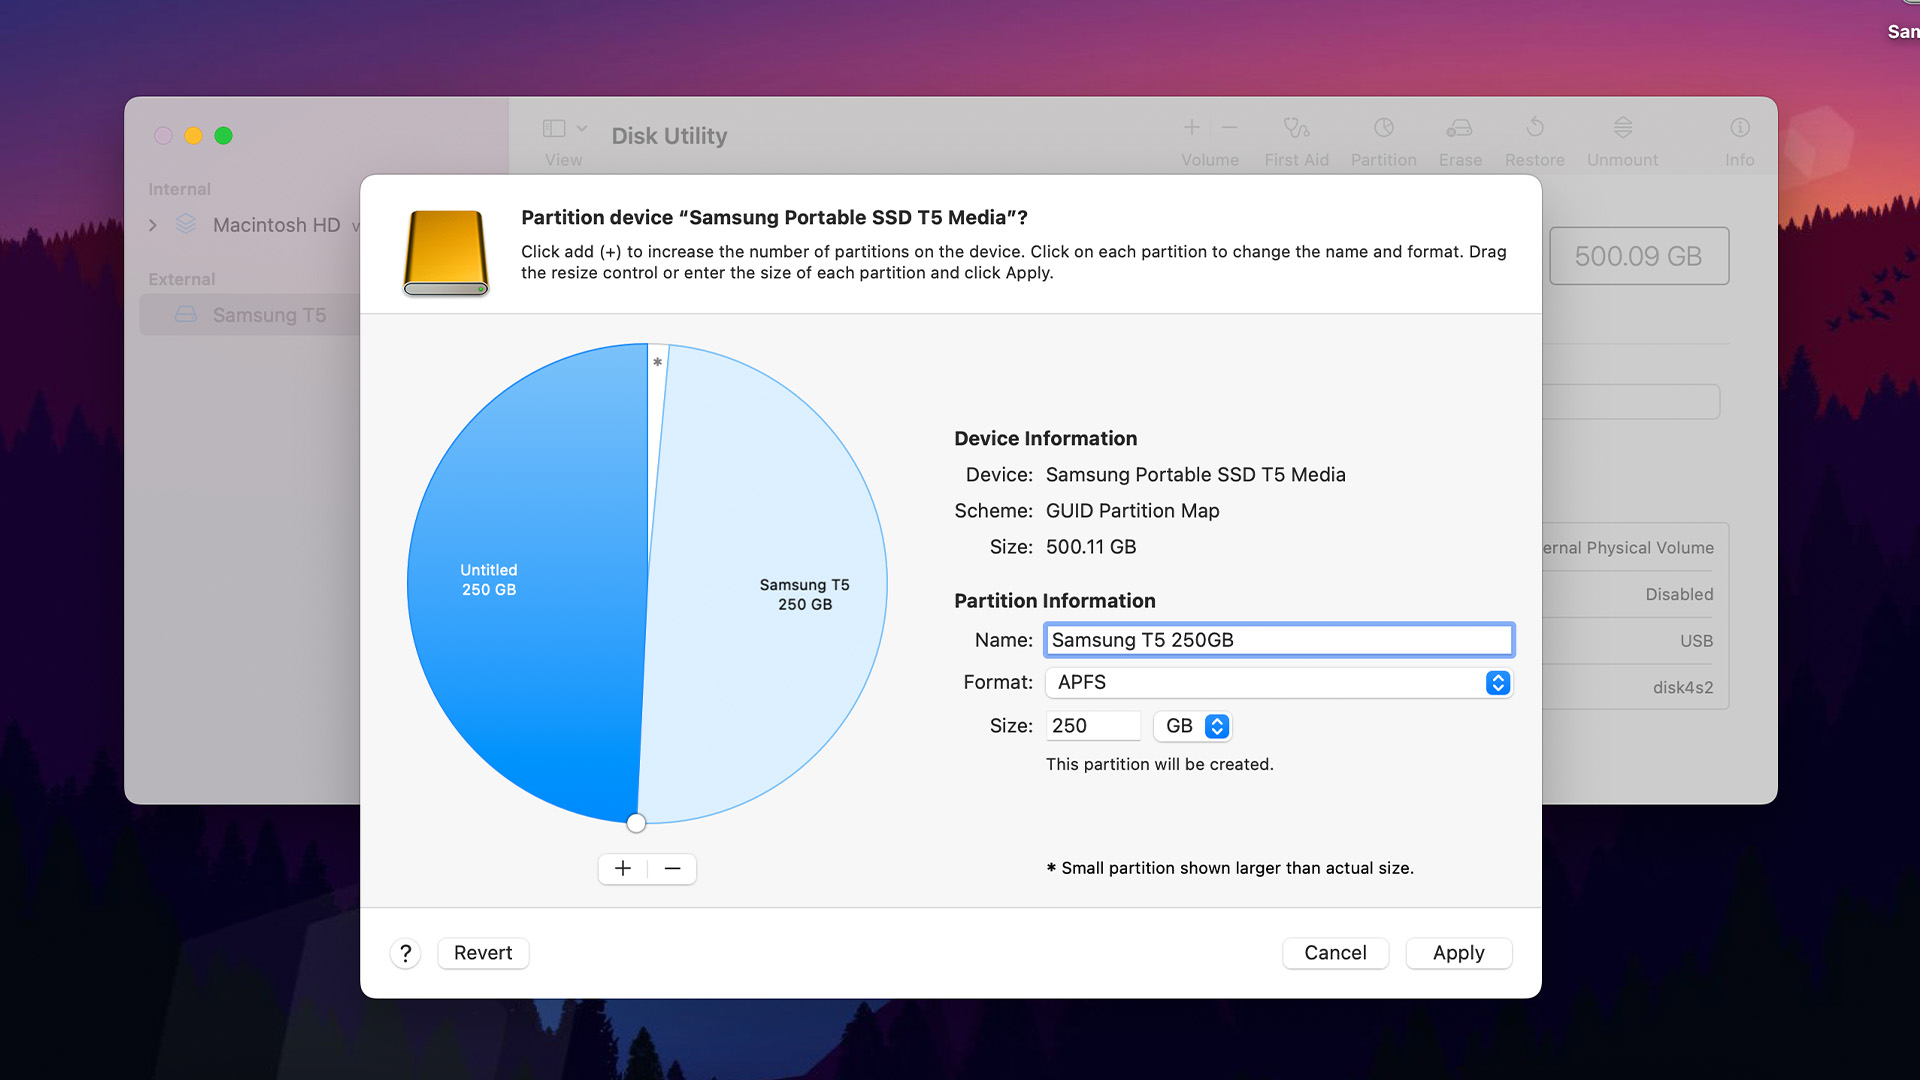
In macOS, you can format the drive by opening Disk Utility, selecting the external hard drive, and clicking on the “Erase” button. Choose the desired file system and click “Erase.” Similarly, ensure that you have backed up all important files before proceeding with the formatting process.
After formatting, the external hard drive should no longer be in read-only mode, and you should have full read and write access to the drive. However, bear in mind that all previous data on the drive will be permanently erased.
If formatting the drive does not resolve the read-only mode or if you encounter any errors during the formatting process, it may indicate deeper issues with the drive or its hardware components. In such cases, it is advised to seek professional assistance from data recovery experts or computer technicians.
Remember that formatting is an irreversible action, so it should only be done if all other troubleshooting methods have been exhausted and you have made a thorough backup of your important data.
Regularly backing up your data is essential to prevent data loss in case of unexpected technical issues or the need for formatting. It ensures that even if the read-only mode becomes persistent, your crucial files will remain safe and accessible.
Summing Up and Final Thoughts
Encountering read-only mode on your external hard drive can be a frustrating experience, but by understanding the possible causes and following the appropriate troubleshooting steps, you can resolve the issue and regain full control over your storage device.
Throughout this article, we explored various factors that can contribute to read-only mode, such as file system issues, physical damage, virus or malware infections, and drive permissions. We discussed troubleshooting methods, including checking for drive errors, updating or reinstalling drivers, changing drive permissions, and, as a last resort, formatting the drive.
When troubleshooting, remember to back up your important files before attempting any changes, as data loss can occur in the process. Additionally, if you are uncertain about any steps or encounter persistent issues, it is advisable to seek professional assistance to ensure the security and integrity of your data.
Prevention is key to maintaining the optimal performance and functionality of your external hard drive. Regularly updating drivers, scanning for viruses and malware, managing drive permissions, and practicing safe data handling habits can help minimize the risk of encountering read-only mode or other issues.
Finally, always remember to keep backups of your valuable data. Whether through cloud storage, external hard drives, or other reliable methods, regular backups ensure that even in the event of persisting read-only mode or unforeseen circumstances, your important files remain safely stored and accessible.
By being proactive, staying informed, and taking appropriate measures, you can effectively troubleshoot and resolve read-only mode on your external hard drive, ensuring a smooth and reliable storage experience.


