Common issues with Airpods connection
As convenient and innovative as Airpods may be, they are not immune to occasional connection glitches. Many users have encountered issues where their Airpods show as “connected” but fail to work properly. If you find yourself facing this frustrating problem, rest assured that you are not alone. There are several common reasons why your Airpods may not be working as expected.
One common issue is Bluetooth connectivity problems. Bluetooth is the technology that allows your Airpods to connect wirelessly to your device. If there is interference or a weak Bluetooth signal, it can result in poor connection or no sound at all.
Another possible reason is a simple software glitch. Sometimes, a minor software error can cause your Airpods to malfunction. This can happen after an update or when there is a compatibility issue between your Airpods and your device’s operating system.
In some cases, the problem may lie with your device rather than your Airpods. Your device’s Bluetooth settings or network preferences may need to be reset in order to establish a proper connection with your Airpods.
Additionally, outdated firmware on your Airpods can also lead to connection problems. Apple periodically releases firmware updates to improve performance and address issues. If your Airpods are running on outdated firmware, it may impact their functionality.
Lastly, it is worth considering the possibility of your Airpods not being charged properly. Low battery levels or an issue with the charging case can result in connectivity issues and poor sound quality.
While these are some of the common issues that can affect the connection of your Airpods, it is essential to troubleshoot and identify the specific problem to find an appropriate solution. In the following sections, we will explore troubleshooting steps to resolve these connectivity issues and get your Airpods working seamlessly once again.
Possible reasons why your Airpods are not working properly
If your Airpods are showing as connected but not working as expected, there could be several potential reasons behind this frustrating issue. Understanding these possible causes can help you troubleshoot and find a suitable solution.
1. Bluetooth Interference: Sometimes, external factors such as other electronic devices or Wi-Fi networks can interfere with the Bluetooth signal of your Airpods, leading to connectivity problems. Ensure that you are in a location with minimal interference or try moving closer to your device to improve the connection.
2. Software Glitch: Occasionally, a software glitch can occur that affects the functionality of your Airpods. This can happen after a software update or due to compatibility issues between your Airpods and your device’s operating system. Restarting your device or resetting the Airpods may resolve the issue.
3. Device Compatibility: It is important to ensure that your Airpods are compatible with your device. Some features may not work properly if your device is not running on the required operating system or if it lacks the necessary Bluetooth capabilities.
4. Firmware Outdated: Apple regularly releases firmware updates for Airpods to enhance performance and fix bugs. If your Airpods are running on outdated firmware, it could lead to connectivity problems. Make sure to check for firmware updates and install them if available.
5. Connection Settings: It is worth checking your device’s connection settings to ensure they are properly configured. If your Bluetooth settings are not set up correctly or if there are conflicting settings, it can affect the connection between your Airpods and your device.
6. Charging Issues: Insufficient battery charge or problems with the charging case can cause your Airpods to not work properly. Ensure that your Airpods are adequately charged and that the charging case is functioning correctly.
By considering these possible reasons behind your Airpods not working properly, you can begin the troubleshooting process and find the most suitable solution for the specific issue you are facing.
Troubleshooting steps for Airpods connection problems
Experiencing connection problems with your Airpods can be frustrating, but there are several troubleshooting steps you can take to resolve the issue. Follow these steps to help restore the seamless connection and functionality of your Airpods:
1. Check Bluetooth connectivity: Ensure that Bluetooth is turned on and active on your device. If it’s off, turn it on and try connecting your Airpods again. Additionally, make sure that there are no other devices interfering with the Bluetooth signal.
2. Restart your Airpods and devices: Restarting your Airpods and the device you are trying to connect to can often resolve connection issues. For Airpods, place them back in the charging case, close the lid, wait a few seconds, and then open the lid to re-establish the connection.
3. Reset network settings on your device: If you are still experiencing connection problems, resetting the network settings on your device can help. This will clear any incorrect or corrupted network configurations that may be affecting the connection with your Airpods. Keep in mind that this step will also reset other network-related settings, such as Wi-Fi passwords, so be prepared to re-enter them.
4. Update firmware on your Airpods: Keeping your Airpods firmware up to date is essential for optimal performance. Check for any available firmware updates by connecting your Airpods to your device and going to the Bluetooth settings. If an update is available, follow the instructions to install it on your Airpods.
5. Check for software updates on your device: Make sure that both your Airpods and the device you are connecting to have the latest software updates installed. Software updates often include bug fixes and improved compatibility, which can help resolve connection problems.
6. Forget and reconnect your Airpods: Sometimes, deleting your Airpods from your device’s Bluetooth settings and reconnecting them can solve connection problems. Go to your device’s Bluetooth settings, locate your Airpods, and select the option to forget or remove them. Afterward, put your Airpods in pairing mode and reconnect them to your device.
7. Check battery levels and charging: Low battery levels on your Airpods can lead to connection issues. Ensure that your Airpods are adequately charged and that the charging case is working correctly. Try charging them fully and then attempting to connect again.
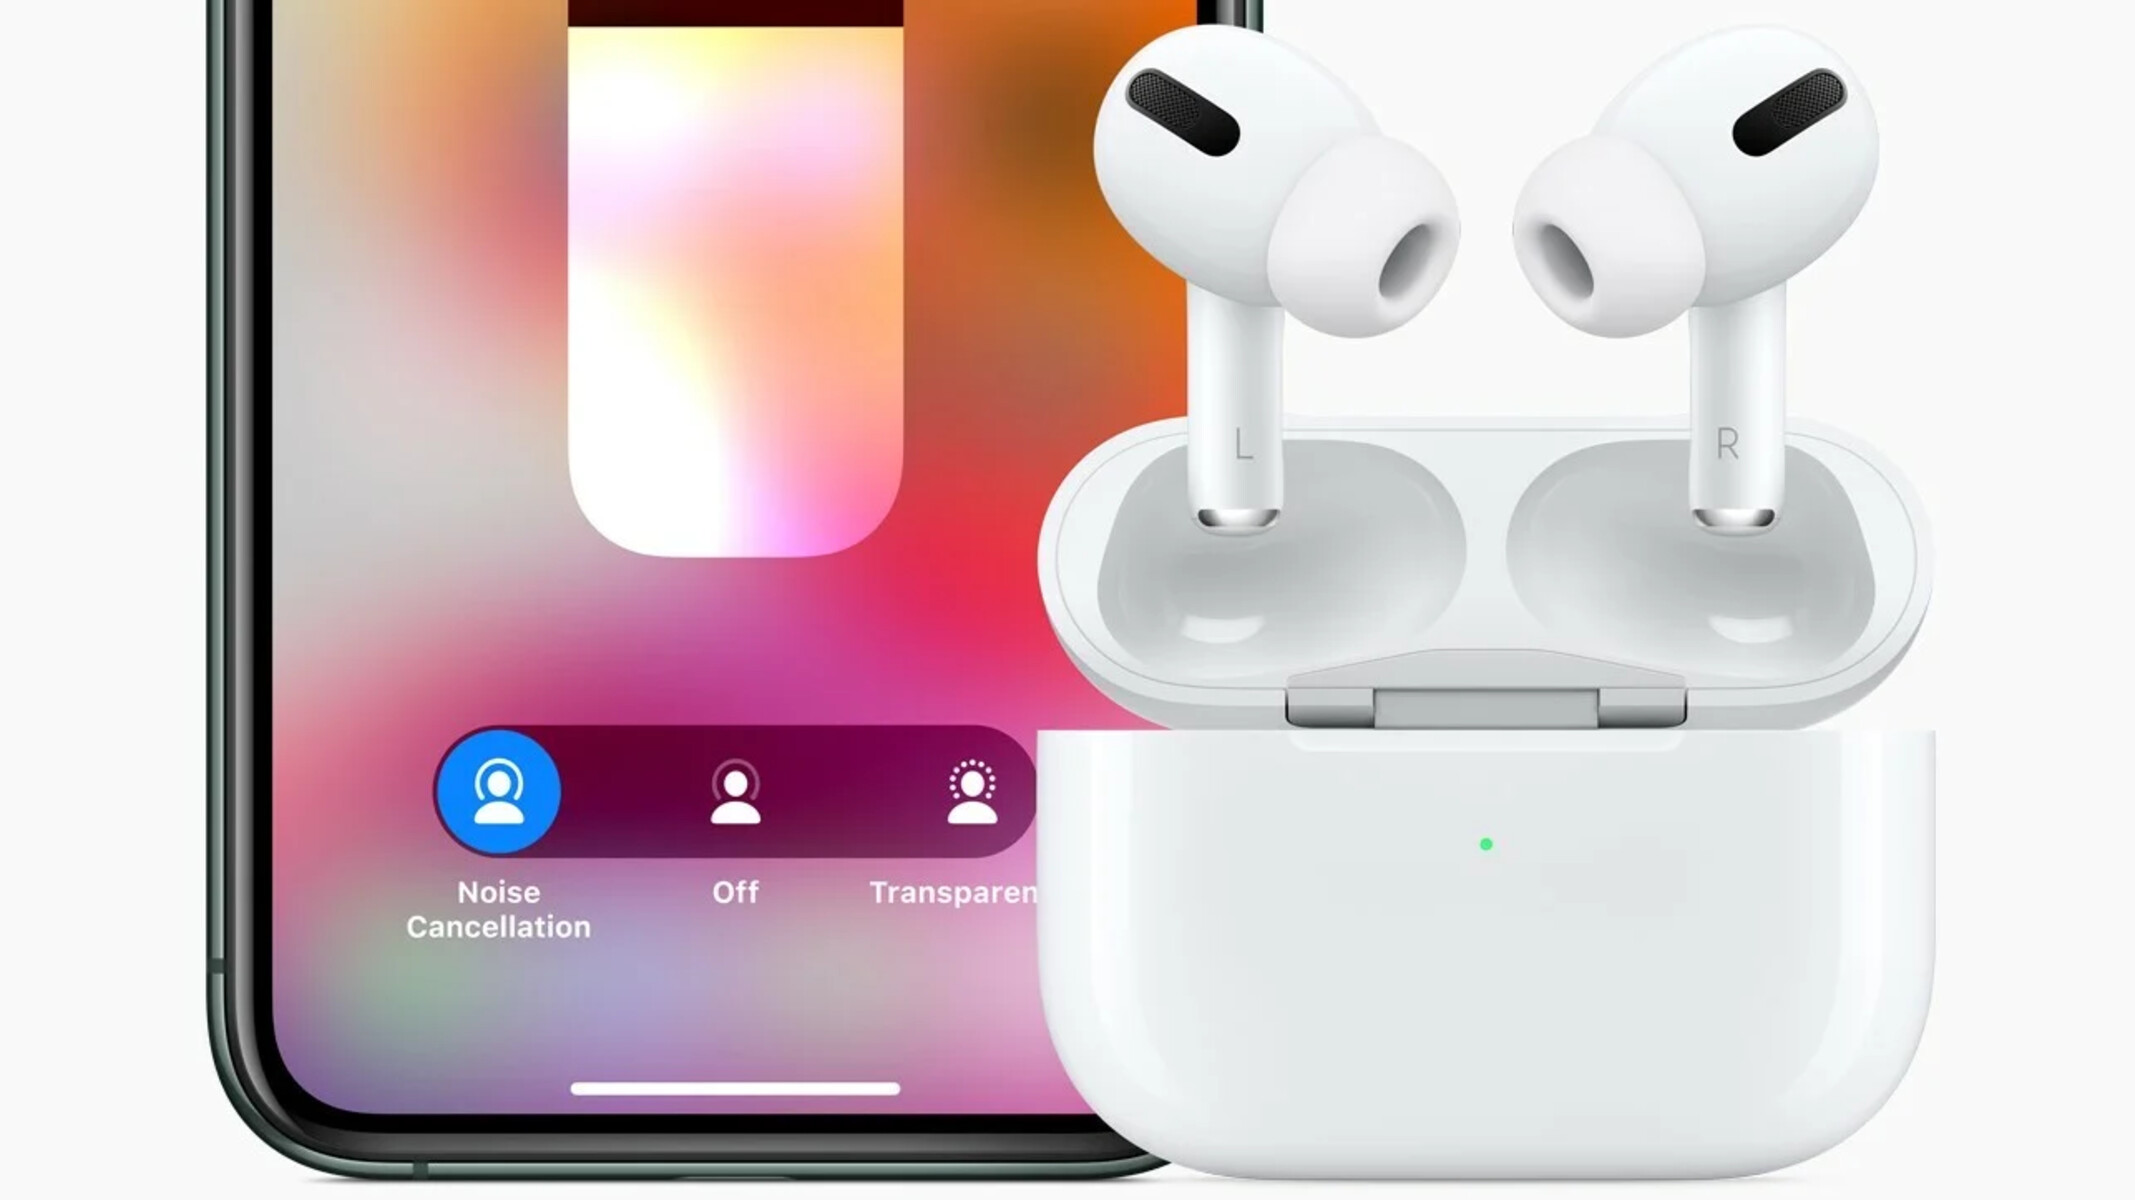
8. Disable automatic ear detection: In some cases, the automatic ear detection feature on your Airpods may interfere with the connection. Disable this feature by going to the Bluetooth settings on your device and selecting your Airpods. Look for an option related to ear detection and turn it off.
9. Try connecting your Airpods to another device: Connecting your Airpods to a different device can help determine whether the issue is specific to the original device or the Airpods themselves. If your Airpods work fine with another device, it suggests that the problem lies with the original device’s settings or configurations.
If all else fails, and you have tried these troubleshooting steps without success, it is recommended to contact Apple Support for further assistance. They can provide more specific guidance and help you resolve any persistent connection problems you are experiencing with your Airpods.
Solution 1: Check Bluetooth connectivity
When your Airpods are not working properly, the first and most essential step is to check the Bluetooth connectivity. Bluetooth is responsible for the wireless connection between your Airpods and your device. Follow these steps to ensure that the Bluetooth settings are properly configured:
1. Check Bluetooth settings: Open the settings menu on your device and navigate to the Bluetooth section. Make sure that Bluetooth is turned on and active. Some devices have a quick toggle in the control center or notification panel for easy access to Bluetooth settings. Ensure that it is enabled.
2. Remove interference: Bluetooth signals can be affected by other electronic devices or Wi-Fi networks. Move away from other devices or networks that may be causing interference, or turn them off temporarily. This can help improve the Bluetooth signal strength and establish a more stable connection with your Airpods.
3. Keep your Airpods and device close: Sometimes, the range between your Airpods and device can impact the Bluetooth connection. Keep your Airpods within close proximity to your device, preferably within five to ten feet, to ensure a strong and stable connection.
4. Restart Bluetooth: If you have checked all the settings and the connection is still not working properly, try turning off and on the Bluetooth on your device. Often, a simple restart can resolve any temporary glitches or conflicts that can occur with the Bluetooth functionality.
5. Forget and reconnect: If the above steps did not solve the problem, try “forgetting” your Airpods on your device and then reconnecting them. Go to the Bluetooth settings and locate your Airpods in the list of paired devices. Tap on the Airpods and select the option to forget or remove them. Then, put your Airpods back in the charging case, close the lid, and open it again to initiate the pairing process.
By checking and ensuring that the Bluetooth connectivity on both your Airpods and your device is functioning properly, you can eliminate one of the common issues that may be causing the connection problems. If this solution doesn’t resolve the issue, you can move on to the next troubleshooting step to further diagnose the problem and find a solution.
Solution 2: Restart your Airpods and devices
If your Airpods are connected but not working as expected, one simple yet effective solution is to restart both your Airpods and the device you are trying to connect them to. Restarting can help resolve temporary glitches or software conflicts that may be causing the connection problem. Follow these steps to restart your Airpods and devices:
1. Restart Airpods:
– Place your Airpods back into the charging case.
– Close the lid of the charging case.
– Wait for a few seconds.
– Open the lid of the charging case.
– The LED light on the front of the case should start blinking white, indicating that your Airpods are ready for pairing.
2. Restart Device:
– Depending on your device, either press and hold the power button until the power off slider appears, or go to the settings menu and choose the “Restart” or “Shut Down” option.
– Slide the power off slider or follow the prompts to shut down your device.
– Wait for a few seconds.
– Press and hold the power button again until the device powers back on, or follow the prompts to turn it on.
3. Reconnect Airpods:
– After both your Airpods and device have restarted, go to the Bluetooth settings on your device.
– Look for your Airpods in the list of available devices and tap on them to reconnect.
– If prompted, follow any additional instructions to complete the pairing process.
Restarting your Airpods and devices can often resolve connection issues and restore their normal functionality. It clears any temporary software glitches and helps establish a fresh connection between the devices. If the connection problem persists, you can move on to other troubleshooting steps to further diagnose the issue.
Solution 3: Reset network settings on your device
If your Airpods are connected but not working properly, resetting the network settings on your device can help resolve any incorrect or corrupted network configurations that may be affecting the connection. Follow these steps to reset the network settings:
1. Go to the settings menu on your device: Depending on your device, the settings app may have a different name, such as “Settings,” “Preferences,” or “Options.”
2. Find the “Reset” option: Look for an option called “Reset” or “System” within the settings menu. It is usually located towards the bottom of the menu.
3. Reset network settings: Within the “Reset” or “System” options, locate the option to reset network settings. It may be labeled as “Reset Network Settings,” “Network Reset,” or something similar.
4. Confirm the reset: Once you select the network settings reset option, you will be prompted to confirm your choice. Read any warnings or instructions carefully before proceeding.
5. Enter your passcode: For security purposes, you may need to enter your device passcode or pattern to confirm the network settings reset.
6. Wait for the device to reset: After confirming, your device will proceed with resetting the network settings. This may take a few moments, and your device may restart during the process.
7. Reconnect your Airpods: Once the network settings reset is complete, go to the Bluetooth settings on your device and reconnect your Airpods. Put your Airpods in the charging case, open the lid, and follow the pairing instructions on your device’s screen.
Resetting the network settings on your device can help resolve connectivity issues by removing any incorrect or corrupted network configurations. Keep in mind that this process will also clear other network-related settings, such as Wi-Fi passwords, so be prepared to re-enter them. If the connection problem persists, you can move on to other troubleshooting steps to further diagnose the issue.
Solution 4: Update firmware on your Airpods
Updating the firmware on your Airpods is crucial for optimal performance and to resolve any known bugs or issues. Outdated firmware can sometimes cause connectivity problems, so it’s important to keep your Airpods up to date. Follow these steps to update the firmware on your Airpods:
1. Connect your Airpods to your device: Ensure that your Airpods are connected and paired with the device you want to update the firmware on. Place your Airpods in your ears or keep them in the charging case with the lid open.
2. Check for available updates: Open the settings menu on your device and navigate to the Bluetooth settings. Locate your Airpods in the list of paired devices and tap on them to access their settings.
3. Check the firmware version: Within the Airpods’ settings, look for information about the firmware version. It should display the current firmware version installed on your Airpods.
4. Check for firmware updates: Look for an option to check for firmware updates or a similar option within the Airpods’ settings. Tap on it to check if any updates are available for your Airpods.
5. Install the firmware update: If an update is available, follow the on-screen prompts to install the firmware update. This process may take a few minutes, so ensure that your Airpods have enough battery charge to complete the update.
6. Keep your Airpods connected: It’s essential to keep your Airpods connected to your device and not interrupt the update process. Do not remove the Airpods from your ears or close the lid of the charging case until the update is successfully installed.
7. Verify the updated firmware: Once the update is complete, you can verify the firmware version within the Airpods’ settings. It should now display the updated firmware version.
Updating the firmware on your Airpods can improve connectivity and fix any known issues. By keeping your Airpods up to date, you ensure that you have the latest features and enhancements. If the connection problem persists even after updating the firmware, you can proceed to other troubleshooting steps to further diagnose the issue.
Solution 5: Check for software updates on your device
Keeping your device’s software up to date is crucial for ensuring compatibility and resolving any issues that may impact the functionality of your Airpods. If your Airpods are connected but not working properly, it’s important to check for any available software updates on your device. Follow these steps to check for software updates:
1. Open the settings menu: Start by opening the settings menu on your device. The location and appearance of the settings menu may vary depending on your device’s operating system.
2. Look for “Software Update” or similar option: Within the settings menu, look for an option labeled “Software Update,” “System Update,” or something similar. It is typically located in the “System” or “General” section of the settings menu.
3. Check for updates: Tap on the “Software Update” option to check for any available updates for your device’s operating system. Depending on your device, it may initiate a search for updates automatically.
4. Download and install the update: If updates are available, follow the on-screen instructions to download and install them. Ensure that your device is connected to a stable Wi-Fi network and has sufficient battery charge to complete the update process.
5. Restart your device: After installing the updates, restart your device to complete the update process. This allows the software changes to take effect and can help resolve any software-related issues that may be affecting the functionality of your Airpods.
Regularly checking for and installing software updates on your device is essential for maintaining compatibility with your Airpods and resolving any software-related issues. These updates often include bug fixes, improvements, and new features that can enhance the overall performance of your device and its interaction with your Airpods. If the connection problem persists, you can proceed to other troubleshooting steps to further diagnose the issue.
Solution 6: Forget and reconnect your Airpods
If you’re experiencing connectivity issues with your Airpods, forgetting and reconnecting them to your device can often resolve the problem. This process helps establish a fresh connection and can eliminate any incorrect settings or configurations that may be causing the issue. Follow these steps to forget and reconnect your Airpods:
1. Open the Bluetooth settings on your device: Go to the settings menu on your device and navigate to the Bluetooth section. This is where you can manage the Bluetooth connections for your device.
2. Locate your Airpods in the list of paired devices: Look for your Airpods in the list of available devices under the Bluetooth settings. It should be listed by its name, such as “Airpods” or “Your Name’s Airpods.”
3. Forget your Airpods: Tap on the “i” or “Settings” icon next to your Airpods’ name to access the device details. From there, you should see an option to “Forget” or “Remove” the Airpods. Tap on it to remove the Airpods from your device’s Bluetooth settings.
4. Put your Airpods in pairing mode: After forgetting your Airpods, put them back into the charging case. Open the lid of the charging case, and you should see the LED indicator light on the front of the case start flashing white. This indicates that your Airpods are in pairing mode and ready to be connected to a device.
5. Reconnect your Airpods: On your device, navigate back to the Bluetooth settings and look for your Airpods in the list of available devices. Tap on your Airpods to initiate the pairing process. Follow the on-screen prompts to complete the connection.
By forgetting and reconnecting your Airpods, you establish a fresh connection between your Airpods and your device, ensuring that any previous settings or configurations that may have caused the connectivity issue are removed. If the connection problem persists, you can move on to other troubleshooting steps to further diagnose the issue.
Solution 7: Check battery levels and charging
When your Airpods are connected but not functioning properly, it’s essential to check the battery levels and ensure that they are adequately charged. Low battery levels or issues with the charging case can result in connectivity problems and poor sound quality. Follow these steps to check the battery levels and charging of your Airpods:
1. Check Airpods battery levels: Open the Airpods case with your Airpods inside and bring them close to your paired device. On your device, go to the home or lock screen, and the battery widget should display the battery levels of your Airpods. Check if the battery levels are sufficient. If they are critically low, it may affect the functionality of your Airpods.
2. Charge your Airpods: If the battery levels are low, place your Airpods back into the charging case and connect it to a power source using the Lightning cable. Ensure that the case is properly closed, and the LED indicator on the front of the case turns orange, indicating that your Airpods are charging. Leave them to charge for a sufficient amount of time until the LED indicator turns green, indicating a full charge.
3. Clean the charging contacts: Over time, dirt or debris can accumulate on the charging contacts of your Airpods and the charging case. This can interfere with proper charging. Gently wipe the charging contacts on both your Airpods and the charging case with a soft, lint-free cloth to remove any dirt or debris. Ensure that they are clean and dry before placing your Airpods back in the case for charging.
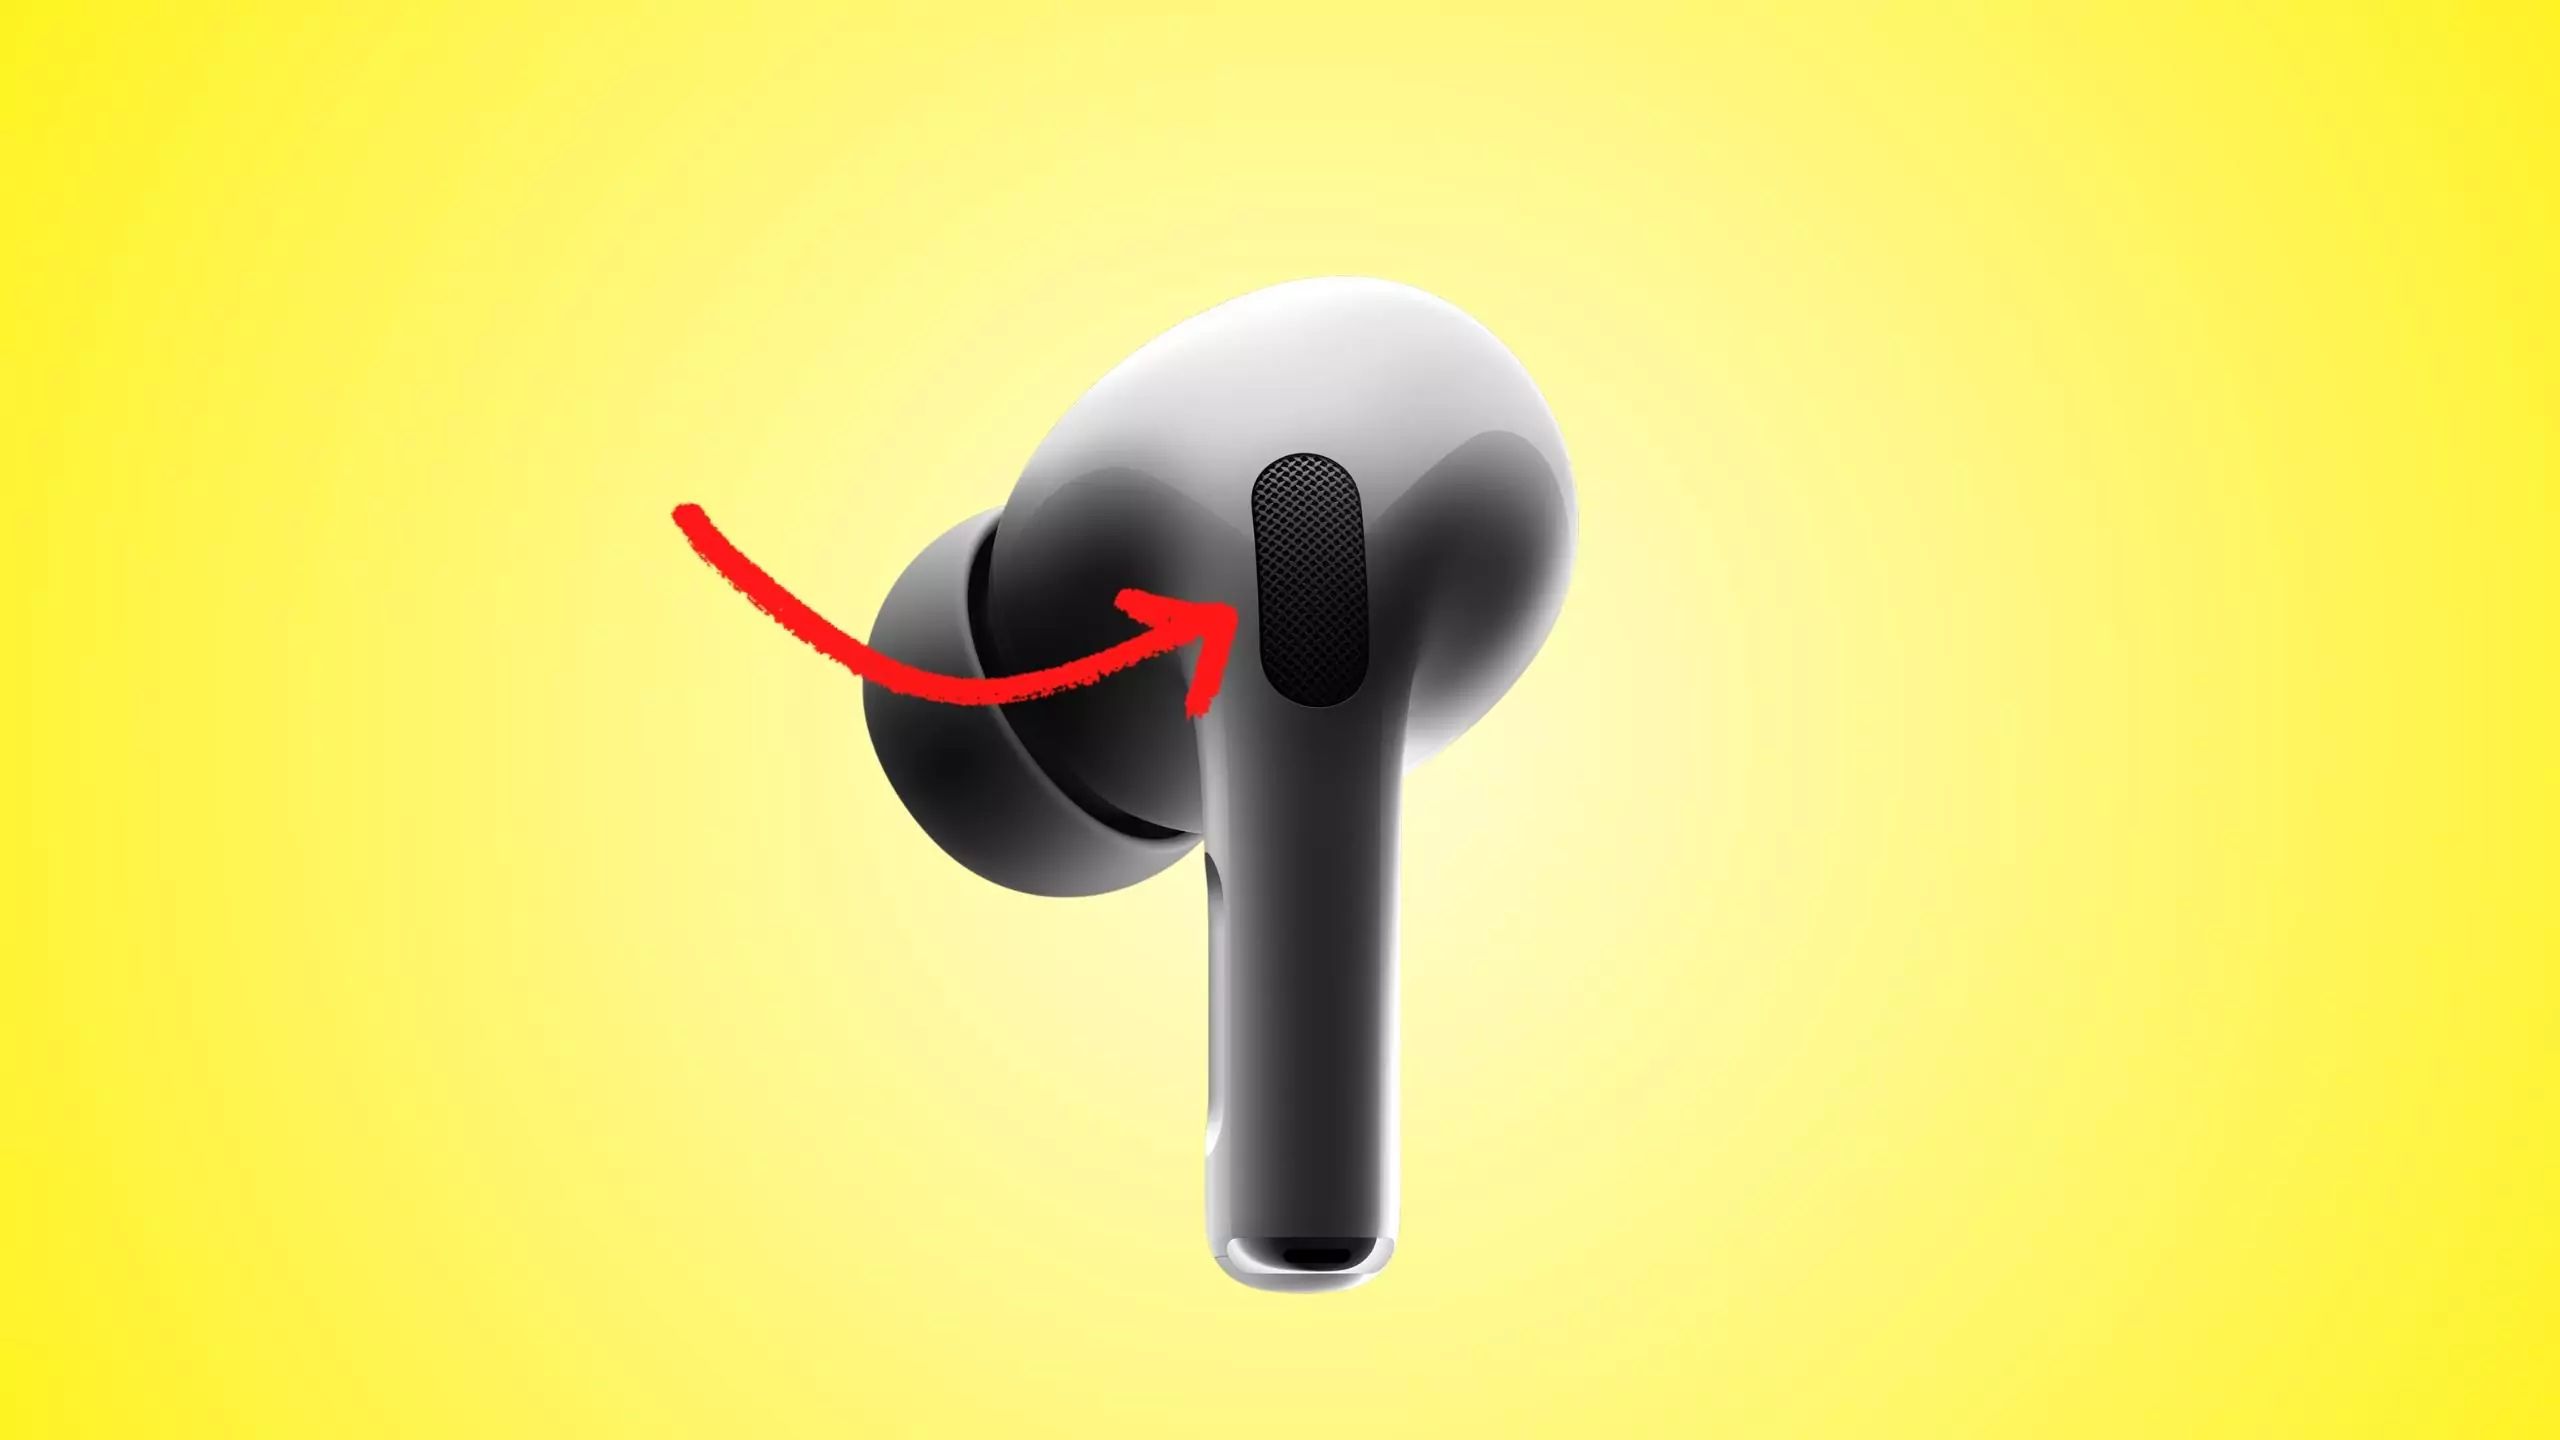
4. Reset your Airpods: If you have checked the battery levels and charging, but your Airpods are still not functioning properly, you can try resetting them. Place your Airpods in the case, open the lid, and press and hold the setup button on the back of the case until the LED indicator starts flashing white. Follow the on-screen prompts on your device to reconnect and set up your Airpods again.
Checking the battery levels and ensuring proper charging of your Airpods is essential for maintaining their functionality. If the connection problem persists even after checking and addressing the battery and charging issues, you can proceed to other troubleshooting steps to further diagnose the issue.
Solution 8: Disable automatic ear detection
If your Airpods are connected but not working as expected, disabling the automatic ear detection feature may help resolve the issue. This feature allows your Airpods to automatically pause audio playback when you remove them from your ears. However, in some cases, it can interfere with the connection and cause connectivity problems. Follow these steps to disable automatic ear detection:
1. Open the settings menu on your device: Locate the settings app on your device and open it. The location and appearance of the settings menu may vary depending on your device’s operating system.
2. Go to the Bluetooth settings: Within the settings menu, look for the “Bluetooth” or “Connected Devices” section and tap on it to access the Bluetooth settings.
3. Locate your Airpods in the list of paired devices: Scroll through the list of paired devices until you find your Airpods. They will be listed by their name, such as “Airpods” or “Your Name’s Airpods.”
4. Access Airpods settings: Tap on the “i” or “Settings” icon next to your Airpods’ name to access the specific settings for your Airpods.
5. Disable automatic ear detection: Look for an option related to automatic ear detection within the Airpods’ settings. This option may be labeled as “Ear Detection,” “Automatic Ear Detection,” or something similar. Toggle this option to the “Off” or “Disable” position.
6. Reconnect your Airpods: After disabling automatic ear detection, go back to the Bluetooth settings and reconnect your Airpods. Tap on your Airpods in the list of available devices, and follow the on-screen prompts to complete the connection.
By disabling automatic ear detection, you eliminate a potential source of connectivity issues and allow your Airpods to maintain a consistent connection without interruptions caused by the presence or absence of your ears. If the connection problem persists, you can proceed to other troubleshooting steps to further diagnose the issue.
Solution 9: Try connecting your Airpods to another device
If you are experiencing connection problems with your Airpods, one way to troubleshoot the issue is by trying to connect them to another device. Connecting your Airpods to a different device can help determine whether the problem lies with the original device or with the Airpods themselves. Follow these steps to connect your Airpods to another device:
1. Pick another device: Choose a different device to connect your Airpods to. It can be a smartphone, tablet, laptop, or any other device that supports Bluetooth connectivity.
2. Open the Bluetooth settings: On the chosen device, open the settings menu and navigate to the Bluetooth or Connected Devices section.
3. Enable Bluetooth: If Bluetooth is not already turned on, enable it. This can typically be done by tapping a toggle switch or selecting an option to turn Bluetooth on.
4. Put your Airpods in pairing mode: Place your Airpods back in the charging case, close the lid, and then open the lid again. The LED light on the front of the case should start blinking white, indicating that your Airpods are in pairing mode and ready to connect to a device.
5. Connect your Airpods: On the new device, search for available Bluetooth devices. Your Airpods should appear in the list of available devices. Select your Airpods from the list to initiate the pairing process.
6. Follow pairing instructions: Follow the on-screen prompts on the new device to complete the pairing process. This may include entering a pairing code or confirming the connection on both the Airpods and the new device.
After successfully connecting your Airpods to another device, test their functionality to see if they work properly. If your Airpods function correctly with the new device, it indicates that the problem may lie with the original device’s settings or configurations. If the issue persists on the new device as well, it suggests that the problem may be with the Airpods themselves. In either case, this information can help you determine the appropriate next steps to resolve the connectivity issue.
Solution 10: Contact Apple Support for further assistance
If you have tried the previous troubleshooting steps and are still facing connectivity issues with your Airpods, it may be time to seek further assistance. Apple Support has a team of experts who can provide personalized assistance and guidance to help resolve any persistent issues you are experiencing. Here’s what you can do:
1. Visit the Apple Support website: Go to the Apple Support website and navigate to the Airpods support section. There, you will find detailed articles, guides, and frequently asked questions that may address your specific issue.
2. Contact Apple Support: If you are unable to resolve the problem on your own, reach out to Apple Support directly for assistance. You can contact them via phone, online chat, or email, depending on your preference and availability.
3. Provide details and explain the issue: When contacting Apple Support, be prepared to provide detailed information about the connectivity problems you are facing with your Airpods. Describe the troubleshooting steps you have already taken to help them understand the extent of the issue.
4. Follow their guidance: Apple Support will provide you with detailed instructions and troubleshooting advice based on your specific situation. Follow their guidance carefully and provide any additional information or feedback they may request.
5. Consider warranty or service options: If your Airpods are still under warranty and efforts to resolve the connectivity issue have been unsuccessful, Apple Support may guide you through warranty claim processes or direct you to service options, such as repairs or replacements, depending on the nature of the issue.
Apple Support is dedicated to ensuring customer satisfaction and resolving any technical issues with their products. They have the expertise and resources to assist you further if the previous solutions prove ineffective. Don’t hesitate to reach out to them for additional support and solutions.