Pairing Airpods Pro with your device
Pairing your Airpods Pro with your device is a quick and straightforward process that allows you to enjoy the seamless wireless experience they offer. Whether you have an iPhone, iPad, Mac, or even an Android device, the following steps will guide you through the pairing process.
To begin, make sure that your Airpods Pro are charged and the Bluetooth on your device is turned on. Then, follow these steps:
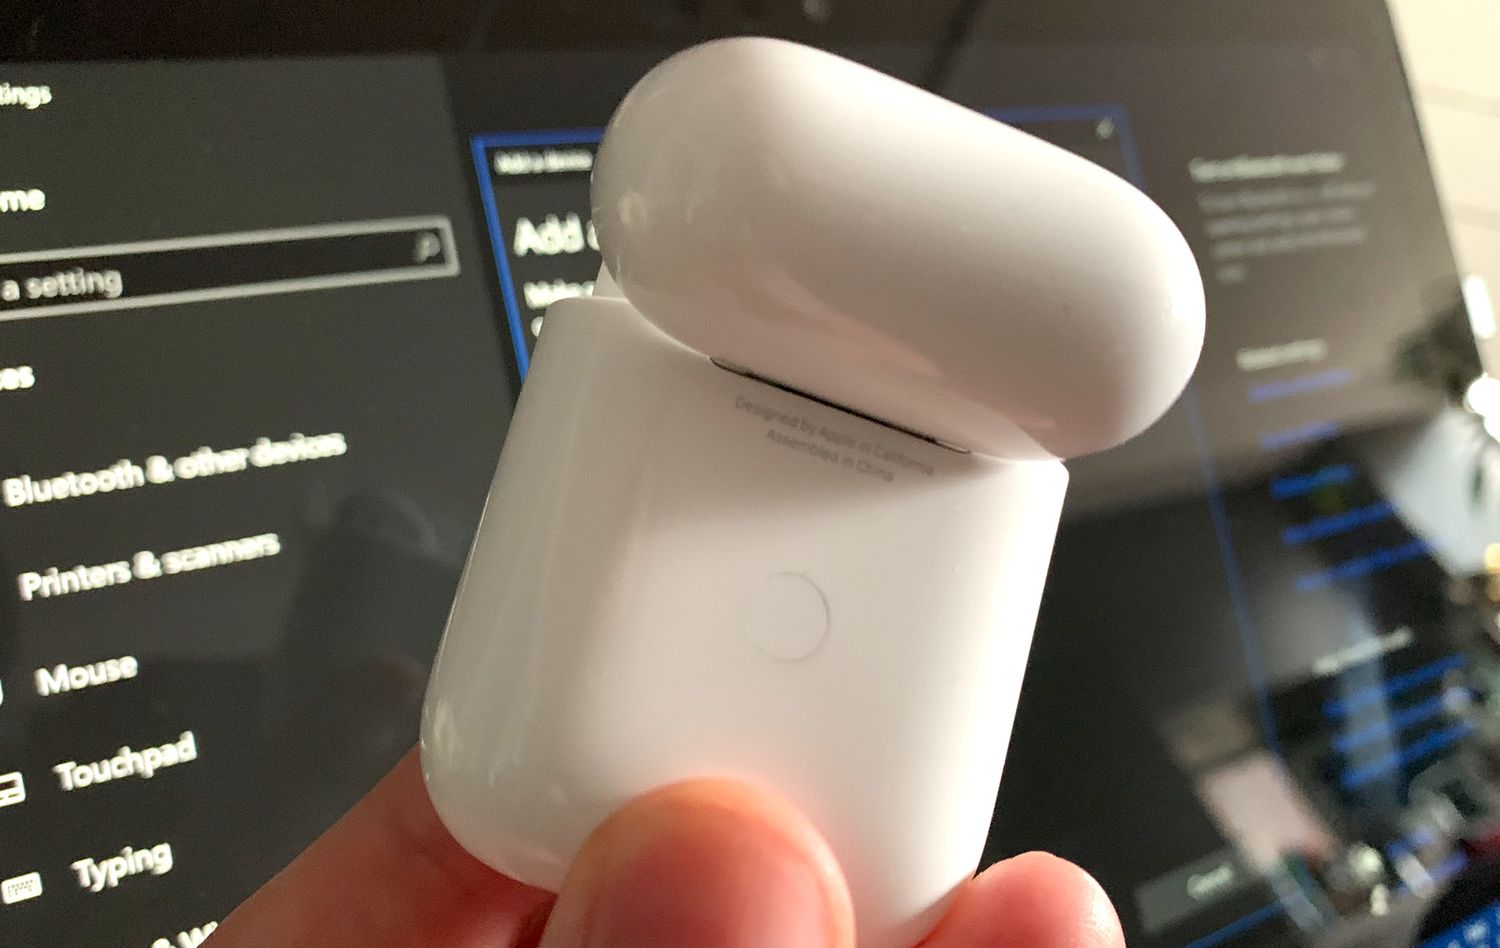
- Open the lid of your Airpods Pro case.
- On your device, go to the Settings menu and tap on Bluetooth.
- In the Bluetooth menu, you should see Airpods Pro listed as an available device. Tap on it to connect.
- A pop-up window will appear on your screen, confirming the pairing process. Tap on “Connect” to proceed.
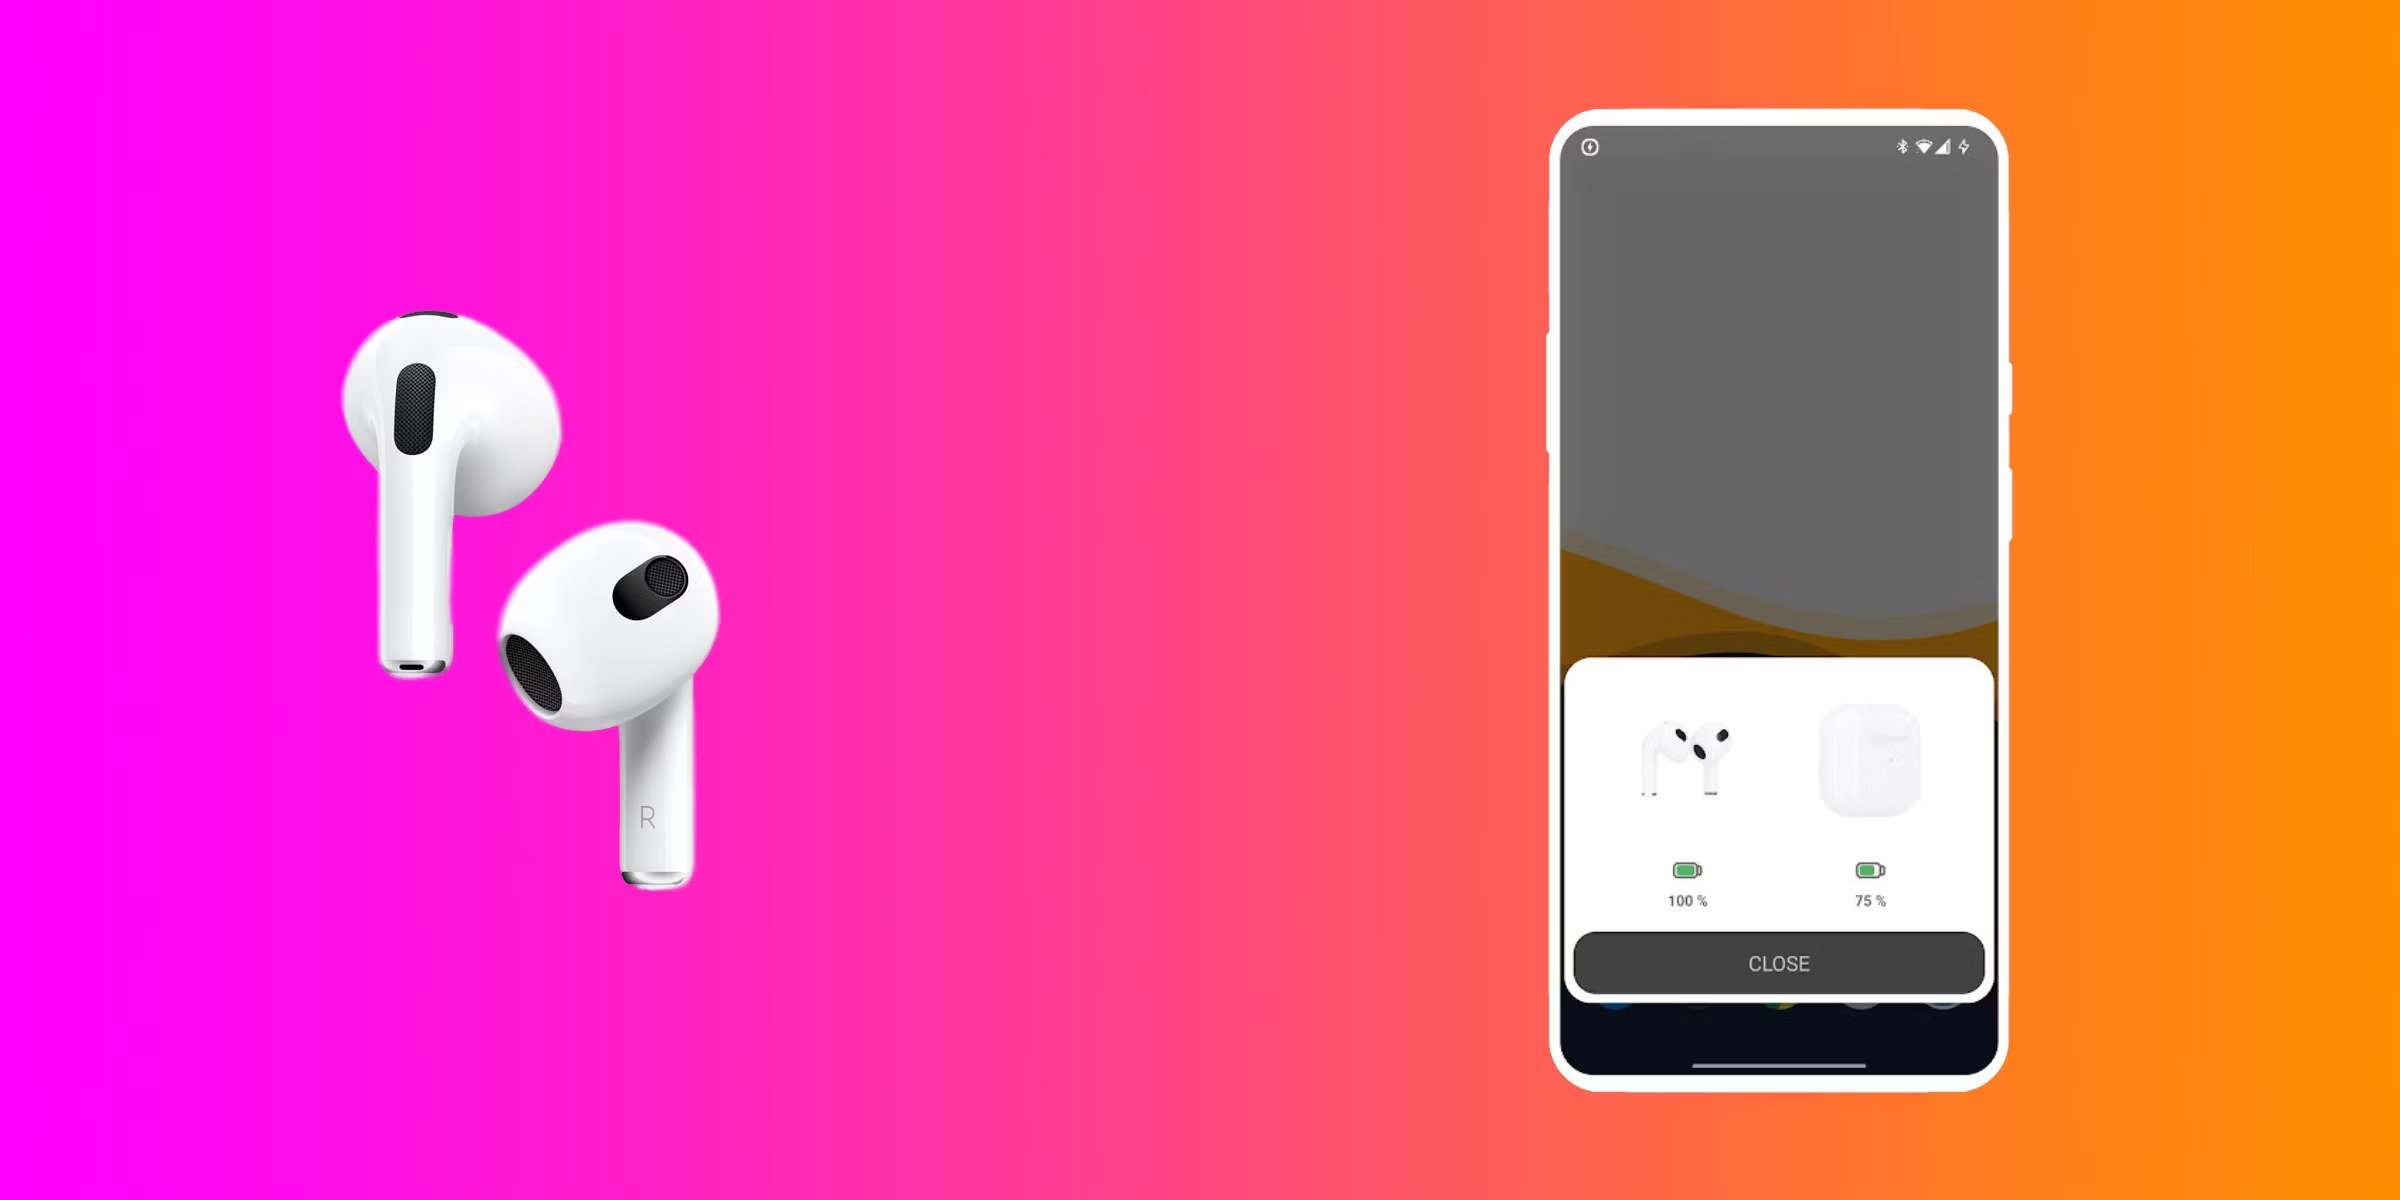
- Wait for a few seconds until the connection is established. Once connected, you will see the battery status of your Airpods Pro on your device’s screen.
That’s it! Your Airpods Pro are now paired with your device, and you can start using them to listen to music, make phone calls, or interact with Siri.
Please note that if you have multiple Apple devices using the same iCloud account, your Airpods Pro will automatically connect to the device that is currently in use. This seamless switching between devices is one of the many convenient features of Airpods Pro.
If you ever need to pair your Airpods Pro with a new device, simply repeat the above steps. The Airpods Pro will remember the previously paired devices, but you may need to re-establish the connection with each new device you want to use.
Pairing your Airpods Pro with your device is just the first step to enjoy the full potential of these wireless earbuds. In the following sections, we will explore the basic controls, advanced features, and troubleshooting tips to help you make the most of your Airpods Pro experience.
Basic controls and gestures
Understanding the basic controls and gestures of your Airpods Pro will allow you to conveniently navigate through your music, manage calls, and access additional features. Here are some essential controls and gestures you should be familiar with:
- Play/Pause: Simply tap once on either Airpod to play or pause your music or podcast. This is especially handy when you need to quickly pause your audio.
- Next/Previous Track: Double-tap on the right Airpod to go to the next track, or double-tap on the left Airpod to go to the previous track. This lets you effortlessly switch between songs without reaching for your device.
- Answer/End Calls: When a call comes in, a double-tap on either Airpod will answer the call. To end the call, double-tap again. This provides a seamless way to manage your phone conversations without having to take out your phone.
- Activate Siri: To interact with Siri, simply say “Hey Siri” or double-tap on either Airpod. You can then give voice commands to Siri for various tasks, such as making a call, sending a message, or adjusting the volume.
- Volume Control: Adjusting the volume is as easy as saying “Hey Siri, increase/decrease the volume,” or using the volume controls on your connected device. Alternatively, you can use the force sensor located on the stem of the Airpods Pro to increase or decrease the volume with a long press.
It’s worth noting that you can customize some of these controls and gestures to better suit your preferences. This can be done through the Airpods settings on your device, which we will explore in a later section.
In addition to these basic controls, your Airpods Pro also come with intelligent sensors that automatically detect when you insert them in your ears or remove them. This ensures that your audio playback will pause when you take them out and resume when you put them back in, providing a seamless listening experience.
Understanding and mastering these basic controls and gestures will make using your Airpods Pro a breeze. Next, let’s delve into the advanced features, starting with the highly acclaimed Active Noise Cancellation.
Active Noise Cancellation
One of the standout features of the Airpods Pro is their Active Noise Cancellation (ANC) technology. ANC helps to block out unwanted background noises, allowing you to immerse yourself fully in your music or focus on the task at hand. Here’s how Active Noise Cancellation works and how you can control it:
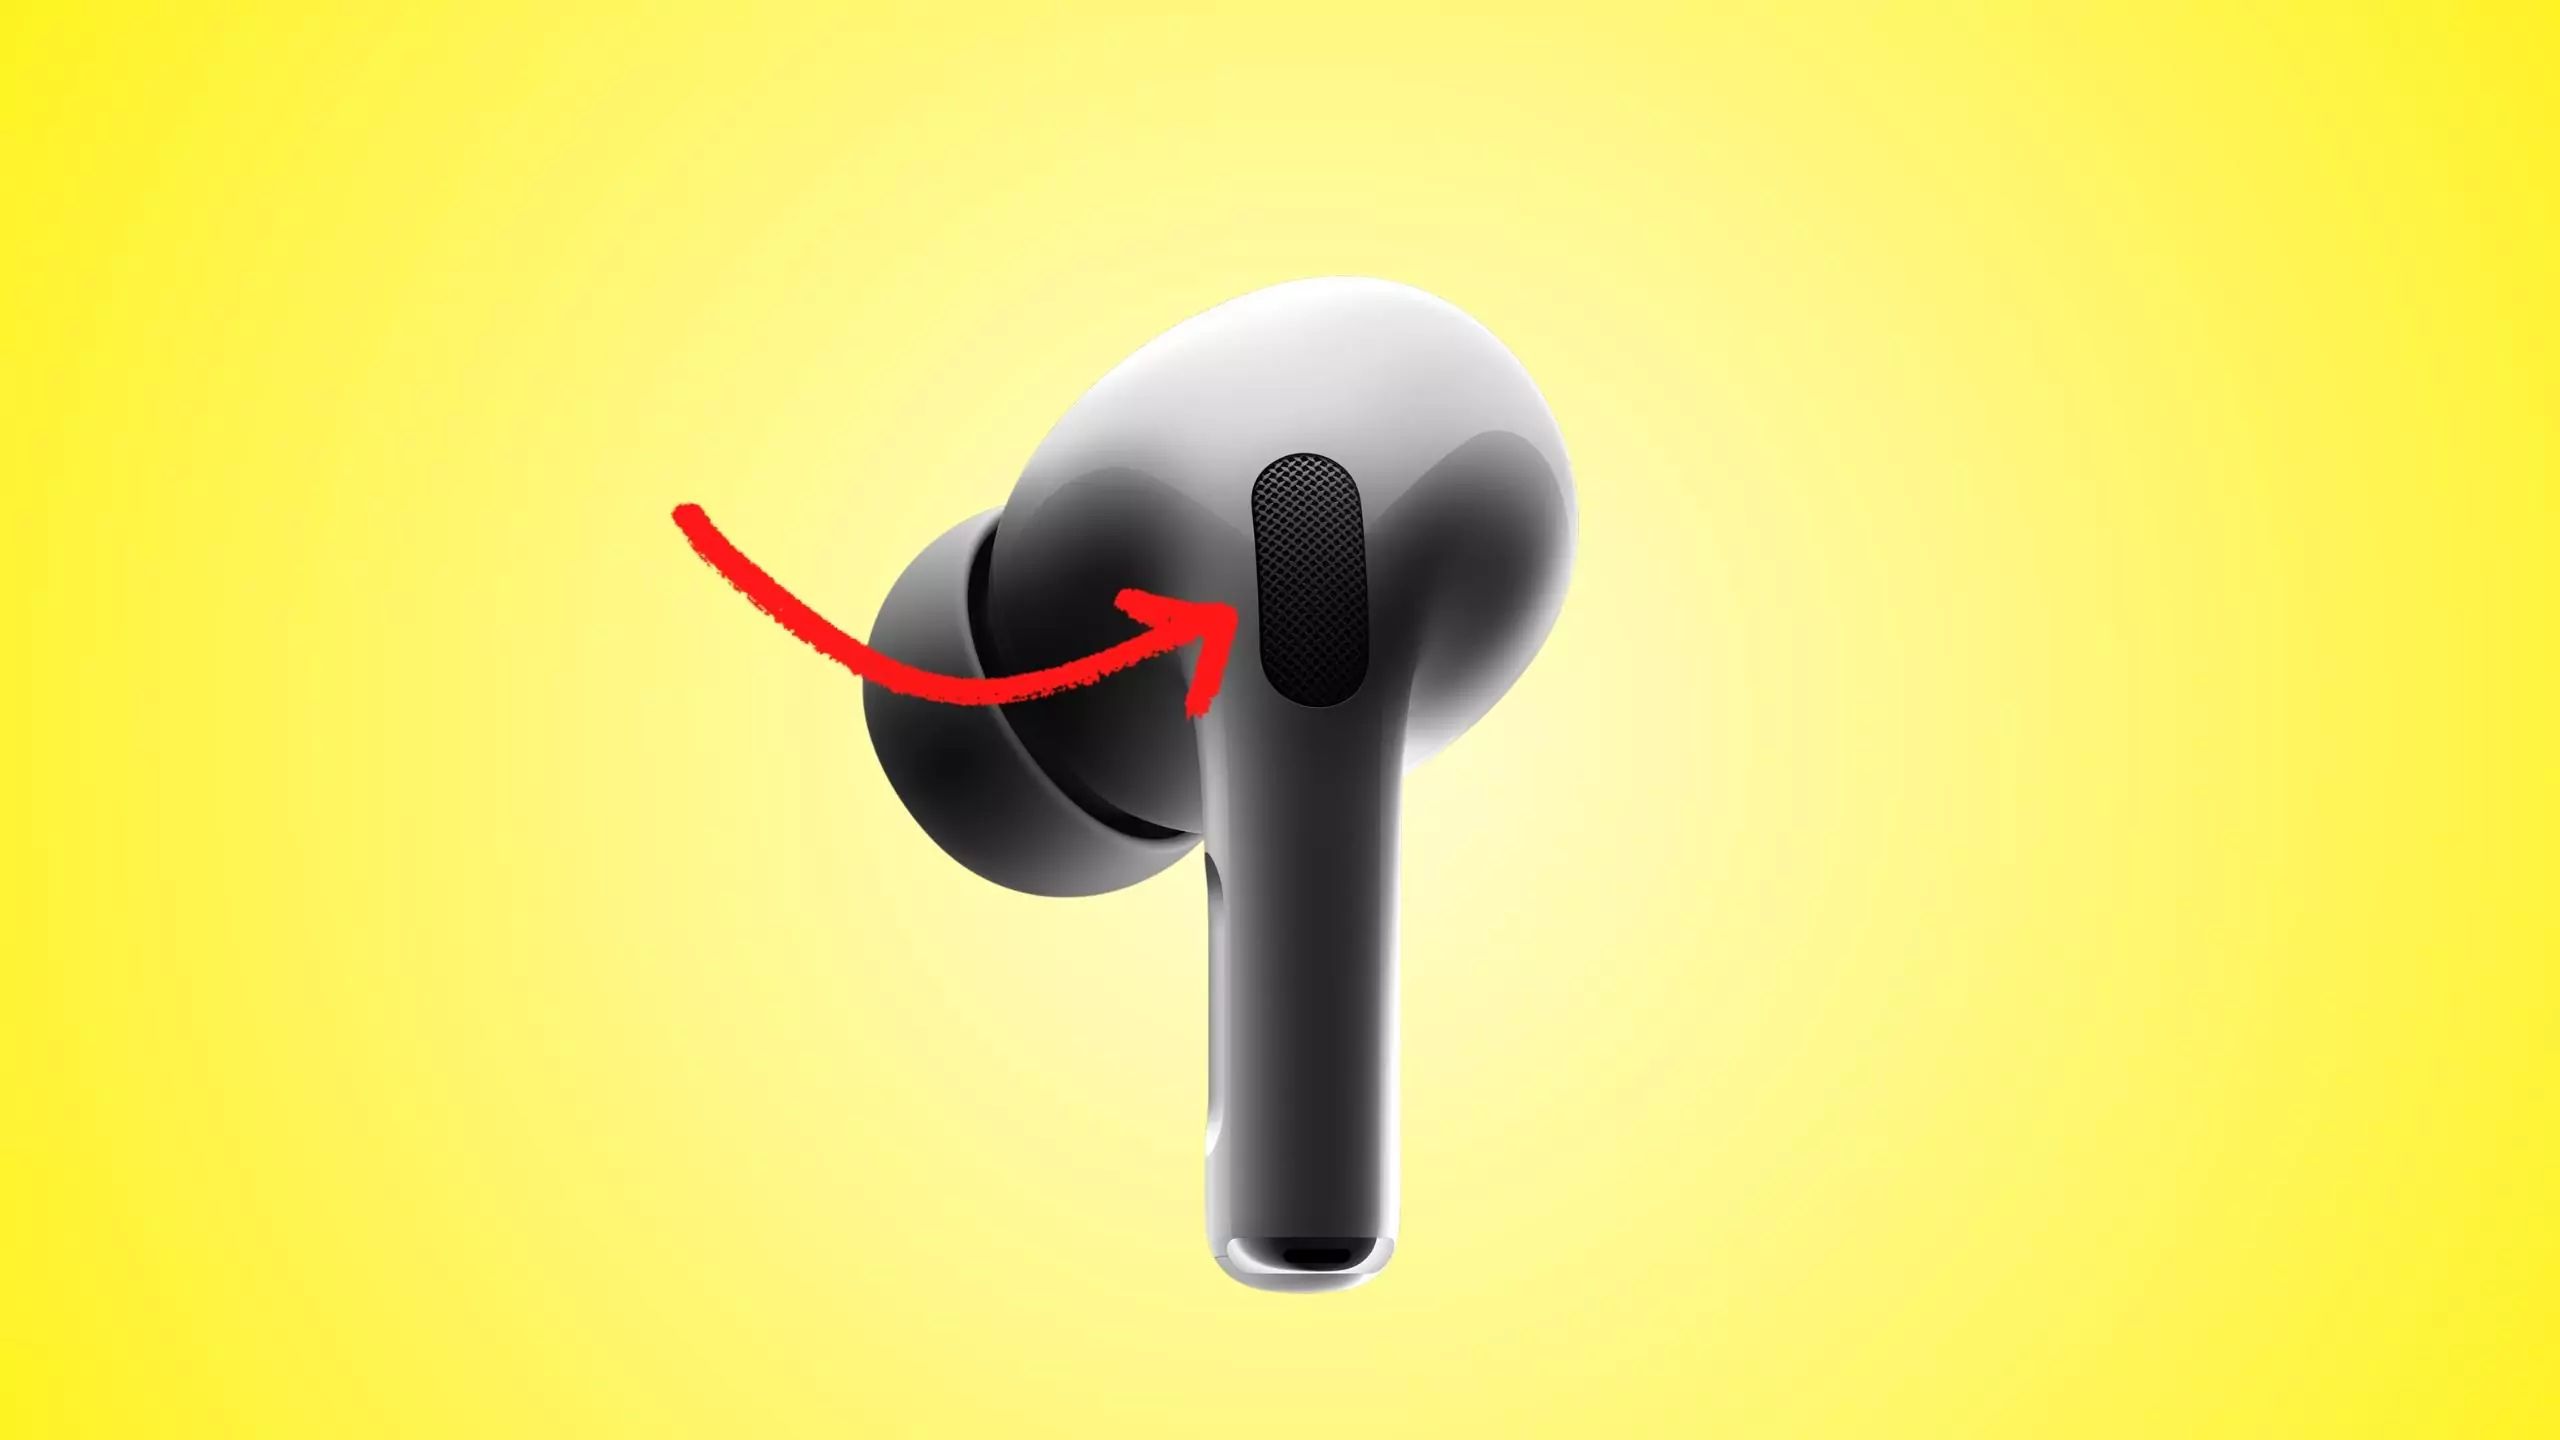
Active Noise Cancellation uses two microphones on each Airpod to constantly adapt and measure the external sound. The Airpods Pro then generate an equal but opposite sound wave, canceling out the unwanted noise before it reaches your ears. This technology is particularly effective in reducing low-frequency sounds such as airplane engine noise or traffic hum.
To enable or disable Active Noise Cancellation, you have a couple of options. You can either use the Control Center on your iOS or iPadOS device or press and hold the force sensor on the stem of the Airpods Pro until you hear a chime. This will toggle between Active Noise Cancellation and Transparency mode, which we will discuss in the next section.
You can also adjust the intensity of the Active Noise Cancellation. Open the Control Center on your iOS or iPadOS device and long-press the volume slider. This will reveal the Noise Control panel, allowing you to choose between three modes: Off, Low, and High. The Low mode reduces background noise while still allowing some ambient sound to come through, and the High mode offers maximum noise cancellation.
Active Noise Cancellation is not only useful for enjoying your music in peace but also for creating a focused environment for work or study. By eliminating distracting noises, you can enhance your productivity and concentration wherever you are.
However, it’s important to note that Active Noise Cancellation may affect your awareness of surrounding sounds, such as traffic or important announcements. In situations where it is essential to remain aware of your surroundings, you can switch to the Transparency mode.
Now that we’ve explored Active Noise Cancellation, let’s discover the Transparency mode and how it can enhance your listening experience in different scenarios.
Transparency mode
Transparency mode is another impressive feature of the Airpods Pro that allows you to hear and interact with the world around you while still enjoying your audio. This mode is particularly useful when you need to be aware of your surroundings, such as during outdoor activities or when having a conversation.
When Transparency mode is enabled, it uses the built-in microphones of the Airpods Pro to amplify the sounds around you, making them more audible. This ensures that you can listen to your music or podcast while still being aware of important environmental sounds and conversations.
To activate Transparency mode, you have a couple of options. You can use the Control Center on your iOS or iPadOS device or press and hold the force sensor on the stem of the Airpods Pro until you hear a chime. This will switch between Active Noise Cancellation and Transparency mode.
Just like with Active Noise Cancellation, you can adjust the intensity of Transparency mode through the Control Center on your device. Long-press the volume slider to reveal the Noise Control panel, and choose between Off, Low, and High modes. The Low mode lets in more ambient sound, while the High mode offers maximum transparency.
Transparency mode is not only helpful in everyday scenarios but also enhances safety, especially when walking or running outdoors. By enabling Transparency mode, you can stay aware of incoming vehicles, pedestrians, or other potential hazards.
Additionally, Transparency mode is particularly useful when you need to have a conversation without taking off your Airpods Pro. This allows you to listen to the person speaking clearly, without the need to remove your earbuds or pause your audio.
The ability to seamlessly switch between Active Noise Cancellation and Transparency mode is a testament to the versatility of the Airpods Pro. Next, let’s explore how you can customize your Airpods Pro settings to tailor them to your preferences.
Customizing Airpods Pro settings
Your Airpods Pro come with a range of customizable settings that allow you to personalize your listening experience. These settings can be accessed through the Bluetooth settings menu on your device. Let’s explore some of the key settings and how you can customize them:
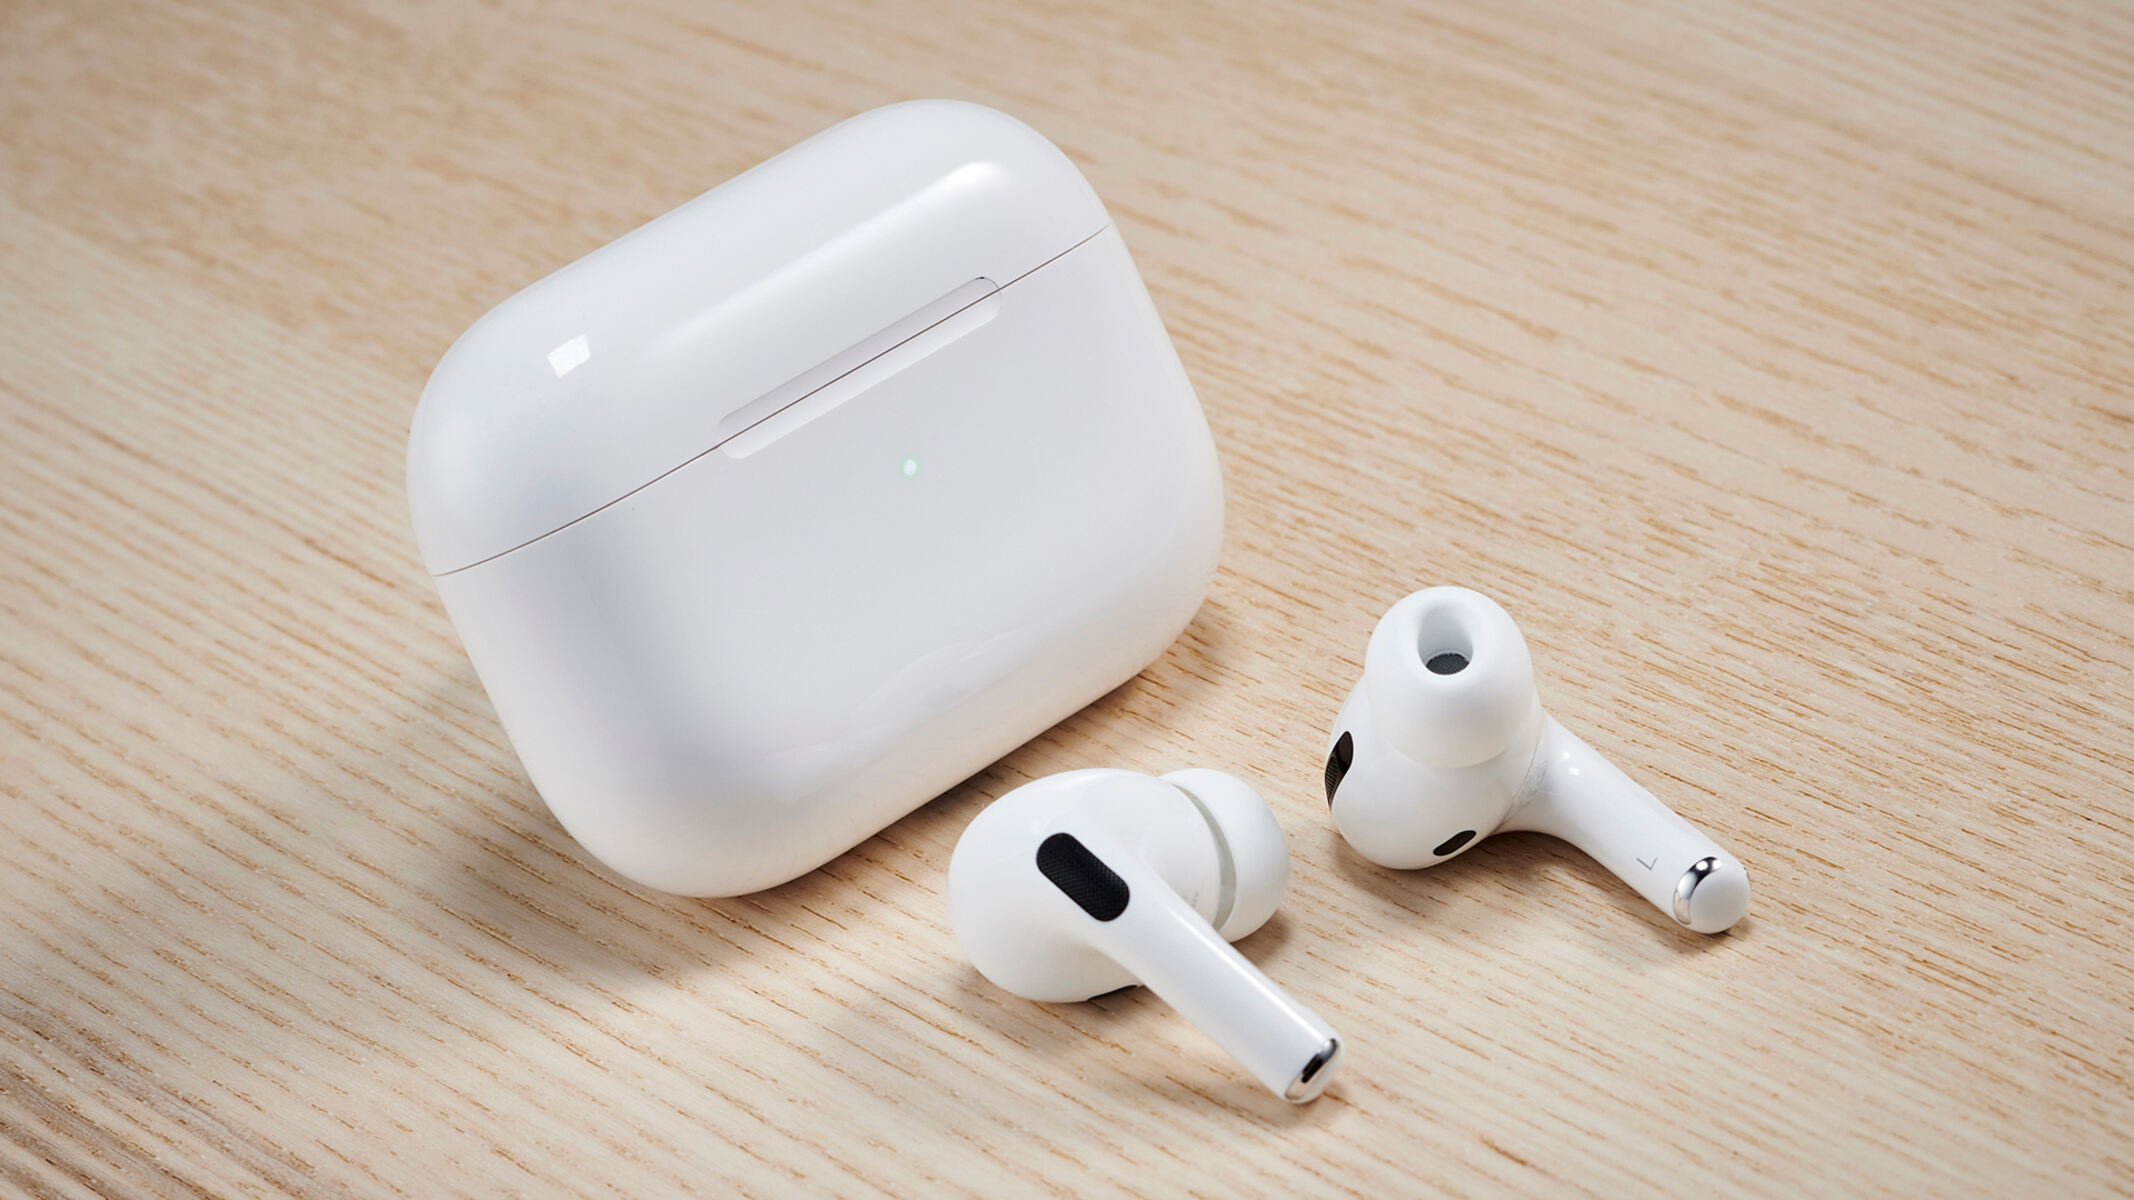
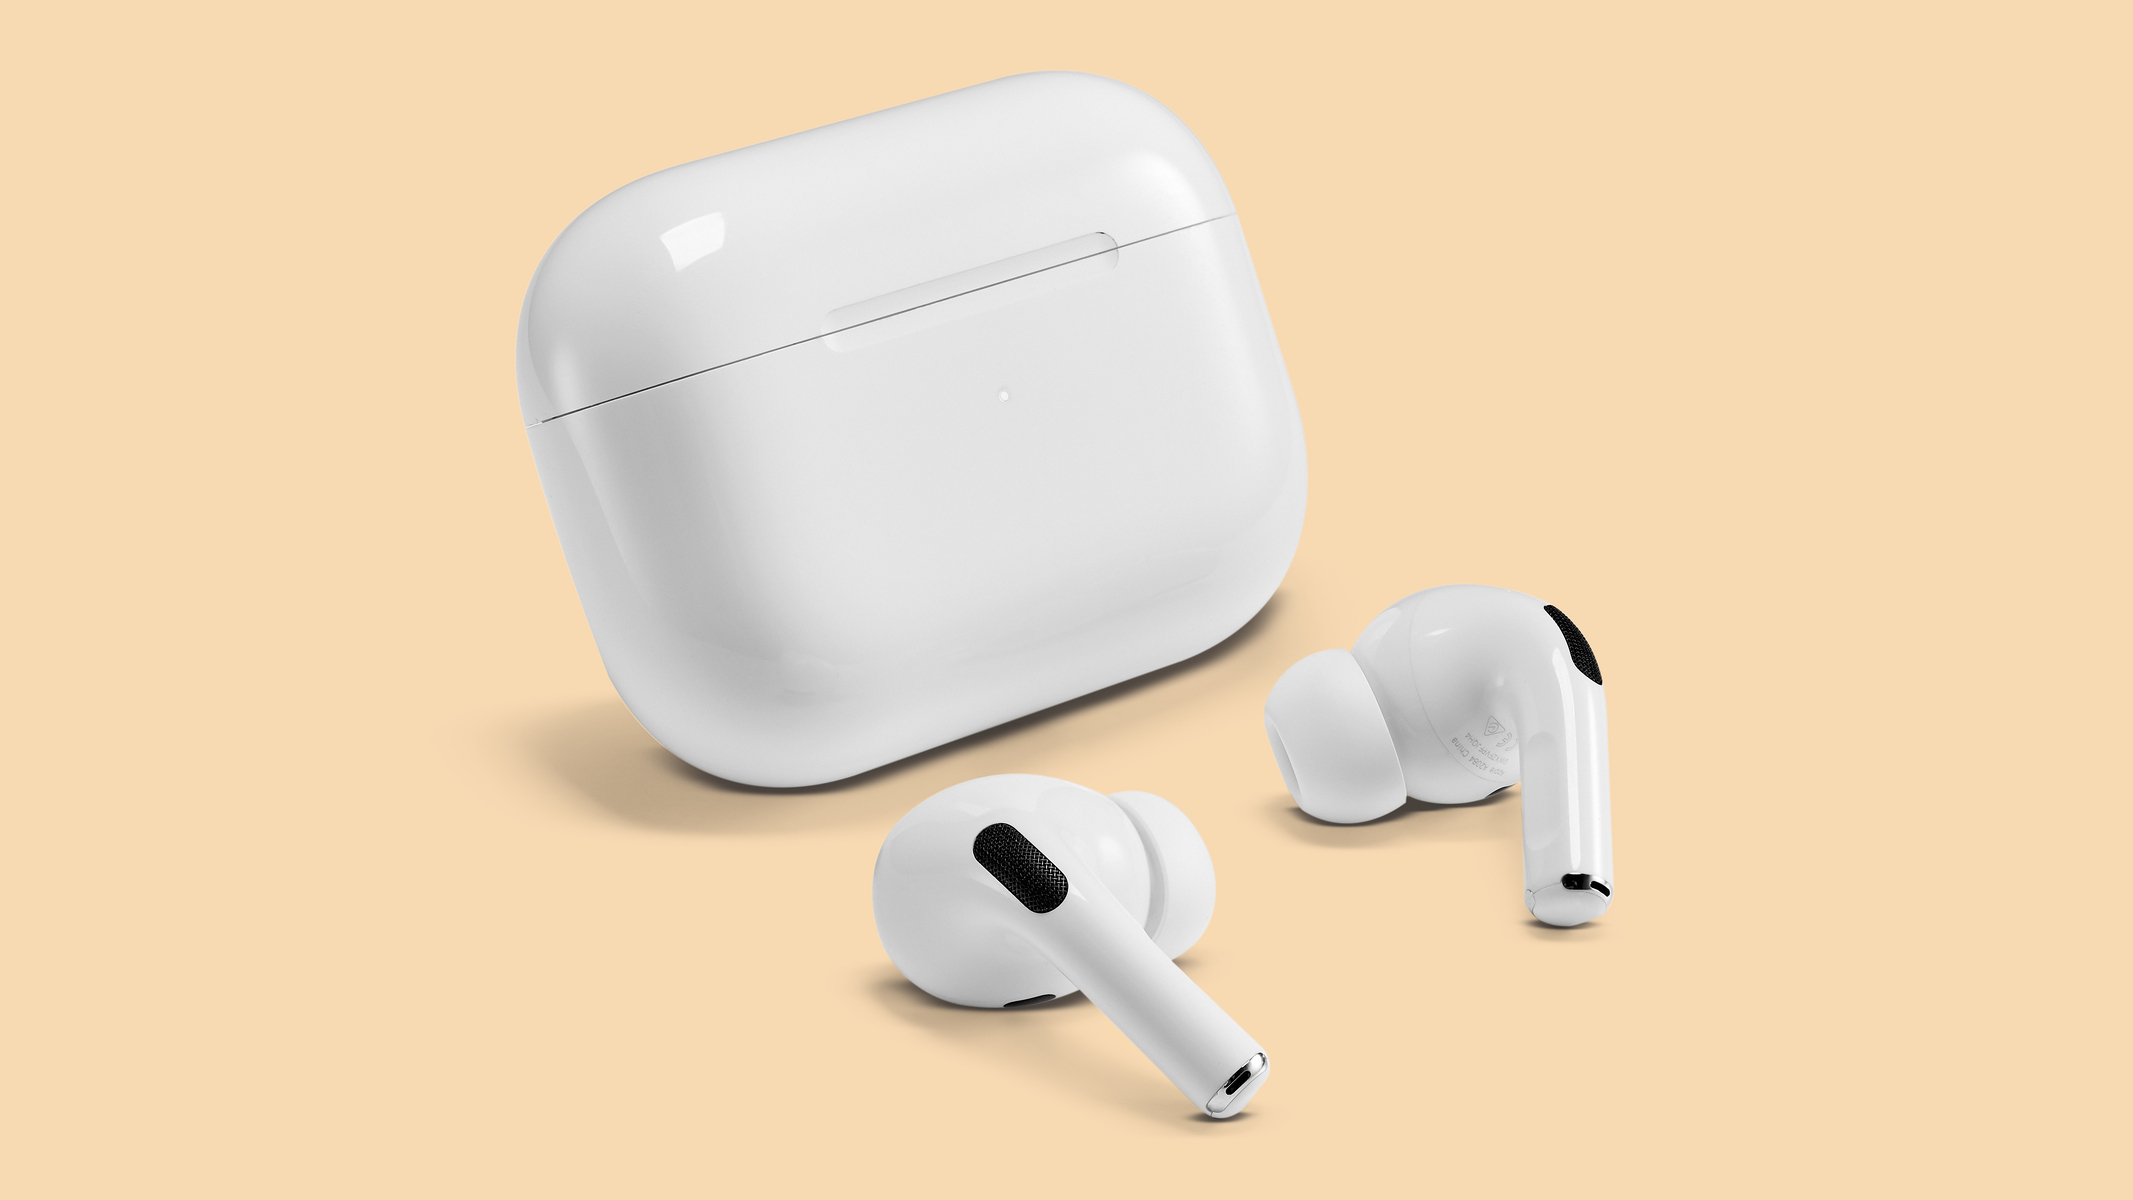
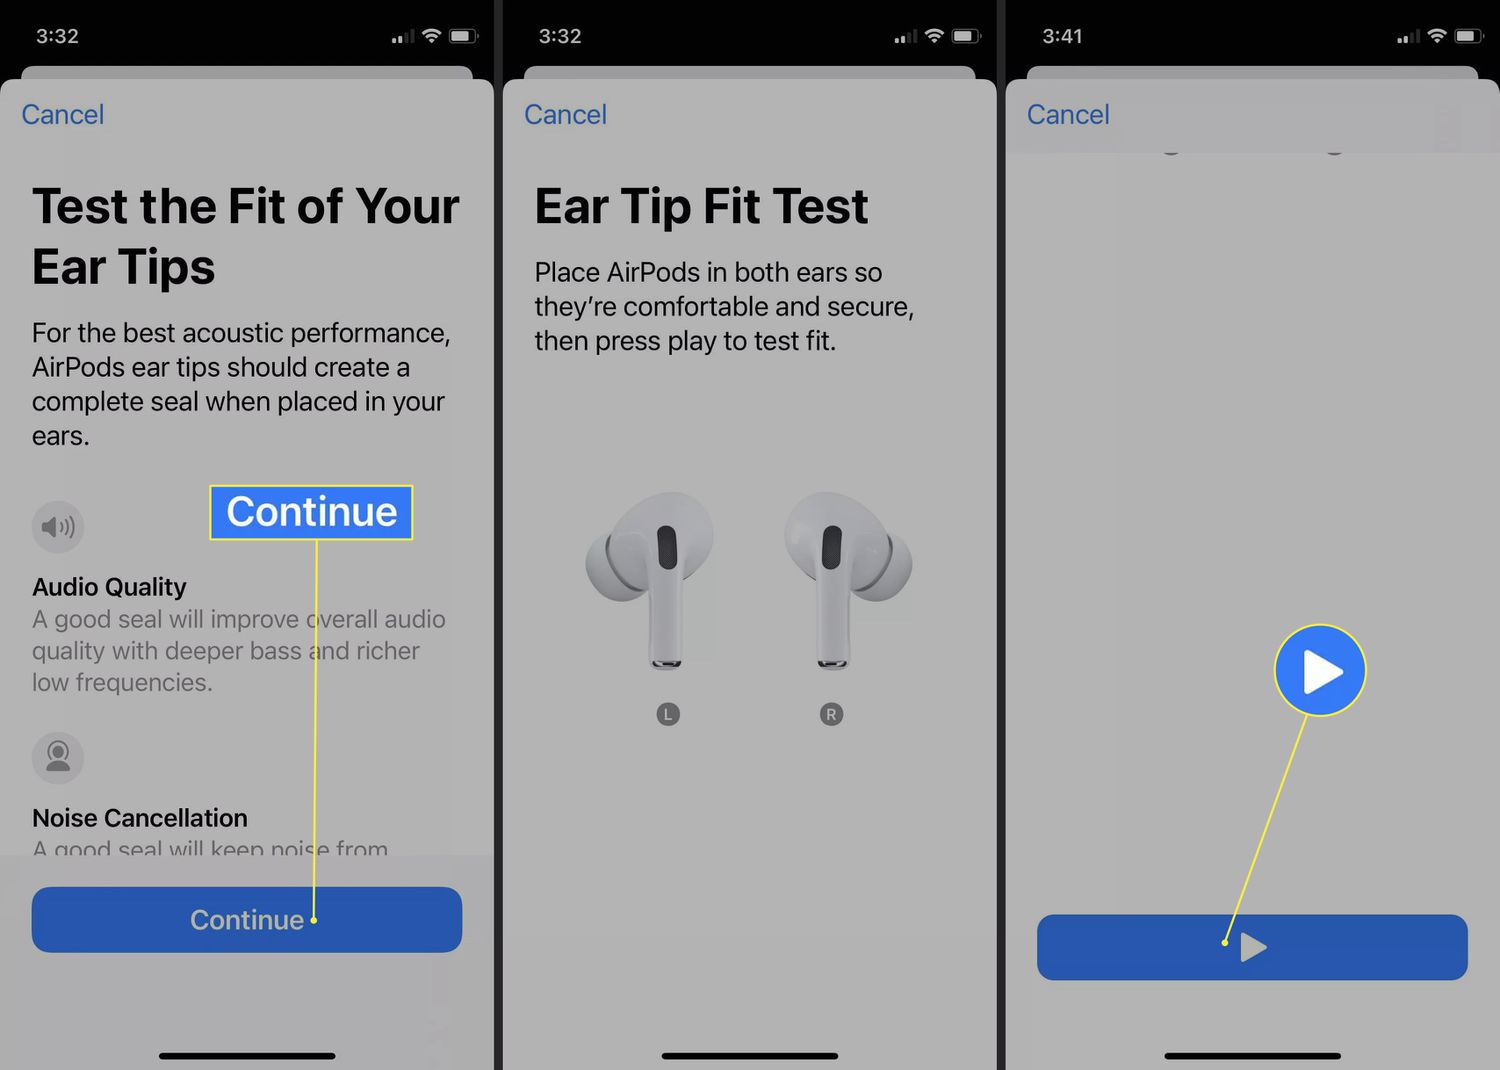
- Change Ear Tip Fit: The Airpods Pro come with three sizes of ear tips – small, medium, and large. It’s important to find the right fit to ensure comfort and optimal audio performance. Experiment with different sizes and choose the ones that provide a secure and comfortable fit.
- Customize Press and Hold Action: By default, pressing and holding the force sensor on the stem of the Airpods Pro activates Siri. However, you can customize this action to suit your needs. In the Bluetooth settings menu, select your Airpods Pro and choose the desired action, such as Play/Pause, Next Track, or Previous Track.
- Automatic Ear Detection: The Airpods Pro have sensors that detect when they are in your ears or when you remove them. This feature enables automatic playback pause when you take them out and resume when you put them back in. You can enable or disable this feature in the Bluetooth settings menu.
- Announce Messages with Siri: With this feature, Siri can read your incoming messages aloud when you’re wearing your Airpods Pro. You can choose to have messages announced always, only when using Siri, or never. Configure this setting in the Notifications section of your device’s settings.
- Equalizer Settings: Customize the audio output of your Airpods Pro with the built-in equalizer settings. In the Bluetooth settings menu, select your Airpods Pro, and in the Audio Accessibility section, you can choose from a range of presets like Bass Boost, Treble Boost, or Vocal Boost, or create a custom equalizer setting.
These are just a few of the many customizable settings that allow you to tailor your Airpods Pro to your preferences and enhance your listening experience.
It’s worth noting that some of these settings may vary depending on the device you’re using. For example, certain settings may be available only on Apple devices with the latest operating systems.
Now that you’re familiar with how to customize your Airpods Pro settings, let’s move on to exploring how you can make the most of Siri’s capabilities when using your Airpods Pro.
Using Siri with Airpods Pro
Siri, Apple’s virtual assistant, is seamlessly integrated into your Airpods Pro, allowing you to access various functions and control your device hands-free. With Siri, you can perform a wide range of tasks or get information with just your voice. Here’s how you can use Siri with your Airpods Pro:
To activate Siri, you have two options:
- Say “Hey Siri” followed by your command.
- Double-tap on either Airpod.
Once Siri is activated, you can ask it to perform tasks like playing music, making phone calls, sending messages, setting reminders, getting directions, and much more. Here are some examples of what you can ask Siri:
- “Play some upbeat music.”
- “Call John.”
- “Send a message to Mom.”
- “What’s the weather like today?”
- “Set a reminder for tomorrow at 10 AM.”
Siri can also be handy for adjusting the volume, skipping tracks, and controlling other playback functions on your Airpods Pro. For example:
- “Increase the volume.”
- “Skip to the next song.”
- “Pause the music.”
Keep in mind that Siri relies on an active internet connection to process your requests, so make sure you have a stable connection for optimal performance.
Moreover, Siri’s voice can be adjusted to suit your preferences. You can choose between a male or female voice, or even enable Voice Feedback, which provides spoken responses for your commands.
With Siri at your disposal, you can effortlessly control your Airpods Pro and perform various tasks, all with the power of your voice. It’s just one more way that Airpods Pro enhance your wireless listening experience.
Next, let’s delve into the battery life and charging options for your Airpods Pro.
Battery life and charging
The Airpods Pro come with impressive battery life that allows you to enjoy your favorite music, podcasts, and calls for extended periods without interruption. Here’s what you need to know about the battery life and charging options for your Airpods Pro:
The Airpods Pro themselves provide up to 4.5 hours of listening time and up to 3.5 hours of talk time on a single charge. With the charging case, you can get additional charges, resulting in a total of up to 24 hours of listening time and up to 18 hours of talk time.
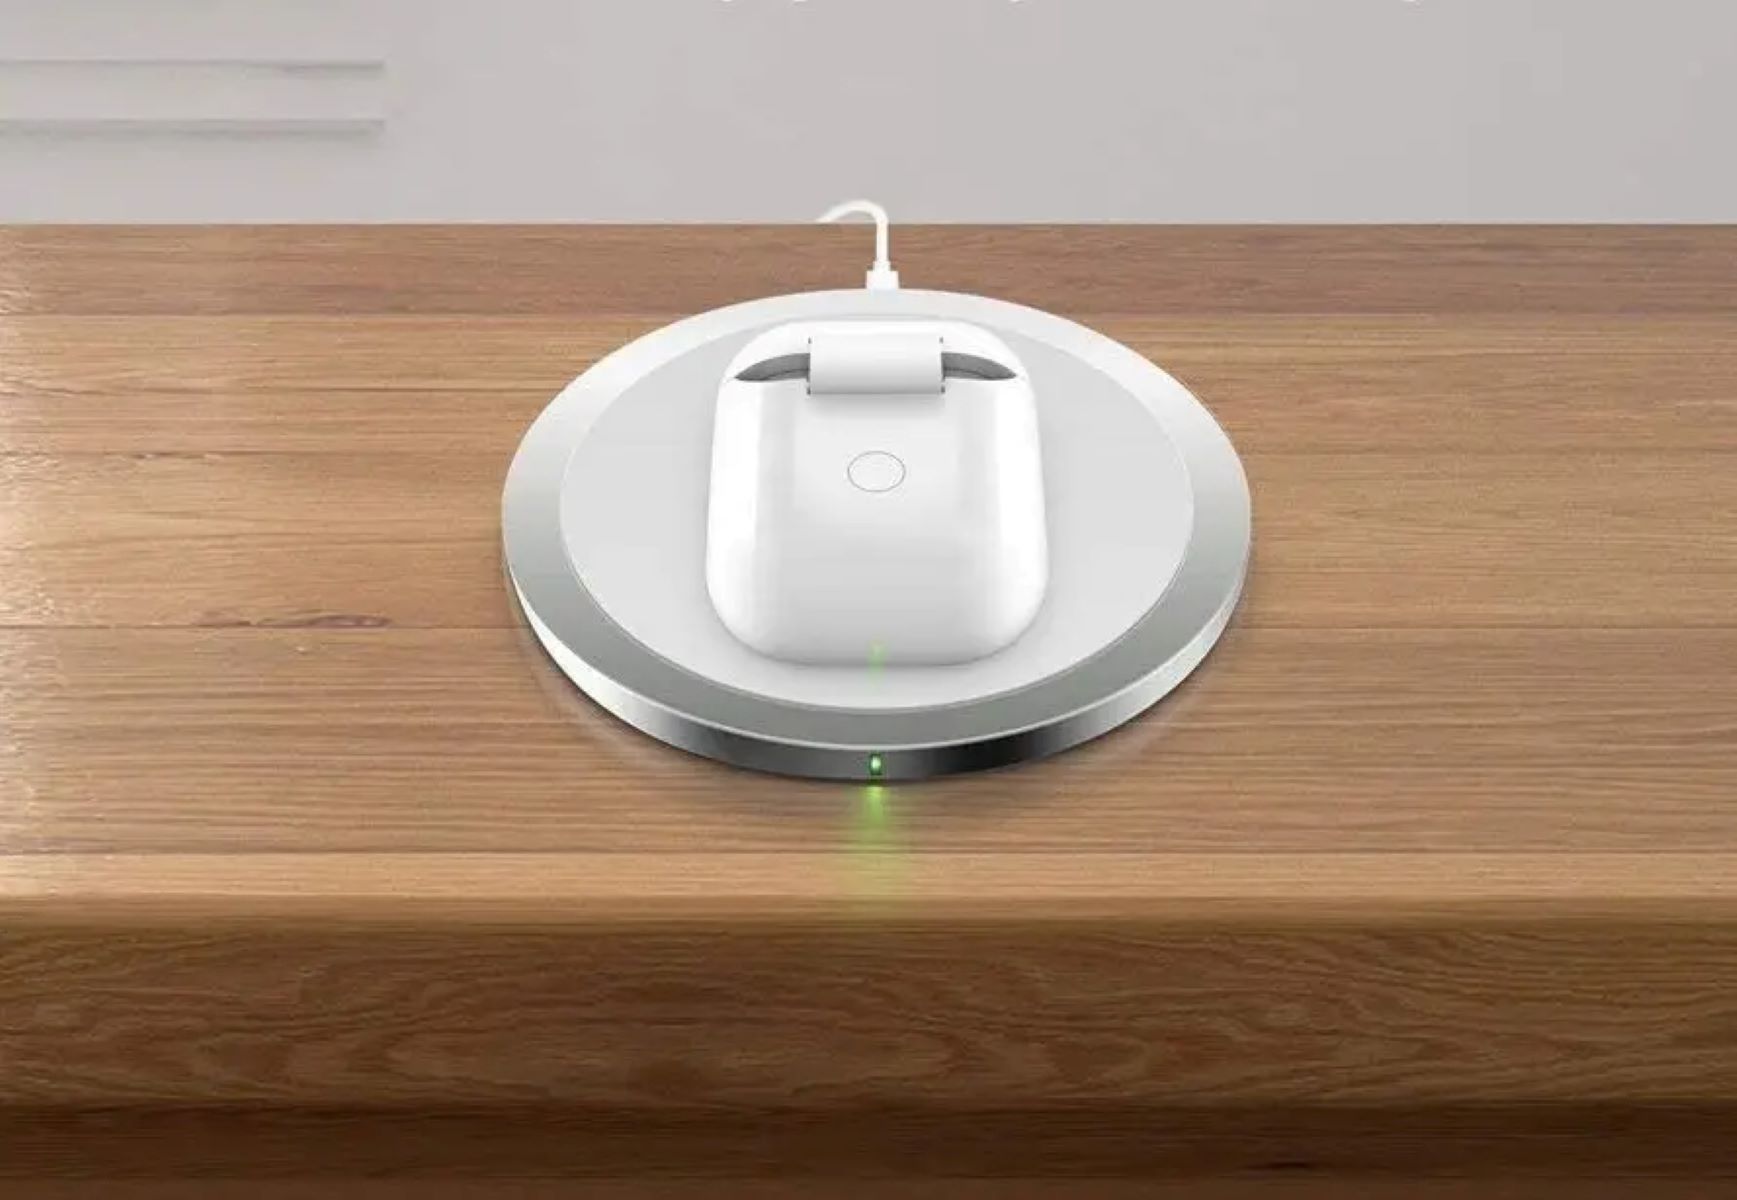
Charging your Airpods Pro is effortless with the included wireless charging case. Simply place the case on a Qi-certified charging mat or use a Lightning cable to connect it to a power source. The LED light on the front of the case indicates the charging status: green for fully charged, amber for charging in progress, or no light when the case is out of power.
Thanks to the fast charging capability, a quick 5-minute charge can provide around 1 hour of listening time or around 1 hour of talk time. This is particularly useful when you’re in a rush and need a quick boost of battery life.
If you prefer a more visual representation of the battery status, you can check it on your connected device. The battery widget on your iOS or iPadOS device displays the battery levels of both your Airpods Pro and the charging case, ensuring that you’re always aware of the remaining battery life.
It’s worth noting that the battery life of your Airpods Pro may vary based on factors such as the audio content you’re listening to, the volume level, and the usage of features like Active Noise Cancellation or Siri.
In case you need to conserve battery life, you can put your Airpods Pro in their case to automatically enter a low-power mode. The Airpods Pro will disconnect from your device and stop using power until you’re ready to use them again.
Now that you have an understanding of the battery life and charging options, let’s move on to the next section, where we’ll address common issues that users may encounter with their Airpods Pro and provide troubleshooting tips to resolve them.
Troubleshooting common issues with Airpods Pro
While the Airpods Pro are designed to provide a seamless experience, you might encounter some common issues from time to time. Here are some troubleshooting tips to help you resolve these issues:
1. Connectivity issues: If your Airpods Pro are not connecting to your device, start by ensuring that Bluetooth is enabled on your device. Then, try unpairing and repairing your Airpods Pro. You can do this by going to the Bluetooth settings menu on your device, selecting your Airpods Pro, and choosing the option to forget the device. Afterward, follow the initial pairing steps to reconnect your Airpods Pro.
2. Poor sound quality: If you’re experiencing poor sound quality or distortion, check the following: ensure that the volume on both your device and Airpods Pro is turned up, clean the speaker mesh on the Airpods Pro, and make sure the ear tips are securely in place and properly fitted.
3. Battery drain: If you notice that your Airpods Pro battery is draining quickly, try the following: make sure you’re using the latest firmware by checking for updates in the Bluetooth settings menu, disable unnecessary features like Active Noise Cancellation if you’re not using them, and put your Airpods Pro in their case when not in use to enter low-power mode.
4. Automatic ear detection not working: If your Airpods Pro are not pausing or resuming playback when you take them out or put them back in your ears, make sure that the Automatic Ear Detection feature is enabled. You can check and enable this feature in the Bluetooth settings menu.
5. One Airpod not working: If one of your Airpods Pro is not working, try the following: make sure the Airpod is clean and free from debris, ensure that the ear tip is securely attached, unpair and repair your Airpods Pro, and if the issue persists, contact Apple support for further assistance.
If you continue to experience issues with your Airpods Pro, it’s recommended to visit the Apple Support website or contact Apple support directly for more advanced troubleshooting and assistance.
Now that we’ve covered troubleshooting tips, let’s explore some additional tips and tricks to help you maximize your Airpods Pro experience.
Tips and tricks for maximizing your Airpods Pro experience
To get the most out of your Airpods Pro and enhance your listening experience, consider implementing the following tips and tricks:
1. Find the perfect fit: Experiment with the different ear tip sizes to find the one that fits your ears snugly and provides the best sound quality. A proper fit not only ensures comfort but also helps to maximize noise isolation and enhance bass response.
2. Control audio using your Apple Watch: If you own an Apple Watch, you can control your Airpods Pro directly from your wrist. This allows for convenient playback control, volume adjustment, and more, without needing to reach for your connected device.
3. Share audio with others: Take advantage of the Audio Sharing feature to share audio from your Airpods Pro with a friend who also has a compatible pair of Airpods or Beats headphones. Simply bring their headphones close to your device and follow the prompts to share your audio.
4. Use “Find My” to locate your Airpods Pro: If you misplace your Airpods Pro, you can use the “Find My” feature on your iOS device or via the iCloud website to locate them on a map, play a sound to help you find them, or activate the Lost Mode to protect your Airpods Pro from unauthorized use.
5. Use one Airpod at a time: If you prefer to use just one Airpod at a time, you can leave the other one in the charging case. This allows you to conserve battery power and extend the listening time of your Airpods Pro.
6. Keep your Airpods Pro up to date: Regularly check for firmware updates for your Airpods Pro to ensure you have the latest features and improvements. You can do this by connecting your Airpods Pro to your device and going to the Bluetooth settings menu.
7. Customize your controls: Take advantage of the ability to customize the controls and gestures of your Airpods Pro. This allows you to tailor the double-tap action, adjust the force sensor behavior, and make your Airpods Pro work exactly how you want them to.
8. Clean and maintain your Airpods Pro: Keep your Airpods Pro in optimal condition by regularly cleaning them. Use a soft, lint-free cloth to wipe away any dirt or debris, and gently clean the ear tips. Avoid using liquids or harsh cleaners that could damage your Airpods Pro.
By implementing these tips and tricks, you can make the most of your Airpods Pro and enjoy a seamless and immersive audio experience.
With this comprehensive guide, you are now equipped with the knowledge to pair, control, and customize your Airpods Pro, troubleshoot common issues, and maximize your overall experience. So put on your Airpods Pro and enjoy the freedom, convenience, and exceptional sound quality they provide!