Introduction
Welcome to our guide on the types of screws needed for M.2 SSDs! If you’re new to the world of solid-state drives (SSDs), you may be wondering why screws are required for their installation. M.2 SSDs are highly compact and versatile storage devices that are commonly used in laptops and desktop computers. They provide faster data transfer speeds and better overall performance compared to traditional hard drives.
When installing an M.2 SSD, it is crucial to have the appropriate screws to secure it in place. In this article, we will explore the various types and sizes of screws used for M.2 SSDs, as well as where to find replacement screws if needed.
Whether you’re a tech enthusiast building your own PC or someone who simply wants to upgrade their laptop’s storage, understanding the different types of screws and their importance in M.2 SSD installation is essential. So, let’s dive in and discover everything you need to know about finding the right screw for your M.2 SSD!
What is an M.2 SSD?
An M.2 SSD, also known as Next Generation Form Factor (NGFF) SSD, is a solid-state drive that utilizes the M.2 form factor for its physical design. It is a slim and compact storage solution that has gained popularity due to its high performance and small footprint. Compared to traditional hard drives, M.2 SSDs offer faster data transfer speeds, lower power consumption, and increased reliability.
The M.2 form factor was introduced to replace the larger and bulkier mSATA and mini-PCIe connectors. M.2 SSDs are typically found in laptops, ultrabooks, and small form factor desktop computers. They can also be used as an upgrade option in older systems with compatible motherboard slots.
One of the key advantages of M.2 SSDs is their small physical size, which allows for more flexibility in system design and installation. They are available in various lengths, ranging from 30mm up to 110mm, with different keying options to ensure compatibility with specific motherboard slots.
M.2 SSDs use NAND flash memory chips to store data, similar to other types of SSDs. However, they connect to the system using the PCIe (Peripheral Component Interconnect Express) or SATA (Serial ATA) interface, allowing for faster data transfer rates compared to traditional hard drives that rely on spinning disks.
With their compact size, high performance, and versatility, M.2 SSDs have become an ideal choice for users looking to enhance the storage capabilities of their systems. Whether you’re a gamer seeking faster load times, a content creator working with large files, or a professional needing faster data access, an M.2 SSD is a worthy investment.
Why do I need a screw for an M.2 SSD?
While M.2 SSDs may be small and lightweight, they still require a screw for proper installation and secure attachment to the motherboard or SSD mounting bracket. Let’s explore why you need a screw for your M.2 SSD:
1. Stability and Protection: M.2 SSDs need to be firmly secured in place to prevent any movement or disconnection during operation. A securely fastened screw ensures that the M.2 SSD remains stable and does not shift or come loose, reducing the risk of damage to both the drive and the motherboard.
2. Electrical Connection: The M.2 slot on the motherboard provides both a physical and electrical connection for the SSD. The screw serves as a grounding mechanism to maintain a consistent electrical connection between the SSD and the slot, ensuring reliable data transfer and preventing any potential interference or signal loss.
3. Heat Dissipation: M.2 SSDs can generate heat during intensive usage, and the screw provides a thermal connection between the SSD and the motherboard or SSD mounting bracket. This connection helps transfer heat away from the SSD, promoting better airflow and cooling, thereby improving overall stability and longevity.
4. Compatibility and Alignment: Different M.2 SSDs come in varying lengths, and the placement of the screw hole on each drive can differ as well. The screw helps align the SSD correctly with the mounting point on the motherboard or SSD bracket, ensuring a secure fit that matches the specific dimensions of the M.2 slot.
5. Easy Installation: Using a screw to install an M.2 SSD makes the process much simpler. It provides a convenient point of reference, allowing you to easily position and secure the drive in place. Without a screw, it would be challenging to ensure proper alignment and fixation of the SSD.
Overall, a screw is an essential component when installing an M.2 SSD. It ensures stability, electrical connection, heat dissipation, compatibility, and ease of installation. By utilizing the appropriate screw, you can confidently secure your M.2 SSD, enabling it to perform optimally and reliably in your system.
Types of screws for M.2 SSDs
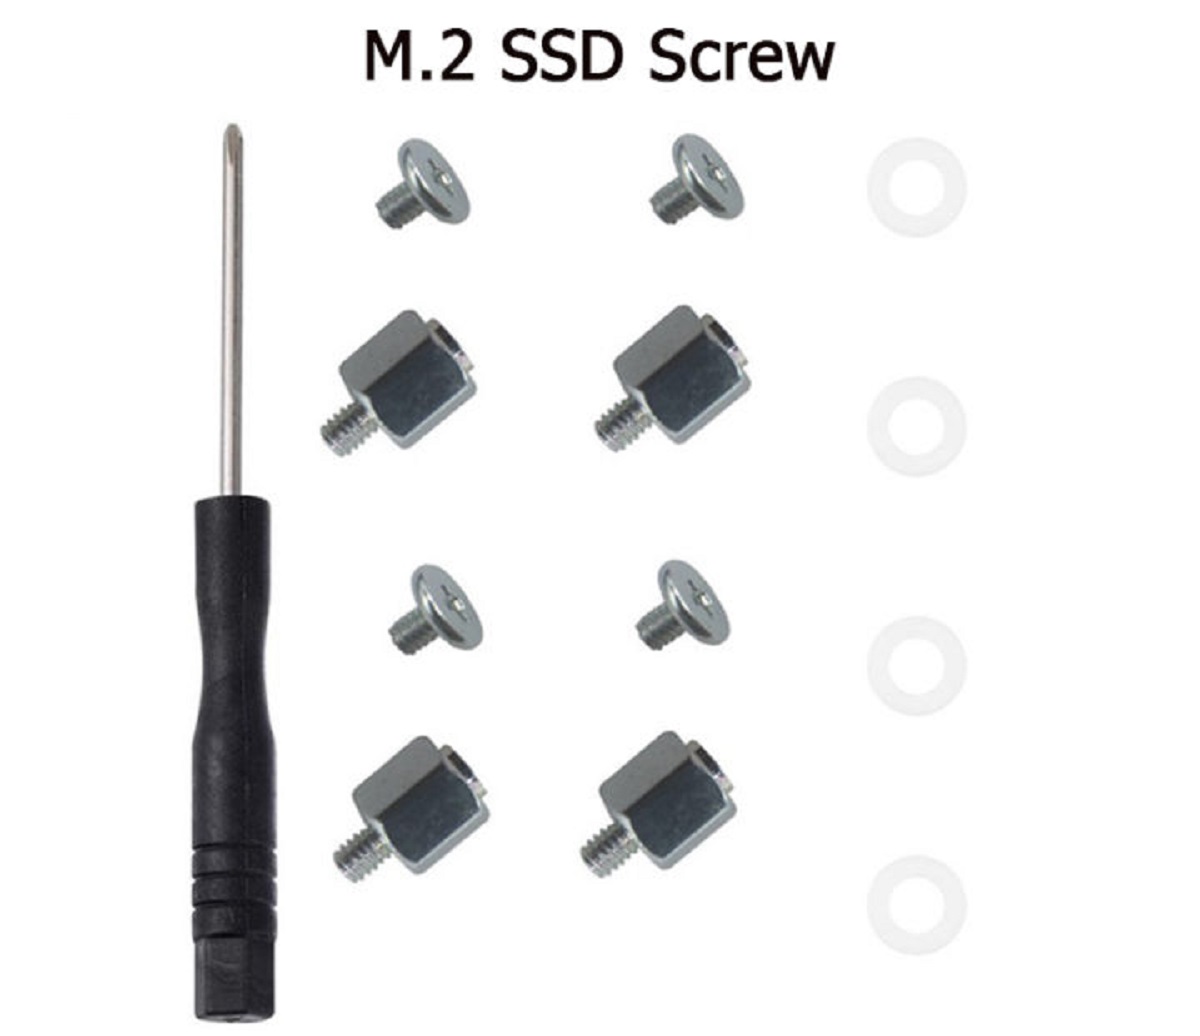
When it comes to M.2 SSD screws, there are a few different types that you may encounter. These screws are specifically designed to secure the M.2 SSD in place and ensure a proper and secure connection. Let’s explore the common types of screws used for M.2 SSDs:
1. Standoff Screws: Standoff screws are the most common type used for M.2 SSD installation. They are typically made of metal and have a male thread that attaches to the motherboard or SSD mounting bracket. Standoff screws come in different heights to accommodate varying motherboard designs and ensure proper alignment with the M.2 slot.
2. Riser Screws: Riser screws are similar to standoff screws but are designed with a female thread. These screws are especially useful when mounting an M.2 SSD on a raised or angled slot, as they allow for a secure connection without interfering with the design or layout of the motherboard.
3. Captive Screws: Captive screws are screws that are permanently attached to the motherboard or SSD mounting bracket. They have a built-in washer or retainer, allowing for easy installation without the risk of losing or misplacing the screws. Captive screws are commonly found in laptops and other compact systems where convenience and quick installation are prioritized.
4. Thumb Screws: Thumb screws are specialized screws with a larger and more prominent head that can be easily tightened or loosened by hand, without requiring any additional tools. These screws offer convenience and ease of installation, making it simple to secure or remove the M.2 SSD when needed, without the hassle of using a screwdriver.
5. Hex Screws: Hex screws, also known as Allen screws or hexagon screws, have a hexagonal-shaped socket in the head. This type of screw requires a hex wrench or Allen key for installation and removal. Hex screws offer a more secure and tamper-proof option, suitable for situations where you want to deter unauthorized access or ensure a tighter and more reliable connection.
It is important to note that the specific type of screw required for your M.2 SSD installation will depend on the design of your motherboard or SSD mounting bracket. Consulting the manufacturer’s documentation or referring to the user manual of your system will help you determine the appropriate screw type and ensure a proper fit for your M.2 SSD.
Common sizes and thread types for M.2 SSD screws
M.2 SSD screws come in various sizes and thread types, which can vary depending on the manufacturer and the specific motherboard or SSD mounting bracket being used. Understanding these sizes and thread types is important to ensure compatibility and proper installation. Let’s explore the common sizes and thread types for M.2 SSD screws:
Screw Length: M.2 SSD screws are available in different lengths to accommodate the varying thicknesses of the SSDs and the depth of the mounting point on the motherboard or SSD bracket. Common lengths range from 3mm to 5mm, with 3mm being the most commonly used length for standard M.2 SSDs.
Thread Type: The thread type refers to the shape and pattern of the threads on the screw, which determines how it engages with the threaded hole on the motherboard or SSD bracket. The most common thread types for M.2 SSD screws are UNC (Unified National Coarse) and UNF (Unified National Fine).
UNC screws have coarse threads and are more widely used in general applications. They offer quick and easy installation and are suitable for most M.2 SSD installations. UNF screws, on the other hand, have finer threads and provide a tighter and more secure fit. They are commonly used in situations where a stronger connection is required.
Screw Head Type: M.2 SSD screws can have different head types, including flat-head, pan-head, and countersunk. These variations in head type allow for different installation methods depending on the design of the system or the preference of the user. The most common head types for M.2 SSD screws are flat-head and pan-head, which provide a flush surface or a slightly raised profile, respectively.
It’s also worth noting that some M.2 SSDs may come with pre-installed screws, especially in laptops or pre-built systems. These screws typically match the required specifications for that particular SSD, making installation quick and straightforward.
If you need to replace or find additional M.2 SSD screws, it is recommended to consult the manufacturer’s documentation or specifications for your motherboard or SSD bracket. Additionally, many computer hardware stores or online retailers sell M.2 SSD screw kits that include various sizes and types of screws to cover a wide range of installations.
By understanding the common sizes and thread types for M.2 SSD screws and ensuring proper compatibility with your system, you can successfully install and secure your M.2 SSD for optimal performance and longevity.
How to determine the screw size for your M.2 SSD
Determining the correct screw size for your M.2 SSD is crucial to ensure a secure and proper installation. Here are some steps to help you determine the screw size for your M.2 SSD:
1. Consult the motherboard or SSD mounting bracket manual: The first step is to refer to the documentation or user manual of your motherboard or SSD mounting bracket. These resources often provide information about the specific screw sizes and types recommended for M.2 SSD installation. Look for details regarding the length, thread type, and head type of the screws required.
2. Measure the mounting point: If you don’t have access to the manual or specifications, you can measure the mounting point on the motherboard or SSD bracket. Use a ruler or caliper to measure the thickness of the M.2 SSD and the depth of the mounting hole. Take note of these measurements as they will help determine the appropriate screw length needed to secure the SSD in place.
3. Examine the existing screw (if applicable): If you are replacing a missing or damaged screw, examine the existing screws used for securing other components in your system. Compare the size and thread type of these screws to determine if they are suitable for the M.2 SSD installation. Keep in mind that while they may look similar, they might not be the ideal size or type for the SSD.
4. Seek manufacturer assistance: If you’re still unsure about the screw size, reach out to the motherboard or SSD manufacturer’s support team. They can provide you with specific information regarding the recommended screw size for your particular model. Be sure to provide them with the product details and any necessary measurements to assist them in accurately identifying the appropriate screw size.
5. Purchase a screw kit: If all else fails, or if you require additional screws, consider purchasing an M.2 SSD screw kit. These kits typically include a variety of screw sizes and types, ensuring compatibility with different M.2 SSD installations. They are readily available at computer hardware stores or online retailers.
By following these steps, you can determine the screw size needed for your M.2 SSD installation. Taking the time to use the correct screw ensures a secure and reliable connection, preventing any potential issues and allowing your M.2 SSD to function optimally in your system.
Where to find replacement screws for M.2 SSDs
If you find yourself in need of replacement screws for your M.2 SSD or require additional screws for your installation, there are several places where you can find them. Here are some options to consider:
1. Manufacturer’s website: The first place to check for replacement screws is the official website of your motherboard or SSD manufacturer. Often, they have a support or accessories section where you can find spare parts, including screws specifically designed for their products. Look for compatibility information to ensure you choose the correct screws for your M.2 SSD.
2. Computer hardware stores: Local computer hardware stores or electronics stores often carry a variety of computer components and accessories. These stores may have replacement screw kits, including M.2 SSD screws, that are compatible with a range of installations. Visit a store in your area and check their selection or inquire with the staff for assistance.
3. Online retailers: Online platforms such as Amazon, Newegg, and other computer component retailers offer a wide range of products, including replacement screws for M.2 SSDs. Search for “M.2 SSD screws” or “replacement screws for M.2 SSD” on these websites, and you’ll find various options to choose from. Read product descriptions and reviews to ensure the screws meet your requirements.
4. DIY repair shops: Local repair shops or do-it-yourself (DIY) computer repair communities can be a valuable resource for finding replacement screws. These shops often have spare parts on hand, or they may know where to source the specific screws you need. Reach out to them and inquire about availability or seek their advice on where to find the right screws.
5. Online forums and communities: Online forums, such as those dedicated to computer hardware enthusiasts or specific motherboard brands, can be a helpful resource. Engage with the community and ask for recommendations on where to find replacement screws for your M.2 SSD. Many forum members are knowledgeable and may be able to provide specific suggestions or share their personal experiences.
When purchasing replacement screws, ensure that they match the required specifications for your M.2 SSD and are of appropriate quality. It’s important to use screws that are designed for M.2 SSD installation to maintain compatibility and avoid any damage to the drive or the motherboard.
By exploring these options, you should be able to find a reliable source for replacement screws for your M.2 SSD. Always double-check compatibility and choose screws that meet the necessary specifications to ensure a successful and secure installation.
Installing an M.2 SSD with the appropriate screw
Once you have determined the appropriate screw size and acquired the correct screws for your M.2 SSD, you can proceed with the installation. Follow these steps to install an M.2 SSD with the appropriate screw:
1. Power off and ground yourself: Before working inside your computer, ensure that it is powered off and disconnected from any power source. To prevent any static discharge that could damage your components, ground yourself by touching a metal object or wearing an anti-static wristband.
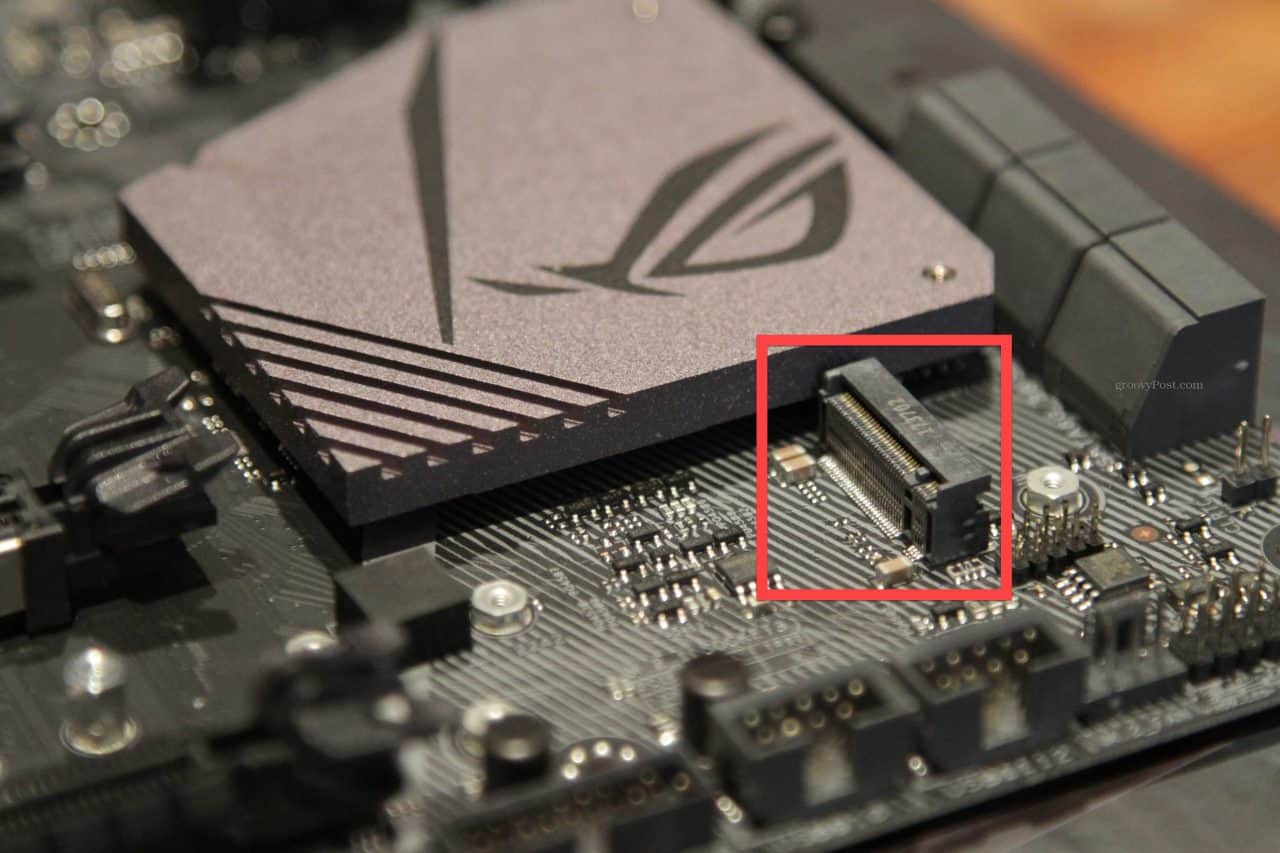
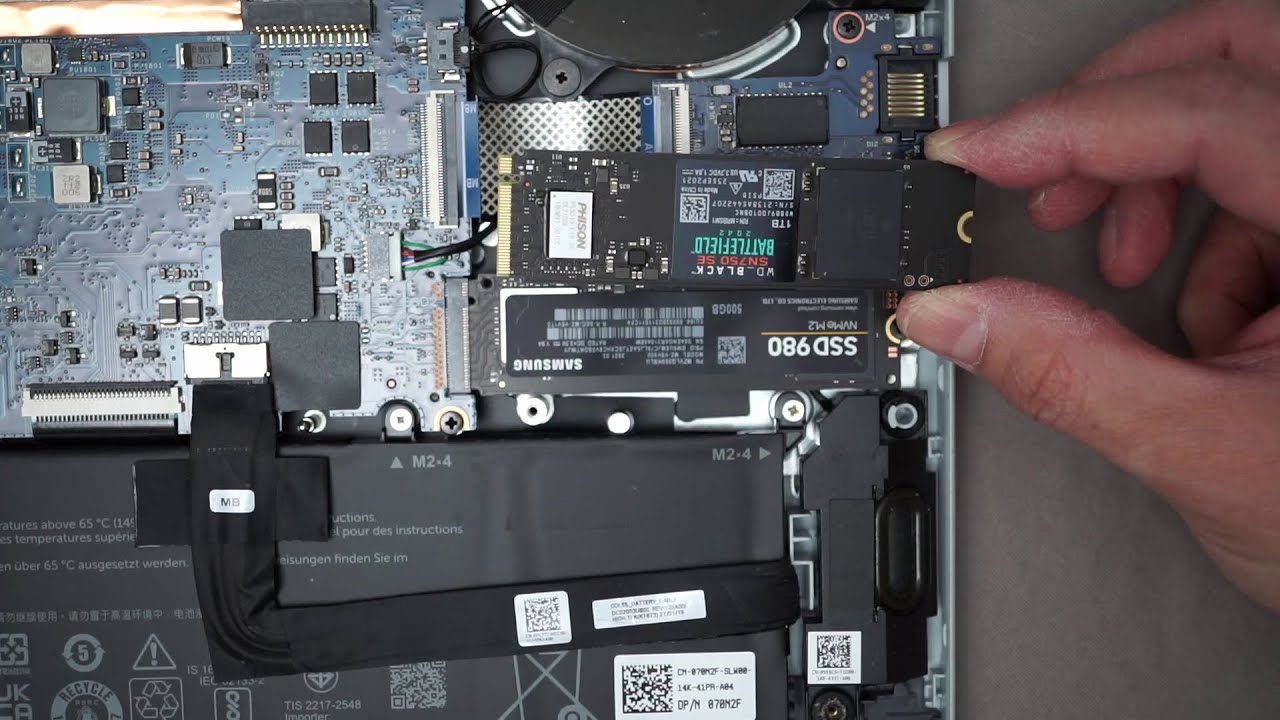
2. Locate the M.2 slot: Identify the M.2 slot on your motherboard or SSD mounting bracket. It is usually labeled and positioned near the CPU socket or PCIe slots. Ensure that the slot matches the type and size of the M.2 SSD you are installing (e.g., PCIe or SATA, length).
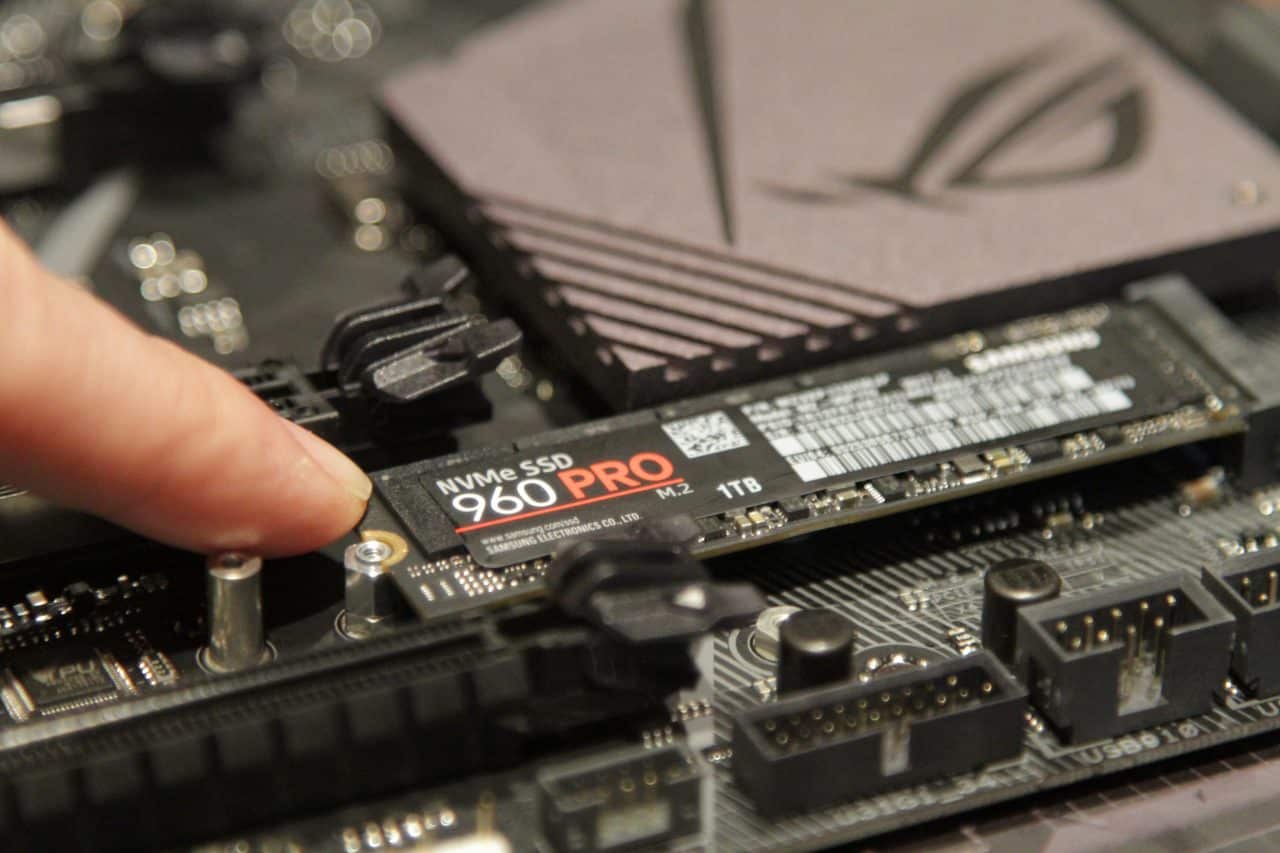
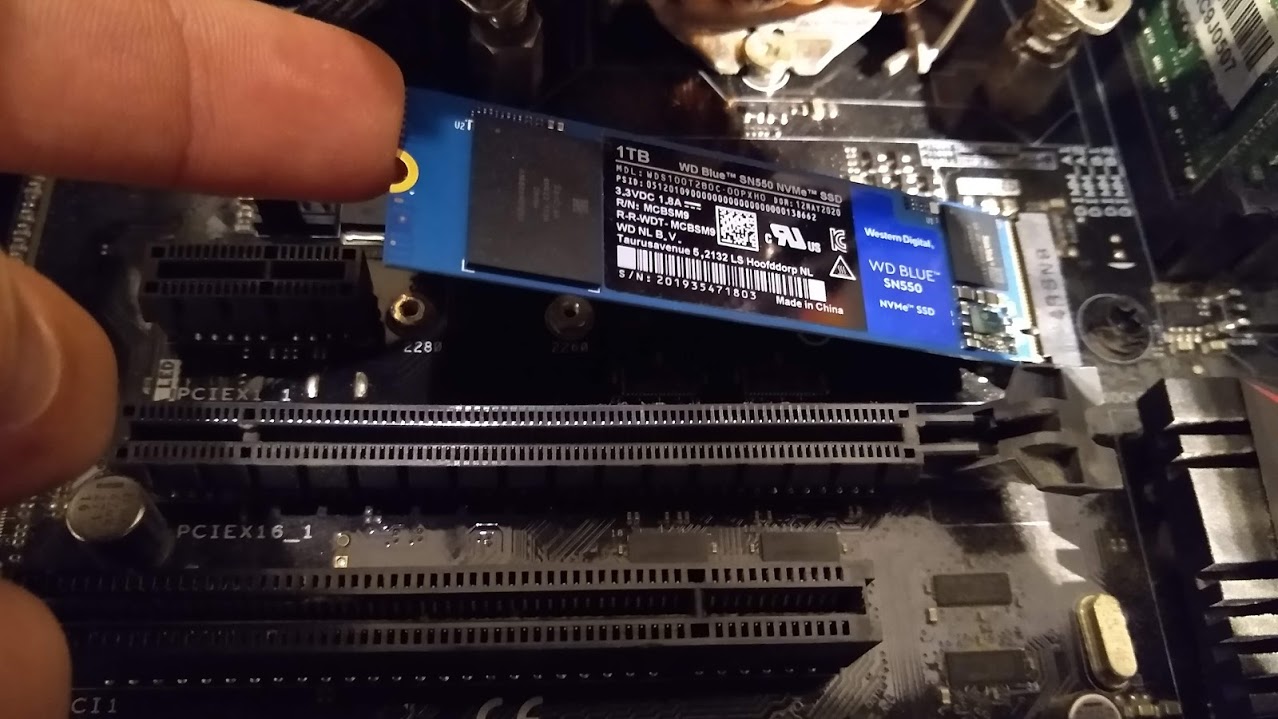
3. Align the M.2 SSD: Carefully position the M.2 SSD in the slot, aligning the notched edge of the SSD with the keying on the slot. Be gentle and avoid bending or applying excessive force to the SSD or the slot. If the SSD does not slide in easily, double-check the alignment and orientation.
4. Insert the screw: Take the appropriate screw for your M.2 SSD and insert it into the screw hole located near the end of the M.2 SSD. Align the screw with the threaded hole on the motherboard or SSD mounting bracket. Use a screwdriver or the appropriate tool to turn the screw clockwise until it is securely tightened. Be cautious not to overtighten, as this could potentially damage the SSD or the motherboard.
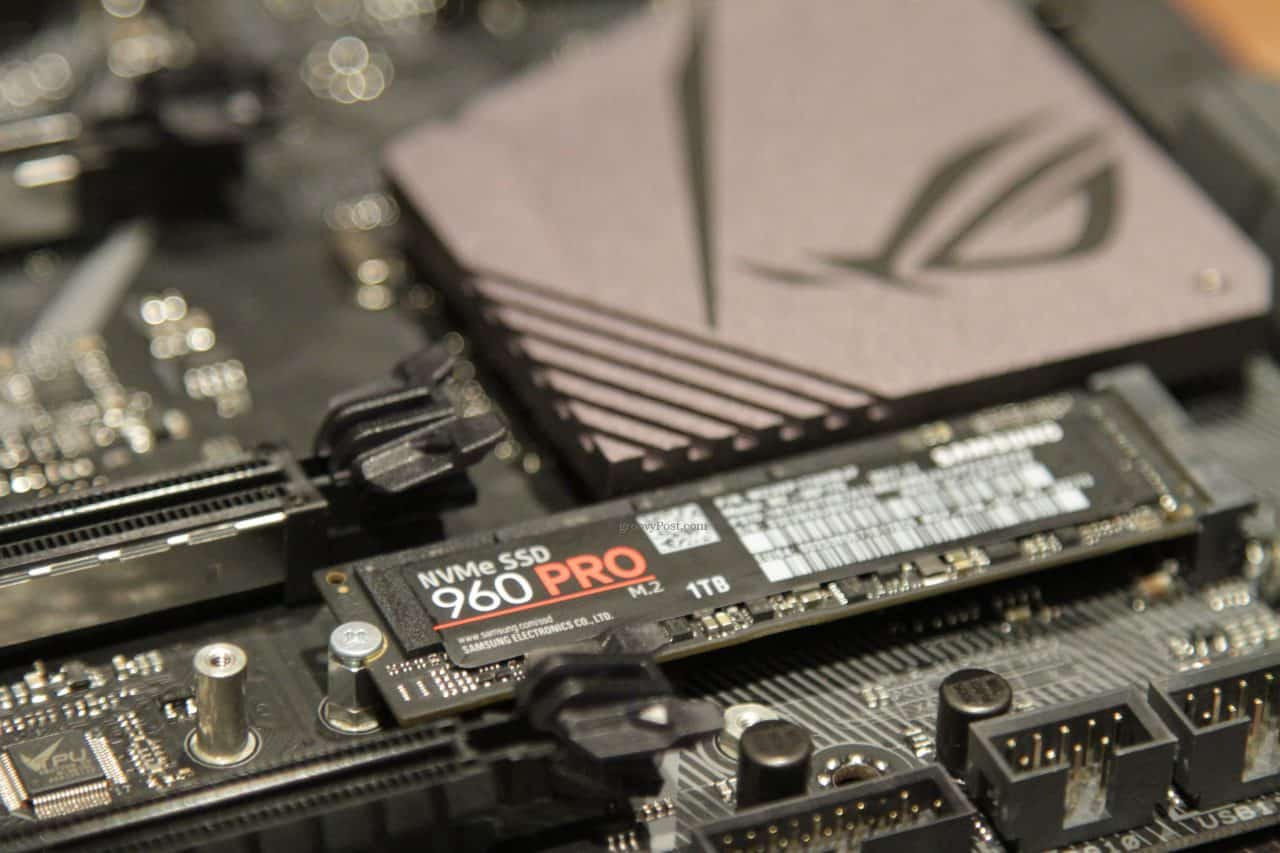
5. Double-check the connection: Once the screw is tightened, gently press down on the M.2 SSD to ensure it is properly seated in the slot. Verify that the notched edge is aligned with the keying on the slot, and the screw is securely holding the SSD in place.
6. Close the computer: If necessary, reattach any components or panels that were removed to access the M.2 slot. Ensure that all connections are secure and that the computer is properly closed before reconnecting the power and powering on the system.
With the M.2 SSD securely installed using the appropriate screw, you can power on your computer and proceed with any necessary BIOS configuration or operating system setup to initialize and use the newly installed SSD.
Remember to always refer to the manufacturer’s instructions and guidelines for your specific motherboard or SSD mounting bracket to ensure the proper installation steps. Taking the time and care to install the M.2 SSD correctly with the appropriate screw will help ensure optimal performance and reliability from your storage device.
Conclusion
Installing an M.2 SSD may seem like a simple task, but it is crucial to have the appropriate screw and follow proper installation procedures to ensure a secure and reliable connection. In this guide, we covered the necessary information about M.2 SSD screws, including their types, sizes, and where to find replacements.
We discussed the importance of using a screw to secure an M.2 SSD, highlighting its role in providing stability, electrical connection, heat dissipation, compatibility, and ease of installation. By using the correct screw, you can ensure that your M.2 SSD operates optimally and remains securely attached to your motherboard or SSD mounting bracket.
We also explored common sizes and thread types for M.2 SSD screws, guiding you on how to determine the appropriate screw size based on manufacturer documentation, measurements, or existing screws. Additionally, we provided various sources where you can find replacement screws, such as the manufacturer’s website, computer hardware stores, online retailers, DIY repair shops, and online communities.
Finally, we discussed the step-by-step process of installing an M.2 SSD with the appropriate screw. By following these instructions, you can successfully install your M.2 SSD, ensuring a stable and reliable connection for optimal performance in your system.
Remember to consult your motherboard or SSD mounting bracket’s manual for specific instructions and recommendations for your setup. Always exercise caution and take proper grounding measures when working with computer components.
With the right screw and proper installation, you can enjoy the benefits of an M.2 SSD – faster data transfer speeds, improved performance, and enhanced storage capabilities. Upgrade your system with confidence and experience the advantages of this advanced storage technology.