Introduction
Welcome to this guide on how to install a second M.2 SSD in your computer. As technology advances, the need for additional storage space becomes essential, especially for those who work with large files or run resource-intensive applications. Adding a second M.2 SSD allows you to expand your storage capacity without sacrificing performance. In this step-by-step tutorial, we will walk you through the process of installing a second M.2 SSD in your computer.
Before we begin, it’s important to note that adding a second M.2 SSD requires some basic computer knowledge and understanding of hardware components. If you’re not comfortable working with computer hardware, consider seeking assistance from a professional technician. Additionally, make sure to consult your computer’s manual or the manufacturer’s website for specific instructions related to your computer model.
In this guide, we will cover the necessary tools and materials, the compatibility of your motherboard, choosing the right M.2 SSD, installation steps, and initializing the new SSD. By the end of this tutorial, you’ll have a clear understanding of how to install a second M.2 SSD and be able to enjoy the benefits of increased storage capacity.
Let’s get started with the first step – gathering the necessary tools and materials.
Step 1: Gather the Necessary Tools and Materials
Before you begin the installation process, it’s essential to gather all the necessary tools and materials. Having everything ready will streamline the process and ensure you have everything you need to successfully install the second M.2 SSD. Here are the key items you’ll need:
- Screwdriver: Depending on your computer model, you may need a Phillips or flat-head screwdriver. Check your computer’s manual or do some research to determine the type needed.
- Antistatic wrist strap: This will help protect your M.2 SSD and other components from potential damage caused by static electricity. It’s an essential precaution to take during any computer installation process.
- New M.2 SSD: Ensure that you have a compatible M.2 SSD that fits the specifications of your motherboard. Consult your computer’s manual or the manufacturer’s website to verify the supported M.2 SSD sizes and technologies.
- User manual: Keep the user manual of your computer and motherboard handy. These will serve as valuable references throughout the installation process, providing specific instructions and illustrations.
- Thermal pad or thermal paste (optional): Depending on your M.2 SSD and motherboard’s design, you may need a thermal pad or thermal paste to help with heat dissipation. Check your M.2 SSD manufacturer’s recommendations.
Additionally, ensure you have a clean and well-lit workspace. A clutter-free environment will reduce the risk of misplacing small components and facilitate a smoother installation experience. With all the necessary tools and materials at hand, you’re ready to proceed to the next steps.
Step 2: Prepare Your Computer
Before you start the installation process, it’s important to prepare your computer for the addition of a second M.2 SSD. Here are some steps to follow:
- Backup your data: It’s always a good idea to create a backup of your important files and data before making any changes to your computer’s hardware. This ensures that you have a copy of your data in case of any unforeseen issues during the installation process.
- Power off your computer: Shut down your computer properly and disconnect it from the power source. This step is crucial to ensure your safety and prevent any damage to the components during the installation.
- Wear an antistatic wrist strap: As mentioned in the previous section, wearing an antistatic wrist strap will protect your components from static electricity. Connect the strap to a grounded metal surface or use an antistatic mat to minimize the risk of electrostatic discharge.
- Remove any static charges: Even with an antistatic wrist strap, it’s a good practice to touch a grounded metal surface before handling any computer components. This helps discharge any remaining static charges from your body.
- Open your computer case: Use the appropriate tools to open your computer case, exposing the internal components. Refer to your computer’s manual for specific instructions on how to open the case safely.
By preparing your computer for the installation, you ensure a smooth process and minimize the risk of any accidental damage. Now that your computer is ready, it’s time to move on to the next step: determining the compatibility of your motherboard.
Step 3: Determine the Compatibility of Your Motherboard
Before proceeding with the installation of a second M.2 SSD, it’s important to determine the compatibility of your motherboard. This step ensures that your motherboard supports the addition of an additional M.2 SSD and that it adheres to the required specifications. Here’s what you need to do:
- Consult your motherboard documentation: Locate the user manual or specifications guide for your motherboard. These documents will provide information about the M.2 slots available and their supported technologies and sizes.
- Identify the M.2 slot: Determine the specific slot where you’ll be installing the second M.2 SSD. Some motherboards may have multiple M.2 slots, each with different capabilities. Ensure that the slot you choose supports the type and size of M.2 SSD you have.
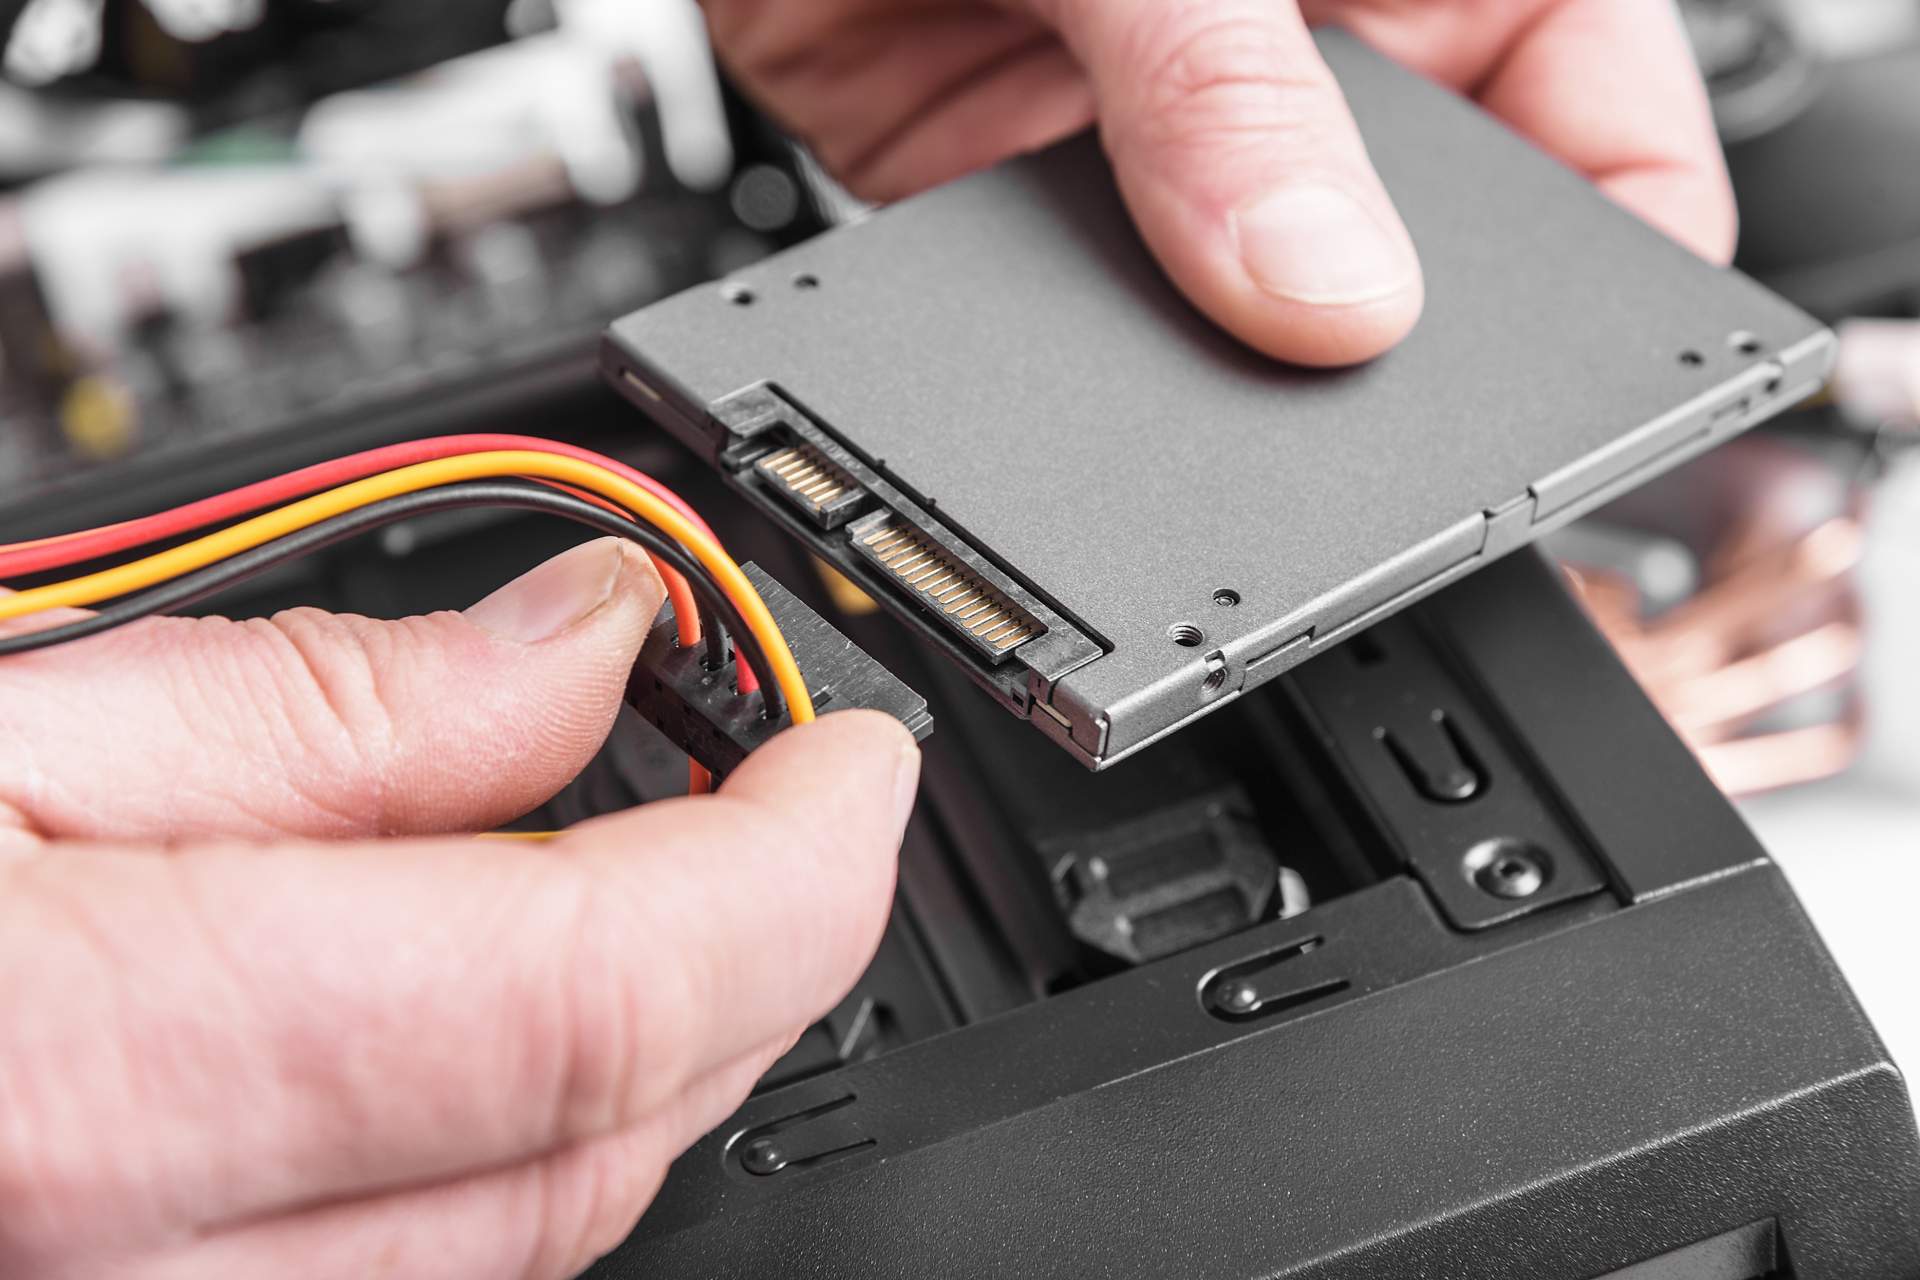
- Check the supported technology: Verify the supported M.2 technologies, such as SATA or PCIe, to ensure compatibility with your new SSD. This information can usually be found in the specifications guide or on the manufacturer’s website.
- Examine the slot type and key: M.2 SSDs come in various sizes and connector types, including M key, B key, and B+M key. Ensure that the slot you choose matches the key type of your SSD to ensure a proper fit and functionality.
- Consider the available bandwidth: If you plan to install multiple M.2 SSDs, check the available bandwidth for each slot. Some motherboards may share the bandwidth across slots, which can affect the performance of your SSDs.
By carefully examining the compatibility of your motherboard, you can ensure a successful installation without any compatibility issues. If you’re unsure about any aspect, consult your motherboard documentation or reach out to the manufacturer for clarification. With the compatibility confirmed, you’re ready to move on to the next step: choosing the right M.2 SSD.
Step 4: Choose the Right M.2 SSD
Choosing the right M.2 SSD is crucial for a successful installation and optimal performance. Consider the following factors when selecting your M.2 SSD:
- Capacity: Determine the storage capacity you need for your additional M.2 SSD. Consider your usage requirements, such as gaming, video editing, or office work, to ensure you have enough space for your files and applications.
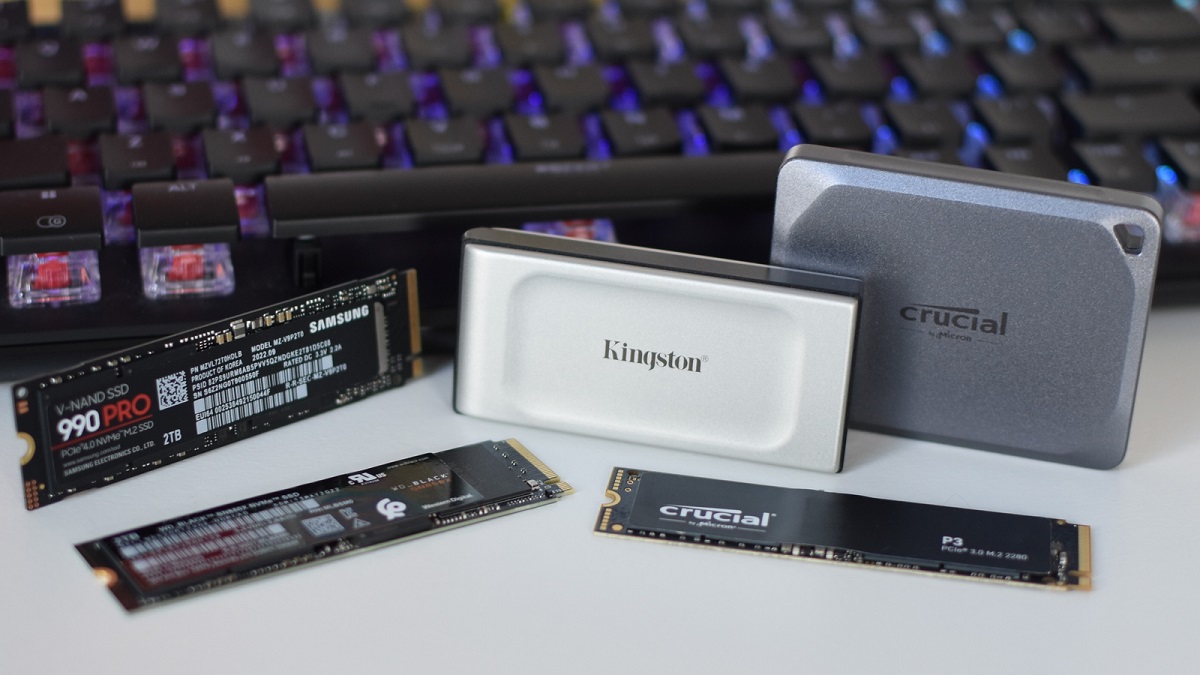
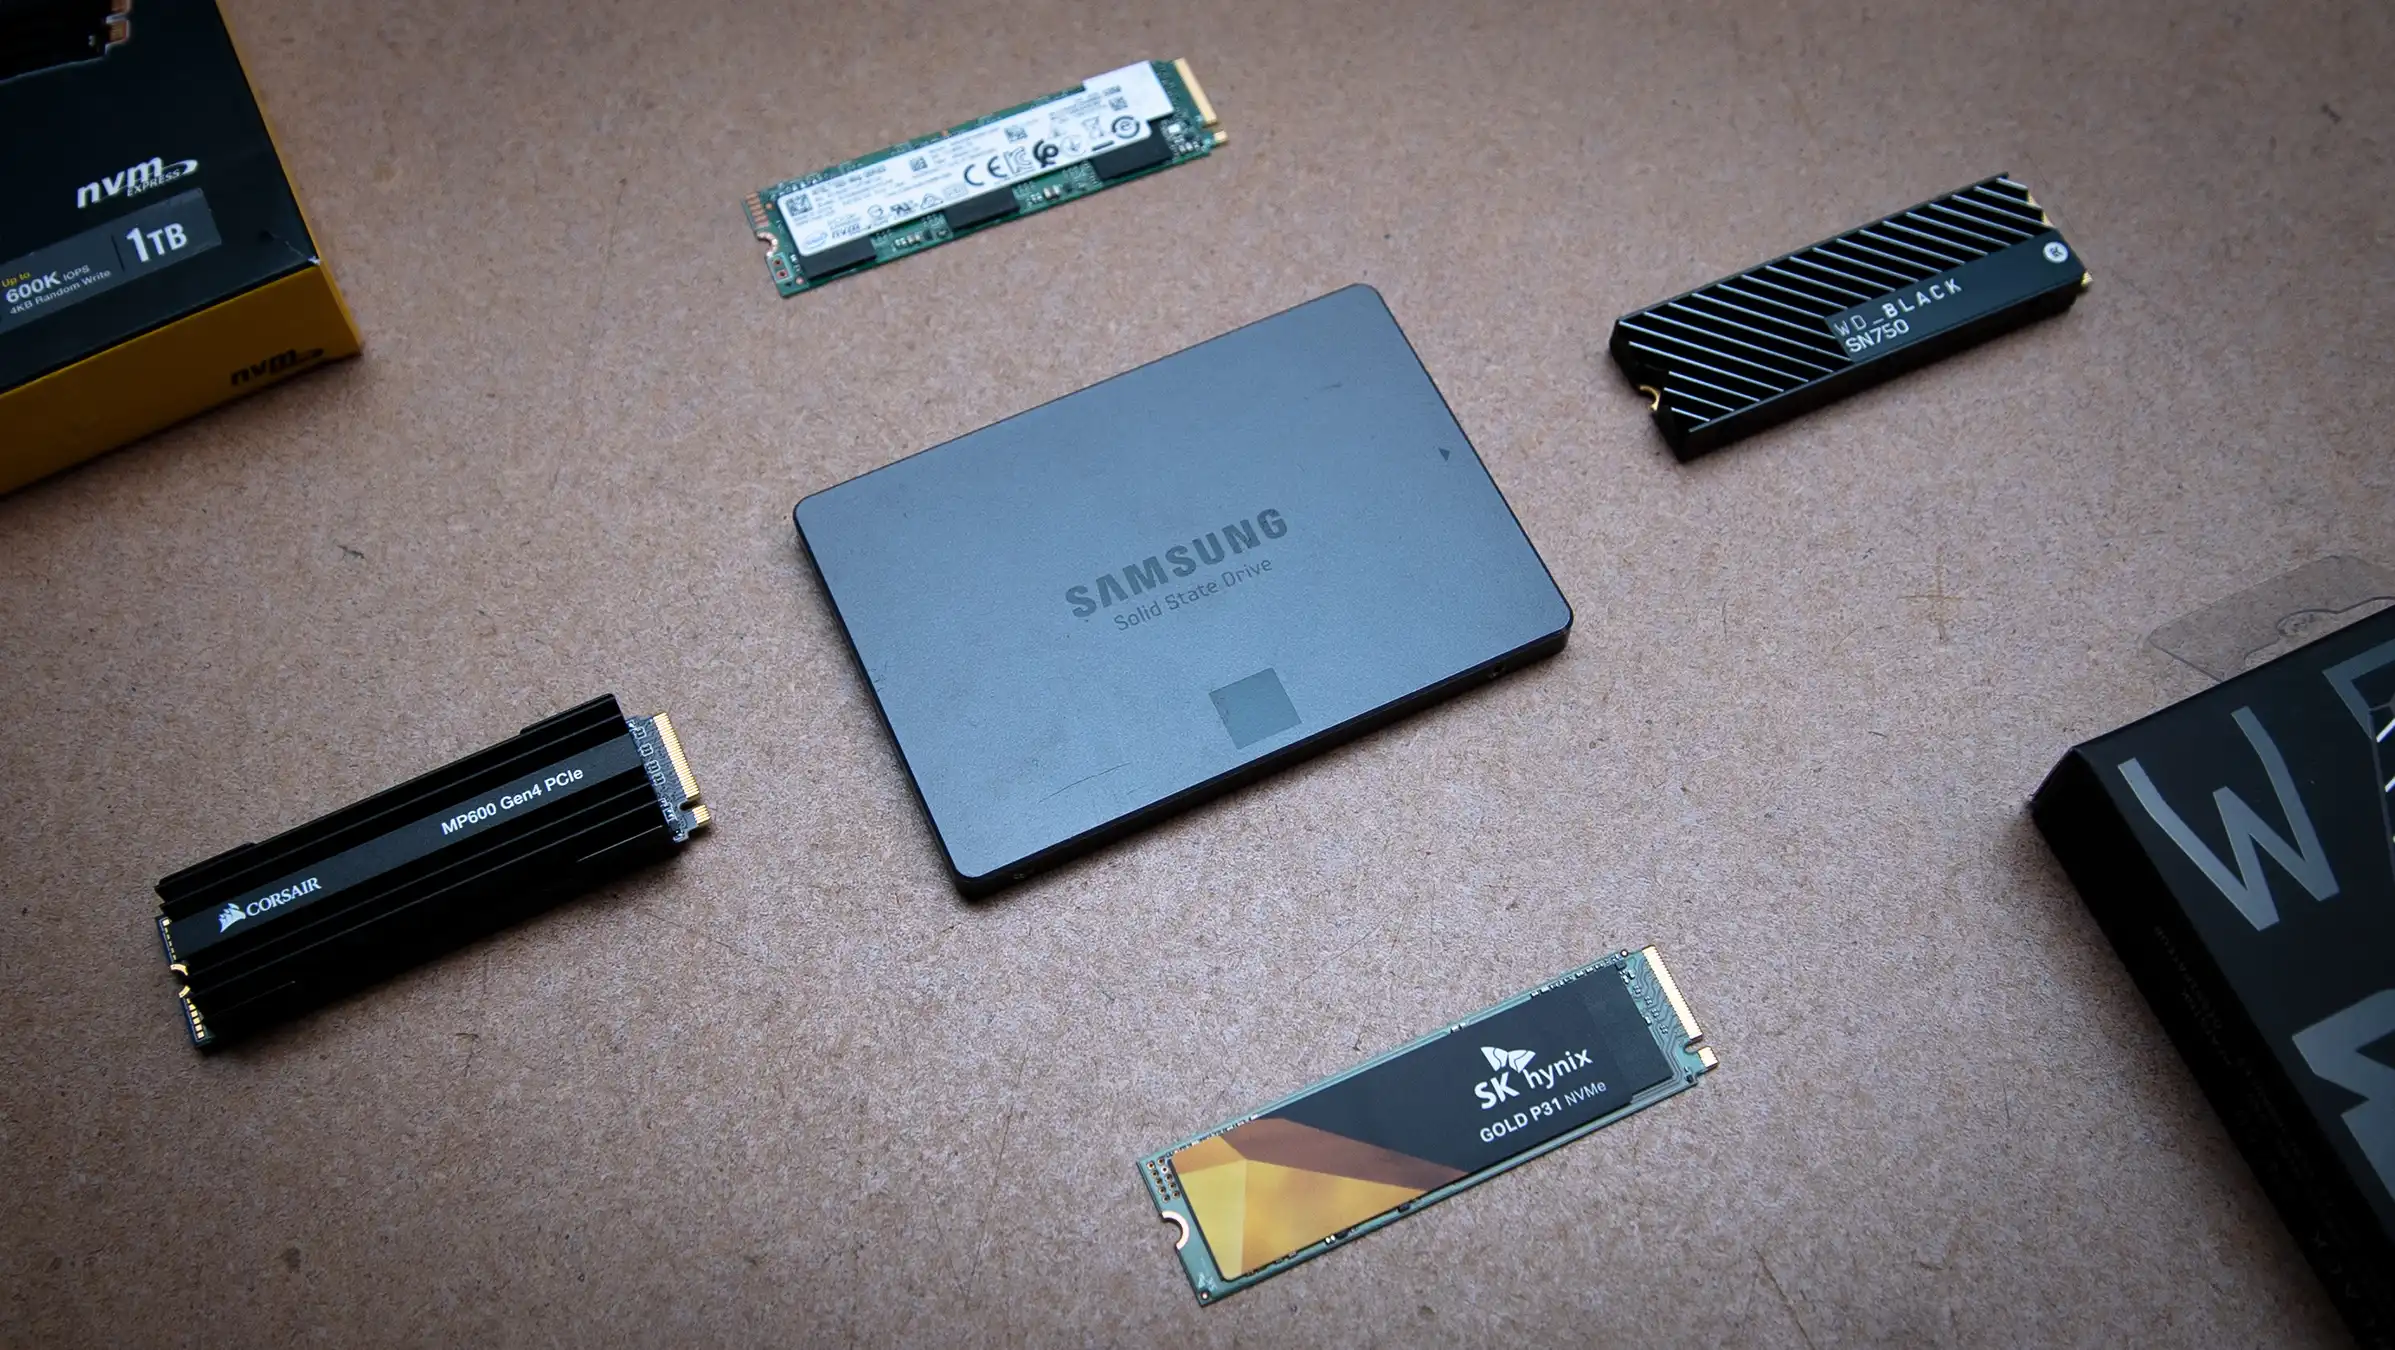
- Form Factor: Check the form factor supported by your motherboard and choose an M.2 SSD that fits that specification. Common form factors include 2242, 2260, and 2280, with the last two indicating the length of the M.2 SSD in millimeters.
- Interface: Depending on your motherboard’s capabilities, choose between SATA or PCIe interface for your M.2 SSD. PCIe offers faster data transfer speeds compared to SATA, so consider your requirements for speed and performance.
- Performance: Look for M.2 SSDs with fast read and write speeds for optimal performance. Consider the sequential and random read/write speeds when comparing different models.
- Endurance and Reliability: Pay attention to the endurance rating and reliability features of the M.2 SSD. Higher endurance means the SSD can withstand more write cycles over its lifespan, important for heavy usage scenarios.
- Price: Consider your budget and compare prices among different M.2 SSDs that meet your requirements. Look for good value for money without compromising on performance and reliability.
Research different M.2 SSD models, read reviews, and check for compatibility with your motherboard. It’s also a good idea to consult your computer’s manual or the manufacturer’s website for any specific recommendations or supported M.2 SSD models. By selecting the right M.2 SSD, you ensure a seamless installation process and a reliable storage solution for your needs.
Step 5: Shut Down Your Computer and Unplug All Power Sources
Before you begin installing the second M.2 SSD, it’s crucial to shut down your computer properly and disconnect it from all power sources. This ensures your safety and prevents any damage to the components. Follow these steps:
- Save and close any open applications: Before shutting down your computer, make sure to save and close any open files or applications. This prevents any data loss or corruption.
- Shut down your computer: Go to the Start menu and select the “Shut Down” option. Allow your computer to shut down completely before proceeding to the next step.
- Unplug all power sources: Once the computer is shut down, unplug the power cord from the wall outlet. Additionally, if your computer has a battery, remove it to ensure complete power disconnection.
- Press the power button to discharge any residual power: While the computer is unplugged, press and hold the power button for a few seconds. This helps discharge any residual electricity that may be stored in the system.
- Ground yourself: Before proceeding, touch a metal surface or wear an antistatic wrist strap to discharge any static electricity. This precaution prevents any potential damage to the sensitive components of your computer.
By shutting down your computer and disconnecting all power sources, you eliminate the risk of electric shock and ensure a safe installation process. Remember to take your time and proceed with caution throughout the installation. With your computer fully prepared, you’re ready to move on to the next step: locating the M.2 slot on your motherboard.
Step 6: Locate the M.2 Slot on Your Motherboard
Before you can install the second M.2 SSD, you need to locate the M.2 slot on your motherboard. The M.2 slot is where your SSD will be securely installed. Follow these steps to find the M.2 slot:
- Refer to your motherboard documentation: Consult your motherboard’s user manual or specifications guide. These documents will provide detailed information about the location and layout of the M.2 slots on your motherboard. Look for diagrams or illustrations that highlight the position of the M.2 slot(s).
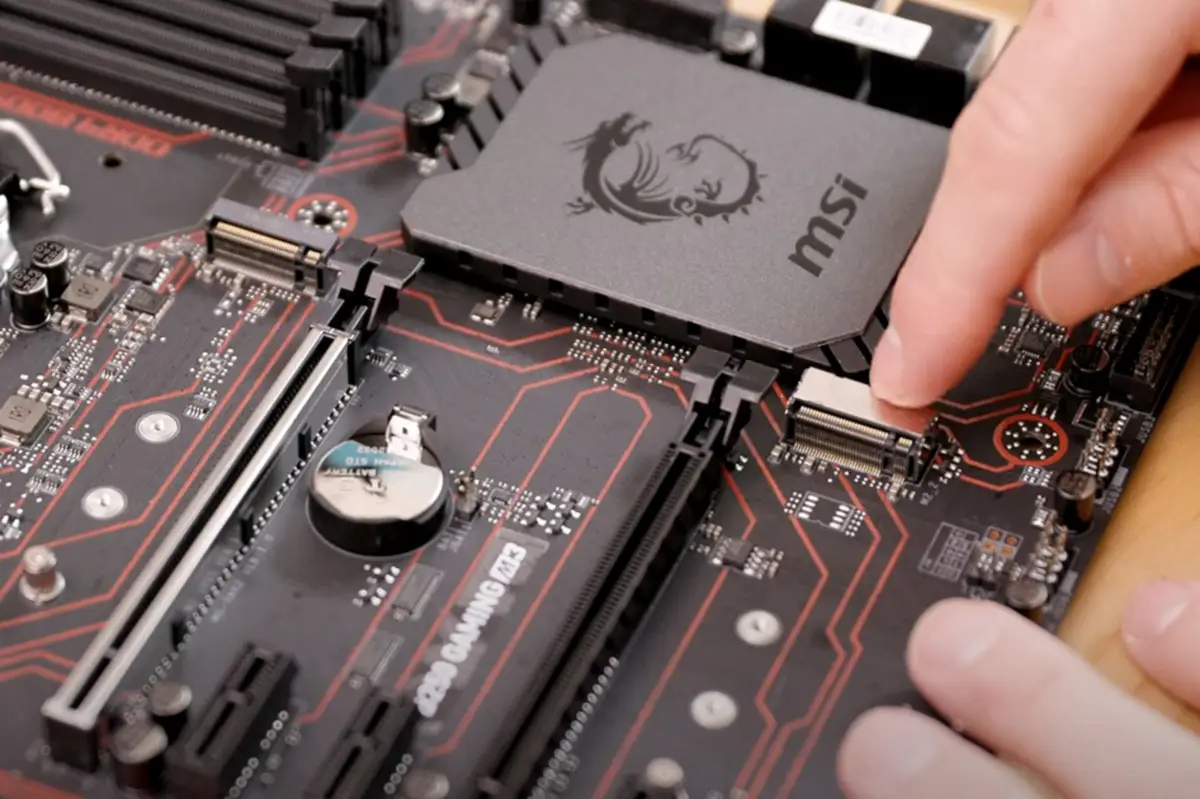
- Inspect the motherboard visually: Take a closer look at your motherboard and identify the M.2 slot(s). The M.2 slot is typically a long, narrow slot that looks similar to a small PCIe slot. It’s usually marked with a label such as “M.2” or “M-Key” for identification.
- Check for any covers or heatsinks: Some motherboards may have protective covers or heatsinks on the M.2 slots. If there are any, carefully remove them to access the M.2 slot. Refer to your motherboard documentation for specific instructions on removing these covers.
- Note the M.2 slot size and key: Take note of the size and key type of the M.2 slot. This information will be useful when selecting and installing the new M.2 SSD. The size (e.g., 2242, 2260, 2280) indicates the length of the M.2 SSD it supports, while the key type (e.g., M, B, B+M) determines the connector compatibility.
By locating the M.2 slot on your motherboard, you’ll have a clear visual understanding of where the new M.2 SSD will be installed. Make sure to handle the motherboard and its components with care and avoid applying excessive force. With the M.2 slot identified, you’re ready to proceed to the next step: installing the second M.2 SSD.
Step 7: Install the Second M.2 SSD
With the M.2 slot successfully located, it’s time to install the second M.2 SSD into your computer. Follow these steps carefully:
- Handle the M.2 SSD with care: Before handling the M.2 SSD, ensure that you are grounded or wearing an antistatic wrist strap to avoid any static discharge that could damage the components. Hold the SSD by its edges to prevent any oils or debris from affecting its performance.
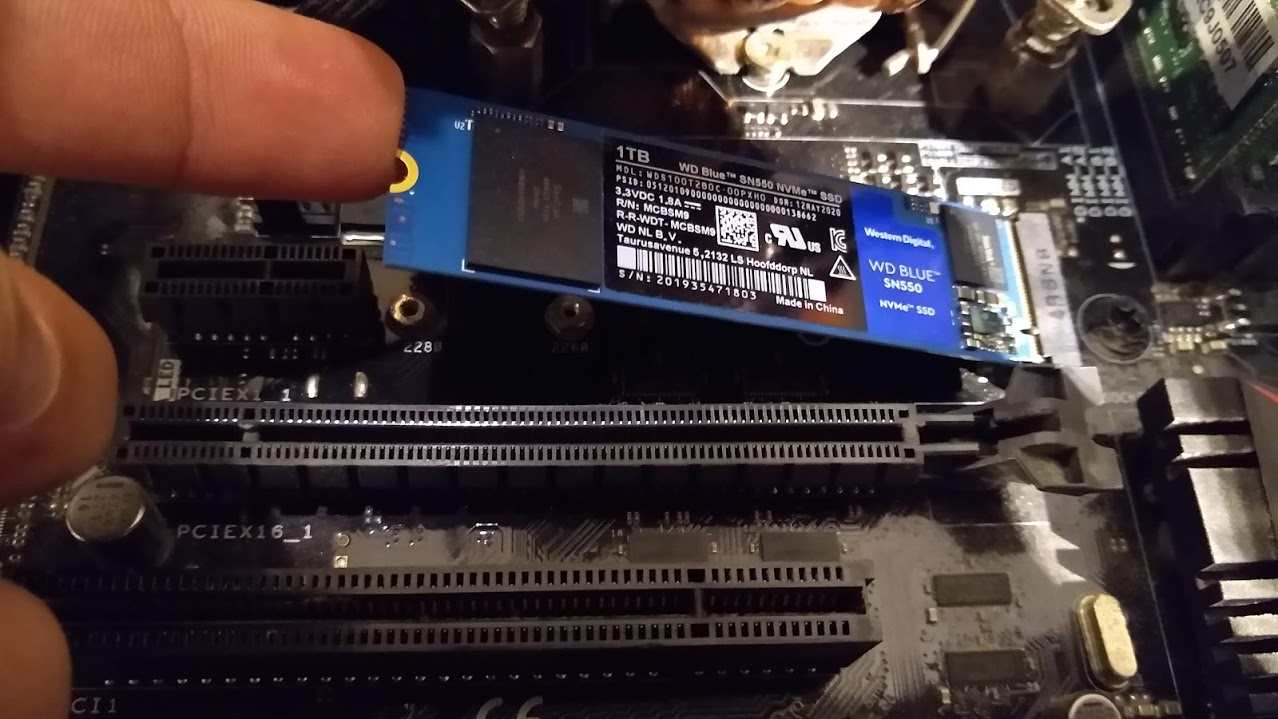
- Identify the correct orientation: Take note of the orientation of the M.2 SSD and the M.2 slot. The SSD will have a notch on one side, while the slot will have a corresponding key. Align these notches to ensure proper insertion.
- Insert the M.2 SSD into the slot: Gently insert the M.2 SSD into the slot at a slight angle. Ensure that the connectors on the bottom of the SSD are fully inserted into the slot. Apply gentle, even pressure until the SSD sits flat in the slot.
- Secure the SSD with the screw: Depending on your motherboard, there may be a screw or retention mechanism provided to secure the M.2 SSD in place. Consult your motherboard documentation for specific instructions on securing the SSD. Use a screwdriver to tighten the screw, but be careful not to overtighten.
It’s important to note that different motherboards may have varying methods for securing the M.2 SSD. Some motherboards may require the use of a standoff or the removal of a protective cover. Refer to your motherboard’s documentation for details specific to your model.
Once the second M.2 SSD is securely installed in the slot, you’re ready to move on to the next step: securing the SSD with a screw.
Step 8: Secure the SSD with the Screw
After inserting the second M.2 SSD into the slot, it’s crucial to secure it in place using the appropriate screw. This step ensures that the SSD remains securely attached to the motherboard. Follow these instructions to properly secure the SSD:
- Locate the mounting screw: Refer to your motherboard documentation to identify the specific screw that is used to secure the M.2 SSD. The screw is usually provided with the motherboard, and its location may vary depending on the motherboard model.
- Place the screw in the designated hole: Align the screw with the designated mounting hole on the motherboard. Carefully insert the screw into the hole, ensuring that it is correctly positioned and facing the right direction.
- Tighten the screw: Using a screwdriver, gently tighten the screw until it is snug but not overly tight. Be cautious not to apply excessive force, as it can damage the motherboard or the SSD.
Note that some motherboards may have multiple mounting holes for different sizes of M.2 SSDs. Ensure that you are using the correct mounting hole that corresponds to the size of your second M.2 SSD.
By properly securing the M.2 SSD with the screw, you ensure that it remains securely attached to the motherboard, preventing any accidental disconnections during use. Once you have completed this step, you can proceed to the next step: reassembling your computer.
Step 9: Reassemble Your Computer
Now that the second M.2 SSD is installed and secured, it’s time to reassemble your computer. Follow these steps to put everything back together:
- Replace any covers or heatsinks: If you removed any protective covers or heatsinks from your motherboard or M.2 SSD slot, carefully reinstall them. Ensure they are properly aligned and securely attached, following the instructions provided in your motherboard documentation.
- Connect all cables and components: Reconnect any cables that you may have disconnected during the installation process. This includes power cables, data cables, and any other peripheral cables. Double-check that all connections are secure and properly aligned.
- Close the computer case: Place the side panel of your computer case back in position and secure it with the appropriate screws or latches. Ensure that the panel is properly aligned and closed to avoid any dust or debris entering the case.
- Plug in your computer: Restore power to your computer by plugging it back into the power source. If applicable, insert the battery back into your laptop. Double-check that everything is securely connected and switched off before proceeding.
Once you have completed these steps, you have successfully reassembled your computer. Ensure that all connections are secure and that there are no loose components before powering on your computer.
Now that your computer is reassembled, it’s time to move on to the final step: booting up your computer and initializing the new SSD.
Step 10: Boot Up Your Computer and Initialize the New SSD
With the hardware installation complete, it’s time to boot up your computer and initialize the new M.2 SSD. Follow these steps to ensure the proper functioning of your newly installed SSD:
- Power on your computer: Press the power button to start your computer. Allow it to go through the usual startup process. You may need to enter your computer’s BIOS or UEFI settings by pressing a specific key during the boot process. Consult your computer’s manual or the manufacturer’s website for the exact key to access the settings.
- Enter BIOS or UEFI settings: Once you’re in the BIOS or UEFI settings, navigate to the “Storage” or “Peripheral” section. Look for the M.2 SSD or NVMe device listed among the storage devices.
- Initialize the SSD: Select the M.2 SSD and choose the option to initialize or format it. This process prepares the SSD for use by creating necessary file systems and partitions. Consult your motherboard’s documentation or the manufacturer’s website for specific instructions on how to perform this step.
- Save changes and exit: After initializing the SSD, save the changes made in the BIOS or UEFI settings and exit the interface. Your computer will restart.
- Check for SSD recognition: Once your computer has restarted, navigate to your operating system’s file explorer or disk management utility to check if the new SSD is recognized. Verify that the capacity of the SSD is accurately displayed.
At this point, your new M.2 SSD is successfully installed, initialized, and ready for use. You may now transfer files, install applications, or utilize the additional storage capacity provided by the second M.2 SSD.
Remember to keep your operating system and drivers up to date for optimal performance. Regularly backup your data to ensure data protection and consider enabling a secure erase feature if provided by your SSD’s manufacturer to securely wipe it if necessary.
Congratulations! You have successfully installed and initialized your second M.2 SSD. Enjoy the increased storage capacity and enhanced performance it brings to your computer!
Conclusion
Congratulations on successfully installing a second M.2 SSD in your computer! With the additional storage capacity and improved performance, you’re now ready to take full advantage of the benefits that come with the extra SSD.
Throughout this guide, we covered the necessary steps to install a second M.2 SSD, starting from gathering the tools and materials, preparing your computer, determining motherboard compatibility, choosing the right M.2 SSD, shutting down your computer and unplugging power sources, locating the M.2 slot, installing and securing the SSD, reassembling your computer, and finally, booting up and initializing the new SSD.
Remember to always follow the manufacturer’s instructions and consult your computer’s manual for specific guidance related to your model. Take your time during the installation process, and if you encounter any difficulties or uncertainties, don’t hesitate to seek assistance from a professional technician.
By expanding your storage capacity with a second M.2 SSD, you can now store larger files, run more applications simultaneously, and experience faster data transfer speeds. Whether you’re a gamer, content creator, or professional who requires ample storage space, the addition of a second M.2 SSD will greatly enhance your computing experience.
Enjoy the benefits of your newly installed M.2 SSD and make the most out of the increased storage capacity and performance it offers. Keep your computer and SSD well-maintained, regularly update your drivers and firmware, and perform backups to ensure the security of your data.
Thank you for following this step-by-step guide. We hope it has provided you with the knowledge and confidence to successfully install a second M.2 SSD in your computer. Happy computing!