Introduction
Welcome to the comprehensive guide on how to install Windows 10 on an M.2 SSD drive. If you’re seeking faster boot times, improved overall system performance, and seamless multitasking, then migrating your operating system to an M.2 SSD drive is an excellent choice. This guide will walk you through the step-by-step process, ensuring a smooth and successful installation.
Before we dive into the installation process, let’s understand why upgrading to an M.2 SSD drive is beneficial. Traditional hard disk drives (HDDs) have been the go-to storage solution for many years, but they come with several limitations. HDDs rely on spinning platters and mechanical parts, which can cause slower read and write speeds. On the other hand, M.2 SSD drives utilize solid-state memory technology, resulting in significantly faster data transfer rates and improved overall performance. By migrating to an M.2 SSD drive, you can experience lightning-fast boot times, reduced application loading times, and smoother system responsiveness.
Now, let’s discuss the requirements for installing Windows 10 on an M.2 SSD drive. Firstly, you will need a compatible M.2 SSD drive. Ensure that your motherboard supports M.2 SSDs and that the drive you choose is compatible with your motherboard’s interface (SATA or NVMe). Additionally, you will need a Windows 10 installation media, such as a USB flash drive or a DVD, and a valid Windows 10 license. Make sure you have a backup of your important data before proceeding with the installation process.
In the next section, we will cover the first step of the installation process: backing up your data. It’s crucial to safeguard your files and documents to prevent any loss during the installation. Let’s get started!
Requirements
Before you embark on the journey to install Windows 10 on an M.2 SSD drive, there are a few essential requirements that you need to fulfill. Ensuring that you have the necessary components and tools will help make the installation process smooth and hassle-free.
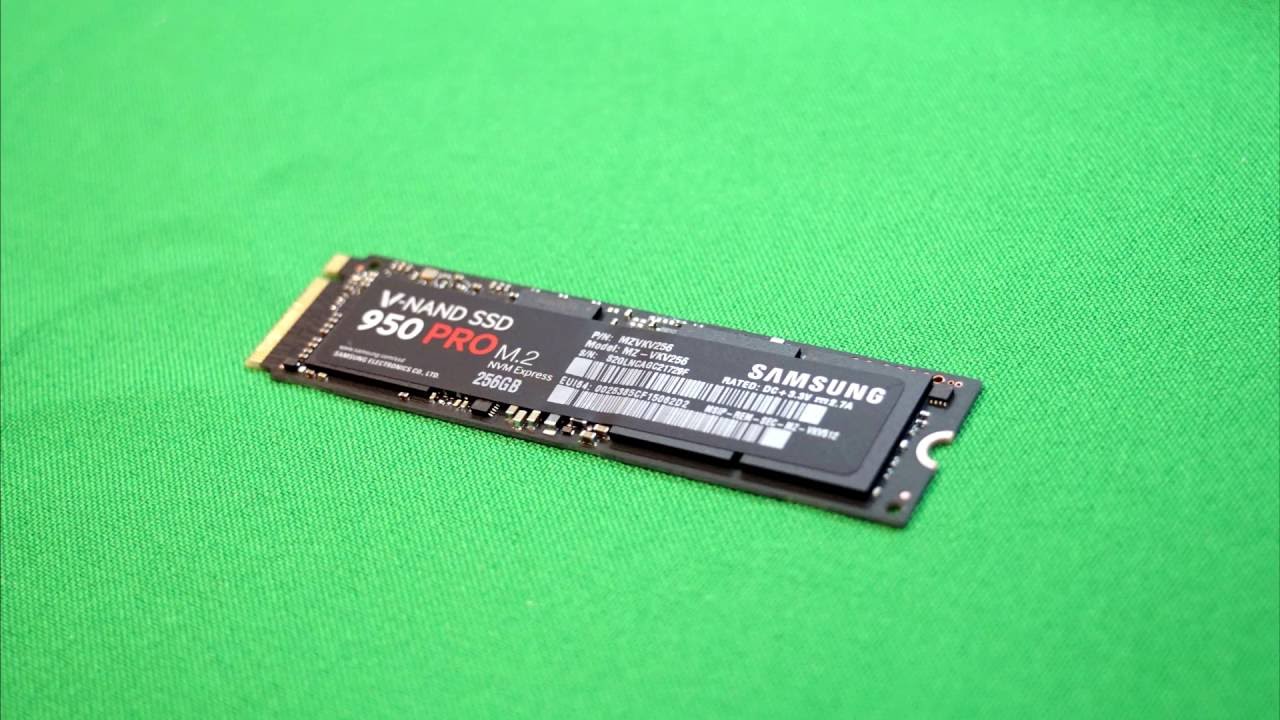
First and foremost, you will need a compatible M.2 SSD drive. Make sure to check your motherboard’s specifications to ensure it supports M.2 SSDs, and note whether it uses the SATA or NVMe interface. This information is crucial for selecting the right M.2 SSD drive for your system. There are a wide variety of M.2 SSDs available in the market, so choose one that meets your storage requirements and is compatible with your motherboard.
In addition to the M.2 SSD drive, you will need a Windows 10 installation media. This can be in the form of a USB flash drive or a DVD. To create a USB installation media, you will require a minimum of 8GB capacity. If you plan to use a DVD, make sure you have a compatible DVD writer and a blank DVD. Keep in mind that the installation media should be bootable, so ensure that it is created correctly.
Another crucial requirement is a valid Windows 10 license. To install and activate Windows 10, you need a legitimate license key. Make sure you have this key before starting the installation process. If you don’t have a Windows 10 license, you can purchase one online or from authorized retailers.
It is important to note that installing Windows 10 on an M.2 SSD drive will involve reinstalling your operating system. Therefore, it is essential to backup your data before proceeding with the installation. You can use external storage devices, cloud storage, or backup software to create a copy of your important files and documents. This step is crucial to prevent any accidental loss of data during the installation process.
Lastly, ensure that you have access to a computer or laptop with internet connection as you may need to download drivers and updates during the installation process. Having a stable internet connection will ensure a smooth and successful installation of Windows 10.
Now that we have covered the requirements, let’s move on to the first step of the installation process: backing up your data. This step is crucial to safeguard your files and ensure a seamless transition to the new M.2 SSD drive. Let’s proceed!
Step 1: Backup your data
Before you begin the installation process of Windows 10 on your M.2 SSD drive, it is crucial to backup all your important data. This step ensures that your files, documents, and settings are protected and can be easily restored after the installation is complete.
There are several methods you can use to backup your data. The choice depends on your preferences and the amount of data you need to back up. Here are a few popular options:
- External Hard Drive or USB Flash Drive: Connect an external hard drive or USB flash drive to your computer and manually copy and paste your files to the storage device. This method is suitable for smaller amounts of data that can easily fit on the external drive.
- Cloud Storage: Make use of cloud storage services such as Dropbox, Google Drive, or OneDrive to upload and store your files. These services often provide a certain amount of storage space for free, and you can access and download your files from anywhere with an internet connection.
- Backup Software: Consider using backup software, such as Acronis True Image or Macrium Reflect, which provides comprehensive backup and restore functionality. These tools allow you to create complete system backups, including your operating system, files, and settings. With backup software, you can easily restore your entire system to its previous state if needed.
Once you have decided on the backup method that suits you best, take the time to organize your files and prioritize what needs to be backed up. It’s a good idea to create separate folders for different types of files (e.g., documents, photos, music) to make the backup and restore process smoother.
Remember to double-check that all your important files are successfully backed up and accessible before proceeding with the Windows 10 installation. Having a backup ensures that you can quickly restore your data if any unforeseen issues or data loss occurs during the installation process.
With your data safely backed up, you can now proceed to the next step: preparing the M.2 SSD for installation. In the next section, we will guide you through the process of preparing your M.2 SSD drive to ensure it is ready for the Windows 10 installation. Let’s get started!
Step 2: Prepare the M.2 SSD
Now that you have successfully backed up your data, it’s time to prepare the M.2 SSD drive for the Windows 10 installation. This step involves physically installing the M.2 SSD onto your motherboard and configuring the necessary settings in the BIOS.
Before you start, ensure that your computer is powered off and unplugged from the power source for safety reasons. Then, follow these steps to prepare the M.2 SSD:
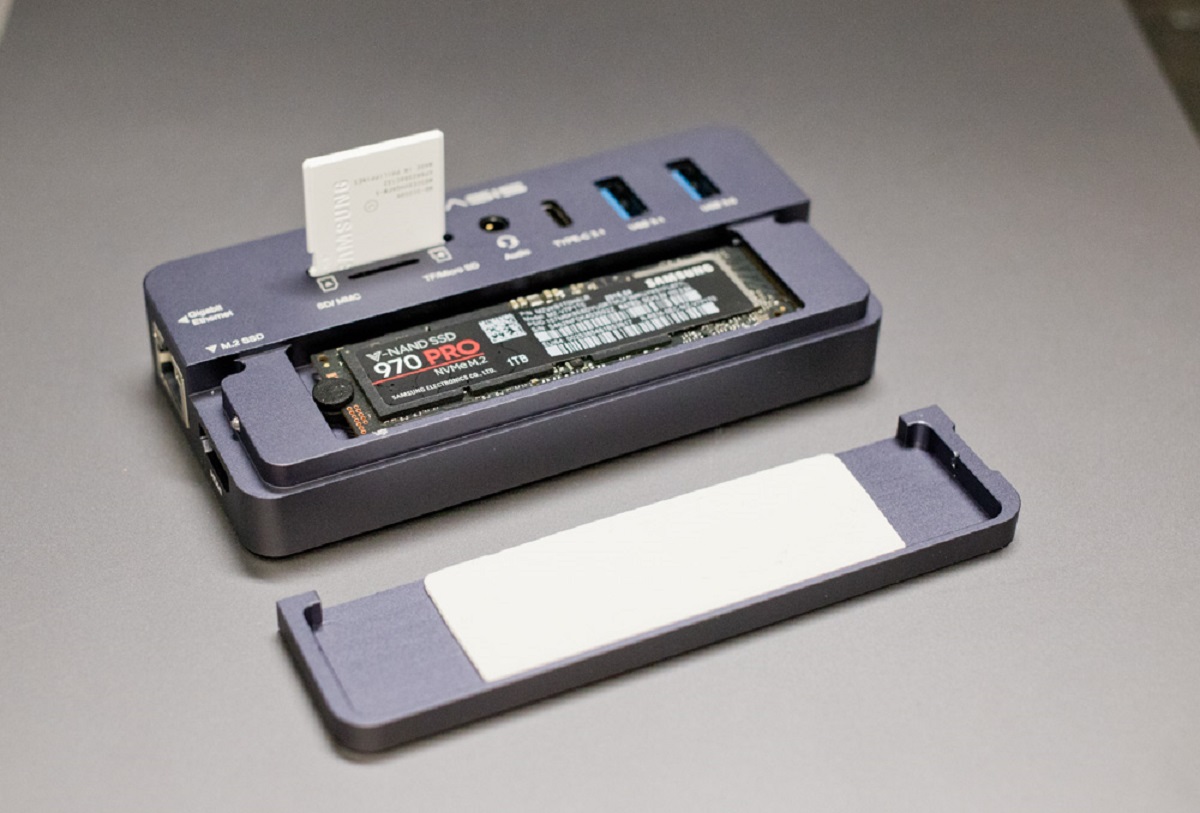
- Locate the M.2 slot: Open up your computer case and locate the M.2 slot on your motherboard. The slot is typically marked and easily identifiable. If you are unsure about the location, refer to your motherboard manual.
- Insert the M.2 SSD: Gently insert the M.2 SSD into the slot, ensuring that the notched end of the drive aligns with the key in the slot. Apply gentle pressure until the drive is securely in place.
- Screw in the M.2 SSD: Some M.2 slots require a screw to secure the drive in place. If your slot has a screw hole, use the provided screw to fasten the M.2 SSD to the motherboard. Be careful not to overtighten the screw.
- Configure BIOS settings: Power on your computer and access the BIOS settings by pressing the designated key (usually Del, F2, or F10) during the boot process. Once in the BIOS, navigate to the storage configuration or boot options section to ensure that the M.2 SSD is recognized and set as the boot drive.
- Save and exit: After making the necessary changes in the BIOS, save the settings and exit. Your computer will restart.
Now, the M.2 SSD is successfully installed and ready for the Windows 10 installation. The next step is creating a Windows 10 installation media, which we will cover in the following section.
Remember to handle the M.2 SSD with care and avoid touching the gold connectors. Additionally, consult your motherboard manual or manufacturer’s website for specific instructions regarding M.2 drive installation and BIOS settings, as these may vary depending on your system.
With the M.2 SSD prepared, you are one step closer to experiencing the benefits of faster storage and improved system performance. In the next section, we will guide you through the process of creating a Windows 10 installation media. Let’s move forward!
Step 3: Create a Windows 10 installation media
With the M.2 SSD installed and prepared, the next step in the process of installing Windows 10 is creating a Windows 10 installation media. This media will allow you to install the operating system onto the M.2 SSD drive. There are a few different methods you can use to create a Windows 10 installation media. Let’s explore two common methods:
- Using the Media Creation Tool:
- Download the Windows 10 Media Creation Tool from the official Microsoft website.
- Run the tool and select the option to create installation media (USB flash drive, DVD, or ISO file).
- Follow the on-screen instructions to choose the language, edition, and architecture (usually 64-bit) of Windows 10.
- Select the USB flash drive option and insert a blank USB drive with at least 8GB of storage capacity. Alternatively, choose the ISO file option to create a Windows 10 installation file that can be burned onto a DVD later.
- Wait for the tool to download the necessary files and create the installation media.
- Using the Windows 10 ISO:
- Download the Windows 10 ISO file from the official Microsoft website or other trusted sources.
- If you haven’t already, insert a blank DVD into your DVD writer.
- Use a reliable ISO burning software like ImgBurn, PowerISO, or IsoBuster to burn the ISO file onto the DVD.
- Ensure that the DVD burning process is successful and that the resulting disc is bootable.
Once you have created the Windows 10 installation media, you are ready to move on to the next step: changing the boot order in the BIOS. This allows your computer to boot from the installation media and begin the Windows 10 installation process. In the following section, we will guide you through this important step, so let’s proceed!
Step 4: Change the boot order in BIOS
Changing the boot order in the BIOS is a crucial step in installing Windows 10 on your M.2 SSD drive. By modifying the boot sequence, you ensure that your computer boots from the Windows 10 installation media instead of the existing operating system on your old storage device. Here’s how you can change the boot order:
- Power on your computer: Start your computer and immediately press the specific key (such as Del, F2, or F10) to enter the BIOS setup. The key to access the BIOS may vary depending on your computer’s manufacturer.
- Navigate to the boot options: Once in the BIOS, navigate to the “Boot” or “Boot Order” section. The exact location may vary depending on your BIOS version.
- Change the boot order: Locate the boot order list and rearrange the boot devices so that the Windows 10 installation media, whether it’s a USB flash drive or a DVD, is at the top of the list. Ensure that the M.2 SSD drive is also included in the boot order list.
- Save the changes: After modifying the boot order, save the changes and exit the BIOS setup. The specific key combination for saving and exiting may be listed at the bottom of the BIOS screen.
Once you have successfully changed the boot order in the BIOS, your computer will restart. It will now boot from the Windows 10 installation media instead of the previous storage device. This allows you to begin the Windows 10 installation process onto the M.2 SSD drive.
In the next section, we will guide you through the step-by-step process of installing Windows 10 onto your M.2 SSD drive. From partitioning the drive to selecting the installation type, we will cover all the necessary details to ensure a successful installation. Let’s proceed to Step 5: Install Windows 10.
Step 5: Install Windows 10
After successfully changing the boot order in the BIOS, you are now ready to install Windows 10 onto your M.2 SSD drive. This step-by-step process will guide you through the installation wizard, allowing you to set up Windows 10 on your newly prepared drive.
- Select language and region: Once your computer restarts, the Windows 10 installation process will begin. Choose your preferred language, time, and currency format, as well as your region settings.
- Enter the product key: If prompted, enter your valid Windows 10 product key. This is the 25-character code provided with your copy of Windows 10.
- Accept the terms and conditions: Read and accept the license terms and conditions to proceed with the installation.
- Choose the installation type: Select the installation type that suits your needs. If you are performing a fresh installation, choose the “Custom” option.
- Create partitions: If required, you can create and modify partitions on your M.2 SSD drive. Adjust the partition sizes based on your preferences and storage requirements.
- Format the drive: Select the partition you want to install Windows 10 on and click the “Format” option to format the drive. This will prepare the partition for the installation.
- Begin installation: Once the drive is formatted, click “Next” to proceed with the installation. The installation process may take some time, so be patient.
- Configure settings: Follow the on-screen instructions to personalize your settings, such as choosing a computer name, creating a user account, and selecting privacy preferences.
- Wait for installation to complete: The installation progress will be displayed on your screen. Once the installation is complete, your computer will restart.
After the installation process is complete and your computer has restarted, you will have a fresh installation of Windows 10 on your M.2 SSD drive. Your files and settings from the previous installation should be backed up, as this process will wipe the old storage device.
In the next step, we will guide you through the process of completing the installation, including updating drivers and installing software. These final touches will ensure that your system is up to date and ready to use. Let’s proceed to Step 6: Complete the installation process.
Step 6: Complete the installation process
After successfully installing Windows 10 on your M.2 SSD drive, there are a few essential steps to complete the installation process. These steps involve updating drivers, installing necessary software, and configuring settings to ensure optimal performance and functionality.
- Update drivers: Begin by updating your system’s drivers. You can manually download the latest drivers from your computer manufacturer’s website or use driver update software to streamline the process. Updating drivers ensures compatibility, fixes bugs, and improves hardware performance.
- Windows Updates: Windows 10 regularly releases updates with bug fixes, security patches, and new features. Make sure to check for and install these updates by going to “Settings” > “Update & Security” > “Windows Update”. Keeping your system up to date enhances stability and security.
- Install necessary software: Install the essential software that you use regularly, such as web browsers, productivity tools, media players, and antivirus software. It’s also a good time to reinstall any specialized software that you need for your work or personal use.
- Configure settings: Customize your system settings according to your preferences. Adjust display settings, power options, privacy settings, and any other settings that ensure the system is tailored to your needs.
- Restore data: If you backed up your data before the installation, restore your files and documents to the appropriate locations on your new Windows 10 installation. Ensure that everything is in place and accessible.
- Verify system stability: Test the stability of your system by performing basic tasks, running applications, and checking for any potential issues. Monitor system performance and resolve any compatibility or functionality issues that may arise.
Completing these installation steps will ensure that your new Windows 10 installation on the M.2 SSD drive is fully functional and optimized for performance. It’s a good practice to periodically update your drivers, software, and Windows to keep your system up to date and secure.
Congratulations! You have successfully installed Windows 10 on your M.2 SSD drive and completed the installation process. Enjoy the faster boot times, improved system responsiveness, and seamless performance that your new M.2 SSD drive brings.
Thank you for following this guide. If you have any further questions or need assistance, feel free to reach out for help.
Step 7: Update drivers and install software
After completing the installation of Windows 10 on your M.2 SSD drive, the next step is to update drivers and install essential software. This step ensures that your system is up to date, compatible with hardware and peripherals, and equipped with necessary tools for optimal performance and functionality.
- Update device drivers: Start by updating the device drivers for your hardware components. Drivers act as communication bridges between your operating system and hardware devices, such as graphics cards, sound cards, and network adapters. To update drivers, you can visit the manufacturer’s website of each device to download and install the latest versions.
- Windows updates: Check for and install any available Windows updates. Windows updates often include important security patches, bug fixes, and performance improvements. To check for updates, go to “Settings” > “Update & Security” > “Windows Update”.
- Install antivirus software: Protect your system from malware and other security threats by installing reliable antivirus software. Choose a reputable antivirus program, update it, and perform a full system scan to ensure your new Windows 10 installation is secure.
- Web browsers and productivity tools: Install your preferred web browsers, such as Google Chrome, Mozilla Firefox, or Microsoft Edge. Additionally, install productivity tools like Microsoft Office or other office suites that you regularly use for work or personal tasks.
- Media and entertainment software: Install media players, photo editing software, and any other entertainment applications you typically use for multimedia purposes. These tools ensure you can enjoy your favorite music, movies, and images on your newly installed Windows 10 system.
- Configure system settings: Customize your system settings according to your preferences. Adjust display settings, power options, privacy settings, and any other settings that allow you to personalize your Windows 10 experience.
- Verify software compatibility: Ensure that all software installed on your new Windows 10 system is compatible and functioning correctly. Launch each application and perform basic tasks to confirm that everything is working as expected.
Updating drivers and installing necessary software enhances system stability, compatibility, and security. Regularly check for drivers and software updates to ensure optimal performance and stay protected against potential vulnerabilities.
Congratulations! You have successfully installed Windows 10 on your M.2 SSD drive, updated drivers, and installed essential software. Your system is now ready for a seamless computing experience.
If you have any further questions or need assistance, feel free to reach out for support. Enjoy your new Windows 10 installation!
Conclusion
Congratulations on successfully installing Windows 10 on your M.2 SSD drive! By following the step-by-step guide, you have migrated your operating system to a faster and more efficient storage solution. The benefits of this migration include improved boot times, enhanced system performance, and quicker application loading.
Throughout the installation process, you learned the importance of backing up your data, preparing the M.2 SSD drive, creating a Windows 10 installation media, changing the boot order in the BIOS, installing Windows 10, updating drivers, and installing essential software. These steps ensure a smooth and successful installation, while also providing a foundation for a robust and optimized system.
Remember to regularly update your drivers and software to keep your system running smoothly. Pay attention to Windows updates and security patches to protect your system from vulnerabilities. Additionally, consider implementing a reliable antivirus solution to safeguard your system against malware and other threats.
Now that you have completed the installation and configuration process, take some time to explore the features and capabilities of Windows 10. Customize your system settings, install additional software that meets your needs, and enjoy the benefits of your new M.2 SSD drive.
We hope that this guide has been helpful and informative in assisting you with installing Windows 10 on an M.2 SSD drive. If you have any further questions or need assistance, don’t hesitate to reach out for support. Happy computing!