Introduction
Welcome to this guide on how to install a new M.2 SSD in your computer. Whether you’re looking to upgrade your storage capacity or boost your system’s performance, installing an M.2 SSD is a great way to achieve both. With its compact form factor and lightning-fast speeds, the M.2 SSD has become increasingly popular among computer enthusiasts and professionals.
In this step-by-step guide, we will walk you through the process of installing a new M.2 SSD into your computer. We’ll cover everything, from gathering the necessary tools and materials, to formatting and configuring the new drive. By following this guide, you’ll be able to take advantage of the speed and efficiency of an M.2 SSD in no time.
Before we dive into the installation process, it’s important to note that every computer is unique, and the steps required may vary depending on your specific hardware configuration. It’s always a good idea to consult your computer’s user manual or the manufacturer’s website for detailed instructions that are tailored to your system.
Now, let’s get started with the first step: gathering the necessary tools and materials.
Step 1: Gather the necessary tools and materials
Before you begin the installation process, it’s essential to ensure you have all the necessary tools and materials on hand. Here’s a list of what you’ll need:
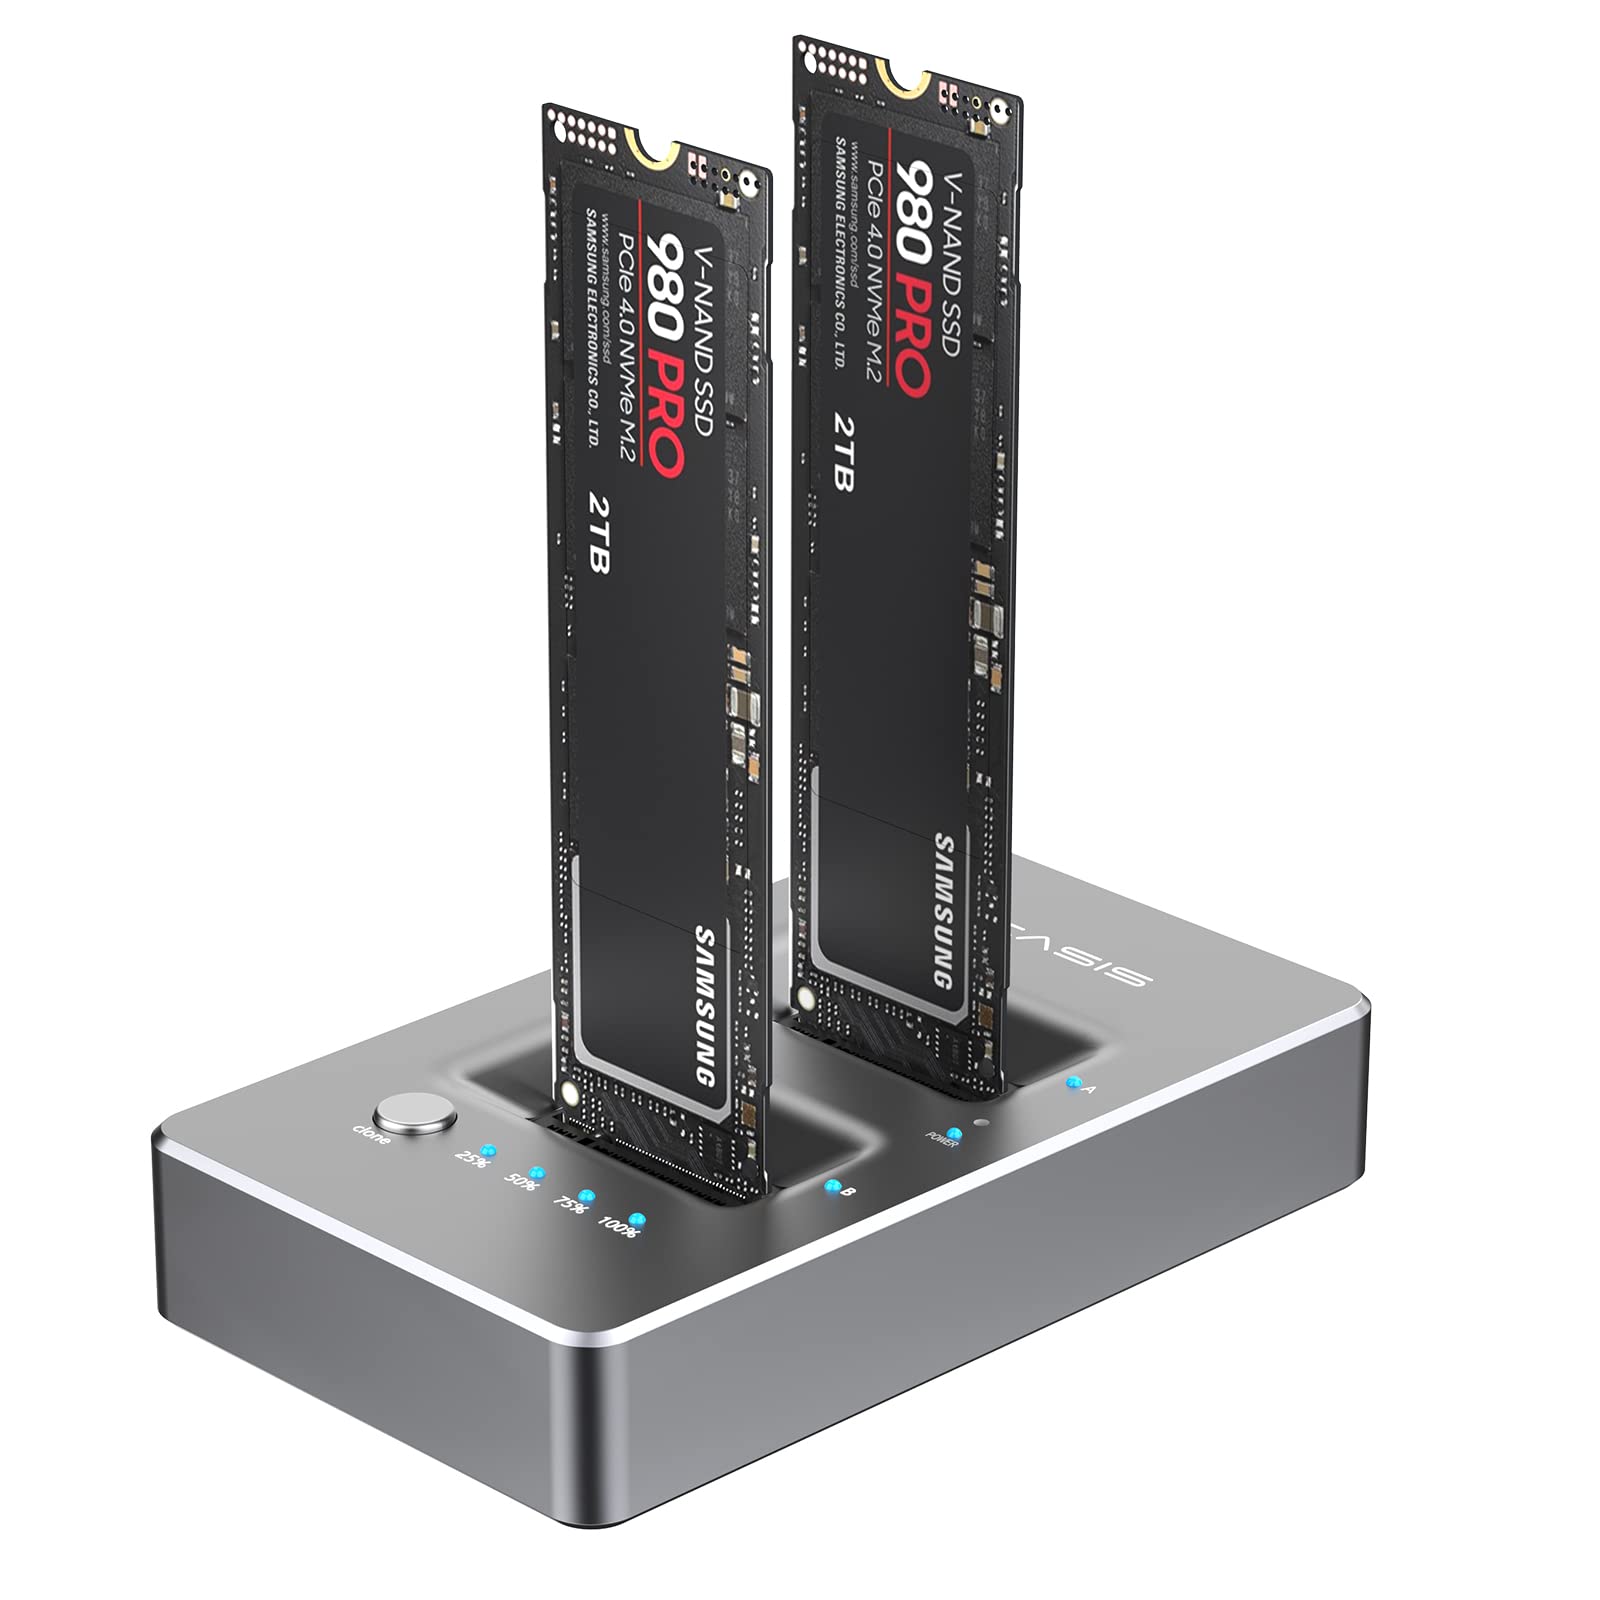
- M.2 SSD: Of course, you’ll need the M.2 SSD itself. Make sure you have the right size and capacity that fits your needs.
- Screwdriver: Most M.2 SSDs require a screwdriver to secure them in place. Check the type of screwdriver needed for your specific SSD model.
- Anti-static wrist strap: This will help protect your SSD from any potential damage caused by static electricity.
- Static-free workspace: It’s important to work on a grounded surface to minimize the risk of static discharge.
- User manual: Consult the user manual included with your SSD for any specific instructions or precautions.
- Optional: M.2 SSD adapter: If your motherboard doesn’t have an M.2 slot, you may need an adapter to install the SSD in a different slot.
Once you have gathered all the necessary tools and materials, you are ready to move on to the next step. It’s always a good practice to double-check everything before proceeding to ensure a smooth installation process.
Important note: Make sure to power off and unplug your computer from the electrical outlet before starting the installation process. Additionally, grounding yourself by touching a metal surface can help discharge any static electricity and prevent damage to the SSD or other computer components.
Step 2: Shut down your computer and disconnect all power sources
Before you can begin installing the new M.2 SSD, it’s crucial to shut down your computer properly and disconnect all power sources. This ensures your safety and prevents any potential damage to your hardware.
Follow these steps to shut down your computer and disconnect the power sources:
- Save your work: Close any open applications and save any unsaved work to avoid data loss.
- Shut down the operating system: Click on the Start button and select the “Shut down” option from the menu. Allow the computer to fully shut down before proceeding.
- Unplug the power cord: Once your computer is shut down, unplug the power cord from the electrical outlet. This step ensures that there is no electricity flowing to your computer, reducing the risk of accidental electrical shock.
- Disconnect any external devices: If you have any external devices connected to your computer, such as monitors, speakers, or USB devices, unplug them as well. This will allow for easier access to the computer’s internals.
- Ground yourself: Before opening your computer case, take a moment to ground yourself. You can do this by touching a grounded metal surface, such as the metal frame of your computer case. This helps discharge any static electricity you may have built up, minimizing the risk of damaging sensitive components.
It’s important to be thorough and double-check that all power sources are disconnected before proceeding to the next step. This ensures your safety and prevents any accidental damage to your computer or its components.
Now that you have shut down your computer and disconnected all power sources, you’re ready to move on to the next step: opening up your computer case.
Step 3: Open up your computer case
Now that you have shut down your computer and disconnected all power sources, it’s time to open up your computer case. Opening the case will give you access to the internals of your computer, allowing you to install the new M.2 SSD.
Follow these steps to safely open your computer case:
- Find the computer case screws: Look for the screws that hold the side panel of your computer case in place. These screws are usually located at the rear of the case.
- Use the appropriate screwdriver: Select the screwdriver that matches the type of screws used to secure your computer case. Most cases use Phillips or flathead screws.
- Remove the screws: Carefully unscrew and remove the screws holding the side panel in place. Set the screws aside in a safe place, as you will need them later to reattach the panel.
- Slide off the side panel: Gently slide the side panel away from the case frame. Be cautious not to use excessive force or apply pressure to any delicate components inside the case.
Once you have successfully removed the side panel, you will have a clear view inside your computer case. Remember to handle the panel with care to avoid any accidental damage.
Caution: While the computer case is open, exercise caution and refrain from touching any sensitive components or circuitry. Always handle internal components by their edges to prevent damage from static electricity or accidental mishandling.
Now that your computer case is open, you are one step closer to installing your new M.2 SSD. The next step is to locate the M.2 slot on your motherboard, which we will cover in the following section.
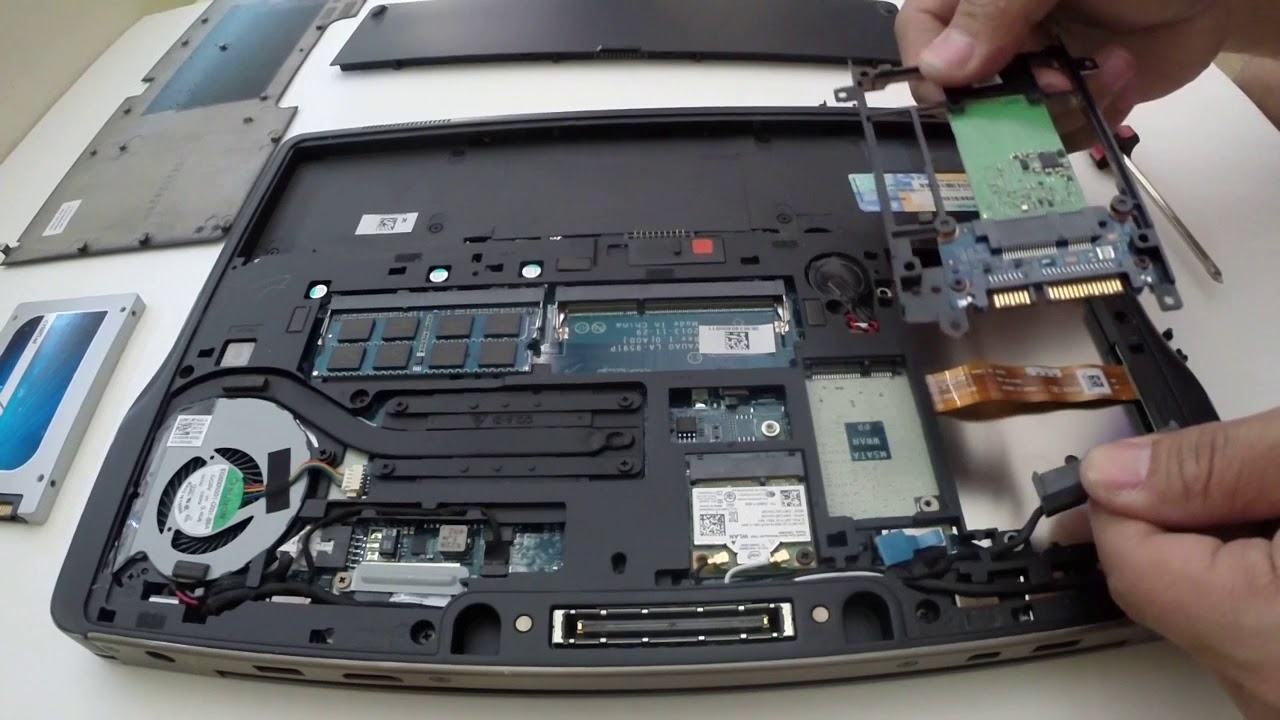
Step 4: Locate the M.2 slot on your motherboard
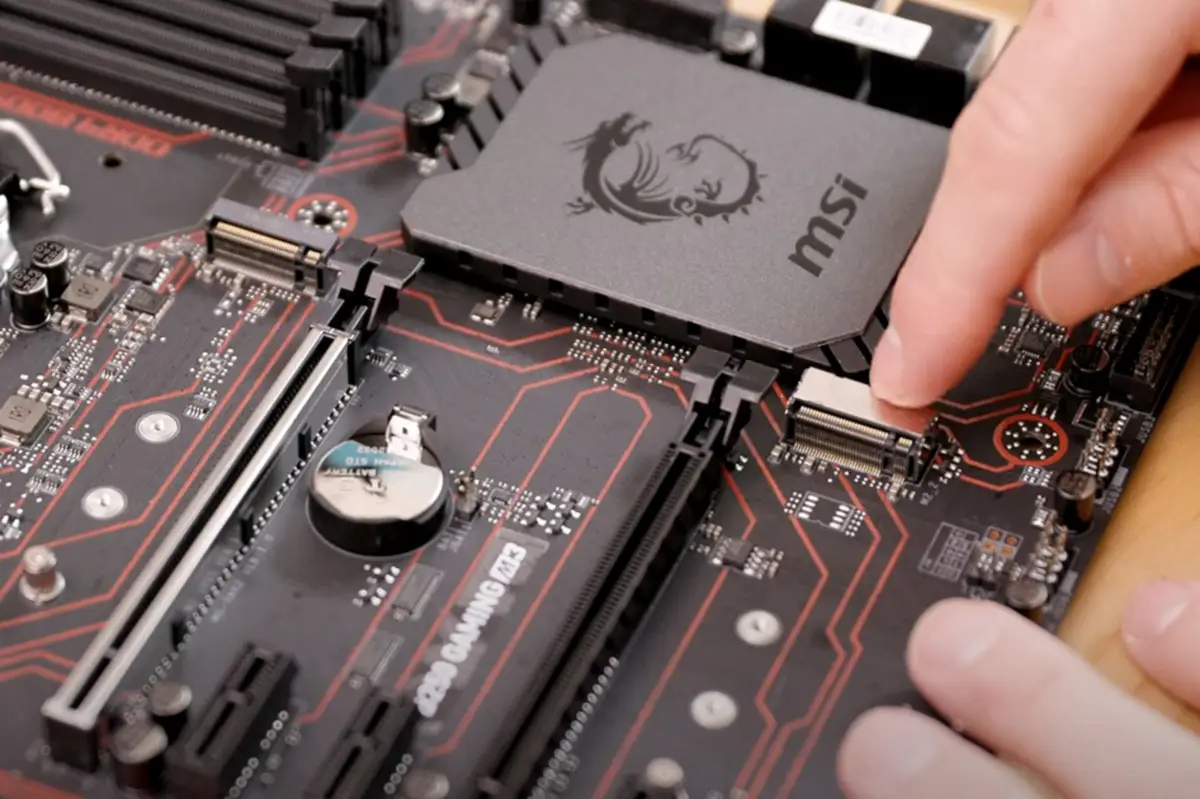
To install your new M.2 SSD, you’ll need to locate the M.2 slot on your motherboard. The M.2 slot is a small, rectangular connector where the SSD will be securely inserted.
Follow these steps to locate the M.2 slot on your motherboard:
- Refer to your motherboard documentation: Consult the user manual or documentation that came with your motherboard. They usually contain detailed information about the location and specifications of the M.2 slot.
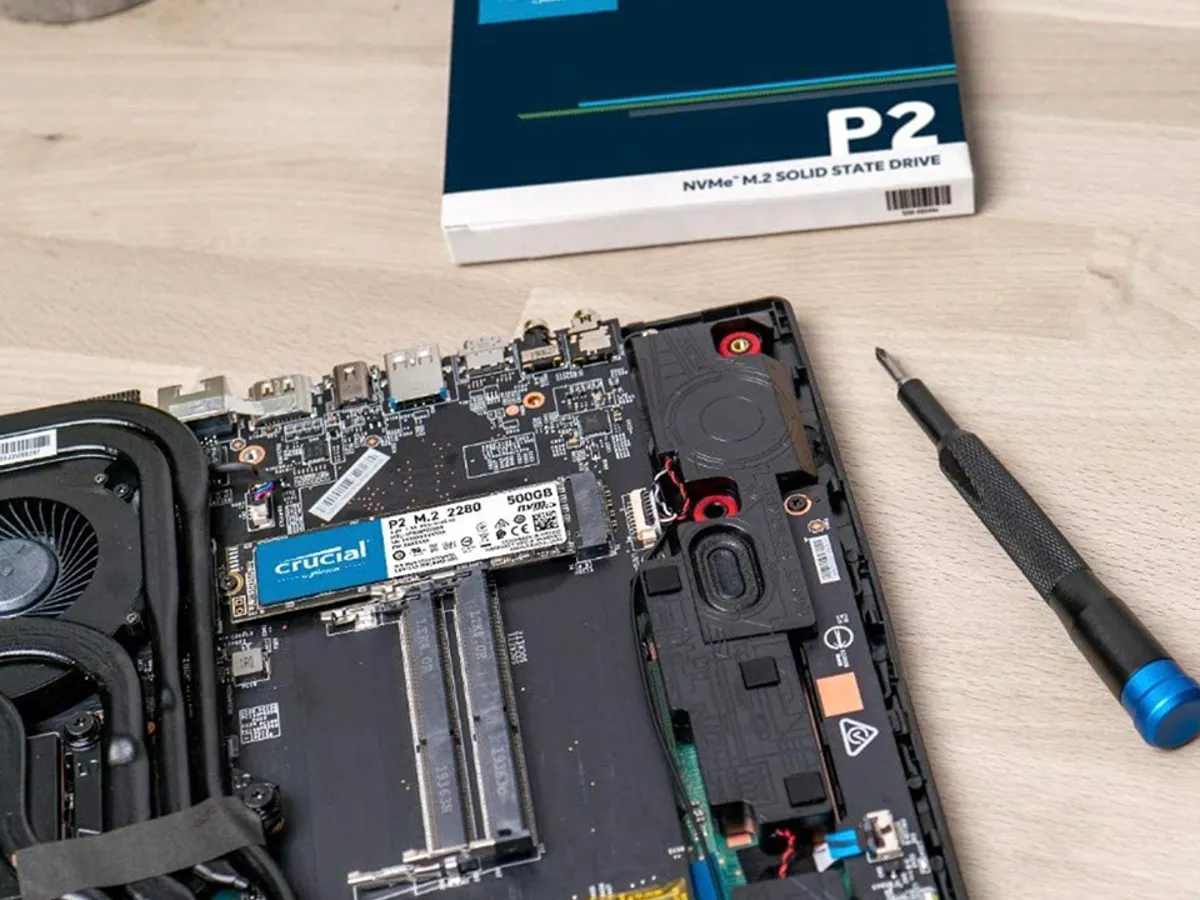
- Identify the M.2 slot: Look for a slot on your motherboard labeled “M.2.” It is commonly found near the CPU socket or along the edge of the motherboard.
- Take note of any keying notches: Some M.2 slots have notches or keying mechanisms to ensure proper alignment and compatibility with specific types of M.2 SSDs. Pay attention to these notches to ensure the correct orientation during installation.
- Determine the maximum supported length: Check your motherboard documentation to find the maximum length of M.2 SSDs supported. This information is crucial as it will help you choose the right-sized M.2 SSD for your motherboard.
If you are having trouble locating the M.2 slot or need additional assistance, don’t hesitate to reach out to your motherboard manufacturer’s customer support or consult online forums for guidance specific to your motherboard model.
Once you have located the M.2 slot and understand its specifications and keying notches, you’re ready to move on to the next step: installing the M.2 SSD into the slot. We will cover this in detail in the following section.
Step 5: Install the M.2 SSD into the slot
Now that you have located the M.2 slot on your motherboard, it’s time to install the M.2 SSD into the slot. This step requires precision and attention to detail to ensure a proper and secure installation.
Follow these steps to install the M.2 SSD into the slot:
- Handle the M.2 SSD with care: Before handling the M.2 SSD, make sure to ground yourself by touching a metal surface. This helps discharge any static electricity and prevents damage to the SSD.
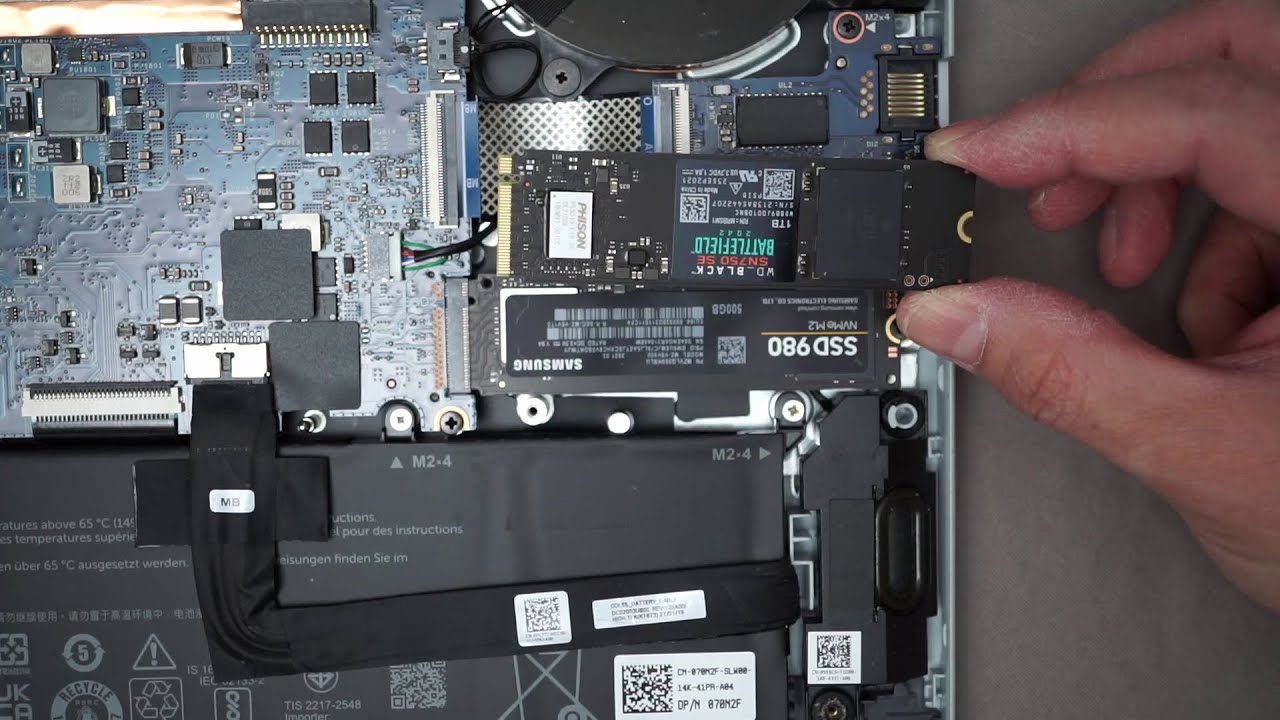
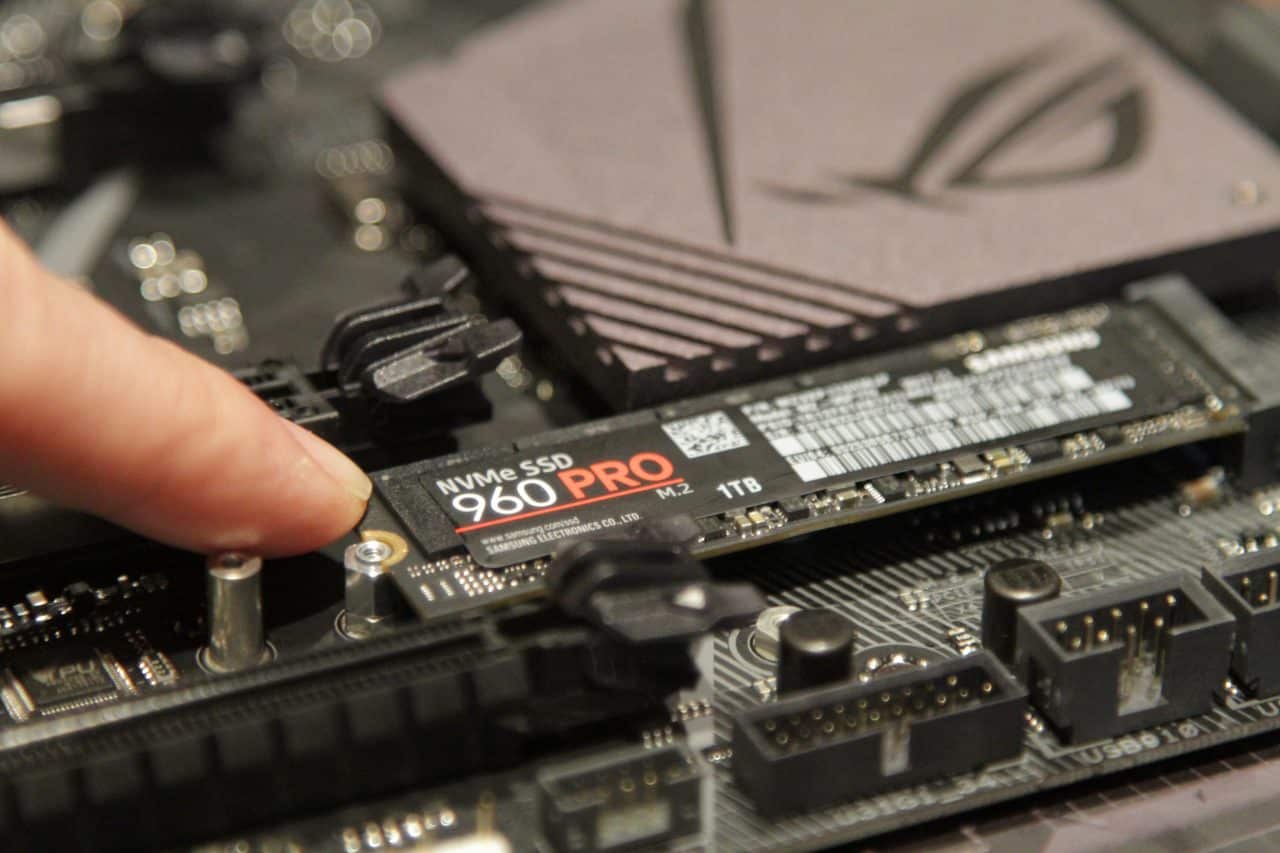
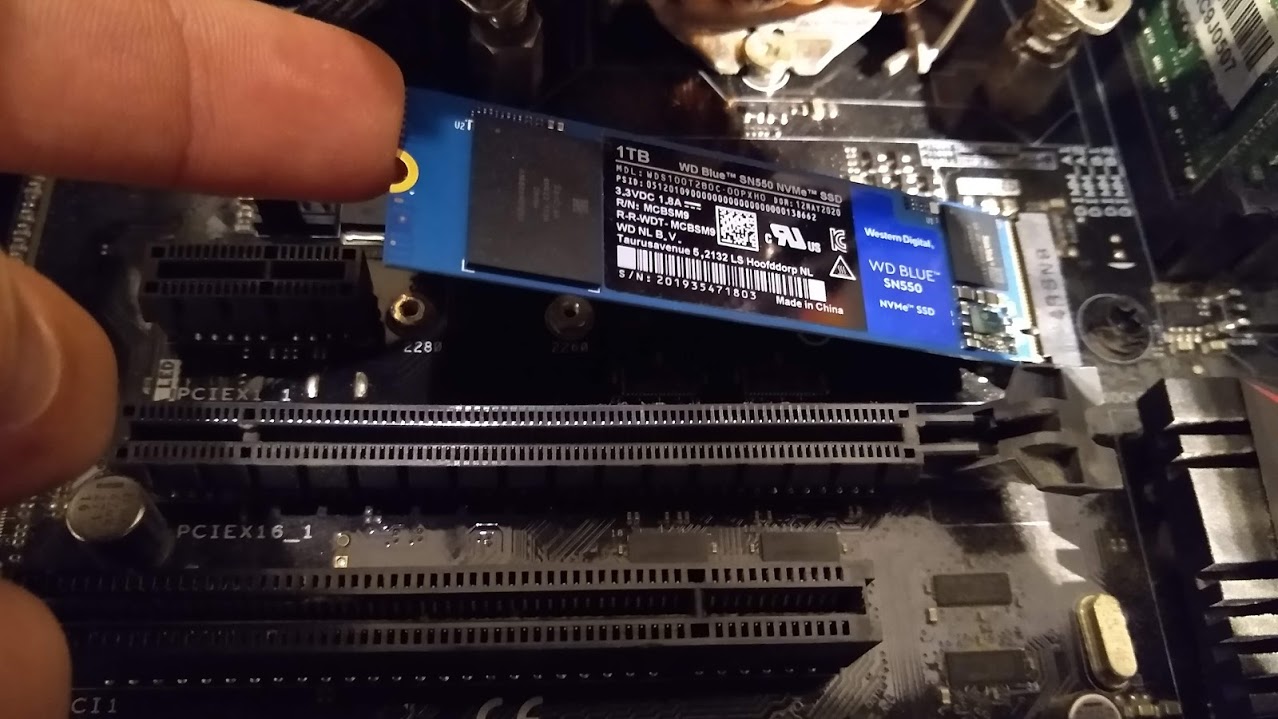
- Align the M.2 SSD correctly: Hold the M.2 SSD carefully and align the notches on the SSD with the keying mechanism on the M.2 slot. Ensure that the gold connectors on the bottom of the SSD are facing down and aligned with the pins inside the slot.
- Insert the M.2 SSD into the slot: Gently slide the M.2 SSD into the slot at a slight angle. Apply even pressure to insert it until it is fully seated in the slot.
- Secure the M.2 SSD: Depending on your motherboard, you may need to secure the M.2 SSD with a mounting screw. Refer to your motherboard documentation for specific instructions on securing the M.2 SSD if necessary.
It’s important to note that some M.2 slots have multiple lengths or support different types of M.2 SSDs. Ensure that you are using the correct slot and that the M.2 SSD matches the supported specifications of your motherboard.
Note: Avoid using excessive force when inserting the M.2 SSD into the slot. If it doesn’t slide in easily, double-check the alignment and try again. Forcing the SSD may damage the delicate connectors.
Once you have installed the M.2 SSD into the slot and secured it if necessary, you’re ready to move on to the next step: securing the M.2 SSD with the mounting screw, if required by your motherboard. We will cover this in detail in the following section.
Step 6: Secure the M.2 SSD with the mounting screw
After installing the M.2 SSD into the slot, some motherboards may require you to secure it in place using a mounting screw. This step ensures that the SSD remains firmly attached to the motherboard and prevents any unwanted movement.
Follow these steps to secure the M.2 SSD with the mounting screw:
- Check your motherboard manual: Consult your motherboard manual to determine if a mounting screw is required to secure the M.2 SSD. If a screw is not required or provided, you can skip this step.
- Locate the mounting screw: Look for a small screw included with your motherboard accessories or find it pre-installed in the designated slot near the M.2 slot.
- Place the mounting screw: Align the mounting screw with the hole on the M.2 SSD. Gently insert and tighten the screw using a screwdriver. Be careful not to overtighten, as it may damage the M.2 SSD or motherboard.
It’s important to note that not all motherboards require a mounting screw for the M.2 SSD. Some motherboards feature a secure click-in mechanism or standoff that holds the SSD in place without the need for a separate screw. In such cases, verify the specific requirements and recommendations in your motherboard’s user manual.
Note: Pay attention to the level of tightness when securing the mounting screw. Over-tightening can lead to damage, while loose screw connection may result in poor contact or instability. Use an appropriate amount of force to ensure a secure fit without applying excessive pressure.
Once you have secured the M.2 SSD with the mounting screw (if required), you can proceed to the next step: closing up your computer case. We will guide you through this step in detail in the following section.
Step 7: Close up your computer case
Now that you have installed and secured the M.2 SSD, it’s time to close up your computer case. Closing the case ensures the internal components are protected, and the system is ready to be powered back on.
Follow these steps to close up your computer case:
- Position the side panel: Carefully line up the side panel with the case and ensure it’s properly aligned. Take note of any hooks, notches, or tabs that need to fit into place.
- Slide the side panel back into place: Gently slide the side panel towards the case to secure it. Apply gentle pressure to ensure it is snugly positioned, but avoid using excessive force.
- Reinsert and tighten the case screws: Use the screws you previously removed to reattach the side panel securely to the case. Tighten them snugly, but again, be cautious not to overtighten.
Double-check that the side panel is properly closed and securely fastened. It’s crucial to ensure a proper seal to prevent dust, debris, or accidental contact with internal components.
Note: If you encounter any resistance or difficulty when closing the case, pause and reevaluate the alignment of the side panel. Avoid forcing the panel into place, as it may indicate a misalignment that could potentially damage your computer.
Now that you have successfully closed up your computer case, you’re ready to move on to the next step: reconnecting all power sources and powering on your computer. We will guide you through these steps in the following section.
Step 8: Reconnect all power sources and power on your computer
With your computer case securely closed, it’s time to reconnect all power sources and power on your computer. This step ensures that your computer has the necessary power to recognize and utilize the newly installed M.2 SSD.
Follow these steps to reconnect the power sources and power on your computer:
- Connect the power cord: Plug the power cord back into the electrical outlet. Ensure a secure connection and make sure the cable is not tangled or obstructed.
- Reconnect external devices: If you disconnected any external devices, such as monitors, speakers, or USB devices, reconnect them to the appropriate ports on your computer.
- Double-check all connections: Take a moment to review and verify that all cables and connections are properly reattached. Ensure they are snug and secure.
- Press the power button: Press the power button on your computer to turn it on. Listen for any startup sounds and monitor the display for the initial boot sequence.
As your computer powers on, it will go through the usual startup process. The BIOS or UEFI firmware will recognize the new M.2 SSD, and your operating system will automatically detect it as well.
If your computer does not recognize the newly installed M.2 SSD or encounters any issues during the boot process, double-check the connections and consult your computer’s documentation or manufacturer’s support for troubleshooting steps specific to your system.
Once your computer has successfully booted up, you can move on to the next step: formatting and initializing the new M.2 SSD. We will guide you through this process in detail in the following section.
Step 9: Format and initialize the new M.2 SSD
Now that your computer has recognized the newly installed M.2 SSD, it’s time to format and initialize the drive. Formatting and initializing the SSD prepares it for use and allows your operating system to utilize its storage capacity.
Follow these steps to format and initialize the new M.2 SSD:
- Access Disk Management: In Windows, you can access Disk Management by right-clicking on the Start button and selecting “Disk Management” from the menu. This utility allows you to manage and configure your computer’s storage devices.
- Identify the new M.2 SSD: In the Disk Management window, locate the newly installed M.2 SSD. It should be listed as an unallocated or unformatted disk.
- Format the M.2 SSD: Right-click on the unallocated space of the M.2 SSD and select the “New Simple Volume” option. Follow the on-screen instructions to format the SSD using the desired file system (such as NTFS) and allocate a drive letter.
- Initialize the SSD: If prompted, initialize the M.2 SSD by choosing the appropriate partition style (MBR or GPT). Select the recommended default settings unless you have specific requirements.
- Confirm the format and initialization: Review your selections and click “Finish” to confirm the format and initialization process. Be aware that formatting will erase any existing data on the drive, so ensure you have a backup if necessary.
After completing these steps, your operating system will recognize and assign a drive letter to the newly formatted M.2 SSD. It will be ready for use, and you can begin storing data or relocating files to take advantage of the increased storage capacity and speed.
Note: The process of formatting and initializing a disk may vary slightly depending on your operating system version or specific requirements. Refer to the documentation or online resources specific to your operating system for more detailed instructions if needed.
With the M.2 SSD formatted and initialized, you can proceed to the next step: transferring data and configuring the new M.2 SSD. We will guide you through this process in the following section.
Step 10: Transfer data and configure the new M.2 SSD
Now that you have successfully formatted and initialized the new M.2 SSD, it’s time to transfer your data and configure the drive to suit your needs. This step involves migrating existing files and configuring any necessary settings to optimize the performance of your new M.2 SSD.
Follow these steps to transfer data and configure the new M.2 SSD:
- Data migration: If you have existing data on another storage device, such as a hard drive, you can transfer it to the new M.2 SSD. You can use built-in tools like Windows File Explorer or third-party software for data migration. Ensure that you have enough storage space on the M.2 SSD to accommodate the transferred data.
- Operating system and software installation: If you wish to install your operating system and commonly used programs on the M.2 SSD for faster performance, you can reinstall them directly onto the new drive or clone your existing system to the SSD. This will maximize the benefits of the M.2 SSD’s speed and responsiveness.
- Configuration and optimization: Depending on your specific needs, you may want to configure certain settings to optimize the performance of the M.2 SSD. This includes enabling TRIM, adjusting power management settings, and ensuring the M.2 SSD is set as the primary boot device in the BIOS or UEFI firmware.
- Organize file storage: With your data transferred and applications installed, organize your file storage on the new M.2 SSD. Create folders and directories to keep your files organized and easily accessible. This will help maintain a clutter-free and efficient file system.
- Regular backups: As with any storage device, it’s important to establish a regular backup routine for your M.2 SSD. This ensures that your data is protected in case of any unexpected failure or loss. Consider using cloud storage or external backup solutions to keep your data safe.
By completing these steps, you’ll have successfully transferred your data and configured the new M.2 SSD to meet your storage needs. Enjoy the improved performance and efficiency that the M.2 SSD brings to your computer system.
Note: It’s always a good practice to refer to the user manual and documentation provided by your M.2 SSD manufacturer for any specific configurations or optimizations recommended for your particular SSD model.
With the data transferred and the M.2 SSD configured, you’re ready to enjoy the improved storage performance and responsiveness that your new drive brings. Congratulations on successfully installing and setting up your M.2 SSD!
Step 11: Enjoy the improved storage performance with your new M.2 SSD
Congratulations on successfully installing and setting up your new M.2 SSD! Now it’s time to reap the benefits of improved storage performance and enhanced speed in your computer system.
With your new M.2 SSD in place, you can expect several advantages:
- Lightning-fast speed: The M.2 SSD offers significantly faster read and write speeds compared to traditional hard drives. This means faster boot times, quicker application launches, and shorter loading times for games and large files.
- Improved multitasking: The increased speed and responsiveness of the M.2 SSD allow for smoother multitasking. Switching between applications, running multiple programs simultaneously, and handling intensive tasks become seamless and efficient.
- Reduced loading times: Whether you’re working on creative projects, editing videos, or gaming, the M.2 SSD’s quick access to data means reduced waiting times. Applications and files load almost instantly, enhancing productivity and enhancing your overall computing experience.
- Increased storage capacity: By adding an M.2 SSD to your system, you can expand your storage capacity without sacrificing performance. Store large media files, games, and other data-intensive files on the M.2 SSD, freeing up space on other drives.
- Enhanced durability: M.2 SSDs are more robust and reliable than traditional hard drives because they have no moving parts. This makes them less susceptible to physical damage caused by drops or shocks, reducing the risk of data loss.
To ensure continued optimal performance with your M.2 SSD, it’s important to keep your system up to date, periodically check for firmware updates from the manufacturer, and maintain regular backups of your data.
Enjoy the seamless computing experience, improved productivity, and faster access to your files that your new M.2 SSD brings. Whether you’re a gamer, creative professional, or everyday computer user, the enhanced storage performance will undoubtedly enhance your overall computing experience.
Thank you for following this step-by-step guide. We hope it has been informative and helpful in installing and setting up your new M.2 SSD. Feel free to refer back to this guide whenever needed, and enjoy the benefits of your upgraded storage system!
Conclusion
Installing a new M.2 SSD in your computer is a straightforward process that can greatly enhance your system’s storage capacity and performance. By following the step-by-step guide outlined in this article, you’ve learned how to gather the necessary tools, open up your computer case, locate and install the M.2 SSD, and secure it in place. You’ve also learned how to format, initialize, transfer data, and configure the new M.2 SSD to meet your specific needs.
The installation of an M.2 SSD brings numerous benefits, including improved speed, reduced loading times, enhanced multitasking capabilities, and increased storage capacity. The lightning-fast read and write speeds of the M.2 SSD significantly boost overall system performance, allowing for a smoother and more efficient computing experience.
Remember to consult your computer’s documentation and user manual for any specific instructions or precautions that pertain to your unique hardware configuration. Additionally, maintaining regular backups of your data and keeping your system up to date will ensure continued optimal performance and safeguard against any potential data loss.
By successfully installing and setting up your new M.2 SSD, you’ve taken a significant step towards optimizing your computer’s storage system and maximizing its potential. Enjoy the improved speed, efficiency, and storage capacity that your new M.2 SSD brings, and elevate your computing experience to new heights.
Thank you for following this guide, and we hope it has been helpful in your journey to enhance your computer’s storage performance. Should you have any questions or need further assistance, don’t hesitate to reach out to the manufacturer’s support or online communities that specialize in SSD installation and configuration.