Introduction
The Wii U, Nintendo’s popular gaming console, offers a unique gaming experience with its innovative controller and impressive library of games. However, one of its limitations is its internal storage capacity. To overcome this limitation and expand the storage space, you can connect an external hard drive to your Wii U.
In this article, we will explore the various options available for external storage on the Wii U and discuss the factors to consider when choosing the right external hard drive. We will also guide you through the process of setting up and formatting the external hard drive for use with your Wii U, as well as transferring game data to it. Additionally, we will provide a list of recommended external hard drives that are compatible with the Wii U.
Expanding the storage capacity of your Wii U is crucial, especially if you are an avid gamer with a large collection of games. With an external hard drive, you can store more games, downloadable content, and even backups of your game saves. This ensures that you have enough space to enjoy all the gaming experiences the Wii U has to offer without worrying about running out of storage.
Whether you are looking to upgrade your existing external hard drive or considering buying a new one for your Wii U, this article will serve as a comprehensive guide to help you make an informed decision. Let’s delve into the world of external storage for the Wii U and explore the options that best suit your gaming needs.
Understanding the Wii U’s External Storage Options
Before we delve into the factors to consider when choosing an external hard drive for your Wii U, it’s important to understand the available options for expanding the console’s storage. The Wii U provides two primary methods of external storage: USB flash drives and external hard drives.
USB flash drives are compact and portable storage devices that connect to the Wii U via the console’s USB ports. They offer a convenient way to store and transfer smaller game files and save data. However, due to their limited storage capacity, USB flash drives may not be suitable for gamers with a vast collection of games or those looking to store larger files.
On the other hand, external hard drives provide a more extensive storage solution for the Wii U. These drives are available in a wide range of storage capacities, from a few hundred gigabytes to multiple terabytes. They offer ample space to store your game library, downloadable content, and backups.
It’s worth noting that not all external hard drives are compatible with the Wii U. The console supports drives that use the USB 2.0 and USB 3.0 standards. USB 3.0 drives offer faster data transfer speeds compared to USB 2.0 drives, resulting in quicker game load times. However, both USB 2.0 and USB 3.0 drives can be used with the Wii U, so you have flexibility in choosing the right drive for your needs.
Understanding the storage options available for the Wii U is essential in determining the type of external storage that best suits your gaming requirements. Whether you opt for a USB flash drive for its portability or an external hard drive for its larger capacity, each option has its own advantages and limitations that should be considered.
In the next section, we will discuss the factors to consider when choosing an external hard drive for your Wii U, helping you make an informed decision and ensuring a seamless gaming experience with ample storage space.
Factors to Consider When Choosing an External Hard Drive
When selecting an external hard drive for your Wii U, there are several important factors to take into consideration to ensure compatibility and optimal performance. By considering these factors, you can choose a drive that best suits your storage needs and enhances your gaming experience.
1. Storage Capacity: The primary consideration when choosing an external hard drive is its storage capacity. Evaluate your gaming needs and determine the amount of storage space required. Consider the size of your game library, downloadable content, and any future expansions. Opt for a drive with higher capacity if you have a vast collection of games or if you are planning to store large files.
2. Compatibility: Ensure that the external hard drive you choose is compatible with the Wii U. Look for drives that support either USB 2.0 or USB 3.0 standards, as these are the supported standards for the console. Note that while USB 3.0 drives offer faster data transfer speeds, USB 2.0 drives can still be used but may result in slower load times.
3. Power Source: Consider whether the external hard drive requires its own power source or can draw power directly from the Wii U. While most modern drives are powered by the USB connection, some larger capacity drives may require an additional power source. Ensure that your chosen drive is compatible with the power supply available to you.
4. Reliability and Durability: Look for an external hard drive that is reliable and durable. Gaming involves frequent file transfers and data access, so you need a drive that can withstand constant use. Read reviews and choose a reputable brand known for producing reliable and durable drives.
5. Portability: If portability is important to you, consider the size and weight of the external hard drive. A compact and lightweight drive can be convenient if you plan to travel with your Wii U or regularly connect the drive to different devices.
6. Price: Set a budget for your external hard drive purchase. Consider the price per gigabyte and balance it with the features and storage capacity you require. Research different drives and compare prices to ensure you get the best value for your money.
By taking these factors into account, you can make an informed decision when choosing an external hard drive for your Wii U. The right drive will provide ample storage space, compatibility with the console, and a reliable and durable solution for expanding your gaming library. In the next section, we will discuss the differences between USB 2.0 and USB 3.0 drives to help you determine which option is best suited for your needs.
USB 2.0 vs USB 3.0: Which is Better for Wii U?
When it comes to choosing between USB 2.0 and USB 3.0 external hard drives for your Wii U, it’s important to understand the differences between these two standards and how they can impact your gaming experience. Both options are compatible with the Wii U, but there are some key distinctions worth considering.
USB 2.0 is an older standard that has been around since the early 2000s. It offers a maximum data transfer rate of up to 480 Mbps (megabits per second). While this may seem sufficient for most gaming needs, it can result in slower load times when compared to the faster USB 3.0 standard.
USB 3.0, also known as USB 3.1 Gen 1, is a newer and faster standard introduced in 2008. It boasts a maximum data transfer rate of up to 5 Gbps (gigabits per second), offering significantly faster file transfer speeds compared to USB 2.0. This means that games and other data can be loaded more quickly from an external hard drive connected via USB 3.0.
The improved speed of USB 3.0 can be particularly beneficial if you have a large game library or frequently transfer large files. It reduces the waiting time during game launches and data transfers, resulting in a smoother and more enjoyable gaming experience.
However, it’s important to consider that the Wii U’s internal hardware limitations may not allow you to fully utilize the speed capabilities of USB 3.0. While USB 3.0 drives are compatible with the Wii U, the console itself has a USB 2.0 interface. This means that the maximum data transfer rate will be limited by the USB 2.0 interface, so you may not experience the full speed potential of a USB 3.0 drive.
Despite this limitation, USB 3.0 drives can still offer advantages over USB 2.0 drives. The increased speed can result in slightly faster load times and quicker access to game files. Additionally, if you plan to use the same external hard drive with other devices that support USB 3.0, such as a computer or another gaming console, having a USB 3.0 drive can be advantageous for faster file transfers between devices.
In summary, while USB 3.0 offers faster data transfer speeds compared to USB 2.0, the Wii U’s USB 2.0 interface may limit the maximum transfer rate. However, USB 3.0 drives can still provide slight performance improvements over USB 2.0 drives and offer compatibility with other USB 3.0 devices. Therefore, if budget permits, opting for a USB 3.0 drive can provide some future-proofing and enhance your gaming experience, even if the full speed potential may not be utilized on the Wii U. In the next section, we will provide some recommended external hard drives that are compatible with the Wii U.
Recommended External Hard Drives for Wii U
When choosing an external hard drive for your Wii U, it’s important to select a drive that is not only compatible with the console but also offers reliable performance and sufficient storage space. To help you make an informed decision, we have compiled a list of recommended external hard drives that are compatible with the Wii U:
1. Seagate Expansion Portable External Hard Drive: Available in various storage capacities ranging from 1TB to 4TB, this drive offers a compact and lightweight design, making it easy to carry around. It is powered via the USB connection, eliminating the need for an additional power source.
2. Western Digital WD_BLACK P10 Game Drive: Designed specifically for gaming, the WD_BLACK P10 offers storage capacities of up to 5TB. With USB 3.2 Gen 1 connectivity, it provides fast data transfer speeds and a durable design built to withstand gaming environments.
3. Toshiba Canvio Basics Portable External Hard Drive: This portable drive is available in capacities of 1TB, 2TB, and 4TB. With a sleek and compact design, it is perfect for expanding your Wii U’s storage. It is USB 3.0 compatible and offers reliable performance.
4. Samsung T5 Portable SSD: While technically not a traditional hard drive, the Samsung T5 Portable SSD offers lightning-fast data transfer speeds and a durable design. With capacities ranging from 500GB to 2TB, it is ideal for gamers who prioritize speed and performance.
5. Seagate Backup Plus Slim Portable External Hard Drive: This slim and lightweight drive is available in capacities up to 5TB. It features USB 3.0 connectivity, and automatic backup software ensures that your game files and data are securely stored.
These are just a few examples of external hard drives that are compatible with the Wii U. When choosing a drive, consider the storage capacity, compatibility, price, and features that best suit your gaming needs.
Remember to check with the manufacturer for any firmware updates or compatibility concerns specific to the Wii U. It’s also recommended to read user reviews and compare prices to find the best deal for your chosen drive.
By selecting a reliable and compatible external hard drive from our recommended list, you can significantly expand your Wii U’s storage capacity and ensure a smooth gaming experience with ample space for your game library and downloadable content.
Setting up an External Hard Drive for Wii U
Once you have chosen a compatible external hard drive for your Wii U, the next step is to set it up and prepare it for use with the console. Here is a step-by-step guide on how to set up an external hard drive for your Wii U:
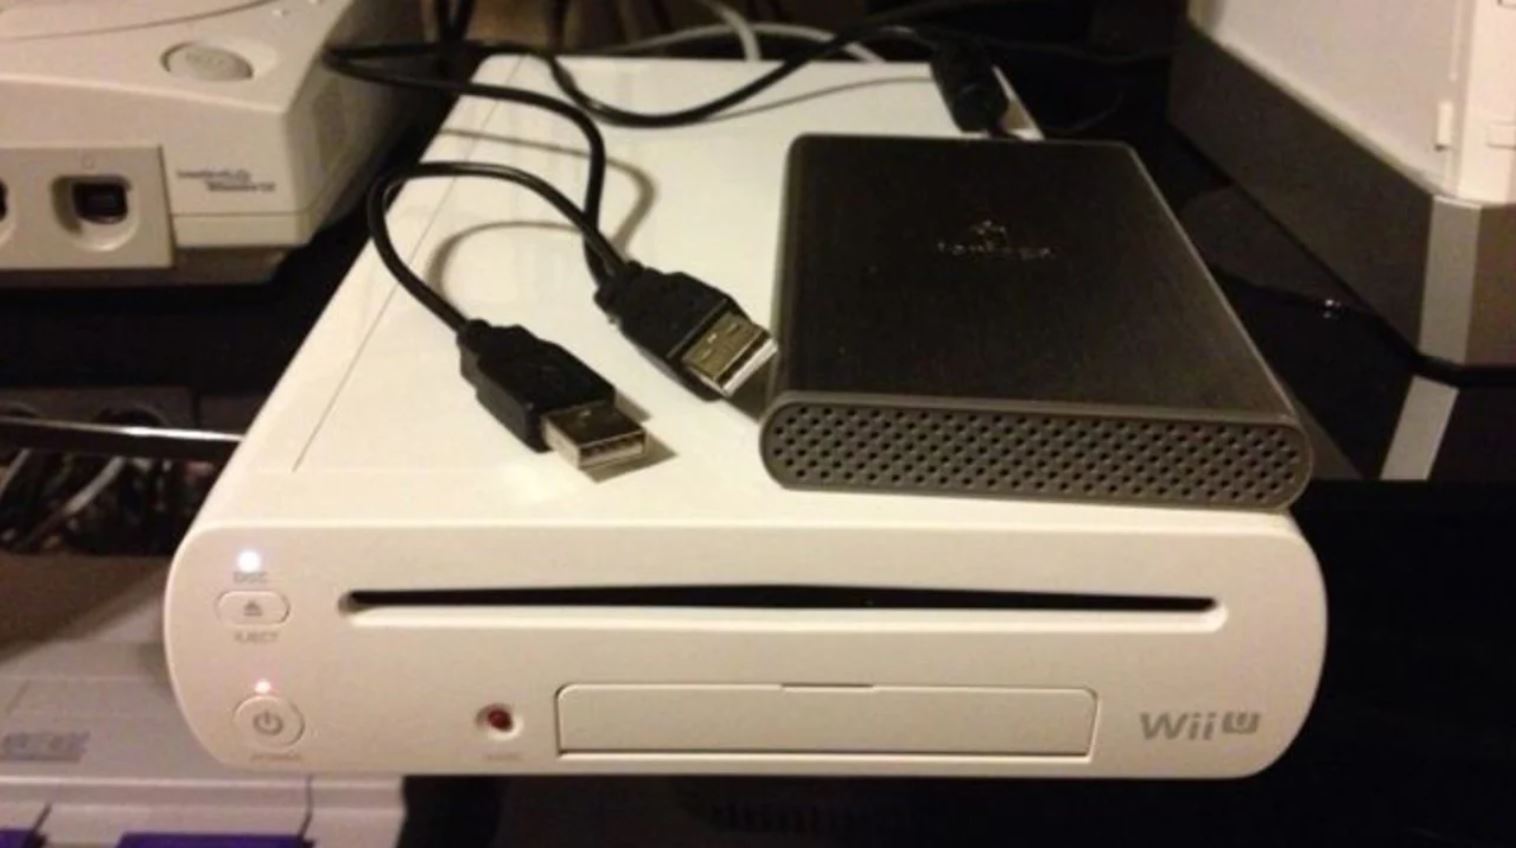
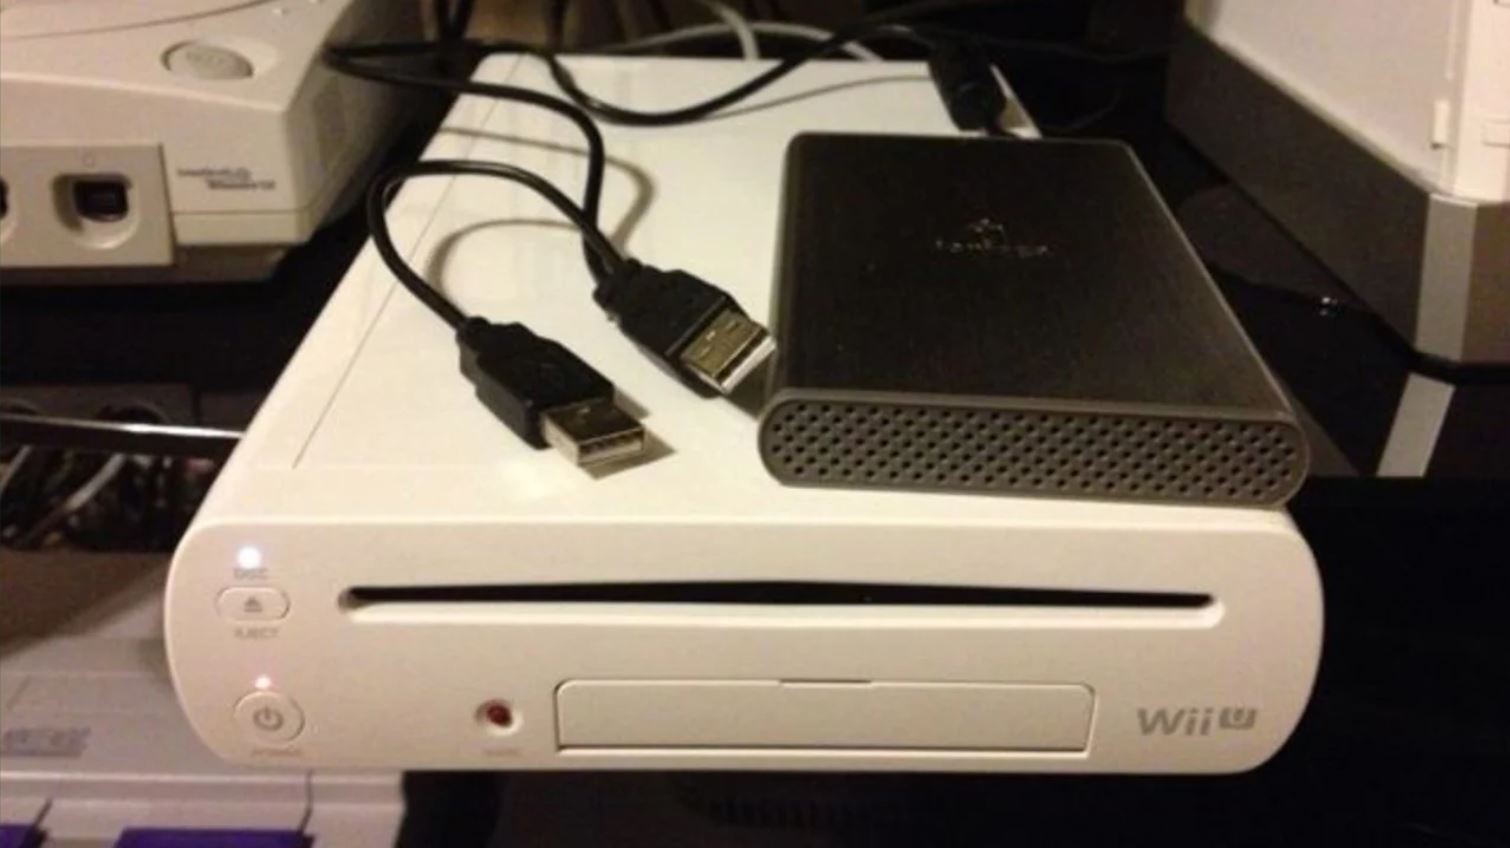
1. Connect the hard drive: Plug the USB cable of the external hard drive into one of the USB ports on the Wii U. Ensure that the drive is properly connected and powered on.
2. Access the Data Management menu: Turn on your Wii U and navigate to the System Settings menu. From there, select “Data Management” and then “External Storage”.
3. Initialize the hard drive: The Wii U will detect the newly connected external hard drive. Select the drive from the list of available storage devices and choose to “Format” it for use with the Wii U.
4. Confirm the format: A warning message will appear, stating that formatting the drive will erase all existing data. If you have no important data on the drive or have already backed it up, proceed with the formatting process.
5. Wait for the formatting to complete: The Wii U will format the drive to be compatible with the console’s file system. The time taken to format the drive will depend on its size and current condition.
6. Set the default USB storage: Once the formatting is complete, you will be prompted to set the default USB storage. Choose to use the newly formatted external hard drive as the default storage device for your games and other data.
7. Complete the setup: After setting the default USB storage, the Wii U will finalize the process. You can now start downloading games and transferring game data to the external hard drive.
It’s important to note that formatting the external hard drive for the Wii U will erase all existing data on the drive. Therefore, it’s recommended to back up any important files before proceeding with the setup process.
Additionally, ensure that you follow the manufacturer’s instructions for proper setup and usage of the external hard drive. Some drives may require regular firmware updates for optimal performance and compatibility with the Wii U.
By following these steps, you can successfully set up an external hard drive for your Wii U, expanding its storage capacity and ensuring that you have enough space to store your games and other data.
Formatting the External Hard Drive for Wii U
Formatting an external hard drive for use with your Wii U is a crucial step in preparing it for optimal compatibility and performance. By formatting the drive, you ensure that it uses the proper file system supported by the console. Here’s a step-by-step guide on how to format an external hard drive for your Wii U:
1. Connect the external hard drive: Plug the USB cable of the external hard drive into one of the available USB ports on your Wii U. Make sure the drive is properly connected and powered on.
2. Access the Data Management menu: Turn on your Wii U and navigate to the System Settings menu. From there, select “Data Management” and then “External Storage”.
3. Format the hard drive: The Wii U will detect the connected external hard drive and display the drive’s information. Select the drive from the list and choose the “Format” option. This will initiate the formatting process.
4. Confirm the format: A warning message will appear, informing you that all data on the drive will be erased by formatting. If you have any important data on the drive, make sure to back it up before proceeding. Confirm your decision to format the drive.
5. Wait for the formatting to complete: The Wii U will format the external hard drive using the appropriate file system for the console. The time required for formatting will depend on the size and condition of the drive.
6. Formatting completion: Once the formatting process is finished, a notification will appear on the screen, indicating that the external hard drive is now ready for use with your Wii U.
It’s important to note that formatting an external hard drive for the Wii U will erase all existing data on the drive. Therefore, make sure to back up any important files before proceeding with the formatting process.
It’s also worth mentioning that the Wii U uses a custom Wii U File System (WFS), and the formatting process will optimize the external hard drive to work seamlessly with the console. Avoid trying to format the drive using a different file system as it may not be compatible with the Wii U.
By following these steps, you can successfully format an external hard drive for use with your Wii U. This will ensure compatibility and allow you to store games, downloadable content, and other data on the drive, enhancing your gaming experience and expanding the storage capacity of your console.
Transferring Game Data to the External Hard Drive
After setting up and formatting your external hard drive for your Wii U, you can now begin transferring game data to the drive. This allows you to free up space on the console’s internal storage and store games directly on the external hard drive. Here is a step-by-step guide on how to transfer game data to the external hard drive:
1. Access the Data Management menu: Turn on your Wii U and navigate to the System Settings menu. From there, select “Data Management” and then “Data Storage”.
2. Select the game data to transfer: In the Data Storage menu, you will see a list of all the games and their associated data stored on the console. Select the game data you want to transfer to the external hard drive.
3. Choose “Move” or “Copy”: After selecting the game data, choose the desired option – “Move” or “Copy”. “Move” will transfer the data to the external hard drive and remove it from the internal storage, freeing up space. “Copy” will create a duplicate of the data on the external hard drive while keeping it on the internal storage as well.
4. Select the external hard drive: If you have multiple external hard drives connected to your Wii U, choose the appropriate drive to transfer the game data to. Confirm your selection.
5. Wait for the transfer to complete: The Wii U will begin transferring the selected game data to the external hard drive. The time taken will depend on the size of the data being transferred.
6. Repeat the process for other games: If you have more games or additional game data to transfer, repeat the above steps for each game individually.
By using this process, you can transfer game data from your Wii U’s internal storage to the external hard drive, freeing up space on the console while keeping your games accessible to play.
It’s important to note that once game data is transferred to the external hard drive, you will need to have the drive connected to the console in order to access and play those games. Disconnecting the external hard drive will result in the games not appearing on the Wii U’s menu until the drive is reconnected.
Additionally, for games that require regular updates or patches, ensure that your Wii U is connected to the internet while playing the games from the external hard drive. This will allow the console to download and install any necessary updates.
With the ability to transfer game data to an external hard drive, you can store a larger collection of games and downloadable content without worrying about limited internal storage. Enjoy the convenience and flexibility of playing your favorite games directly from the external hard drive, enhancing your gaming experience on the Wii U.
Managing Storage Space on the Wii U’s External Hard Drive
Once you have transferred game data to your Wii U’s external hard drive, it’s important to manage the storage space efficiently to ensure optimal performance and make the most of the available capacity. Here are some tips for managing storage space on the Wii U’s external hard drive:
1. Regularly review and organize your game library: As you accumulate more games on your external hard drive, take the time to review and organize your game library. Remove any games that you no longer play or need to free up space for new additions.
2. Delete unnecessary game updates and patches: Game updates and patches can take up significant storage space. If you no longer play certain games or require older updates, delete them from the external hard drive to recover valuable storage space.
3. Consider reinstalling games when needed: If storage space becomes limited on your external hard drive, you can consider uninstalling and reinstalling games as needed. This allows you to manage the games you currently play or prioritize, providing more space for new installations.
4. Use the Wii U’s built-in data management tools: The Wii U provides data management tools that allow you to manage game data, save files, and downloads. Utilize these tools to easily identify and delete any unnecessary files or data that are taking up valuable space on the external hard drive.
5. Regularly back up your game saves: Game saves can accumulate over time and consume storage space. To avoid data loss while freeing up space, regularly back up your game saves to another storage device, such as a computer or cloud storage.
6. Consider upgrading your external hard drive if necessary: If you find that you consistently run out of storage space on your current external hard drive, consider upgrading to a larger capacity drive. This will provide you with additional space to store more games and downloadable content without the need for constant management.
By following these tips and managing the storage space on your Wii U’s external hard drive, you can ensure that you have enough space to accommodate your game library while maintaining optimal performance. Regularly assess your storage needs and make adjustments as necessary to maximize your gaming experience on the Wii U.
Conclusion
Expanding the storage capacity of your Wii U with an external hard drive is a smart decision for gamers who want to store a larger collection of games and downloadable content. By choosing a compatible and reliable external hard drive, formatting it correctly, and efficiently managing storage space, you can enhance your gaming experience and ensure ample storage for your Wii U’s needs.
In this article, we explored the different options available for external storage on the Wii U, including USB flash drives and external hard drives. We discussed the factors to consider when choosing an external hard drive, such as storage capacity, compatibility, and portability.
We also discussed the differences between USB 2.0 and USB 3.0 drives and how they impact the Wii U’s performance. While the Wii U’s internal hardware limitations may not fully utilize the speed advantages of USB 3.0 drives, they still offer improvements in load times and compatibility with other devices.
Furthermore, we provided a list of recommended external hard drives that are compatible with the Wii U, offering a range of storage capacities and features to suit different gaming needs. We also covered the steps involved in setting up and formatting an external hard drive for use with the Wii U, as well as transferring game data and managing storage space effectively.
With a properly set up external hard drive, you can enjoy a vast library of games without worrying about limited internal storage. As you embark on your gaming adventures, remember to back up your game saves and regularly organize and manage your game library to optimize storage space.
Overall, by following the recommendations and guidelines provided in this article, you can make the most of your Wii U’s external storage options, expand your storage capacity, and ensure a smooth and enjoyable gaming experience.