Introduction
Welcome to the world of 3D scanning, where precision and accuracy are paramount. In this digital age, 3D scanning has emerged as a versatile technology with applications in various industries such as manufacturing, architecture, healthcare, and entertainment. As the demand for high-quality 3D scans continues to rise, the importance of calibration for 3D scanners cannot be overstated.
A certificate of calibration plays a crucial role in ensuring the accuracy and reliability of 3D scans. It serves as tangible proof that a 3D scanner has been precisely calibrated, guaranteeing that the measurements it captures are accurate and consistent. But what exactly is a certificate of calibration, and why is it so important?
In this article, we will explore the concept of a certificate of calibration for 3D scanners. We will delve into the reasons why calibration is essential, the information included in a certificate of calibration, the calibration process itself, and the frequency at which a 3D scanner should be calibrated.
Whether you are a professional utilizing 3D scanning technology in your field or an individual interested in understanding more about the calibration process, this article will provide you with valuable insights into the world of 3D scanning and the significance of calibration.
What Is a Certificate of Calibration?
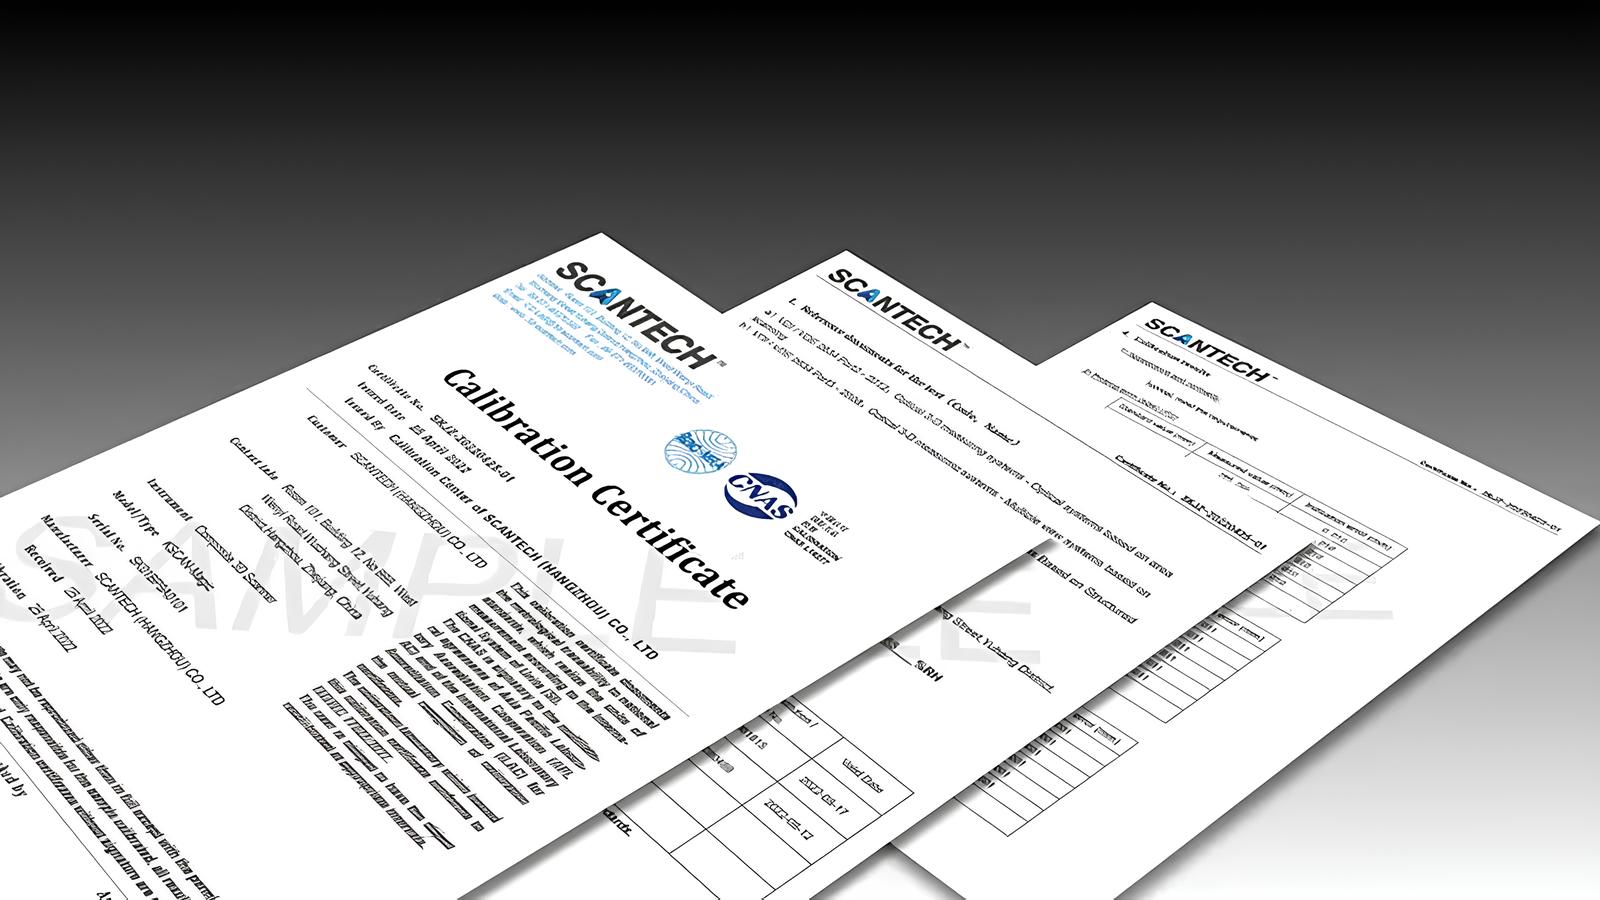
A certificate of calibration is a document that verifies the accuracy and precision of a 3D scanner’s measurements. It is issued by a certified calibration laboratory or manufacturer and serves as tangible evidence of the calibration process undergone by the scanner. The certificate contains essential information regarding the scanner’s calibration status, including the date of calibration, the calibration standards used, and the results of the calibration tests.
The primary purpose of a certificate of calibration is to ensure that the 3D scanner is performing within specified tolerances and meets industry standards. It provides assurance to users that the scanner’s measurements are accurate and reliable, allowing them to have confidence in the data they obtain through 3D scanning.
Calibration involves comparing the measurements of the 3D scanner against a known and traceable standard. This process helps to identify any deviations or errors in the scanner’s measurements and allows for adjustments to be made to ensure accuracy. Once the calibration is completed, the results are documented in the certificate of calibration.
It is essential to note that a certificate of calibration is not a one-time document. Calibration needs to be performed periodically to account for the normal wear and tear, environmental factors, and potential drift in the scanner’s performance over time. Each instance of calibration will result in a new certificate, indicating the new calibration date and the scanner’s updated calibration status.
Having a certificate of calibration is especially crucial for 3D scanning applications that require precise measurements, such as reverse engineering, quality control, and dimensional analysis. It provides a level of confidence in the accuracy of the scanner’s output, ensuring that the data collected can be relied upon for making informed decisions and achieving the desired outcomes.
In the next section, we will explore why calibration is integral to the performance of 3D scanners and the benefits it brings to various industries.
Why Is Calibration Important for 3D Scanners?
Calibration is of utmost importance for 3D scanners as it ensures the accuracy, reliability, and consistency of the measurements they capture. Here are several key reasons why calibration is important:
1. Accuracy: Calibration ensures that the measurements obtained by a 3D scanner align with the true dimensions of the scanned object. By comparing the scanner’s measurements against a known standard, any deviations or errors can be identified and corrected. This ensures that the data collected is precise and trustworthy.
2. Consistency: Calibration helps maintain consistent results over time. As 3D scanners are used repeatedly, factors such as environmental conditions, temperature variations, or wear and tear can impact their performance. Calibration compensates for these factors, ensuring that the scanner consistently provides accurate measurements.
3. Quality Assurance: Calibration plays a vital role in quality assurance processes. Industries that rely on 3D scanning, such as manufacturing and inspection, require precise measurements to meet strict standards. Calibration ensures that the scanners used in these industries meet the required accuracy and precision criteria, ensuring high-quality outputs and preventing costly errors.
4. Compliance: Certain industries, such as medical or aerospace, have regulatory requirements that demand calibrated and traceable measurement devices. Calibration allows 3D scanners to meet these compliance standards, providing assurance that the measurements obtained meet the industry-specific requirements and regulations.
5. Enhanced Efficiency: A calibrated 3D scanner reduces the need for rework and re-scanning. By ensuring accurate measurements from the start, calibration saves time, resources, and effort. It enables streamlined workflows, increases productivity, and facilitates faster decision-making processes.
6. Customer Confidence: For businesses that offer 3D scanning services, having calibrated scanners and providing certificates of calibration instills confidence in customers. The provision of this documentation demonstrates a commitment to accuracy and quality, building trust and credibility with clients.
In summary, calibration is essential for 3D scanners to maintain accuracy, consistency, and reliability in their measurements. It ensures compliance with industry standards, enhances efficiency, and fosters confidence among users. In the next section, we will explore the information typically included in a certificate of calibration for a 3D scanner.
What Information Is Included in a Certificate of Calibration?
A certificate of calibration for a 3D scanner contains essential information that validates the calibration process and provides detailed insights into the scanner’s performance. While the specific details may vary based on the calibration facility or manufacturer, the following information is typically included:
1. Calibration Date: This is the date on which the calibration of the 3D scanner was performed. It signifies the starting point from which the scanner’s accuracy is measured and helps determine when the next calibration is due.
2. Calibration Standards Used: The certificate specifies the specific calibration standards utilized during the calibration process. These standards are traceable to internationally recognized measurement standards, ensuring the accuracy and reliability of the calibration.
3. Calibration Procedure: The certificate outlines the calibration procedure followed during the calibration process. It provides a summary of the steps taken, including the specific tests performed, the equipment used, and any adjustments made to the scanner.
4. Measurement Results: The certificate presents the measurement results obtained during the calibration process. This includes information on the accuracy, precision, and repeatability of the scanner’s measurements, usually reported as a measurement uncertainty.
5. Calibration Status: The certificate indicates the calibration status of the 3D scanner. It specifies whether the scanner passed or failed the calibration tests based on predefined tolerance limits. A “pass” indicates that the scanner’s measurements meet the required accuracy standards, while a “fail” signifies the need for adjustments or further calibration.
6. Instrument Identification: The certificate includes the relevant information about the 3D scanner being calibrated. This typically includes the scanner’s make, model, serial number, and any additional identifying details.
7. Accreditation and Certification: The certificate may provide information regarding the accreditation or certification of the calibration facility or manufacturer. This demonstrates that the calibration lab follows internationally recognized quality standards, further enhancing the credibility and reliability of the calibration.
8. Signatures and Seal: A certificate of calibration is typically signed by the calibration technician or an authorized representative of the calibration facility. It may also bear an official seal or stamp, ensuring authenticity and validity.
The information included in a certificate of calibration provides users with the necessary details to confidently evaluate the accuracy and reliability of the 3D scanner’s measurements. It serves as a tangible document to demonstrate compliance with industry standards and regulatory requirements.
In the next section, we will delve into the calibration process itself and how 3D scanners are calibrated.
How Is a 3D Scanner Calibrated?
The calibration process for a 3D scanner involves a series of steps to ensure its accuracy and reliability. While the specific calibration procedure may vary depending on the scanner make and model, the following is a general overview of how 3D scanners are calibrated:
1. Preparation: The calibration process begins with preparing the 3D scanner and the calibration equipment. This may involve cleaning the scanner to eliminate any dust or debris that could interfere with the measurements.
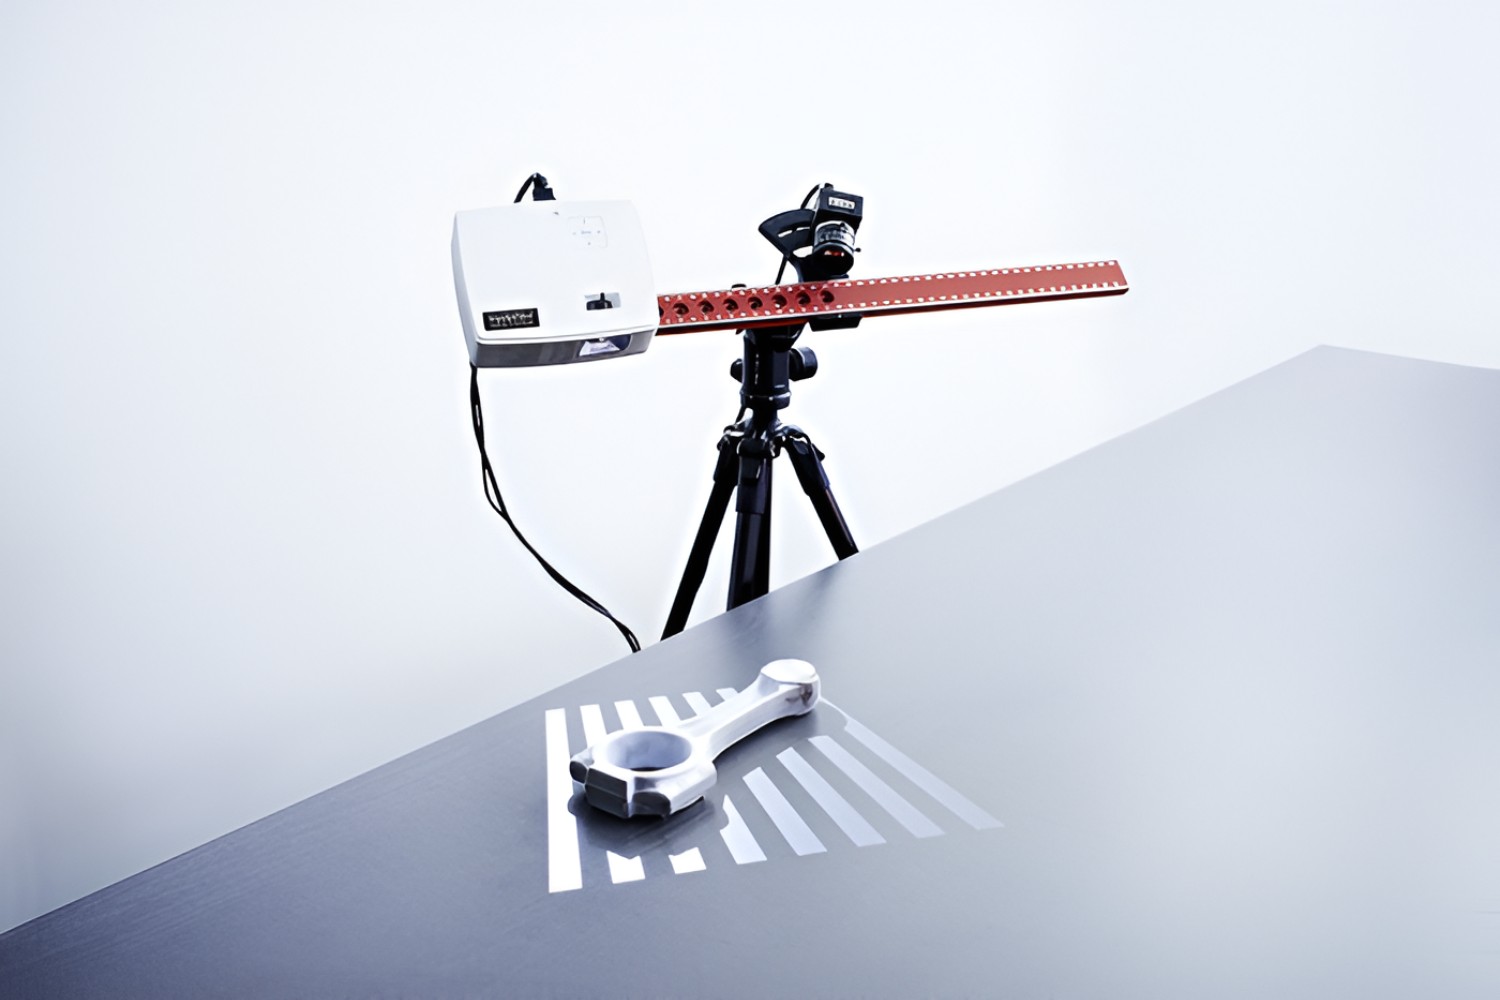
2. Calibration Target: A calibration target, often in the form of a calibration plate or object with known dimensions, is used in the calibration process. The target provides a reference for the scanner to compare its measurements against known values.
3. Multiple Measurements: The 3D scanner captures multiple scans of the calibration target from different angles and positions. This helps to establish a complete and accurate representation of the target’s geometry.
4. Alignment: The scans captured by the 3D scanner are then aligned and merged together to create a single point cloud or mesh representing the calibration target. This alignment process ensures that the various scans are properly registered and aligned with each other.
5. Comparison: The calibrated 3D scanner’s measurements are compared to the known dimensions of the calibration target. Any discrepancies or deviations are recorded and utilized to determine the scanner’s measurement errors.
6. Error Correction: Based on the discrepancies identified during the comparison, the calibration technician may apply correction factors to the 3D scanner’s measurements. These corrections help to compensate for systematic errors and improve the accuracy and reliability of the scanner’s measurements.
7. Verification: After the calibration process, the performance of the 3D scanner is verified to ensure that it meets the required accuracy and precision criteria. This verification may involve capturing additional scans of a separate validation target or an object with known dimensions.
8. Certificate of Calibration: Upon successful completion of the calibration process, a certificate of calibration is issued. This document includes detailed information about the calibration procedure, measurement results, and the calibration status of the 3D scanner.
It is important to note that calibration should be performed by trained professionals using certified calibration facilities or by following the guidelines recommended by the 3D scanner manufacturer. Calibrating a 3D scanner ensures that it performs optimally and provides accurate and reliable measurements for various applications.
In the next section, we will discuss the recommended frequency for calibrating a 3D scanner.
How Often Should a 3D Scanner Be Calibrated?
The frequency at which a 3D scanner should be calibrated depends on several factors, including the scanner’s usage, environment, and industry standards. While there is no one-size-fits-all answer, it is generally recommended to calibrate a 3D scanner at regular intervals to maintain its accuracy and reliability.
For most 3D scanners, an annual calibration is considered a standard practice. This ensures that the scanner’s accuracy is verified and any potential drift or changes in performance are addressed. However, more frequent calibration may be necessary under certain circumstances:
1. Intensive Use: If a 3D scanner is used heavily or in demanding applications, more frequent calibration may be required. Regular usage can result in wear and tear, which may impact the scanner’s accuracy over time. Calibration at shorter intervals can help catch any performance deviations and prevent compromised measurements.
2. Changes in Environment: Environmental factors, such as temperature fluctuations or humidity variations, can affect a 3D scanner’s performance. If the scanner is used in different environments or experiences significant changes in operating conditions, calibration may be needed more frequently to ensure accurate measurements.
3. Calibration Drift: Some 3D scanners may exhibit calibration drift, where their measurements gradually deviate from the accurate values over time. If a scanner demonstrates such tendencies, it may require more frequent calibration to maintain measurement accuracy.
4. Industry Standards and Regulations: Certain industries or applications may have specific requirements or regulations that dictate the calibration frequency for 3D scanners. For example, industries with stringent quality control standards, medical devices, or aerospace applications may necessitate more frequent calibration to comply with industry-specific guidelines.
5. Manufacturer Recommendations: It is advisable to follow the manufacturer’s guidelines and recommendations regarding calibration frequency. They are familiar with the specific characteristics and performance of their scanners and can provide insights into the ideal calibration intervals for their products.
Ultimately, the decision on how often to calibrate a 3D scanner should be based on a careful assessment of the scanner’s usage, environment, and any industry-specific requirements. Regular calibration helps maintain the scanner’s accuracy, consistency, and reliability, ensuring high-quality measurement outputs.
In the following section, we will explore the benefits of using a calibrated 3D scanner in various industries.
Benefits of Using a Calibrated 3D Scanner
Using a calibrated 3D scanner offers numerous benefits across various industries and applications. Let’s explore some of the key advantages:
1. Accurate and Reliable Measurements: A calibrated 3D scanner ensures precise and consistent measurements, resulting in accurate and reliable data. This accuracy is crucial in applications such as reverse engineering, quality control, and dimensional analysis, where precise measurements are necessary for achieving desired outcomes and making informed decisions.
2. Quality Assurance: Calibrated scanners provide confidence in the quality of the 3D scans produced. When using a calibrated scanner, businesses can have peace of mind knowing that their products or components meet the required specifications and comply with industry standards. This helps prevent costly errors, reduces rework, and ensures customer satisfaction.
3. Compliance with Regulations: In industries such as healthcare, aerospace, or manufacturing, compliance with stringent regulations is vital. Using a calibrated 3D scanner helps meet regulatory requirements by ensuring the accuracy, traceability, and reliability of measurements. This is essential for maintaining safety standards, product certification, and legal compliance.
4. Efficiency and Time Savings: By using a calibrated scanner, users can streamline their workflows and save time. The accuracy of the measurements from a calibrated scanner reduces the need for rework, re-scanning, and manual corrections. This leads to increased efficiency, faster decision-making, and overall improved productivity.
5. Enhanced Product Development: Calibrated scanners are valuable tools in product development and design. Accurate 3D scans enable precise analysis and measurement of physical objects, facilitating the creation of accurate CAD models and improving the overall design process. This results in better product quality, reduced development cycles, and enhanced innovation.
6. Customer Confidence: Using calibrated scanners and providing certificates of calibration builds trust and confidence among customers. It demonstrates a commitment to accuracy, quality, and professionalism. Clients can rely on the accuracy of the 3D scans provided, leading to stronger client relationships and repeat business.
7. Long-Term Cost Savings: Regular calibration of a 3D scanner helps detect and address any performance deviations or issues early on. By identifying and resolving such problems promptly, businesses can avoid costly errors, production delays, and potential rework. This leads to long-term cost savings and improved return on investment.
Overall, the benefits of using a calibrated 3D scanner span across accuracy, compliance, efficiency, improved product development, customer satisfaction, and cost savings. Regular calibration ensures that the scanner operates at its optimal performance, providing accurate and reliable measurements for a multitude of applications.
In the next section, we will conclude our discussion on the importance of calibration for 3D scanners.
Conclusion
Calibration is an essential aspect of maintaining the accuracy, reliability, and performance of 3D scanners. A certificate of calibration serves as tangible proof that a scanner has undergone the calibration process and ensures that its measurements meet industry standards. It provides confidence to users that the 3D scanner’s measurements are accurate and trustworthy.
We explored the key components of a certificate of calibration, including the calibration date, calibration standards used, calibration procedure, measurement results, calibration status, instrument identification, and accreditation. Each of these elements contributes to validating the calibration process and the accuracy of the 3D scanner’s measurements.
Calibration holds significant importance for 3D scanners as it ensures accuracy, consistency, quality assurance, compliance with regulations, and enhanced efficiency. A calibrated 3D scanner eliminates errors, saves time and resources, and fosters customer confidence in the data collected through 3D scanning.
The frequency of calibrating a 3D scanner depends on factors such as usage, environmental conditions, calibration drift, industry requirements, and manufacturer recommendations. Regular calibration, typically once a year, helps identify any deviations or changes in performance, ensuring that the scanner’s accuracy is consistently maintained.
Using a calibrated 3D scanner offers numerous benefits, including accurate and reliable measurements, quality assurance, compliance with regulations, efficiency and time savings, enhanced product development, customer confidence, and long-term cost savings. These advantages make calibrated 3D scanners indispensable tools in various industries and applications.
In conclusion, calibration is a critical aspect of utilizing 3D scanning technology effectively. By ensuring the accuracy and reliability of measurements, calibration enables businesses and professionals to make informed decisions, meet quality standards, comply with regulations, and achieve successful outcomes in their respective fields.


