Introduction
Welcome to the exciting world of 3D scanning! In today’s digital age, 3D scanning has become increasingly popular, allowing us to capture real-world objects and convert them into three-dimensional digital models. Whether you’re a hobbyist, a designer, or an engineer, learning how to use a 3D scanner on Windows opens up a world of possibilities for creating, prototyping, and visualizing your ideas.
But what exactly is a 3D scanner? A 3D scanner is a device that captures the geometry and texture of an object to create a digital representation in three dimensions. It allows you to scan objects of various sizes and complexities, ranging from small parts to entire buildings. The scanned data can then be used for a multitude of applications, including 3D printing, virtual reality, animation, and reverse engineering.
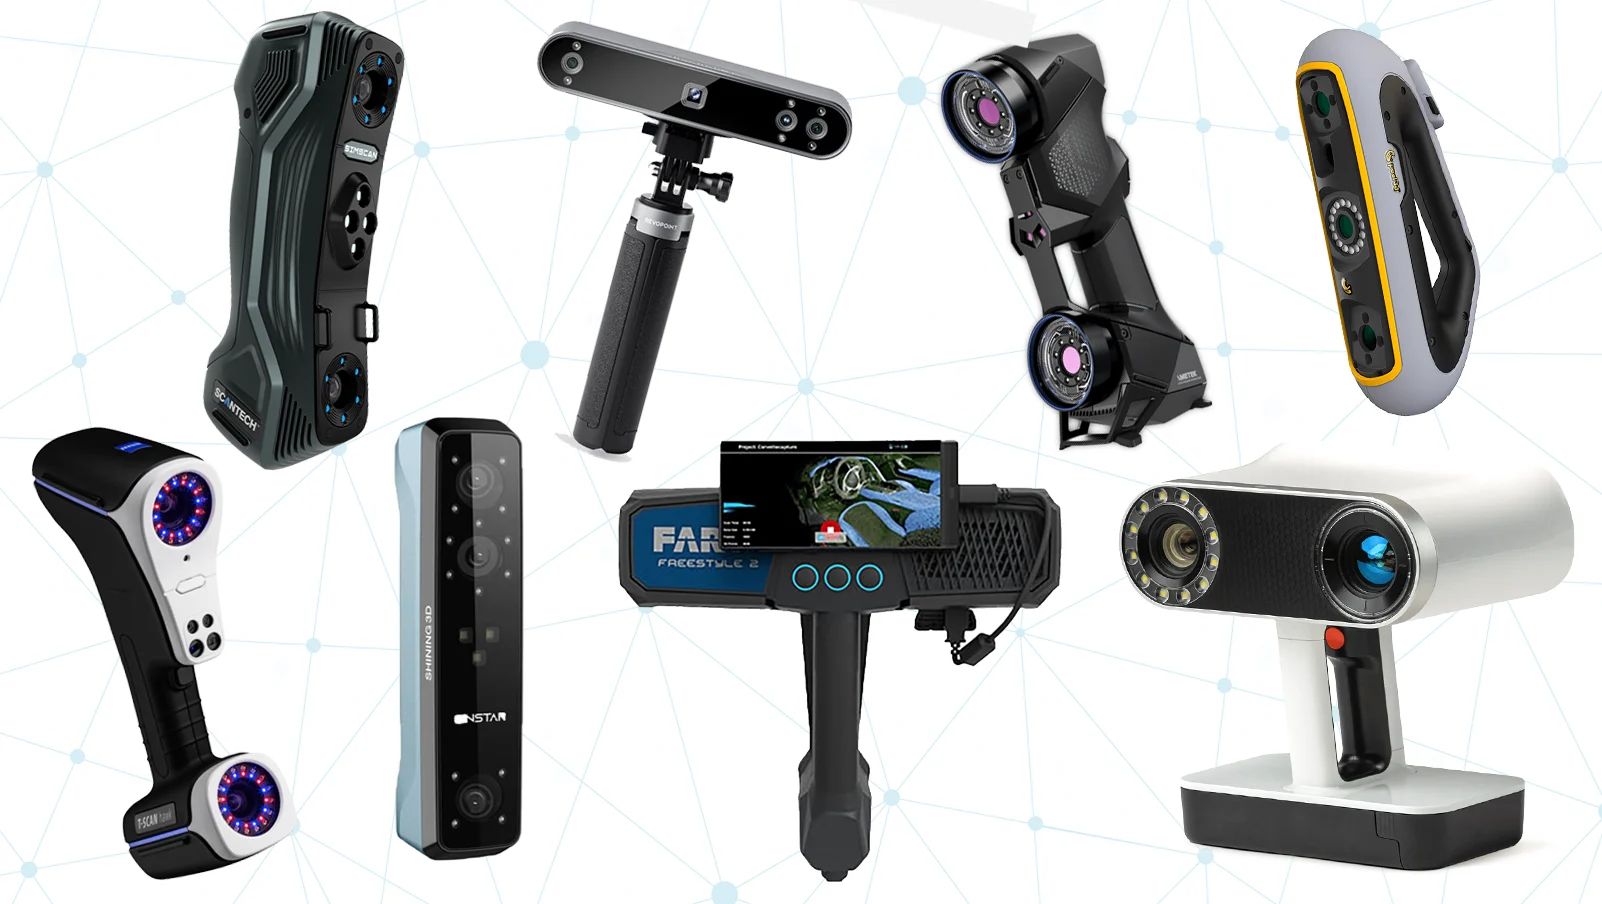
There are different types of 3D scanners available on the market. Some use laser technology to measure the distances between the scanner and the object’s surface, while others utilize structured light patterns or even photogrammetry techniques. Each type comes with its own pros and cons, and the choice depends on your specific scanning needs and budget.
Before you start using a 3D scanner on Windows, there are a few hardware and software requirements you need to consider. First and foremost, you’ll need a Windows PC with sufficient processing power and memory to handle the scanning software. It’s also important to have a compatible 3D scanner that is compatible with Windows and offers the necessary resolution and accuracy for your intended applications.
On the software side, you’ll need to install the appropriate 3D scanning software on your Windows PC. This software will provide you with the tools and functionalities needed to control and process the scanned data. There are various software options available, both free and paid, each offering different features and capabilities.
In this guide, we’ll take you through the process of using a 3D scanner on Windows, from installing the software to scanning an object and editing the resulting 3D model. We’ll cover the essential steps and provide helpful tips along the way, allowing you to unleash your creativity and explore the endless possibilities of 3D scanning.
What is a 3D Scanner?
A 3D scanner is a device that captures the physical characteristics of an object or environment and converts it into a digital 3D model. It essentially enables the digitalization of real-world objects, providing a detailed and accurate representation of their shape, texture, and color. The resulting 3D model can then be manipulated, analyzed, or used for various applications in industries like architecture, manufacturing, entertainment, and healthcare.
3D scanners use different technologies and techniques to capture the geometry and appearance of objects. Some popular methods include laser scanning, structured light scanning, and photogrammetry. Laser scanners emit laser beams to measure the distance between the scanner and the object’s surface, enabling the creation of a detailed point cloud. Structured light scanners project patterns of light onto the object and capture the distortions to reconstruct the 3D shape. Photogrammetry relies on taking multiple images of the object from different angles and using software algorithms to calculate the depth and positions of points in space.
The applications of 3D scanners are vast and diverse. In architecture and construction, 3D scanners are used for capturing existing building structures and generating accurate as-built models. This aids in renovation projects, construction planning, and documentation. In manufacturing, 3D scanners are used for quality control, reverse engineering, and prototyping. They enable precise measurements and allow for the recreation of objects in a digital format.
3D scanners also play a vital role in the entertainment industry. By capturing the 3D shape and appearance of objects, they are used in visual effects, gaming, and animation. Characters and environments can be scanned and brought to life in a virtual world, providing a level of realism and detail that was previously unattainable.
In the field of medicine and healthcare, 3D scanners are used for creating accurate patient models, custom implants, and prosthetics. They assist in surgical planning, orthodontics, and facial reconstructions, enhancing the precision and efficiency of medical procedures.
With advancements in technology, 3D scanners have become more accessible and affordable, allowing individuals and small businesses to explore the world of 3D scanning. Whether you’re a designer looking to create intricate prototypes or an artist aiming to capture the human form in exquisite detail, a 3D scanner can open up new possibilities and unleash your creativity.
Types of 3D Scanners
There are several types of 3D scanners available, each utilizing different technologies and methods to capture the geometry and appearance of objects. Understanding the different types can help you choose the most suitable scanner for your specific needs. Let’s explore some of the common types of 3D scanners:
- Laser Scanners: Laser scanners use laser beams to measure the distance between the scanner and the object’s surface. This technology is based on the principle of time of flight or triangulation. Time of flight scanners emit laser pulses and measure the time taken for the laser to bounce back, calculating the distance to each point. Triangulation scanners emit a laser line or a series of laser dots onto the object and use the displacement of the laser’s reflection to determine the 3D shape. Laser scanners are known for their high accuracy and capture detailed geometry, making them suitable for precise measurements and intricate objects.
- Structured Light Scanners: Structured light scanners project patterns of light onto the object’s surface and capture the distortions caused by the object’s shape. By analyzing these distortions, the scanner can reconstruct the 3D shape. Structured light scanners can use different patterns like stripes, grids, or random dots. They are often faster in capturing data compared to laser scanners, making them suitable for scanning objects of various sizes and complexities.
- Photogrammetry Scanners: Photogrammetry scanners use a series of photographs taken from different angles to calculate the 3D position and depth of points on the object’s surface. Advanced software algorithms analyze the overlapping images and extract the geometry and texture information. Photogrammetry scanners are versatile, allowing for the scanning of large objects or environments using multiple cameras or even drones.
- Contact Scanners: Contact scanners require physical contact with the object’s surface to capture its shape. This is typically achieved using a probe or a robotic arm with various sensors. Contact scanners are often used for highly detailed and precise measurements, such as in industrial metrology or dental applications.
- X-Ray Scanners: X-Ray scanners are specialized scanners used in medical and industrial fields. They use X-ray technology to capture the internal structure of objects or to perform non-destructive testing. X-Ray scanners are capable of scanning complex materials, such as composite materials or biological specimens, providing valuable insights for various applications.
Each type of 3D scanner has its own advantages and limitations. Consider factors such as scanning speed, accuracy, resolution, and cost when selecting the most suitable scanner for your specific scanning requirements. Whether you need high-precision measurements or want to capture intricate details, there’s a 3D scanner type out there to fulfill your needs.
Hardware Requirements for Using a 3D Scanner on Windows
Before you start using a 3D scanner on your Windows PC, it’s important to ensure that your hardware meets the necessary requirements for a smooth scanning experience. Here are the key hardware considerations to keep in mind:
- Computer Specifications: Your Windows PC will serve as the control hub for the 3D scanner. It’s essential to have a computer with a powerful processor, sufficient RAM, and ample storage space. A multicore processor, such as an Intel Core i5 or i7, is recommended for optimal performance. At least 8GB of RAM is advisable to handle the resource-intensive scanning software smoothly. Additionally, make sure you have enough free storage space, as scanning large objects can generate significant amounts of data.
- Graphics Processing Unit (GPU): While a dedicated GPU is not necessarily required for basic 3D scanning, having a capable graphics card can greatly improve your scanning and rendering experience, especially when dealing with complex models or real-time previews. Look for a GPU with a decent amount of VRAM, such as an NVIDIA GeForce or AMD Radeon series, to handle the rendering tasks effectively.
- Connectivity: Depending on the type of 3D scanner you’re using, you may need specific connectivity options. Some scanners use USB or Thunderbolt connections, while others offer wireless connectivity. Ensure that your computer has the necessary ports or adapters to connect the scanner seamlessly. Additionally, a stable and high-speed internet connection may be required if you plan to use cloud-based scanning services or access online resources related to 3D scanning.
- Power Supply: Depending on the size and complexity of the objects you plan to scan, the scanning process can be time-consuming. It’s crucial to have a reliable power supply for your computer to avoid interruptions or unexpected shutdowns during scanning. Consider using a UPS (uninterruptible power supply) to protect your hardware and prevent data loss in case of power outages.
- 3D Scanner Compatibility: Ensure that the 3D scanner you’re using is compatible with Windows. Check the manufacturer’s specifications and system requirements to confirm compatibility with your specific version of Windows. Also, make sure that the scanner’s drivers and software are compatible with your operating system, as outdated or incompatible software can cause functionality issues.
By ensuring that your hardware meets these requirements, you can maximize the performance and reliability of your 3D scanning process. Having a well-equipped computer will allow you to handle the data-intensive tasks involved in scanning, processing, and editing the 3D models effectively. Remember to check the specific hardware recommendations provided by the scanner manufacturer, as they may have additional requirements or recommendations for optimal performance.
Software Requirements for Using a 3D Scanner on Windows
To utilize a 3D scanner effectively on your Windows PC, you’ll need to have the appropriate software installed. The software plays a crucial role in controlling the scanner, processing the scanned data, and editing the resulting 3D models. Here are the key software requirements for using a 3D scanner on Windows:
- 3D Scanning Software: The first requirement is the specific 3D scanning software that is compatible with your scanner. Many 3D scanner manufacturers provide their proprietary software to accompany their devices. These software packages are designed to work seamlessly with their respective scanners, offering features and functionalities tailored to their specifications. Make sure to download and install the correct software version for your scanner model, ensuring compatibility with your Windows operating system.
- Operating System Compatibility: Verify that the 3D scanning software you choose is compatible with your Windows operating system. Some software may only be compatible with specific versions, so it’s important to check for compatibility before installation. Additionally, ensure that you have the latest updates and service packs installed on your Windows PC to ensure smooth operation and support for the latest features of the software.
- System Requirements: Similar to hardware requirements, software also has specific system requirements. Check the software manufacturer’s specifications for CPU, RAM, and storage requirements. Additionally, some scanning software may require a specific graphics card or GPU for accelerated processing or real-time visualization. It’s important to ensure that your computer meets or exceeds these system requirements to ensure optimal performance and functionality.
- Post-Processing and Editing Software: While the 3D scanning software allows you to capture the geometry and texture of objects, you may also need post-processing and editing software to refine and optimize the resulting 3D models. This can include software packages like MeshLab, Blender, or Autodesk Meshmixer, which offer advanced editing tools for cleaning up the scanned data, aligning and merging multiple scans, and performing other necessary modifications.
- File Formats and Compatibility: Consider the compatibility of the file formats generated by your 3D scanning software. Ensure that the software supports popular file formats, such as OBJ, STL, or PLY, which are commonly used for further processing, editing, or sharing of 3D models. It’s also worth checking if the software allows for exporting files in formats supported by other software packages or 3D printers that you plan to use.
By satisfying these software requirements, you can ensure that you have the necessary tools and capabilities to control your 3D scanner, process the scanned data, and edit the resulting 3D models effectively. Remember to keep your software up to date, as software updates often include improvements, bug fixes, and new features that enhance the scanning experience and overall functionality.
Installing the 3D Scanning Software on Your Windows PC
Installing the 3D scanning software on your Windows PC is a crucial step to get started with your 3D scanning journey. This software allows you to control the scanner, capture the scanned data, and process the resulting 3D models. Here are the steps to install the 3D scanning software on your Windows PC:
- Verify System Requirements: Before you begin the installation process, make sure your computer meets the system requirements specified by the software manufacturer. Check the minimum CPU, RAM, storage, and graphics card specifications to ensure compatibility and optimal performance.
- Download the Software: Visit the scanner manufacturer’s website or the software developer’s official site to download the latest version of the 3D scanning software. Look for the specific software version that is compatible with your scanner model and Windows operating system. If there are multiple versions available, choose the one that suits your needs and requirements.
- Run the Installation Setup: Once the software package is downloaded, locate the installation file in your Downloads folder or the designated location on your computer. Double-click on the file to run the installation setup. Follow the on-screen prompts, such as accepting the terms and conditions and choosing the desired installation location, to proceed with the installation.
- Complete the Installation: After the setup wizard guides you through the necessary steps, the software will begin installing on your computer. The installation process may take a few minutes, depending on the size of the software package and the speed of your computer. Once the installation is complete, you may be prompted to restart your computer for the changes to take effect. It’s recommended to restart your computer to ensure a smooth installation.
- Update the Software: After the installation is complete, launch the 3D scanning software on your Windows PC. Check for any available software updates within the software or visit the manufacturer’s website to download and install the latest updates. Software updates often include improvements, bug fixes, and new features that enhance the usability and performance of the software.
- Connect the 3D Scanner: Once the software is installed and updated, connect your 3D scanner to your Windows PC using the appropriate cable or interface. The software should recognize the scanner, and you will be ready to start using it for your scanning projects.
By following these installation steps, you can successfully set up the 3D scanning software on your Windows PC. Remember to refer to the software’s user manual or online documentation for any specific instructions or troubleshooting steps that may be required during the installation process.
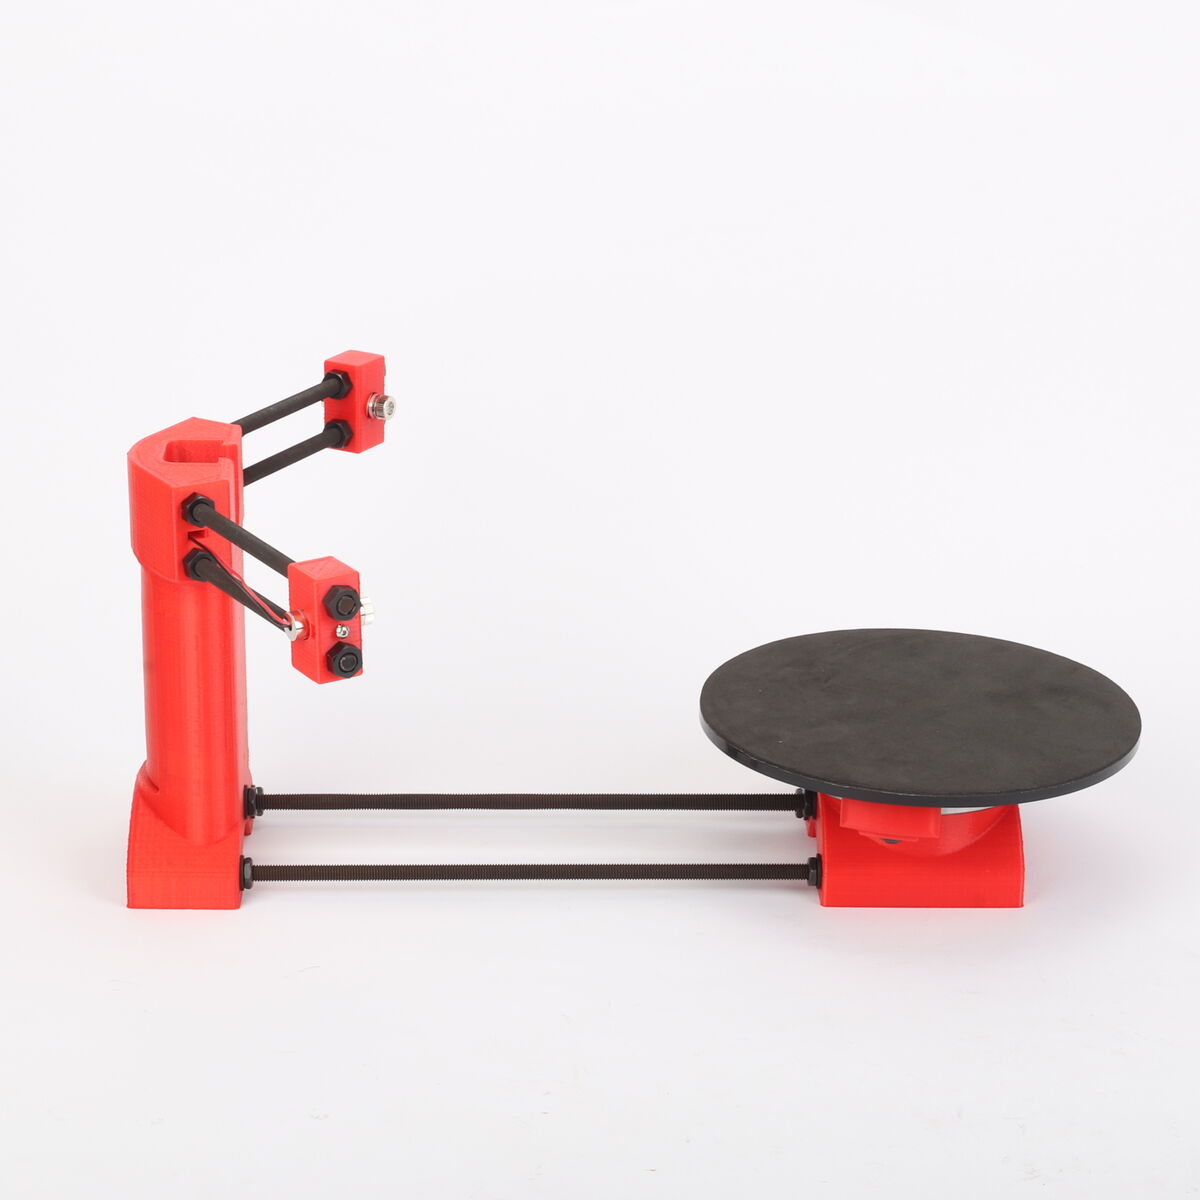
Setting Up the 3D Scanner Hardware
Once you have installed the 3D scanning software on your Windows PC, it’s time to set up the 3D scanner hardware. Proper setup ensures that the scanner is calibrated correctly and ready to capture accurate and high-quality 3D scans. Here are the steps to set up the 3D scanner hardware:
- Read the User Manual: Familiarize yourself with the user manual provided by the scanner manufacturer. It contains important information about the specific setup requirements and procedures for your scanner model. Ensure that you have all the necessary components, cables, and accessories as mentioned in the user manual.
- Choose an Appropriate Scanning Environment: Select a suitable space for scanning, preferably in a well-lit and clutter-free area. Ensure you have enough room to move around the object or the scanner, depending on the scanning technique. Consider using a clean and stable surface or a turntable to rotate the object during scanning if required.
- Connect Power and Cables: Connect the power cable to the scanner and plug it into a power outlet. Connect any additional cables, such as USB or Ethernet cables, to establish a connection between the scanner and your Windows PC. Make sure the connections are secure and properly inserted into their respective ports.
- Position the Scanner: Position the scanner according to the instructions provided in the user manual. Some scanners need to be mounted on a tripod or placed at a specific distance and angle from the object to obtain accurate measurements. Follow the recommended setup guidelines to ensure optimal scanning results.
- Calibrate the Scanner: Most 3D scanners require calibration to ensure accurate measurements and precise data capture. Follow the calibration procedures provided in the user manual or the software instructions to calibrate the scanner. This process typically involves capturing calibration patterns or using reference objects to establish a known scale or coordinate system.
- Test the Scanning Process: Before starting your actual scanning project, perform a test scan to ensure the scanner is functioning properly. Use a simple object or a calibration target provided by the manufacturer to capture a scan. Verify that the scan results are accurate and meet your expectations. Adjust any scanner settings or positioning if necessary.
- Explore Scanner Settings: Take some time to familiarize yourself with the scanning settings and options available in the software. Experiment with different settings like resolution, scanning speed, or texture capture to customize the scanning process according to your specific requirements.
By following these steps, you can effectively set up the 3D scanner hardware for scanning objects with precision and accuracy. Remember to refer to the specific instructions provided by the scanner manufacturer for any additional setup steps or troubleshooting guidelines. A well-set-up scanner ensures optimal performance, and it allows you to capture detailed and high-quality 3D scans for your projects.
Calibrating the 3D Scanner
Calibration is a crucial step in using a 3D scanner to ensure accurate measurements and precise data capture. By calibrating the scanner, you establish a known scale or coordinate system that allows the scanner to accurately determine the distances and positions of points in space. Here are the steps to calibrate the 3D scanner:
- Read the User Manual: Before starting the calibration process, it’s important to thoroughly read the user manual provided by the scanner manufacturer. The manual will provide specific instructions and guidelines for calibrating your particular scanner model.
- Prepare Calibration Tools: Some scanners come with specific calibration tools or targets, while others may require you to create or acquire calibration objects on your own. Follow the documentation provided by the manufacturer to gather the necessary calibration tools or print the calibration targets as instructed.
- Position the Calibration Object: Place the calibration object or target in the scanning area, ensuring it is stable and securely positioned. If the scanner requires multiple calibration positions, follow the manufacturer’s instructions to place the calibration object in each designated position.
- Initiate Calibration Mode: Launch the scanning software on your Windows PC and access the calibration mode or option. This can usually be found in the software settings or preferences. Follow the software’s instructions to enter the calibration mode.
- Scan the Calibration Object: In the calibration mode, use the scanner to capture scans of the calibration object or target from different angles and positions as specified by the manufacturer. Ensure that each scan covers the entire calibration object or target and captures all necessary details for calibration.
- Process the Scanned Data: Once the scans are captured, the software will process the data and use it to calibrate the scanner. This involves analyzing the known dimensions or reference points of the calibration object and adjusting the scanner’s internal parameters to ensure accurate measurements.
- Verify Calibration Results: After the calibration process is complete, perform a validation test by scanning a calibration check object or target to verify the accuracy of the scanner’s measurements. Compare the scanned dimensions of the check object with their known values to ensure they match within the acceptable tolerance limits.
- Repeat if Necessary: If the validation test indicates any calibration issues or inaccuracies, check the calibration data and settings in the software. You may need to recalibrate the scanner or make adjustments to the calibration parameters as instructed by the manufacturer.
Calibrating your 3D scanner is a critical step that ensures accurate and reliable results. It establishes a foundation for precise measurements and consistent data capture. By following the manufacturer’s instructions and guidelines, you can calibrate your scanner effectively and optimize its performance for your scanning projects. Remember to refer to the user manual or contact technical support if you encounter any difficulties or require further assistance with the calibration process.
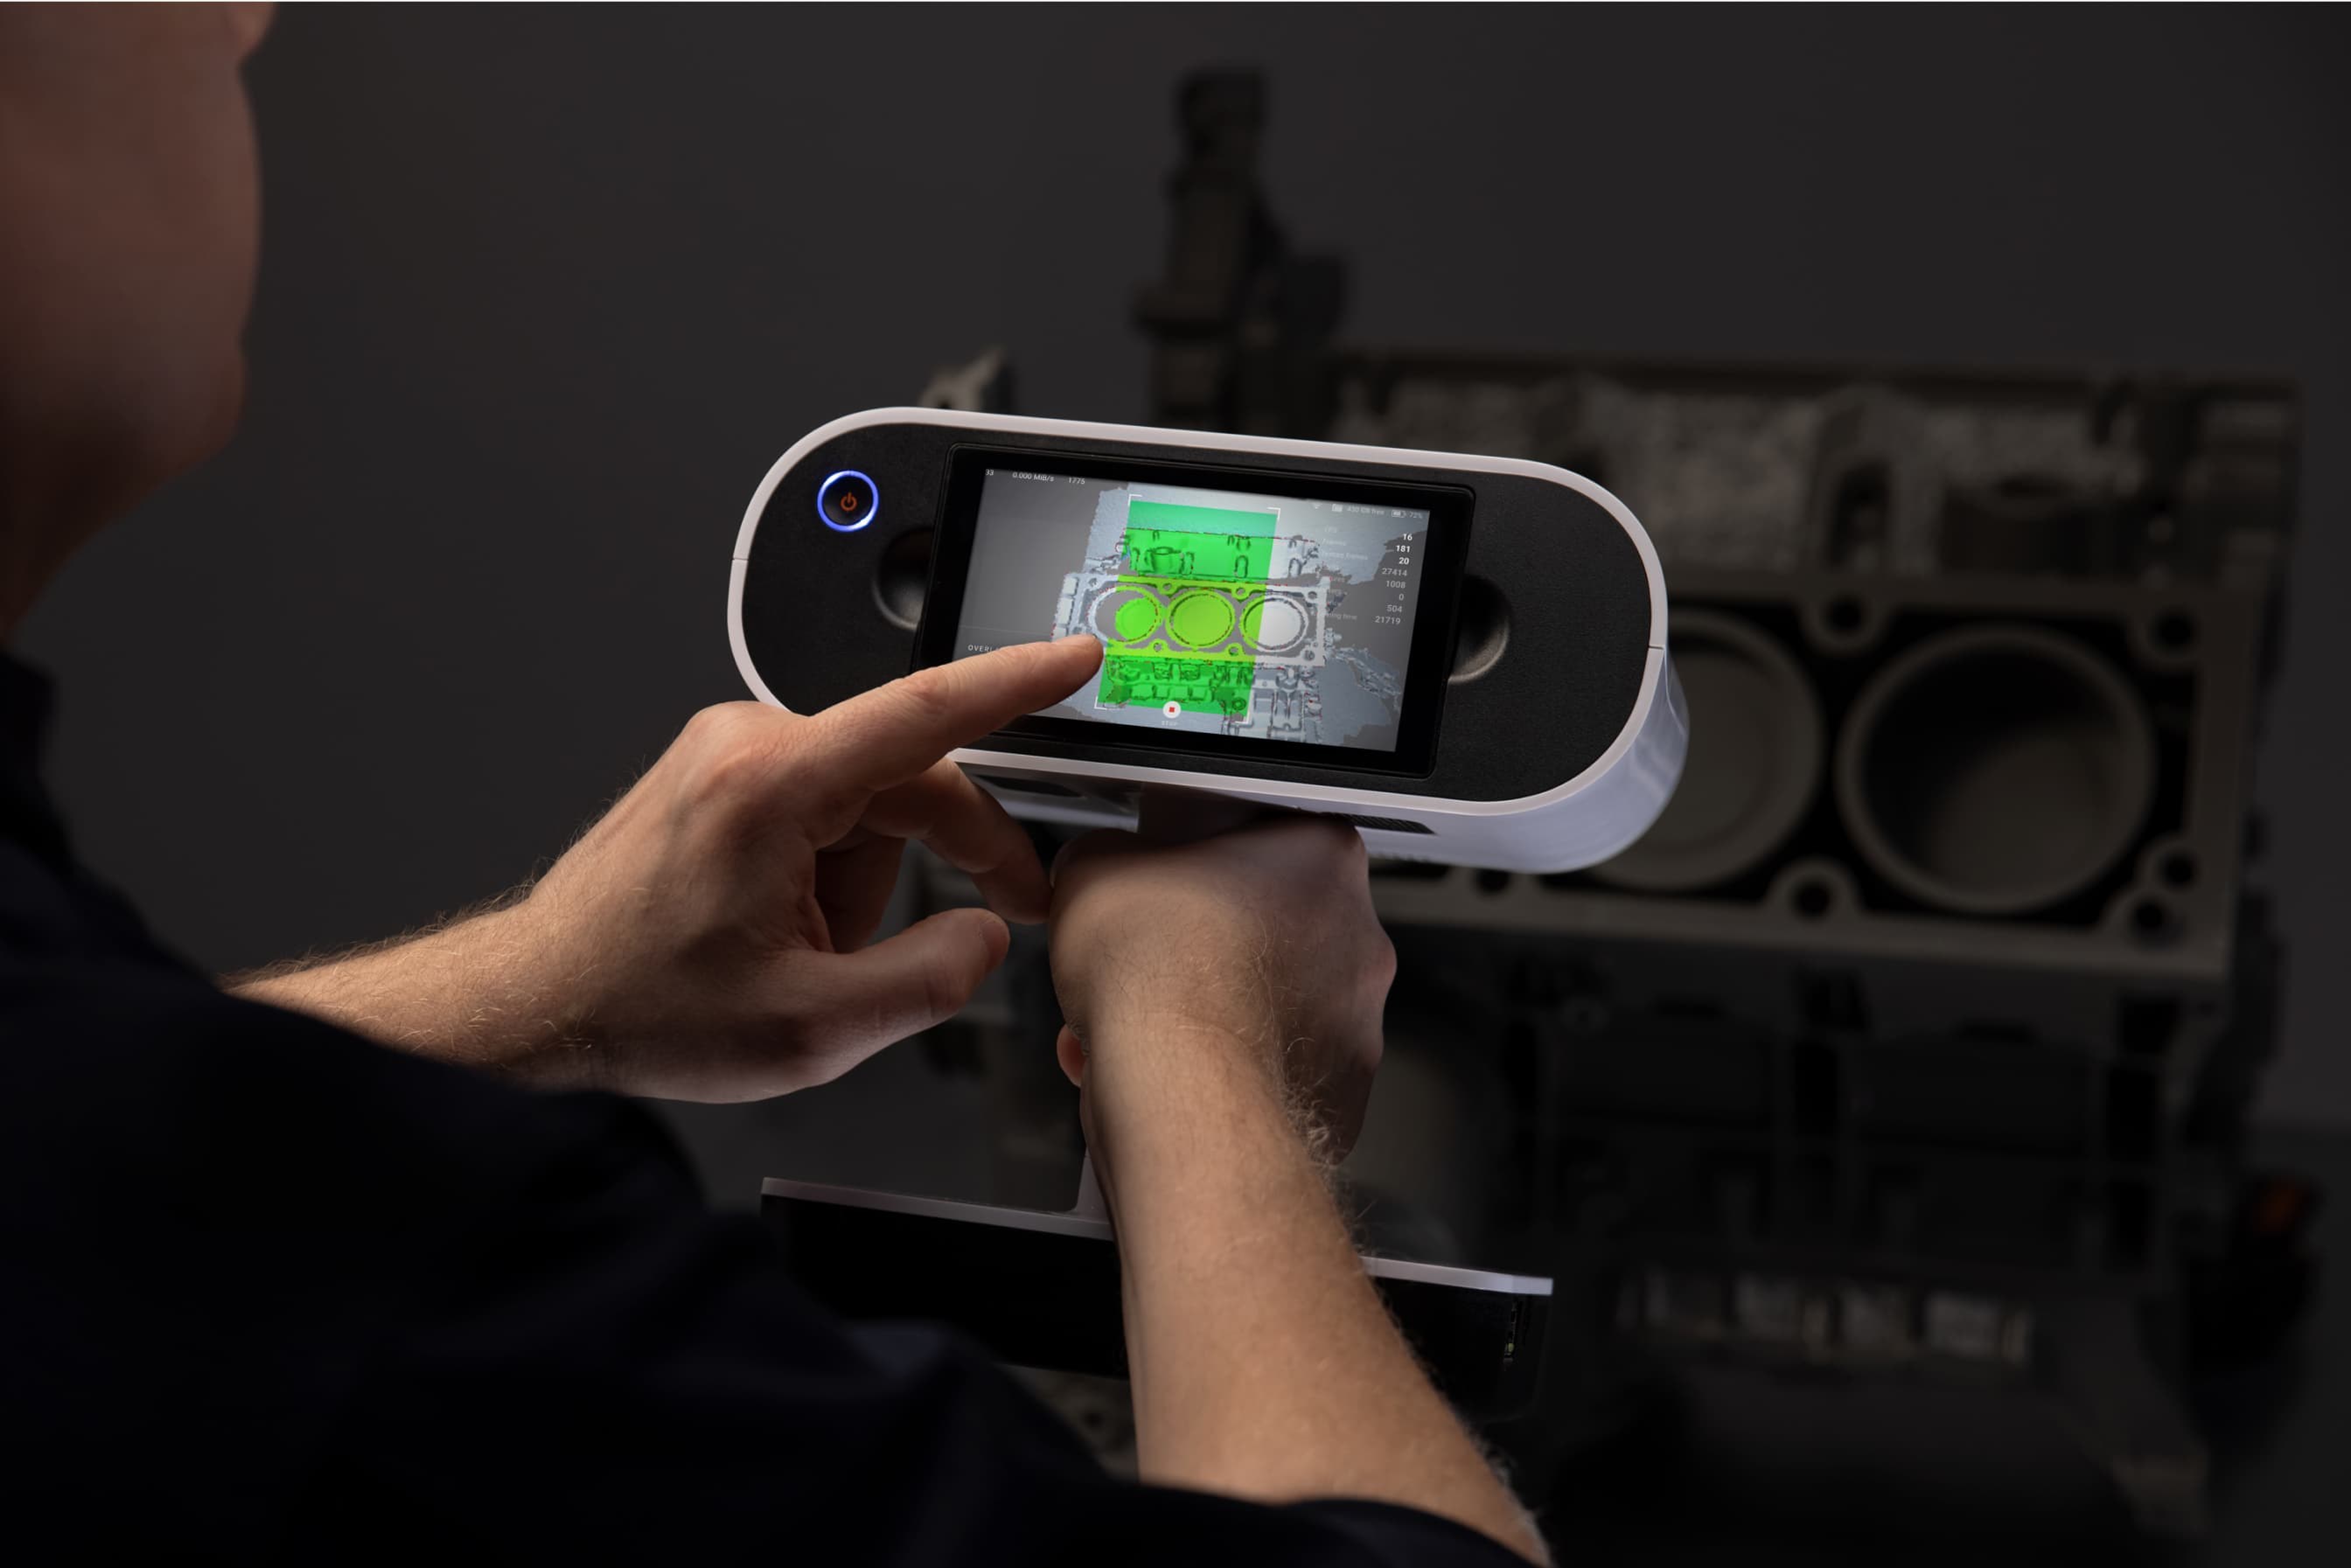
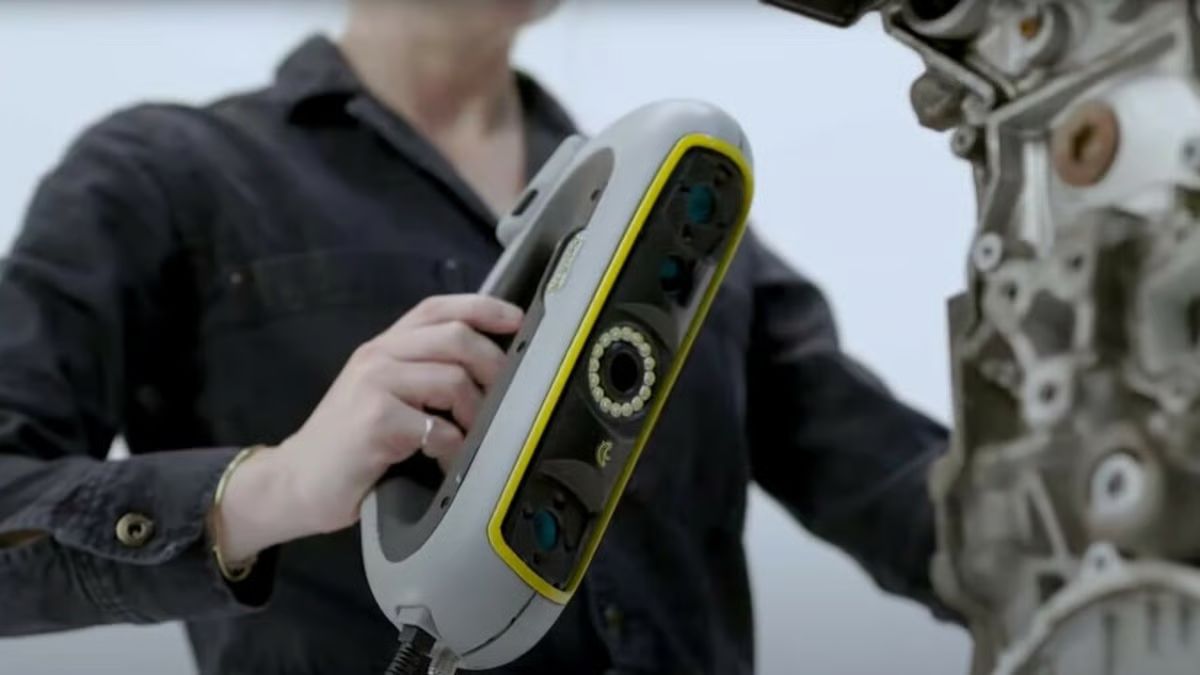
Scanning an Object with the 3D Scanner
Now that you have set up and calibrated your 3D scanner, you are ready to start capturing 3D scans of objects. Scanning an object with a 3D scanner involves capturing the geometry and texture of the object’s surface to create a digital representation. Here are the steps to scan an object with your 3D scanner:
- Choose the Object: Select the object you want to scan. Consider the size, complexity, and material of the object. Keep in mind that some scanners are better suited for specific types of objects or materials, so choose accordingly.
- Prepare the Object: Clean the object to remove dust, dirt, or any other debris that may affect the scanning process. Depending on the object, you may also need to apply a matte spray or remove any reflective surfaces to improve scan quality.
- Position the Object: Place the object in the scanning area, ensuring it is stable and securely positioned. Depending on the scanner and object size, you may need to use a turntable or tripod to rotate or hold the object during scanning.
- Suitable Scanning Technique: Select the appropriate scanning technique based on the object and scanning software capabilities. This can include single-shot scanning, multi-shot scanning, or continuous scanning. Follow the instructions provided by the software or scanner manufacturer for the desired technique.
- Scan Settings: Adjust the scanning settings in the software, such as resolution, distance, exposure, and texture capture. These settings may vary depending on the software and scanner model. Experiment with different settings to achieve the desired scan quality and level of detail.
- Start the Scanning Process: Initiate the scanning process using the scanning software. Follow the on-screen instructions for capturing scans of the object. Depending on the technique and software, you may need to capture scans from different angles and positions to ensure full coverage of the object.
- Review and Edit Scans: After capturing the scans, review them in the software to ensure they meet your requirements. Use the software’s editing tools to align, merge, or clean up the scans if necessary. This step helps to create a more accurate and complete 3D model.
- Fill in Missing Data: In cases where certain parts of the object are hidden or inaccessible during scanning, use additional scanning techniques, such as photogrammetry or manual measurements, to fill in the missing data. This can help create a more comprehensive and detailed 3D model.
- Refine the 3D Model: Once the scans are aligned and merged, refine the resulting 3D model using post-processing tools in the software. Smooth out any imperfections, remove noise or artifacts, and optimize the model’s geometry and texture for further use.
- Save and Export: Save the final 3D model in a suitable file format, such as OBJ or STL, for future use and compatibility with other software or 3D printers. Depending on your requirements, you may also scale the model, add texturing, or apply other modifications before exporting.
Scanning an object with your 3D scanner is an exciting and creative process. Remember to experiment with different settings and techniques to achieve the desired scan quality and level of detail. Practice and experience will help you refine your scanning skills and produce accurate and high-quality 3D models of various objects.
Processing and Editing the Scanned 3D Model on Windows
Once you have captured the scans of an object using your 3D scanner, the next step is to process and edit the scanned 3D model on your Windows PC. Processing and editing involve various steps and tools to refine and optimize the 3D model for further use. Here is a guide on how to process and edit the scanned 3D model on Windows:
- Import the Scanned Data: Open the scanning software on your Windows PC and import the scanned data into the software. This may include the point cloud, mesh, or texture files generated by the scanner during the scanning process.
- Align and Merge Scans: If you captured multiple scans of the object from different angles or positions, use the software’s alignment functionality to align the scans accurately. This ensures that the separate scans are seamlessly merged into a cohesive 3D model.
- Clean Up the Model: Use editing tools available in the software to clean up any unwanted noise, artifacts, or inconsistencies in the 3D model’s geometry. This can involve smoothing out rough surfaces, filling gaps, or removing unwanted elements that may have been captured during the scanning process.
- Refine the Geometry: Fine-tune the geometry of the 3D model by adjusting vertices, edges, or surface details. This can include enhancing sharp features, optimizing the topology, or making adjustments to achieve a more accurate representation of the object.
- Texture Mapping: If your scanner captures the texture of the object, apply the texture map to the 3D model. This process involves projecting the captured textures onto the surface of the model, providing a more realistic and detailed visual representation.
- Optimize the Model: Reduce the complexity of the 3D model if necessary, especially if it contains a high number of polygons or large file size. Use the software’s optimization tools to simplify the geometry while preserving the overall shape and details. This helps improve the performance when working with the model and saves storage space.
- Apply Smoothing or Sculpting: Use sculpting or smoothing tools to refine the surface details of the 3D model. This can involve adding or enhancing specific features, removing imperfections, or shaping the model to achieve the desired aesthetic or functional outcome.
- Add Colors or Materials: If desired, apply colors, textures, or materials to the 3D model to enhance its visual appearance. This can be achieved by painting directly on the model or by applying digital textures or materials to different parts of the model.
- Check for Errors: Validate the edited 3D model for any remaining errors or issues. Use the software’s analysis tools to check for non-manifold geometry, flipped normals, or other common errors that may affect the quality of the model.
- Save and Export: Once you are satisfied with the processing and editing of the 3D model, save it in a suitable file format, such as OBJ or STL. This allows for compatibility with other software or 3D printing applications. Additionally, consider saving incremental versions as backup and for future reference if further edits or adjustments are needed.
Processing and editing the scanned 3D model on your Windows PC allows you to refine and optimize it for specific purposes, such as 3D printing, visualizations, or virtual reality applications. Utilize the tools and functionalities available in the software to bring out the best in your scanned 3D models, ensuring that they meet your desired specifications and requirements.
Exporting and Sharing the Scanned 3D Model
Once you have processed and edited the scanned 3D model on your Windows PC, the next step is to export and share it. Exporting the model allows you to save it in a file format that is compatible with other software or 3D printers, while sharing it enables you to showcase your work or collaborate with others. Here’s a guide on how to export and share the scanned 3D model:
- Select the Desired File Format: Determine the file format that best suits your intended use of the 3D model. Common file formats include OBJ, STL, FBX, or PLY. Consider compatibility with the target software or platform on which you plan to use or share the model.
- Review and Clean Up the Model: Before exporting, review the 3D model to ensure that it is free from any artifacts, errors, or unnecessary components. Clean up the model, remove any unwanted elements, and optimize its geometry to ensure optimal performance and efficiency.
- Export Options: Explore the export options provided by the software. This may include settings for vertex/face count, resolution, or texture compression. Adjust these options to strike a balance between file size and model quality, considering the requirements of your target platform or application.
- Save the Exported File: Specify the destination folder and file name for the exported 3D model. Save it in the chosen file format. Consider creating a separate folder for the exported model and its associated textures or materials if applicable.
- Check Compatibility: Verify the compatibility of the exported 3D model with other software or applications that you plan to use. Some software or platforms may have specific requirements or limitations on the supported file formats or feature compatibility.
- Sharing Platforms: There are several platforms where you can share your 3D models with others. Popular options include online platforms like Sketchfab, where you can upload and showcase your models, as well as collaborative platforms like GitHub or Dropbox, where you can share the model files with colleagues or collaborators.
- Create Renderings or Animations: Consider creating renderings or animations of the 3D model to enhance its visual appeal or demonstrate its functionality. Use rendering software or animation tools to create captivating visuals that highlight the features and details of the model.
- Document Your Work: Provide relevant documentation, such as a readme file or a PDF document, that explains the details of the 3D model, its intended use, and any specific requirements or credits. This documentation helps others understand your work and facilitates collaboration or sharing within a professional or academic context.
- Protect Intellectual Property: If your 3D model contains original designs or proprietary information, consider using watermarks or copyright notices to protect your intellectual property rights when sharing or showcasing the model publicly.
Exporting and sharing the scanned 3D model allows you to showcase your work, collaborate with others, or make it available for use in various applications. By following these steps and considering the compatibility, file formats, and documentation, you can effectively export and share your 3D models, ensuring they are accessible and ready to be utilized by others in the desired manner.
Conclusion
Congratulations! You have now learned the essential steps for using a 3D scanner on your Windows PC. From understanding what a 3D scanner is to setting up the hardware, calibrating the scanner, scanning an object, and processing the captured 3D model, you have gained valuable insights into the world of 3D scanning.
By following the hardware and software requirements, you can ensure that your Windows PC is equipped to handle the scanning process and provide optimal performance. The calibration of the 3D scanner is crucial for accurate measurements and precise data capture, and the scanning process itself allows you to capture detailed and high-quality 3D models of various objects.
Processing and editing the scanned 3D model on your Windows PC provides the opportunity to refine and optimize the model for specific applications. Whether it’s cleaning up the model, refining its geometry, or adding colors and textures, these steps allow you to enhance the visual appeal and functionality of the 3D model.
Finally, exporting and sharing the scanned 3D model enables you to make your work accessible to others. By choosing the appropriate file format, considering compatibility, and utilizing sharing platforms or documentation, you can showcase your creations, collaborate with others, or utilize the 3D model in various applications.
Remember, the field of 3D scanning is vast and constantly evolving. As technology advances, new techniques, software, and hardware options will become available, providing even more exciting opportunities in the world of 3D scanning on Windows. Stay curious, experiment, and continue to explore this fascinating field to unlock the full potential of 3D scanning in your projects and endeavors.