Introduction
Welcome to the exciting world of 3D scanning with the Xyzprinting 3D Scanner! With this innovative device, you can turn physical objects into digital models, allowing you to create, modify, and replicate items with incredible precision.
Whether you’re a designer, artist, engineer, or simply someone looking to explore the possibilities of 3D scanning, this guide will walk you through the process of using the Xyzprinting 3D Scanner effectively. From installation to troubleshooting, we’ll cover everything you need to know to get started.
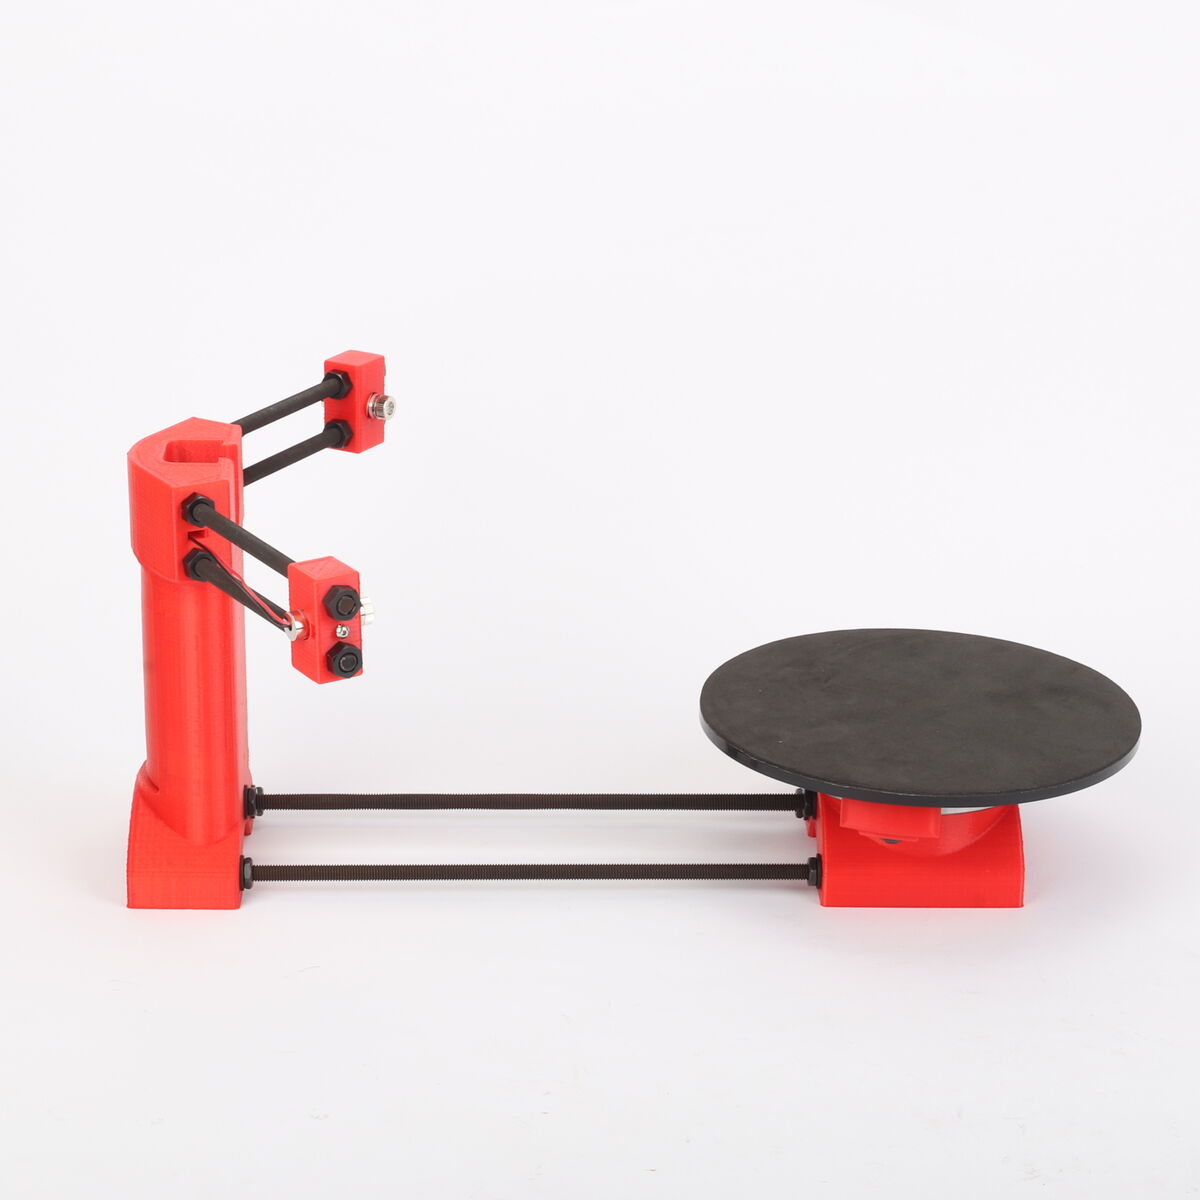
The Xyzprinting 3D Scanner combines advanced hardware and software to capture the geometry and texture of objects in stunning detail. It utilizes structured light technology to project patterns onto the object, while the camera captures the distortions to create a 3D model.
This device is incredibly versatile and can be used for various purposes, such as creating digital replicas of sculptures, reverse engineering objects, or even scanning objects for 3D printing. Whether you’re a hobbyist or a professional, the Xyzprinting 3D Scanner is a valuable tool for your creative and technical endeavors.
In this guide, we’ll cover the basic steps of using the Xyzprinting 3D Scanner, including installing the necessary software, setting up the hardware, calibrating the scanner, and performing scans. We’ll also explore how to adjust scan settings, edit scanned models, and export them for further use.
If you encounter any challenges along the way or have questions about using the Xyzprinting 3D Scanner, don’t worry. We’ve included a troubleshooting section to help you overcome common issues and ensure a smooth scanning experience.
So, let’s get started on this exciting journey of exploring the possibilities of 3D scanning with the Xyzprinting 3D Scanner. It’s time to unleash your creativity, improve your workflow, and bring your ideas to life!
Getting Started
Before diving into the world of 3D scanning, it’s important to familiarize yourself with the essential steps to get started with the Xyzprinting 3D Scanner. Follow these instructions to ensure a smooth setup process:
- Unbox the Xyzprinting 3D Scanner and ensure that all the components are present. These typically include the scanner itself, a USB cable, and any additional accessories that may come with it.
- Make sure that your computer meets the system requirements for running the Xyzprinting 3D Scanner software. These requirements can usually be found in the product documentation or on the manufacturer’s website.
- Download the latest version of the Xyzprinting 3D Scanner software from the official Xyzprinting website. This software is necessary for controlling and managing the scanning process.
- Install the software by following the provided instructions. Once the installation is complete, launch the software to ensure that it is working correctly.
- Connect the Xyzprinting 3D Scanner to your computer using the supplied USB cable. Ensure that the cable is securely connected to both the scanner and the computer.
- Power on the Xyzprinting 3D Scanner and wait for it to initialize. Most scanners have indicator lights that will confirm when the device is ready for use.
- Launch the Xyzprinting 3D Scanner software on your computer. The software should detect the connected scanner automatically and display the necessary controls and settings.
By following these steps, you’ll be well on your way to successfully setting up the Xyzprinting 3D Scanner. The next section will cover the process of installing the software in more detail, so you can proceed with confidence.
Remember, the Xyzprinting 3D Scanner is a powerful tool that requires careful handling. Always follow the manufacturer’s instructions for safe usage and make sure to protect the scanner from any potential physical damage.
Now that you’re familiar with the initial setup process for the Xyzprinting 3D Scanner, let’s move on to the next section, where we’ll explore how to install the necessary software to unleash the scanner’s full potential.
Installing the Software
Before you can start scanning with the Xyzprinting 3D Scanner, you’ll need to install the necessary software on your computer. Follow these step-by-step instructions to ensure a successful installation:
- Visit the official Xyzprinting website and navigate to the support or downloads section. Here, you should be able to find the software specifically designed for the Xyzprinting 3D Scanner.
- Download the appropriate software for your operating system. Ensure that you’re selecting the version compatible with your computer’s specifications.
- Once the download is complete, locate the installation file in your computer’s downloads or designated folder. Double-click on the file to begin the installation process.
- Follow the prompts displayed on the installation wizard to proceed. The wizard will guide you through the necessary steps, such as accepting the license agreement and choosing the installation location.
- Once you’ve completed the installation steps, the Xyzprinting 3D Scanner software should be installed on your computer. Look for a desktop shortcut or locate the software in your programs menu to launch it.
- Connect the Xyzprinting 3D Scanner to your computer using the provided USB cable. Ensure that the scanner is powered on and in a ready state.
- Launch the Xyzprinting 3D Scanner software. It should automatically detect the connected scanner and display the appropriate controls and settings.
It’s important to note that during the installation process, you may be prompted to install additional drivers or software components. Follow the on-screen instructions to install these components as they are necessary for the proper functioning of the Xyzprinting 3D Scanner.
If you encounter any issues during the installation, refer to the product documentation or contact Xyzprinting support for assistance. They will be able to provide you with guidance or troubleshooting steps to resolve any installation-related problems.
Now that you have successfully installed the Xyzprinting 3D Scanner software, the next section will cover the process of connecting the 3D scanner to your computer. This step is crucial for establishing a communication link between the scanner and the software, allowing you to control and manage your scans effectively.
Connecting the 3D Scanner to Your Computer
Now that you have installed the Xyzprinting 3D Scanner software on your computer, it’s time to establish a connection between the scanner and your computer. Follow these instructions to ensure a successful connection:
- Locate the USB cable that came with the Xyzprinting 3D Scanner. Connect one end of the cable to the USB port on your computer.
- Take the other end of the USB cable and connect it to the USB port on the back of the scanner. Ensure that the connection is secure.
- Power on the scanner by pressing the power button or using the designated power switch. Wait for the scanner to initialize. Most scanners have indicator lights that will confirm when the device is ready for use.
- Launch the previously installed Xyzprinting 3D Scanner software on your computer. The software should automatically detect the connected scanner and display the necessary controls and settings.
- Verify that the software recognizes the scanner by checking the status or connection indicator. It should indicate that the scanner is connected and ready to use. If the connection is not established, try disconnecting and reconnecting the USB cable to ensure a proper connection.
It’s important to note that some scanners may require additional steps for establishing a connection. Check the user manual or the manufacturer’s website for specific instructions related to your scanner model.
If you encounter any issues with connecting the 3D scanner to your computer, make sure to check the USB cable for any damage or try connecting it to another available USB port. In some cases, updating the drivers or re-installing the software may also resolve connection problems.
Once the connection between the scanner and your computer is established, you’re ready to move on to the next step – calibrating the 3D scanner. Calibration ensures that the scanner produces accurate and precise scans, and it’s an essential step before starting any scanning process.
Please proceed to the next section to learn how to calibrate the Xyzprinting 3D Scanner for optimal results.
Calibrating the 3D Scanner
Calibrating the Xyzprinting 3D Scanner is a crucial step to ensure accurate and reliable scans. Proper calibration allows the scanner to correctly interpret the geometry and texture of objects, resulting in high-quality 3D models. Follow these steps to calibrate your 3D scanner:
- Ensure that the scanner is connected to your computer and powered on.
- Launch the Xyzprinting 3D Scanner software on your computer if it’s not already open.
- Look for the calibration option within the software’s user interface. It is usually found in the settings or preferences section. Click on the calibration option to begin the process.
- Follow the on-screen instructions provided by the software to start the calibration process. This typically involves positioning the scanner in a specific location or using calibration panels that may have been included with the scanner.
- During the calibration process, the scanner will capture several reference points to establish accurate measurement parameters. It’s important to follow the instructions precisely and maintain stillness during this process.
- Once the calibration process is complete, the software will confirm the successful calibration. Take note of any specific instructions or settings provided by the software, as these may be necessary for optimal scanning results.
It’s important to perform calibration regularly, especially if you notice any discrepancies or inaccuracies in your scans. Calibration ensures that the scanner is properly aligned and calibrated for capturing accurate 3D data.
If you’re using the scanner for the first time or if you’ve made any significant changes to the setup, such as moving the scanner or changing scanning environment, performing a calibration is highly recommended.
Remember to follow the manufacturer’s guidelines regarding calibration and consult the user manual or support resources for specific instructions related to your Xyzprinting 3D Scanner model.
Now that you’ve successfully calibrated your 3D scanner, you’re ready to move on to the next exciting step – scanning objects. In the upcoming section, we’ll explore how to capture the geometry and texture of physical objects using the Xyzprinting 3D Scanner.
Scanning Objects
Now that your Xyzprinting 3D Scanner is calibrated and ready to go, it’s time to start scanning objects! Follow these steps to capture the geometry and texture of physical objects:
- Launch the Xyzprinting 3D Scanner software on your computer.
- Place the object you want to scan on a stable surface. Ensure that it is well-lit and there is sufficient contrast for the scanner to capture accurate data.
- In the software, navigate to the scan section or choose the option to start a new scan.
- Position the scanner and adjust its distance from the object. It’s recommended to start with a medium distance and make adjustments as needed.
- In the software, initiate the scanning process. This may involve clicking a “Start Scan” or similar button.
- Slowly move the scanner around the object, ensuring that you cover all sides and angles. Maintain a steady pace to capture consistent data.
- Pay attention to any prompts or guidance provided by the software in terms of scanning speed and movement.
- Continue scanning until you have captured the complete geometry and texture of the object from all desired viewpoints.
- Once the scan is complete, the software will generate a preview or render of the scanned object in real-time.
- Review the scan and inspect it for any areas that may require additional scanning or adjustments.
It’s important to note that scanning objects can be a trial-and-error process, especially if you’re new to 3D scanning. Don’t be afraid to experiment with different scanning techniques and angles to achieve the best results.
For complex objects or those with intricate details, you may need to perform multiple scans from different viewpoints and merge them later in the editing process for a complete model.
Additionally, keep in mind that larger objects may require multiple scans of different sections that can be merged together during the editing process to create a full 3D model.
As you gain more experience with the Xyzprinting 3D Scanner, you’ll develop a better understanding of how to optimize your scanning techniques for various types of objects. Don’t be discouraged if your initial scans aren’t perfect – practice makes perfect!
In the next section, we’ll explore how to adjust the scan settings to fine-tune your scanning process and ensure the best possible results. Stay tuned!
Adjusting Scan Settings
To optimize your scanning process and achieve the best possible results, it’s important to adjust the scan settings of your Xyzprinting 3D Scanner. These settings allow you to fine-tune the scanning parameters based on the specific object and desired outcome. Follow these steps to adjust the scan settings:
- Launch the Xyzprinting 3D Scanner software on your computer.
- Ensure that your scanner is connected and calibrated properly.
- Navigate to the scan settings section within the software. This may be labeled as “Scan Parameters,” “Options,” or something similar.
- Review the available scan settings, which may include options such as scan resolution, scanning speed, and color capture.
- Adjust the scan resolution based on the level of detail you want to capture. Higher resolutions will result in more detailed scans but may require more processing power and storage space.
- Determine the scanning speed that works best for your specific object. Slower scanning speeds may capture more data, but they can also increase the risk of motion blur or other artifacts.
- If your scanner supports color capture, decide whether you want to include color information in the scan. Enabling color capture can enhance the visual appeal of the 3D model.
- Experiment with different settings to find the optimal combination for your scanning needs. It may require some trial and error to determine the settings that produce the best results for a specific object.
- Once you have adjusted the settings to your satisfaction, proceed with the scanning process as outlined in the previous section.
Remember that the scan settings can significantly impact the quality and accuracy of the 3D scan. It’s recommended to start with default settings and make subtle adjustments as needed to achieve the desired outcome.
Additionally, keep in mind that the optimal scan settings may vary depending on the object’s characteristics, such as size, texture, and complexity. It’s a good practice to test different settings and evaluate the results to find the most suitable configuration.
With practice and experimentation, you’ll develop a better understanding of how different scan settings affect the final scan quality. Don’t be afraid to continue tweaking and refining your settings to achieve the best possible scans.
In the next section, we’ll explore how to edit the scanned models and make necessary adjustments before exporting them for various applications. Stay tuned!
Editing Scanned Models
After capturing a scan with your Xyzprinting 3D Scanner, it’s common to have to make some adjustments to the scanned model before it’s ready for use or further processing. Editing the scanned models allows you to refine details, remove imperfections, and prepare them for various applications. Follow these steps to edit your scanned models:
- Import the scanned model into the editing software of your choice. There are several options available, including Xyzprinting’s proprietary editing software or third-party applications such as MeshLab, Blender, or Autodesk Meshmixer.
- Inspect the scanned model and identify any areas that require editing or improvement. This may include smoothing rough surfaces, filling in gaps, or removing unwanted artifacts.
- Use the tools provided in the editing software to manipulate the model. Common tools may include sculpting brushes, mesh repair tools, or texture smoothing options.
- Refine the geometry of the model by adjusting the shape, removing unnecessary elements, or repositioning parts if needed. This step helps to improve the overall quality and aesthetics of the model.
- Apply texture mapping or painting techniques to enhance the visual appearance of the model. This can involve adding color, texture, or other visual effects to create a more realistic representation.
- Inspect the edited model from different angles and viewpoints to ensure that it meets your desired specifications. Make any necessary adjustments or additional edits as required.
- Save your edited model in a compatible file format such as STL or OBJ. These formats are widely supported and can be used for various purposes, including 3D printing, rendering, or further modifications.
Editing scanned models can be a creative and iterative process. Don’t be afraid to experiment with different editing techniques and tools to achieve the desired result. It may take some time and practice to become proficient in editing scanned models, but with persistence, you’ll improve your skills.
Additionally, it’s worth exploring tutorials, forums, and online resources specific to the editing software you’re using. These resources can provide valuable insights and help you discover advanced editing techniques and tips.
Once you have edited and finalized your scanned model, you’re ready to move on to the next crucial step – exporting the model for use in various applications. In the next section, we’ll explore the process of exporting scanned models in different file formats. Stay tuned!
Exporting Scanned Models
Once you have completed the editing process for your scanned model, it’s time to export it in a suitable file format for further use or applications. Exporting the model allows you to share it with others, prepare it for 3D printing, or import it into other software for additional modifications. Follow these steps to export your scanned models:
- Ensure that your edited model is open and ready for export in your editing software.
- Navigate to the export or save options within the software. Look for options such as “Export,” “Save As,” or “Export As.”
- Choose the desired file format for the exported model. Common file formats for 3D models include STL, OBJ, or PLY.
- Consider the intended use or application of the exported model. Some file formats may be more suitable for specific purposes, such as 3D printing or rendering.
- Provide a meaningful and descriptive name for the exported file. This will make it easier to locate and identify the model in the future.
- Specify the export location on your computer or external storage device. Choose a folder or directory where you can easily access the exported model.
- Review any additional export settings or options provided by your software. These may include options for adjusting the model’s scale, orientation, or level of detail.
- Click “Export” or “Save” to initiate the export process. Depending on the complexity of the model and the chosen file format, the export process may take some time.
- Once the export is complete, verify that the exported file is saved in the designated location. You can also inspect the exported model by opening it in a 3D viewing software or importing it into another application.
It’s worth noting that different software applications may have variations in their export processes and available file formats. Familiarize yourself with the specific capabilities and requirements of your chosen editing software to ensure a smooth exporting experience.
Additionally, consider creating multiple versions of the exported model in different file formats if you anticipate using it for various purposes. This provides flexibility and compatibility when working with different software or platforms.
Congratulations! You have successfully exported your edited model. Now you can utilize it for 3D printing, further modifications, or any other application of your choice.
In the next section, we’ll address some common troubleshooting issues that you may encounter during the scanning and editing process, providing solutions to help you resolve them efficiently. Stay tuned!
Troubleshooting Common Issues
While using the Xyzprinting 3D Scanner and navigating the scanning and editing process, you may encounter some common issues. Don’t worry! Here are solutions to help you troubleshoot and overcome these challenges:
1. Poor Scan Quality: If your scans are coming out blurry, incomplete, or with significant artifacts, try the following:
- Ensure that the object is well-lit and has sufficient contrast for the scanner to capture accurate data.
- Double-check that the scanner is calibrated correctly. Calibration is essential for accurate scanning.
- Adjust the scan settings, such as resolution and scanning speed, to find the optimal combination for your specific object.
- Ensure that you are moving the scanner at a steady pace during the scanning process to avoid motion blur.
2. Connection Issues: If you’re experiencing difficulties connecting the scanner to your computer, follow these steps:
- Check the USB cable for any damage and try using a different USB port on your computer.
- Make sure that the scanner is powered on and in a ready state before attempting to connect it.
- Install or update the necessary drivers for the scanner, if prompted, and ensure that the software is up to date.
3. Editing Problems: If you encounter challenges while editing the scanned models, consider the following solutions:
- Refer to online tutorials, forums, or user guides specific to your chosen editing software to learn more about its features and capabilities.
- Experiment with different editing tools and techniques to achieve the desired results. Practice and exploration can improve your editing skills over time.
- If encountering mesh errors, try using the software’s mesh repair tools to correct any issues with the scanned model.
4. Software Crashes: If the Xyzprinting 3D Scanner software crashes or freezes during the scanning or editing process, try the following:
- Ensure that your computer meets the minimum system requirements for running the software.
- Update the software to the latest version to address any potential bugs or stability issues.
- Restart your computer to clear any temporary conflicts or memory issues that may be causing the crashes.
If you continue to experience difficulties or encounter issues that are not addressed here, it is recommended to consult the Xyzprinting support team or refer to the product documentation for further assistance. They will be able to provide specific troubleshooting steps or guidance tailored to your scanner model.
The troubleshooting tips provided here should help you overcome common issues that may arise during the scanning and editing process. Don’t get discouraged – with perseverance, you’ll become more proficient and confident in using the Xyzprinting 3D Scanner.
In the next section, we’ll conclude our guide and summarize the key points covered throughout this article.
Conclusion
Congratulations! You have reached the end of our guide on how to use the Xyzprinting 3D Scanner. Throughout this article, we have covered the essential steps and considerations for a successful scanning experience. Let’s recap the key points:
We started by introducing the Xyzprinting 3D Scanner and its capabilities. This innovative device uses structured light technology to capture the geometry and texture of physical objects, providing a gateway to endless creative possibilities.
Getting started with the Xyzprinting 3D Scanner involves unboxing and installing the necessary software. We walked through the process of connecting the scanner to your computer and calibrating it for optimal scanning results.
Next, we explored the step-by-step process of scanning objects using the Xyzprinting 3D Scanner. We discussed the importance of lighting and proper scanning techniques to capture accurate and detailed models.
To achieve the best results, we delved into adjusting the scan settings. Fine-tuning parameters such as resolution, scanning speed, and color capture allows you to optimize the scanning process to suit your specific needs.
Editing scanned models is an integral part of the workflow. We explained how to import the scans into editing software, refine the geometry, and enhance the visual appearance. These adjustments ensure that your scanned models are refined and ready for your desired applications.
Lastly, we provided insights into troubleshooting common issues that may arise during scanning and editing, with solutions to help you overcome challenges and achieve better results.
By following the steps and tips outlined in this guide, you are well-equipped to explore the potential of the Xyzprinting 3D Scanner and unleash your creativity. Remember to practice, experiment, and continue learning to master the art of 3D scanning.
If you have any further questions or encounter any difficulties, consult the product documentation or reach out to Xyzprinting support for assistance. They are there to guide you through any technical issues you may encounter.
So, get started with your Xyzprinting 3D Scanner, and enjoy the incredible world of 3D scanning and digital modeling. Embark on captivating projects, bring ideas to life, and share your creations with the world!