Introduction
Welcome to the world of QuickBooks, a powerful and versatile accounting software that provides small businesses with the tools they need to streamline financial processes, track expenses, manage invoices, and generate accurate reports. Whether you’re a sole proprietor, freelancer, or a small business owner, QuickBooks can help simplify your financial record-keeping and provide insights to help you make informed business decisions.
In today’s fast-paced digital landscape, manual bookkeeping methods are time-consuming and prone to errors. QuickBooks offers a user-friendly interface that allows you to organize your financial data efficiently and access it whenever you need it. With its intuitive features and customizable options, QuickBooks can adapt to fit the unique needs of your business.
In this comprehensive guide, we will take you through the various aspects of using QuickBooks, from getting started to customizing the software to suit your business requirements. Whether you’re new to QuickBooks or looking to optimize your usage, this guide will equip you with the knowledge and skills you need to maximize the benefits of this powerful accounting tool.
Throughout the chapters, we will explore different functionalities of QuickBooks, such as creating and managing invoices, tracking expenses and bills, reconciling transactions, generating reports, and integrating QuickBooks with other tools. Each chapter will provide step-by-step instructions and expert tips to help you navigate the software effortlessly.
By the end of this guide, you will have a solid understanding of how to use QuickBooks effectively and efficiently manage your finances. Whether you’re a small business owner looking to keep track of your cash flow or a freelancer aiming to streamline your invoicing process, QuickBooks can be your reliable companion.
So, let’s dive in and unlock the full potential of QuickBooks to take control of your finances and propel your business towards success.
Chapter 1: Getting Started with QuickBooks
Before you can start using QuickBooks, it’s important to familiarize yourself with the essentials. In this chapter, we will guide you through the initial setup process, account creation, and software installation. By the end of this chapter, you’ll be up and running with QuickBooks.
The first step is to choose the right version of QuickBooks for your business. QuickBooks offers different editions, such as QuickBooks Online and QuickBooks Desktop, catering to different business needs. Take some time to evaluate the features and benefits of each edition to determine which one aligns best with your requirements.
Once you’ve selected the appropriate edition, you can proceed with the account creation process. Visit the QuickBooks website and sign up for an account. Provide the necessary information, such as your business name, contact details, and industry type. This will enable QuickBooks to tailor the software to suit your specific business needs.
After creating your account, you’ll need to download and install the QuickBooks software onto your computer. Follow the on-screen instructions provided by QuickBooks to complete the installation process. Based on your edition, you may need to input the product key during installation.
Once the installation is complete, you will be prompted to set up your company profile. This includes entering details such as your business address, fiscal year, and tax ID information. It’s crucial to input accurate information as this will be used for various financial reports and tax filings.
Next, you’ll need to connect your bank accounts to QuickBooks. This will allow you to automatically import transactions, track expenses, and reconcile accounts in a more efficient manner. QuickBooks supports a wide range of banks, making it convenient to link your accounts seamlessly.
Before you begin using QuickBooks for your day-to-day operations, it’s recommended to explore the software’s features and functionalities. QuickBooks provides a guided tour, tutorials, and online resources to help you navigate the interface and understand how to leverage its features effectively.
In this chapter, we’ve covered the initial steps to get started with QuickBooks, from choosing the right edition to setting up your company profile and connecting your bank accounts. Now that you’re acquainted with the basics, you’re ready to explore the various features and functionalities that QuickBooks has to offer in the subsequent chapters.
Chapter 2: Setting up QuickBooks
Setting up QuickBooks correctly is crucial for ensuring smooth and efficient financial management. In this chapter, we will guide you through the essential steps of setting up QuickBooks, including configuring company preferences, adding customers and vendors, and customizing your chart of accounts.
The first task in setting up QuickBooks is to configure your company preferences. This includes defining settings such as your company’s fiscal year, tax preferences, and payment terms. By customizing these settings according to your business requirements, you can ensure accurate financial reporting and seamless invoicing processes.
Next, you’ll want to add your customers and vendors to QuickBooks. This allows you to track transactions, manage accounts receivable and accounts payable, and generate reports. Create customer and vendor profiles by entering their contact details, payment terms, and any other relevant information. Make sure to update these profiles whenever there are changes in contact information or terms.
One of the critical components of QuickBooks is the chart of accounts. The chart of accounts provides a structure for categorizing and organizing your financial transactions. Customize your chart of accounts to align with your business’s unique needs. Add account categories, such as income, expenses, assets, and liabilities, and specify sub-accounts for more detailed tracking.
When setting up QuickBooks, it’s important to connect and synchronize any third-party apps or integrations that are essential for your business operations. QuickBooks offers a range of integrations, such as payment processors, e-commerce software, and time tracking tools. Explore the QuickBooks App Store to identify and install integrations that can enhance your workflow and streamline processes.
Another crucial aspect of setting up QuickBooks is establishing user access and permissions. Determine who within your organization requires access to the software and define their roles and permissions accordingly. This ensures that sensitive financial data is only accessible to authorized individuals and minimizes the risk of data breaches.
Before you fully dive into using QuickBooks, take some time to explore the additional settings and preferences available. QuickBooks provides options to customize forms, enable multi-currency support, adjust notifications, and much more. By familiarizing yourself with these settings, you can tailor QuickBooks to better suit the specific needs of your business.
In this chapter, we’ve covered the essential steps of setting up QuickBooks, including configuring company preferences, adding customers and vendors, customizing the chart of accounts, integrating third-party apps, and managing user access. By ensuring your QuickBooks is properly set up, you’ll be able to streamline your financial processes and gain valuable insights into your business’s financial health.
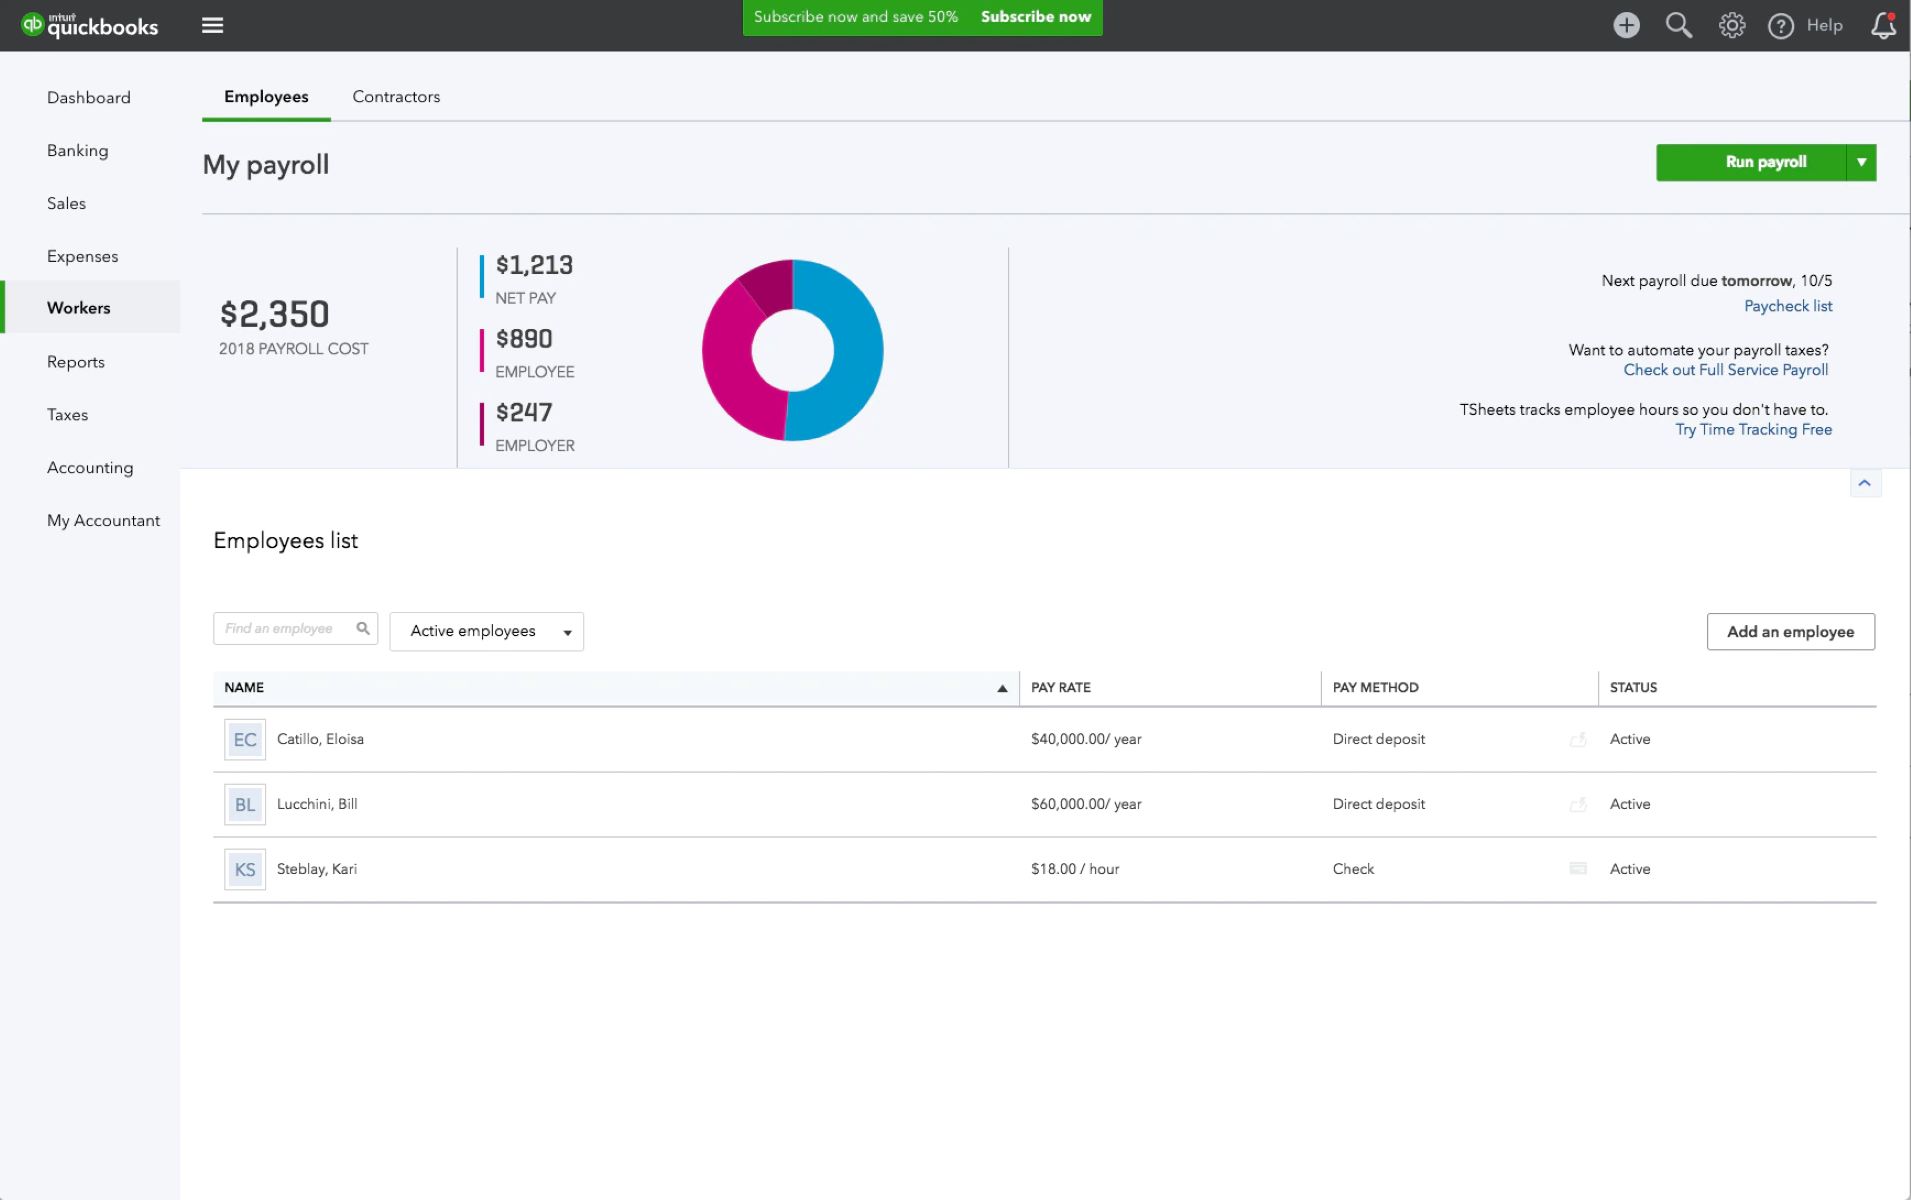
Chapter 3: Navigating the QuickBooks Dashboard
The QuickBooks dashboard is your command center for managing your financial data and accessing various features and tools. In this chapter, we will guide you through the navigation of the QuickBooks dashboard, allowing you to effortlessly navigate the software and make the most of its functionalities.
When you log in to QuickBooks, you’ll be greeted by the dashboard, which provides an overview of your business’s financial status. The dashboard displays key information such as account balances, recent transactions, and upcoming tasks. It serves as a central hub for accessing different areas of QuickBooks.
One of the main features of the QuickBooks dashboard is the navigation bar, located on the left side of the screen. The navigation bar acts as a menu, providing access to various modules, including sales, expenses, banking, reports, and more. Simply click on the respective module to access its features and functions.
The navigation bar also contains a search bar, which allows you to quickly locate specific transactions, customers, vendors, or reports. By typing in relevant keywords, you can narrow down your search and find the information you need in a matter of seconds. This feature saves time and helps you stay organized.
Within each module, you’ll find additional sub-menus and options to further customize your experience. For example, in the sales module, you can create and manage invoices, estimates, and sales receipts. In the banking module, you can connect your bank accounts, categorize transactions, and reconcile your accounts.
To make navigating even easier, QuickBooks provides a customizable homepage. You can rearrange and resize the widgets on the homepage to display the most relevant information for your business. For example, you can choose to have a widget that shows your top-selling products or one that displays your outstanding invoices.
In addition to the dashboard and navigation bar, QuickBooks also offers a notification center where you can view important alerts and reminders. This feature ensures that you stay on top of due dates, payment reminders, and other time-sensitive tasks, helping you maintain financial accountability.
As you become more familiar with the QuickBooks dashboard, take advantage of the in-app tutorials and resources available. QuickBooks provides virtual tours, help articles, and video tutorials to assist you in navigating the software and maximizing its potential.
In this chapter, we have explored the navigation of the QuickBooks dashboard, including the dashboard overview, navigation bar, search functionality, customizable homepage, notification center, and available resources. By understanding how to navigate the QuickBooks dashboard, you’ll be able to efficiently access the tools and features you need to manage your business finances effectively.
Chapter 4: Creating and Managing Invoices
Invoices play a crucial role in any business as they facilitate timely and accurate payments from clients and customers. QuickBooks provides a user-friendly interface that allows you to efficiently create, customize, and manage invoices. In this chapter, we will guide you through the process of creating and managing invoices in QuickBooks.
To create an invoice in QuickBooks, start by navigating to the Sales module and selecting the option to create a new invoice. You’ll be prompted to enter details such as the customer’s name, the products or services provided, quantities, prices, and any applicable discounts or taxes. QuickBooks automatically calculates the total amount due based on the information provided.
With QuickBooks, you have the ability to customize your invoices to align with your brand identity. You can add your company logo, adjust the layout and formatting, and include personalized messages or terms. This customization feature helps create a professional and cohesive look for your invoices, enhancing your brand image.
Once your invoice is created, you can save it in QuickBooks and choose to either print and mail a physical copy or send it electronically via email. QuickBooks allows you to track the status of each invoice, whether it’s pending, paid, or overdue. You also have the option to set up automatic reminders for overdue payments, ensuring that you receive timely payments.
In addition to creating and sending invoices, QuickBooks allows you to track and manage the entire invoicing process. You can generate reports to view the status of your invoices, track outstanding balances, and monitor payment history. This feature provides valuable insights into your cash flow and aids in effective financial management.
QuickBooks also offers the convenience of online payments. By enabling online payment options, you can include a secure payment link on your invoices, making it easy for your customers to pay directly online. This feature accelerates the payment process, reduces manual data entry, and improves cash flow for your business.
Furthermore, QuickBooks allows you to set up recurring invoices for repeat customers or services. This feature automates the invoicing process, saving you time and effort. You can schedule invoices to be automatically generated and sent at specific intervals, ensuring consistent and timely billing.
As your business grows, you may need to manage multiple invoices simultaneously. QuickBooks enables you to group invoices, create batch transactions, and apply bulk actions. This capability streamlines your invoicing workflow and improves efficiency.
In this chapter, we have explored the process of creating and managing invoices in QuickBooks. From creating customized invoices to tracking payment status and utilizing online payment options, QuickBooks provides the tools you need to streamline your invoicing processes and maintain a healthy cash flow for your business.
Chapter 5: Tracking Expenses and Managing Bills
Keeping track of expenses and managing bills are essential components of managing your business’s finances effectively. QuickBooks provides robust features that allow you to easily track and categorize expenses, as well as efficiently manage and pay bills. In this chapter, we will delve into the process of tracking expenses and managing bills in QuickBooks.
Tracking expenses in QuickBooks starts with entering and categorizing your expenses. You can manually input expenses or import them directly from your bank accounts using the bank feed feature. QuickBooks provides a range of expense categories and allows you to create custom categories that align with your specific business needs. Categorizing expenses properly ensures accurate financial reporting and enables you to monitor spending patterns.
Once expenses are entered, QuickBooks provides tools to review and analyze your spending. You can generate expense reports that provide a comprehensive view of your business’s expenditures. These reports can be sorted by date, vendor, and category, offering insights into where your money is being spent. Analyzing expense reports allows you to identify areas of overspending, make necessary adjustments, and make informed financial decisions.
Another significant aspect of expense tracking is the ability to attach receipts and documents directly to expense entries in QuickBooks. This feature eliminates the need for physical storage of receipts and enables easy retrieval when needed for auditing or reimbursement purposes.
In addition to tracking expenses, QuickBooks simplifies the process of managing bills. You can enter vendor bills directly into QuickBooks, including details such as due dates, amounts owed, and any applicable discounts or late fees. QuickBooks provides a centralized system where you can view and manage all your outstanding bills, ensuring they are paid on time to maintain healthy vendor relationships.
QuickBooks allows you to set up recurring bills for regular expenses, such as rent or utilities. By scheduling recurring bills, you can automate the bill payment process, saving time and minimizing the risk of missing payments. QuickBooks notifies you when bills are due, and you can initiate payment directly from within the software.
Furthermore, QuickBooks offers the convenience of online bill payments. You can connect your bank accounts to QuickBooks to make payments directly from the software, eliminating the need for manual check writing or online banking. This feature streamlines the bill payment process, improves efficiency, and reduces the chance of payment errors.
By effectively tracking expenses and managing bills in QuickBooks, you can maintain accurate financial records, gain insights into your spending, and streamline your bill payment processes. QuickBooks provides the tools and features necessary to simplify expense tracking and bill management, allowing you to focus on growing your business.
Chapter 6: Recording and Reconciling Transactions
Accurate and up-to-date record-keeping is vital for any business’s financial health. QuickBooks offers powerful features that enable you to record and reconcile transactions efficiently. In this chapter, we will explore the process of recording and reconciling transactions in QuickBooks.
The first step in recording transactions in QuickBooks is to enter each transaction into the appropriate account. Whether it’s a sale, expense, or transfer, QuickBooks provides a simple and intuitive interface to input all relevant details. You can categorize transactions, assign them to specific accounts, and add important information such as dates, amounts, and payment methods.
QuickBooks also supports automatic transaction importing through bank feeds. By connecting your bank accounts to QuickBooks, your transactions can be imported, categorized, and matched to existing records. This saves time and reduces data entry errors.
Once transactions are recorded, it’s essential to regularly reconcile your accounts in QuickBooks. Reconciliation involves comparing your recorded transactions against your bank statements to ensure that they match. QuickBooks provides a reconciliation tool that guides you through the process step-by-step.
During the reconciliation process, you’ll review your bank statements and match them with the transactions recorded in QuickBooks. Any discrepancies or missing transactions can be identified and corrected. Reconciling your accounts regularly helps detect errors, fraud, or unauthorized transactions, ensuring the accuracy of your financial records.
QuickBooks also allows you to automate the reconciliation process. By enabling bank rules, QuickBooks can automatically categorize and match transactions based on predefined criteria. This feature saves time and streamlines the reconciliation process, especially when dealing with a large volume of transactions.
In addition to recording and reconciling transactions, QuickBooks offers the capability to split transactions. This feature can be helpful when a single transaction needs to be assigned to multiple accounts or categories. Splitting transactions ensures that each portion is accurately recorded, providing clearer insights into different aspects of your business’s finances.
By recording and reconciling transactions in QuickBooks, you maintain a comprehensive and accurate record of your business’s financial activities. This enables you to monitor cash flow, track expenses and income, and generate reports that provide valuable insights into your business’s financial health.
In this chapter, we have explored the process of recording and reconciling transactions in QuickBooks. From entering and categorizing transactions to reconciling accounts and utilizing automation features, QuickBooks offers robust tools to streamline your finance management processes and ensure the integrity of your financial records.
Chapter 7: Generating Reports in QuickBooks
Generating accurate and insightful reports is essential for understanding the financial health of your business and making informed decisions. QuickBooks provides a wide range of reporting features that allow you to analyze and interpret your financial data effectively. In this chapter, we will explore the process of generating reports in QuickBooks.
QuickBooks offers a variety of pre-built reports that cater to different aspects of your business’s finances. These reports include profit and loss statements, balance sheets, cash flow statements, sales reports, expense reports, and more. To generate a report, navigate to the Reports module and select the desired report from the available options.
Once you select a report, you can customize it according to your specific needs. QuickBooks provides options to choose the reporting period, select specific accounts or categories, apply filters, and sort data. Customizing reports allows you to focus on the most relevant information and gain insights specific to your business.
QuickBooks also offers interactive report features such as drill-down capability. This feature allows you to click on specific data points within a report to view more detailed information. For example, you can click on a specific expense category to view a breakdown of individual transactions contributing to that category.
In addition to pre-built reports, QuickBooks provides the flexibility to create custom reports. Custom reports enable you to define specific criteria, metrics, and groupings to obtain the exact information you need. The custom report feature allows for more granular analysis and provides the ability to track specific performance indicators unique to your business.
Another valuable reporting feature in QuickBooks is the ability to memorize and schedule reports. This feature allows you to save frequently generated reports and have them automatically generated and sent to designated recipients at specified intervals. This automated reporting ensures that you regularly receive timely financial updates without the need for manual intervention.
QuickBooks also allows you to export reports in various formats, such as PDF or Excel. Exporting reports provides the flexibility to share or further analyze the data outside of QuickBooks. You can distribute reports to stakeholders, accountants, or use them for presentations or financial planning purposes.
In this chapter, we have explored the process of generating reports in QuickBooks. By leveraging the pre-built reports, customizing reports, utilizing interactive features, and automating reporting, QuickBooks empowers you to gain valuable insights into your business’s financial performance, make data-driven decisions, and effectively communicate financial information to stakeholders.
Chapter 8: Customizing QuickBooks for Your Business
Every business has unique needs and preferences when it comes to managing their finances. QuickBooks understands this and provides extensive customization options to tailor the software to your specific requirements. In this chapter, we will explore how you can customize QuickBooks to optimize its functionality for your business.
One of the first steps in customizing QuickBooks is setting up your company preferences. This includes configuring settings such as your fiscal year, tax settings, payment terms, and default accounts. By customizing these preferences, you ensure that QuickBooks aligns with your specific business processes and regulations.
QuickBooks also allows you to customize your chart of accounts. You can create, modify, and organize account categories to accurately reflect your business’s financial structure. Customizing your chart of accounts ensures that you can track income, expenses, assets, and liabilities in a way that best suits your business’s needs.
Furthermore, QuickBooks provides options to customize invoices, estimates, and other forms. You can add your logo, adjust the layout and formatting, and include personalized messages or terms. This customization feature helps create a professional and cohesive look for your financial documents, reinforcing your branding efforts.
In addition to visual customization options, QuickBooks allows you to personalize the user interface to enhance your user experience. You can rearrange, resize, and hide widgets on the dashboard to display the most relevant information for your daily operations. Customizing the dashboard ensures that you have quick access to the tools and data you need.
QuickBooks also offers the flexibility to customize reports to meet your specific reporting requirements. You can choose the data, metrics, and timeframes to include in your reports. Additionally, you can customize the appearance and style of your reports, such as adding headers, footers, or company logos. Customized reports enable you to present financial information in a format that is most meaningful for your business.
Another beneficial customization feature in QuickBooks is the ability to add or integrate apps and extensions. QuickBooks has a vast ecosystem of third-party apps and integrations that can enhance the software’s functionality. From payment processors and e-commerce platforms to project management tools and time-tracking apps, you can customize QuickBooks by leveraging these integrations to meet specific business needs.
By customizing QuickBooks to fit your business, you increase efficiency, accuracy, and overall user satisfaction. Take advantage of the customization options available to optimize the software’s functionality for your unique financial management requirements.
In this chapter, we have explored the various ways you can customize QuickBooks for your business. From setting up company preferences to customizing forms, reports, and the user interface, QuickBooks provides the flexibility to adapt to your specific needs. Embrace these customization features to maximize the software’s potential and tailor it to your business’s requirements.
Chapter 9: Integrating QuickBooks with Other Tools
QuickBooks is a powerful accounting software on its own, but its capabilities can be further enhanced by integrating it with other tools and applications. In this chapter, we will explore the benefits of integrating QuickBooks with other tools and how this integration can streamline your business processes.
One common integration is connecting QuickBooks with your bank accounts. By linking your bank accounts to QuickBooks, you can automate the process of importing transactions, categorizing expenses, and reconciling accounts. This integration saves time and reduces the chance of manual data entry errors.
Furthermore, integrating QuickBooks with payment processors or merchant services enables you to seamlessly accept online payments. With a configured integration, your customers can conveniently pay invoices online, and the payment details are automatically recorded in QuickBooks. This integration accelerates the payment process, improves cash flow, and reduces the need for manual reconciliation.
An integration that can significantly benefit businesses is the connection between QuickBooks and customer relationship management (CRM) software. This integration allows you to sync customer data between QuickBooks and your CRM. By integrating these systems, you can streamline sales processes, track customer interactions, and have a unified view of customer information across both platforms.
For businesses that rely heavily on e-commerce, integrating QuickBooks with e-commerce platforms is crucial for seamless order and inventory management. With this integration, you can automatically sync sales data, track inventory levels, and update product information between QuickBooks and your e-commerce platform. This integration saves time on manual data entry and ensures accurate and up-to-date information across both systems.
Other integrations worth considering include time tracking tools, project management software, payroll services, and expense management applications. Each integration reduces manual effort, improves data accuracy, and provides a holistic view of your business’s finances.
QuickBooks provides an App Store where you can explore and discover a wide range of integrations. The App Store showcases third-party apps and extensions that integrate seamlessly with QuickBooks. Take the time to evaluate and choose integrations that align with your business needs and goals.
Remember, when integrating with other tools, ensure compatibility and confirm that the integration meets your specific requirements. Some integrations may require additional configuration or a subscription fee. Collaborate with your IT team or consult with the integration provider to ensure a smooth and successful integration process.
In this chapter, we have explored the benefits of integrating QuickBooks with other tools and applications. By connecting QuickBooks with bank accounts, payment processors, CRM systems, e-commerce platforms, and other tools, you can streamline your business processes, increase efficiency, and gain a more comprehensive view of your financial data.
Conclusion
Throughout this guide, we have covered various aspects of using QuickBooks to effectively manage your business’s finances. From getting started with QuickBooks to customizing the software, recording transactions, generating reports, and integrating with other tools, you now have a solid foundation to navigate and optimize your financial processes.
By utilizing the features and functionalities of QuickBooks, you can streamline your invoicing, track expenses, manage bills, and gain valuable insights into your business’s financial health. The software’s user-friendly interface, customization options, and reporting capabilities empower you to make informed decisions and drive your business toward success.
Remember, as you continue using QuickBooks, always explore new features and updates that become available. Stay up to date with the latest integrations and leverage them to further streamline your processes and enhance your business operations.
Additionally, QuickBooks offers a wealth of resources such as tutorials, webinars, and a supportive online community. Take advantage of these resources to expand your knowledge and deepen your understanding of how to maximize the benefits of QuickBooks.
Now it’s time to apply what you’ve learned and embark on your QuickBooks journey. Start by familiarizing yourself with the software’s interface, entering your financial data, and exploring the different modules and functionalities. As you gain more experience, continue to fine-tune your usage and leverage QuickBooks to its full potential.
With QuickBooks as your financial management companion, you have the tools and insights necessary to take control of your business’s finances, make informed decisions, and fuel the growth of your venture. Embrace the power of QuickBooks and embark on a path of efficient financial management and growth.