Introduction
Creating invoices is an essential part of running a business. It allows you to bill your customers for products and services rendered, keeping track of payments and managing your finances effectively. QuickBooks, a popular accounting software, offers a seamless and efficient way to generate invoices and manage your invoicing process.
In this article, we will guide you through the process of creating invoices in QuickBooks step by step. Whether you are a small business owner or a freelancer, this comprehensive guide will help you streamline your invoicing process and ensure accuracy in your financial records.
From setting up the necessary information in QuickBooks to customizing your invoice templates and managing discounts and taxes, we will cover all the essential steps required to create professional-looking invoices that reflect your brand identity and facilitate prompt payments.
Mastering the art of creating invoices in QuickBooks will not only save you time but also improve cash flow and ensure transparency in your financial transactions. So, let’s dive in and explore the step-by-step process of creating invoices in QuickBooks.
Step 1: Setting up the necessary information
Before you start creating invoices in QuickBooks, it is important to set up the necessary information to ensure accurate and detailed invoicing. QuickBooks allows you to customize your invoice template and input essential details that will be automatically populated in each invoice. Follow these steps to set up the necessary information:
- Open QuickBooks and go to the “Settings” menu: Launch QuickBooks and navigate to the “Settings” menu by clicking on the gear icon located at the top right corner of the screen.
- Select “Custom Form Styles”: Once you are on the “Settings” menu, click on “Custom Form Styles” to access the options related to your invoice templates.
- Create a new invoice template: In the “Custom Form Styles” section, you have the option to either customize an existing template or create a new one. Click on “+ New Style” to create a fresh invoice template tailored to your business needs.
- Choose a template type: QuickBooks offers different types of templates, such as “Standard,” “Service,” “Product,” or “Professional.” Select the template type that best fits your business requirements.
- Personalize your template: Customize your invoice template by adding your company logo, selecting colors that align with your brand, and modifying the font style. You can also include additional fields, such as payment terms, due dates, and contact information.
- Save your template: Once you have personalized your template, click on “Done” to save your changes. Your template will now be available for use when creating invoices.
By setting up the necessary information and customizing your invoice template, you ensure that your invoices reflect your brand identity and contain all the essential details required for effective invoicing. This step sets the foundation for creating professional and accurate invoices in QuickBooks.
Step 2: Creating a new invoice
Now that you have set up your invoice template in QuickBooks, it’s time to create a new invoice. Follow these steps to generate an invoice:
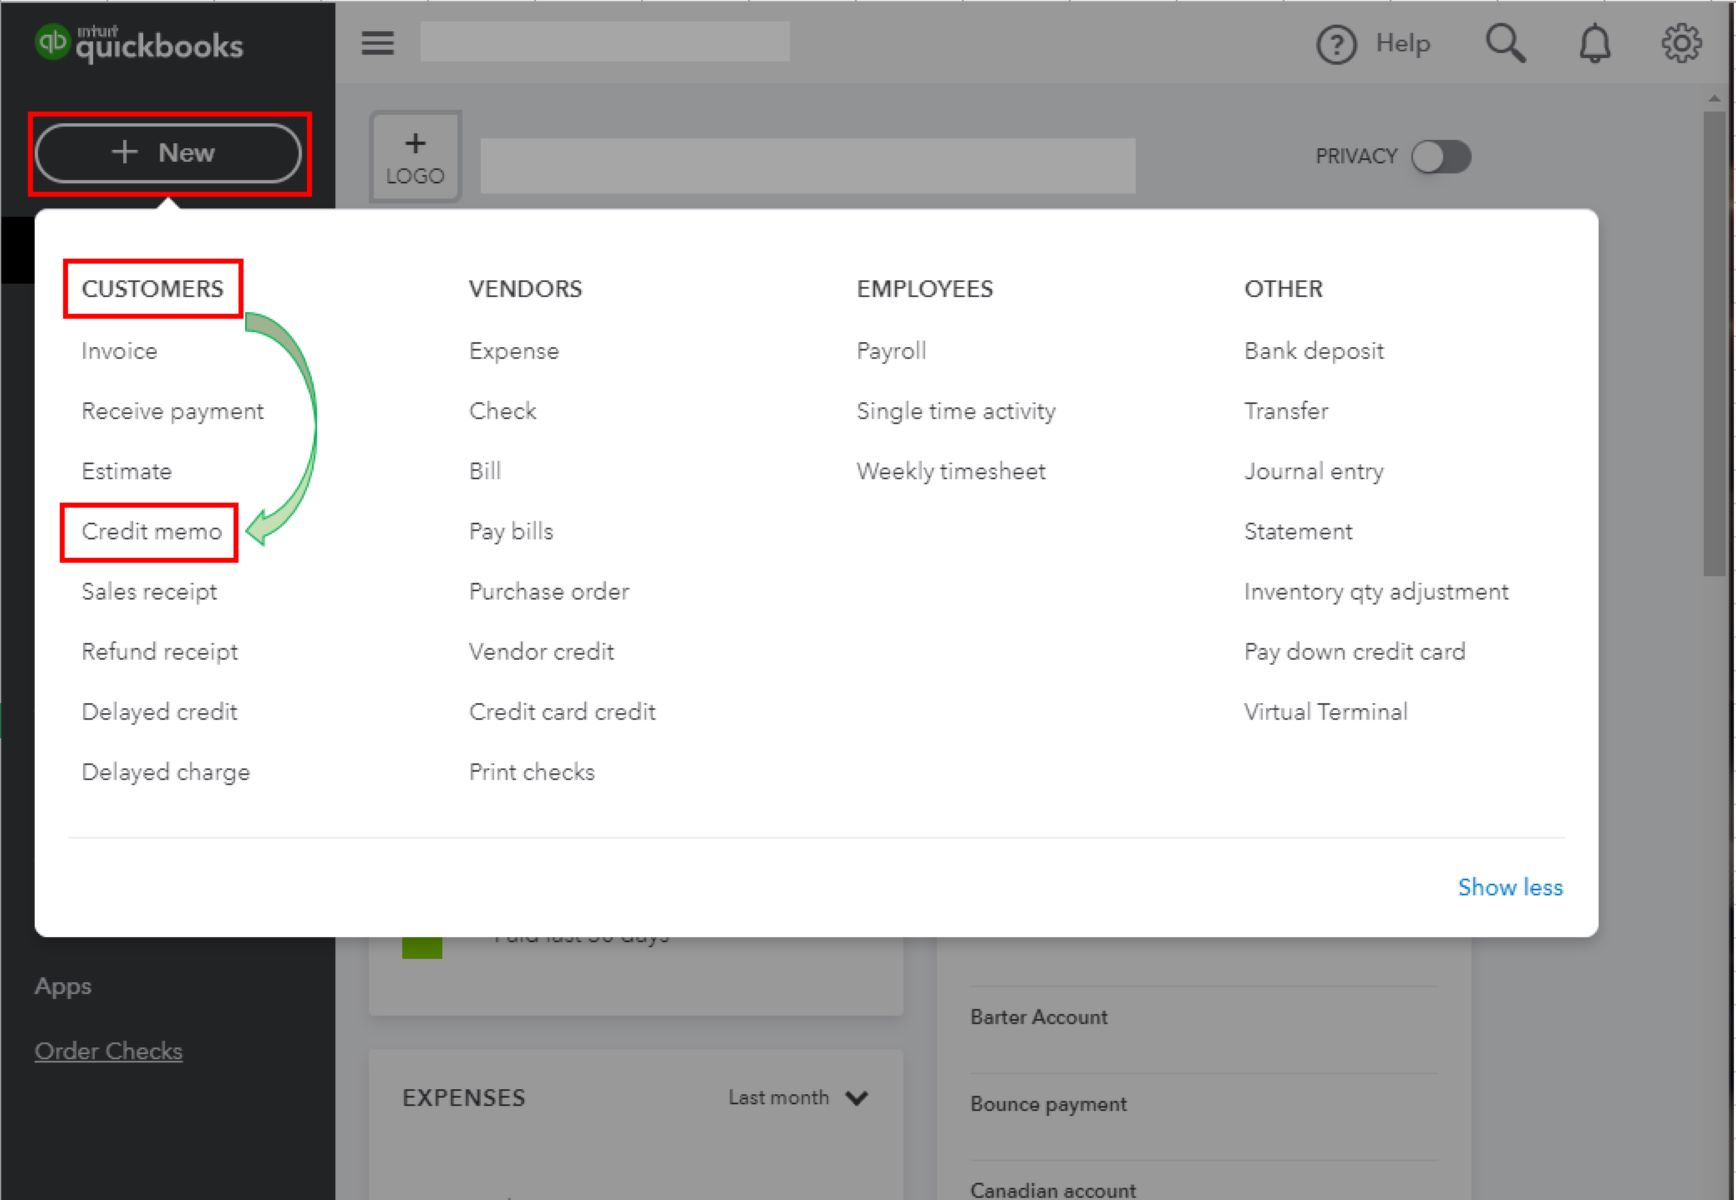
- Access the Invoice Menu: From the QuickBooks main dashboard, click on the “Invoicing” or “Create” tab to access the invoice creation menu.
- Select “Invoice”: In the invoice creation menu, click on the option that says “Invoice” to start creating a new invoice.
- Choose the customer: In the “Customer” field, either select an existing customer from your contact list or add a new customer by clicking the “+ Add New” button. Fill in the customer’s contact information such as name, address, email, and phone number.
- Select the billing date: Set the date of the invoice by choosing the appropriate date from the “Invoice Date” field. This is the date when the invoice is issued to the customer.
- Assign an invoice number: QuickBooks automatically assigns an invoice number for you. However, if you have your own numbering system, you can edit the auto-generated number to match your preferences.
- Add a description: Include a clear and concise description of the products or services provided in the “Product/Service” field. You can enter multiple items by clicking on the “+ Add” button.
- Enter the quantity and rate: Indicate the quantity and rate of each item or service provided. QuickBooks will calculate the total automatically.
- Include any additional charges: If there are additional charges, such as shipping fees or applicable taxes, you can include them under the “Add your service” or “Add your product” sections.
- Save the invoice: Once you have entered all the necessary information, click on the “Save and send” or “Save and close” button to save the invoice. You can choose to save it as a draft or send it directly to the customer.
By following these steps, you can easily create a professional invoice in QuickBooks. The flexibility of the software allows you to tailor each invoice to the specific details of the transaction, ensuring accuracy and clarity for your customers.
Step 3: Adding customer and item details
Once you have created a new invoice in QuickBooks, it’s important to add customer and item details to make the invoice specific and accurate. Follow these steps to include customer and item details in your invoice:
- Customer Information: In the invoice creation screen, ensure that the correct customer is selected or add a new customer if necessary. Include relevant details such as their name, address, email, and phone number. This information will appear on the invoice for easy identification and communication.
- Item Details: Include the items or services you are invoicing for in the invoice. Start by selecting the “Product/Service” field and choose the appropriate item from your predefined list. If the item is not in the list, you can add it by clicking the “+ Add New” option. Specify the quantity, rate, and any relevant descriptions for each item.
- Description: Provide a clear and concise description of the products or services being invoiced. This will help your customers understand what they are being billed for. You can include additional details, such as specifications or special instructions, if required.
- Item customization: QuickBooks allows you to customize each item on the invoice. You can add custom fields, specify different tax rates, or apply discounts or markups. This flexibility ensures that each item is accurately represented on the invoice.
- Shipping and handling: If applicable, include any additional charges for shipping, handling, or other services. QuickBooks provides dedicated fields for adding these charges, ensuring that all costs associated with the transaction are clearly communicated to the customer.
By including customer and item details in your invoice, you ensure that the invoice is personalized and accurately reflects the products or services provided. This level of detail not only helps in maintaining transparency and trust with customers but also facilitates efficient record keeping and financial management.
Step 4: Customizing the invoice template
One of the advantages of using QuickBooks for invoicing is the ability to customize the invoice template to match your brand identity and communication style. Follow these steps to personalize and customize your invoice template:
- Access the Custom Form Styles: From the main dashboard of QuickBooks, click on the “Settings” menu and select “Custom Form Styles.” This will take you to the customization options for your invoice templates.
- Select the desired template: Choose the invoice template you want to customize. QuickBooks provides several pre-designed templates to choose from, or you can choose to customize an existing template.
- Modify the layout: Change the layout and format of your invoice template to match your branding. You can add or remove fields, rearrange sections, and resize columns to suit your needs. This ensures that your invoice template presents information in an organized and professional manner.
- Add your logo and colors: Upload your company logo to the template and select colors that align with your brand’s visual identity. This personalization adds a professional touch to your invoices and reinforces your brand recognition.
- Include additional fields: Customize the template by adding fields that are specific to your business needs. This can include terms and conditions, payment methods, or any other information that is essential for your customers to know.
- Save the customizations: Once you have made the desired changes to your invoice template, click on the “Done” button to save the customizations. Your template will now reflect your personalized branding and be ready for use.
By customizing your invoice template, you create a consistent and professional look for all your invoices. This not only enhances your brand image but also improves customer perception and credibility. Take advantage of QuickBooks’ customization features to make your invoices visually appealing and reflective of your business identity.
Step 5: Including discounts and taxes
When creating invoices in QuickBooks, it’s important to include any discounts or taxes that apply to the transaction. Follow these steps to ensure accurate calculation and representation of discounts and taxes in your invoices:
- Adding Discounts: If you offer discounts to your customers, you can include them in your invoices. In the invoice creation screen, find the appropriate field for entering discounts. Specify the discount amount or percentage, and QuickBooks will automatically calculate the discounted total.
- Applying Taxes: Depending on the tax regulations in your region, you may need to include taxes in your invoices. QuickBooks allows you to set up tax rates and apply them to your invoices. In the invoice creation screen, select the appropriate tax rate from the drop-down menu or add a new tax rate if it’s not listed.
- Adding Taxable Items: If certain items on your invoice are taxable while others are not, you can indicate this by selecting the tax rate for each taxable item individually. QuickBooks will calculate the tax amount for each item and display the total tax separately.
- Displaying Discounts and Taxes: By default, QuickBooks displays the subtotal, discounts, taxes, and the final total on your invoice. This provides transparency to your customers by clearly showing the calculations and adjustments applied to the invoice.
- Customizing Discount and Tax Labels: QuickBooks allows you to customize the labels for discounts and taxes to align with your terminology or regional requirements. You can change these labels in the customization settings, ensuring clarity and accuracy in your invoicing process.
- Reviewing and Verifying: Before finalizing the invoice, review the calculations for discounts and taxes to ensure accuracy. Double-check the figures to avoid any discrepancies or errors.
By including discounts and taxes in your invoices, you ensure that the final invoice amount accurately reflects the agreed-upon price and any additional charges. This transparent approach not only prevents confusion but also builds trust with your customers, demonstrating your commitment to fair and accurate invoicing.
Step 6: Previewing and reviewing the invoice
Before finalizing and sending an invoice in QuickBooks, it is crucial to preview and thoroughly review it to ensure accuracy and professionalism. Follow these steps to preview and review your invoice:
- Open the Invoice: Locate the invoice you want to preview and review in QuickBooks. This can be done by searching for the specific invoice number or navigating through the “Invoicing” or “Sales” menu.
- Preview the Invoice: Once you have opened the invoice, take a moment to preview it. Review the customer and item details, discounts, taxes, and any other information included in the invoice. Pay close attention to the layout, formatting, and overall appearance of the invoice.
- Check for Accuracy: Verify the accuracy of the invoice by comparing it with the agreed-upon terms, pricing, and any other special agreements. Ensure that the quantities, rates, and totals are correct. This step is essential to avoid any errors or discrepancies that may cause confusion or delays in payment.
- Review the Language and Tone: Evaluate the language and tone used in the invoice. Make sure it is professional and polite, providing clear instructions, payment terms, and contact information. Pay attention to grammar, spelling, and punctuation errors that could undermine your credibility.
- Consider Branding: Check if the invoice template reflects your brand identity. Ensure that your logo, colors, and other visual elements are consistent with your company’s branding. This helps in maintaining a cohesive and professional image across all customer communications.
- Make Necessary Edits: If you spot any errors or discrepancies during the review process, make the necessary edits. QuickBooks allows you to edit invoices easily, so you can quickly correct any mistakes or update information.
- Save or Send: Once you are satisfied with the preview and review, you can either save the invoice as a PDF file for record-keeping or proceed to send it directly to the customer via email using QuickBooks’ emailing feature.
By taking the time to preview and review your invoice, you ensure that it represents your business accurately, meets professional standards, and provides a positive experience for your customers. Careful review minimizes the risk of any errors or misunderstandings and reflects your commitment to delivering quality service.
Step 7: Sending the invoice to the customer
Once you have reviewed and finalized the invoice in QuickBooks, it’s time to send it to the customer. Sending the invoice promptly and efficiently ensures timely payment and maintains a professional relationship with your clients. Follow these steps to send the invoice:
- Choose the delivery method: QuickBooks provides various methods to send the invoice to your customer. You can either email it directly from within the software or download it as a PDF and send it via other communication channels.
- Email the invoice: If you choose to email the invoice through QuickBooks, click on the “Send” button to open the email composer. Enter the recipient’s email address and customize the email message if desired. QuickBooks will attach the invoice as a PDF file automatically.
- Review the email: Take a moment to review the email before sending it. Check for accuracy in the recipient’s email address, subject line, and message content. Make sure that the email conveys professionalism and provides clear instructions for payment.
- Include additional instructions: If there are any specific instructions or information related to the invoice, such as payment deadlines or preferred payment methods, include them in the email. This helps to ensure a smooth payment process and minimizes any potential confusion.
- Send the email: Once you are satisfied with the email content, click on the “Send” button to deliver the invoice to the customer. QuickBooks will track the delivery status and provide you with relevant information.
- Record the delivery: After sending the invoice, it’s important to record the delivery in QuickBooks for future reference. This helps you keep track of when and how the invoice was sent, facilitating follow-up actions if necessary.
By promptly sending the invoice to the customer, you demonstrate professionalism and efficiency. Regular communication and clear instructions encourage timely payments and smooth financial transactions. Utilize QuickBooks’ email functionality to streamline the invoicing process and maintain a seamless relationship with your customers.
Conclusion
Creating invoices in QuickBooks is a vital aspect of managing your business’s financial transactions. This comprehensive guide has walked you through the step-by-step process of creating professional and accurate invoices. By following these steps, you can streamline your invoicing process, ensure transparency in financial transactions, and maintain a professional image with your customers.
From setting up the necessary information and customizing your invoice template to adding customer and item details, incorporating discounts and taxes, previewing and reviewing the invoice, and finally sending it to the customer, each step plays a crucial role in creating accurate and professional invoices.
Remember to take advantage of QuickBooks’ customization features to personalize your templates, reflect your branding, and provide a consistent experience for your customers.
By paying attention to detail, accuracy, and professionalism throughout the entire invoicing process, you can establish trust, improve cash flow, and ensure prompt payments from your customers.
Keep in mind that following best practices in invoicing not only benefits your business’s financial health but also contributes to building strong relationships with your customers. Effective and efficient invoicing is a key component of business success, and QuickBooks provides the tools to streamline this process.
Now that you have a solid understanding of how to create invoices in QuickBooks, put this knowledge into practice and enjoy the benefits of accurate financial records and efficient invoicing.


