Introduction
Welcome to the world of QuickBooks Online, where managing your finances and receiving payments becomes streamlined and efficient. In today’s digital landscape, businesses need tools that can keep up with the demands of modern payment processing. QuickBooks Online offers a comprehensive platform that allows you to easily set up payment options and receive payments from your customers.
With its user-friendly interface and powerful features, QuickBooks Online provides a seamless experience for generating invoices, accepting online payments, and recording cash or check payments. Whether you’re a small business owner, a freelancer, or an accountant managing multiple clients, QuickBooks Online simplifies the payment process, enabling you to focus on growing your business.
In this article, we will guide you through the step-by-step process of receiving payments in QuickBooks Online. By the end, you will have a clear understanding of how to set up payment options, create invoices, accept online payments, record cash and check payments, apply payments to invoices, and reconcile payments. Let’s get started!
Step 1: Set Up Payment Options
Before you can start receiving payments in QuickBooks Online, you need to set up your payment options. QuickBooks Online provides multiple ways for your customers to pay, including credit cards, bank transfers, and online payment processors such as PayPal and Stripe. Here’s how to get started:
- Go to Your Company Settings: Log in to your QuickBooks Online account and navigate to the Gear icon in the upper right corner. From the dropdown menu, select “Account and Settings.”
- Select the “Payments” Tab: Within the Account and Settings menu, click on the “Payments” tab on the left-hand side of the screen.
- Choose Your Payment Processor: QuickBooks Online offers integration with several popular payment processors. Select the one that best suits your business needs and follow the on-screen instructions to link your account.
- Set Up Bank Transfers: To enable bank transfers as a payment option, click on the “Set Up Bank Transfer” button and provide the necessary banking information.
- Customize Payment Settings: Within the Payments tab, you can customize settings such as invoice reminders, late fees, and sales receipt messages. Take the time to tailor these settings to align with your business policies and preferences.
- Save Your Changes: Once you’ve set up your payment options and customized the settings, click “Save” to apply the changes.
By following these simple steps, you can ensure that your customers have a variety of convenient payment methods to choose from. Setting up payment options in QuickBooks Online not only streamlines the payment process but also enhances customer satisfaction and improves cash flow for your business.
Step 2: Create Invoices
Once you have set up your payment options in QuickBooks Online, the next step is to create invoices that accurately reflect the products or services you are billing your customers for. Invoices serve as professional and detailed records of the transactions, and they also provide a clear breakdown of the payment due. Here’s how to create invoices in QuickBooks Online:
- Navigate to the Invoices Section: From the QuickBooks Online home screen, click on the “Invoicing” tab in the navigation menu on the left-hand side.
- Click on “Create Invoice”: On the upper right corner, you will find a green “Create Invoice” button. Click on it to start creating a new invoice.
- Select Your Customer: In the “Choose a customer” field, search for and select the customer you are creating the invoice for. If the customer is not in your QuickBooks Online customer list, click on “Add a customer” and enter their information.
- Add Line Items: Enter the products or services you are billing the customer for. Specify the description, quantity, rate, and any applicable taxes or discounts for each line item.
- Customize the Invoice: QuickBooks Online allows you to customize the appearance of your invoices to match your brand. You can add your logo, choose a theme, and include personalized messages.
- Preview and Save the Invoice: Before finalizing the invoice, preview it to ensure accuracy. Once you’re satisfied, click on “Save and send” or “Save and close” to save the invoice.
Creating clear and professional invoices is essential for maintaining a smooth payment process. With QuickBooks Online’s invoicing features, you can easily generate invoices that showcase your professionalism and help your customers understand the details of their payments.
Step 3: Accept Online Payments
In the digital age, accepting online payments is a convenient and efficient way to streamline your payment process. QuickBooks Online offers seamless integration with various online payment processors, allowing you to easily receive payments from your customers. Here’s how to accept online payments in QuickBooks Online:
- Enable Online Payments: In the “Account and Settings” menu, navigate to the “Payments” tab and make sure that the online payment option is enabled. This will allow your customers to pay their invoices online.
- Send the Invoice: After creating an invoice, you can choose to send it to your customer via email directly from QuickBooks Online. The invoice will include a “Pay Now” button, which allows the customer to make their payment online.
- Set Up a Payment Gateway: QuickBooks Online seamlessly integrates with popular payment gateways such as PayPal, Stripe, and Square. Choose the payment gateway of your preference and follow the on-screen instructions to link your account.
- Notify Customers: Inform your customers that they can choose to pay their invoices online. Include instructions on how to make online payments and emphasize the convenience and security that online payments offer.
- Track Online Payments: QuickBooks Online automatically tracks and records online payments, simplifying the process of reconciling your accounts and providing accurate financial reports.
Accepting online payments not only provides convenience for your customers, but it also improves your cash flow and reduces manual administrative tasks. QuickBooks Online’s integration with online payment processors makes it effortless to receive payments and ensures a seamless transaction experience for both you and your customers.
Step 4: Record Cash and Check Payments
While online payments offer convenience, some customers may still prefer to pay by cash or check. QuickBooks Online allows you to easily record cash and check payments, ensuring accurate and up-to-date records of your transactions. Here’s how to record cash and check payments in QuickBooks Online:
- Navigate to Sales or Invoicing: From the QuickBooks Online home screen, click on the “Sales” or “Invoicing” tab in the navigation menu on the left-hand side.
- Find the Payment: Locate the invoice that corresponds to the cash or check payment you received. Click on the invoice to open it.
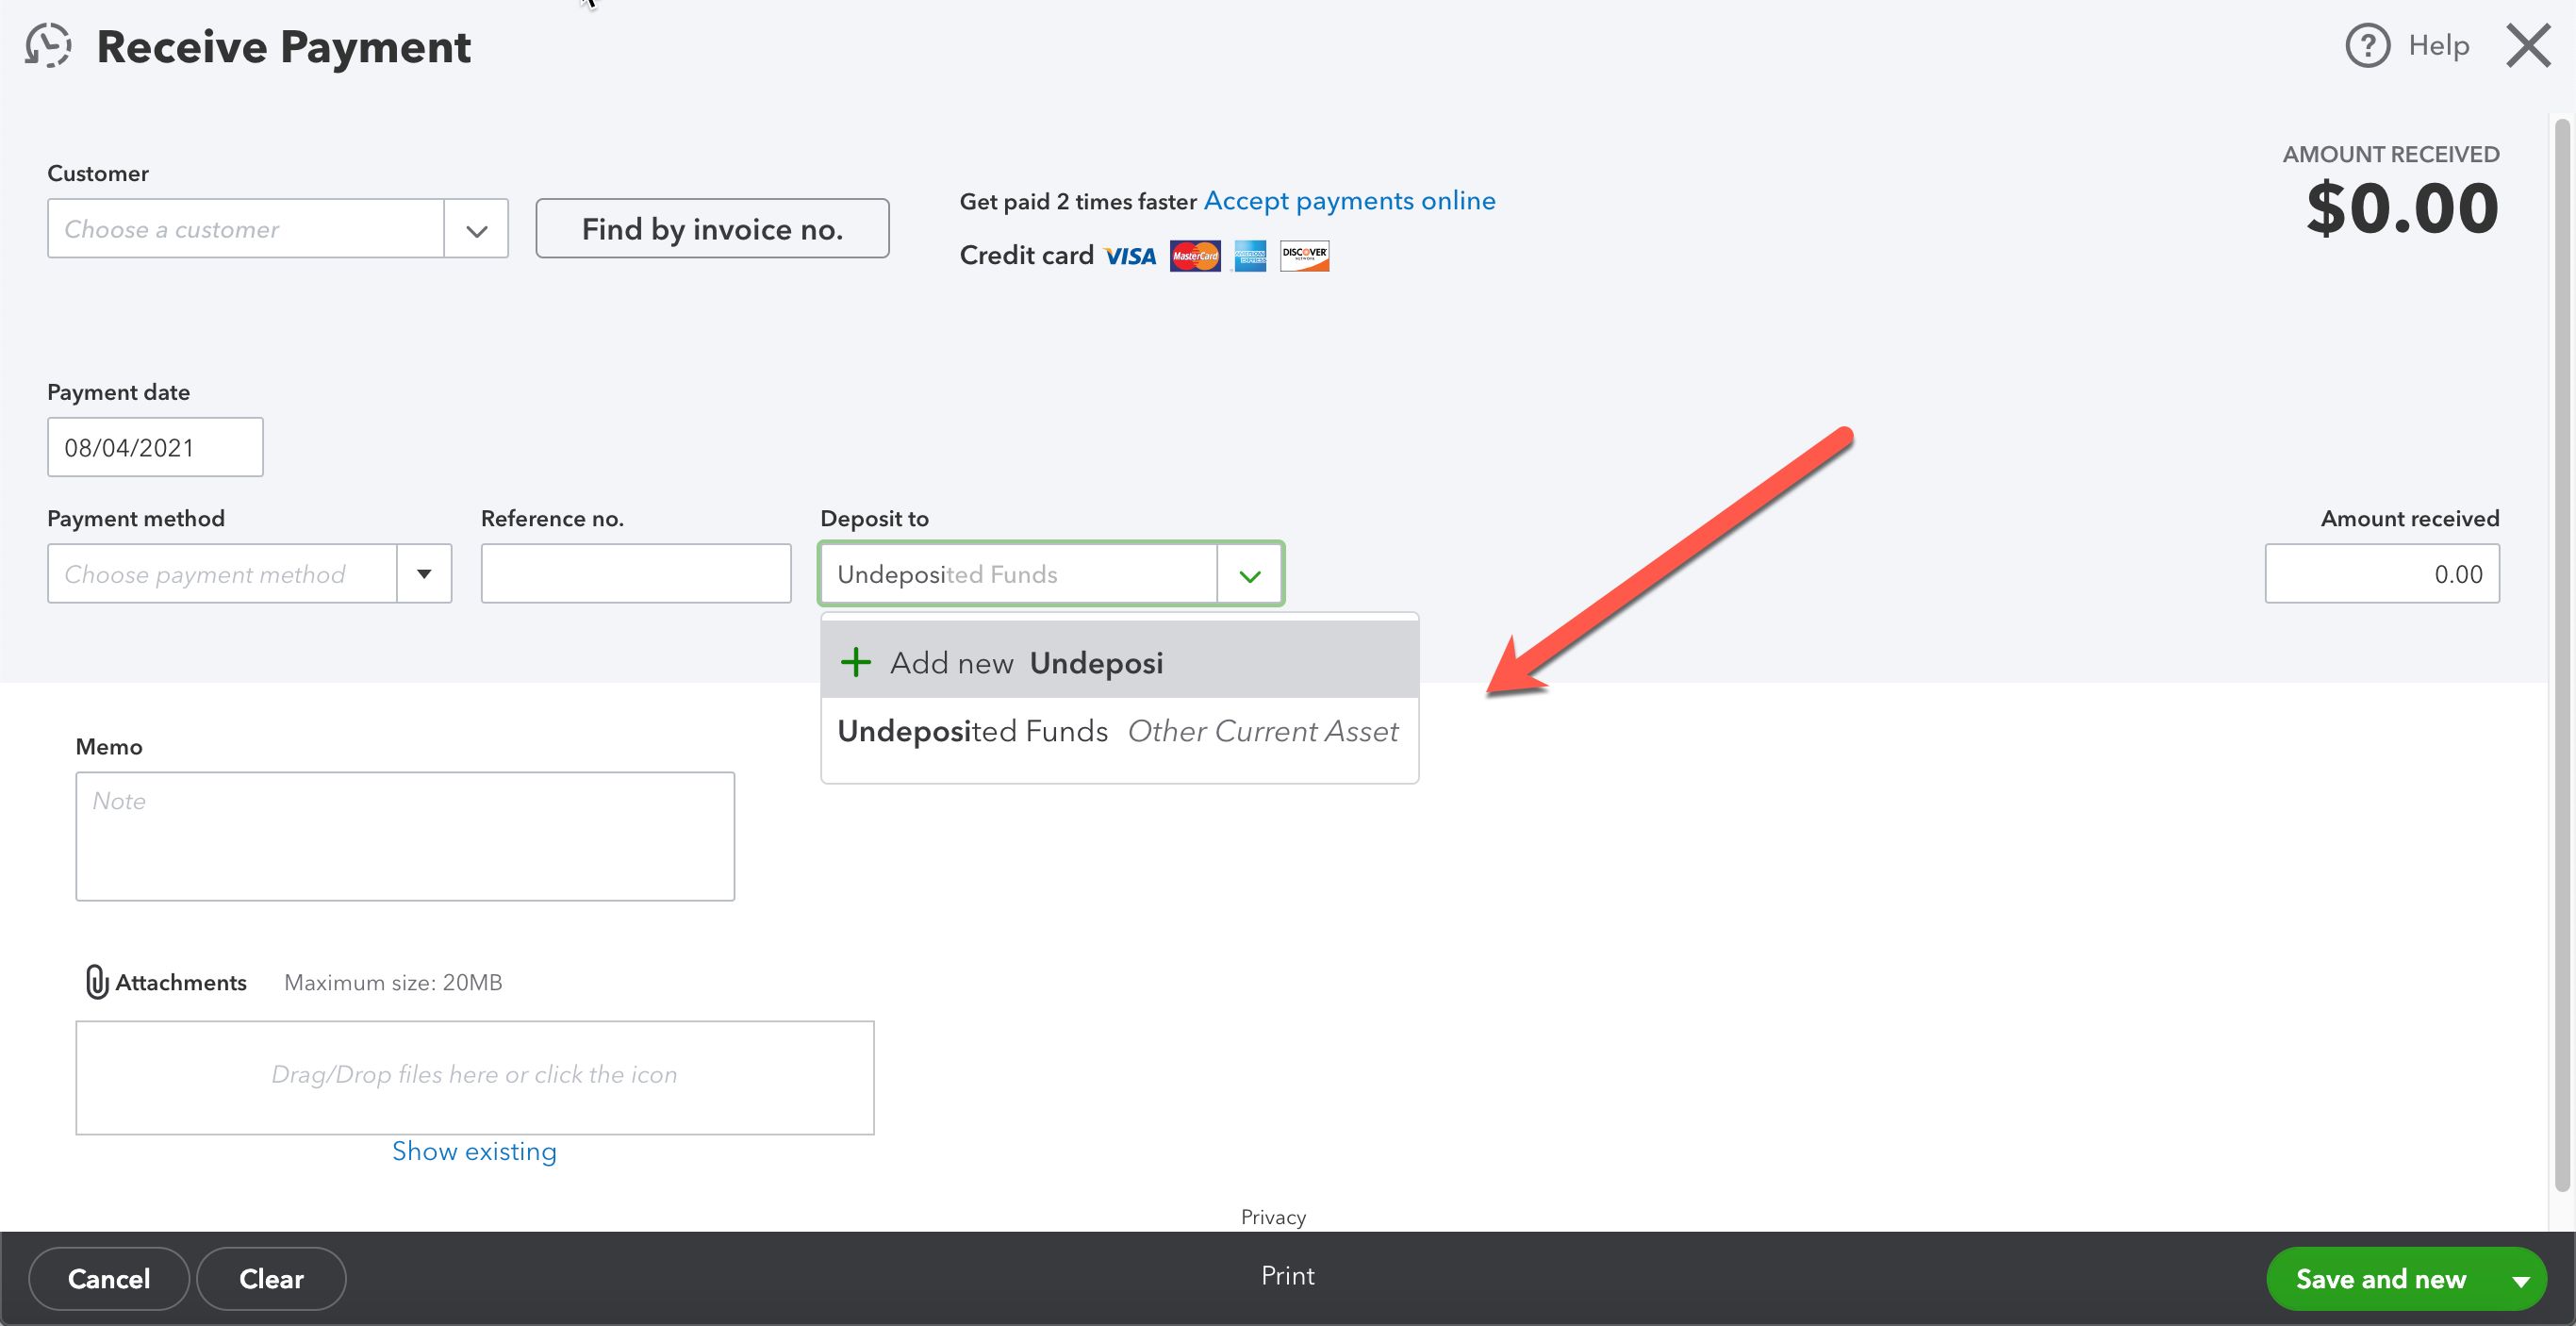
- Click on “Receive Payment”: On the upper right corner of the invoice, you will find a green “Receive Payment” button. Click on it to start recording the payment.
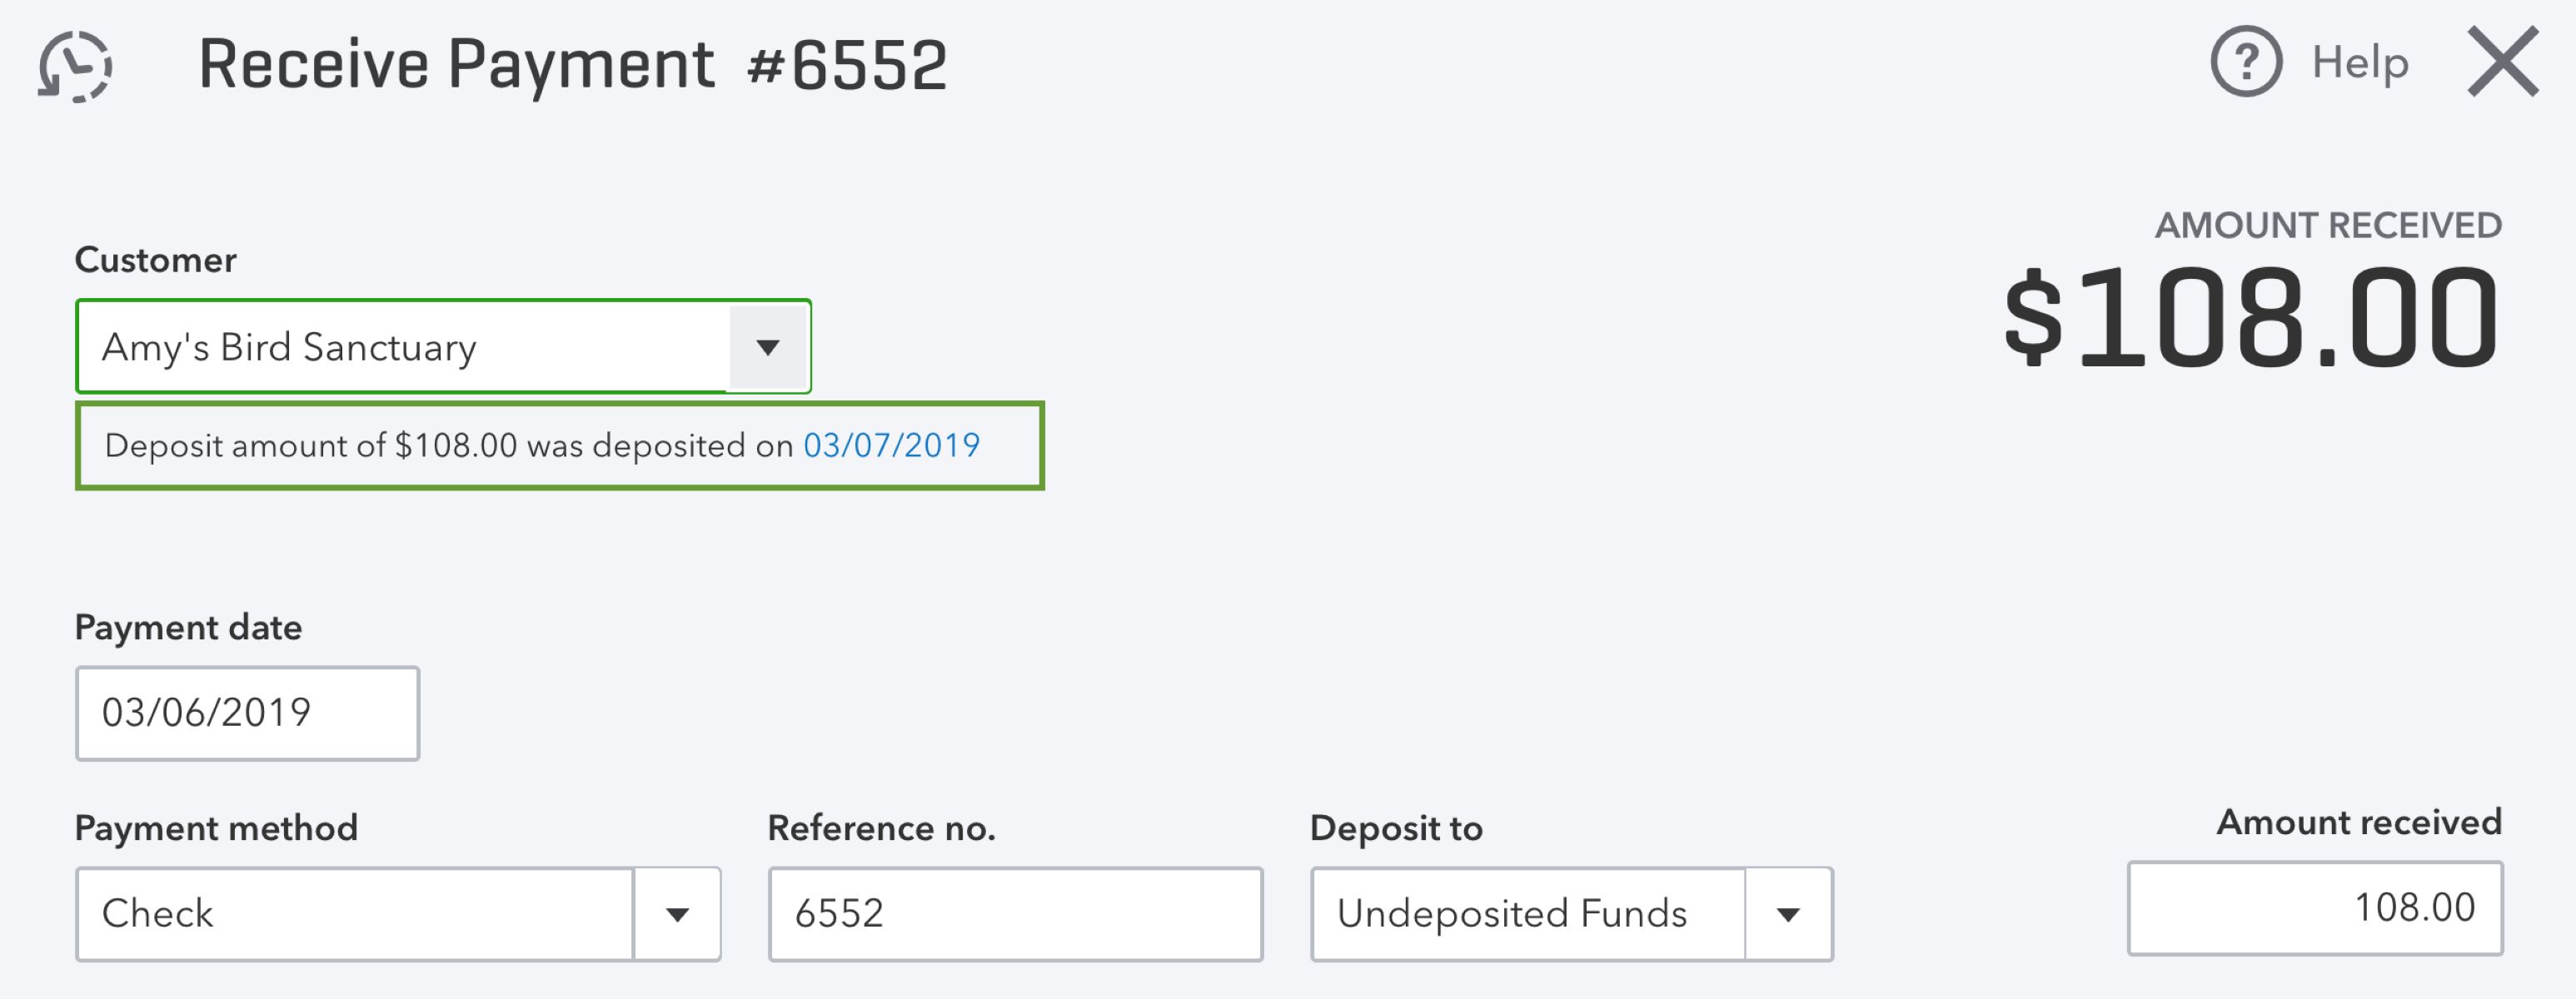
- Select the Payment Type: In the “Payment method” field, choose either “Cash” or “Check” depending on the type of payment received.
- Enter Payment Details: Fill in the payment amount received, payment date, and any additional notes or memos related to the payment.
- Apply the Payment to the Invoice: QuickBooks Online allows you to apply the cash or check payment to the specific invoice. Enter the amount of the payment that should be applied to the invoice.
- Save the Payment: Once you have entered all the payment details, click on “Save and close” to record the cash or check payment.
Recording cash and check payments accurately is crucial for maintaining your financial records and keeping track of your receivables. QuickBooks Online simplifies this process, ensuring that your accounts are up to date and providing you with a clear overview of your cash flow.
Step 5: Apply Payments to Invoices
After receiving payments, it’s important to properly apply those payments to the corresponding invoices in QuickBooks Online. This ensures accurate accounting and keeps your records organized. Here’s how to apply payments to invoices in QuickBooks Online:
- Navigate to Sales or Invoicing: Go to the QuickBooks Online home screen and click on the “Sales” or “Invoicing” tab in the navigation menu on the left-hand side.
- Find the Payment: Locate the payment that you want to apply to an invoice. Click on the payment to open it.
- Click on “Apply to Invoice”: On the payment details screen, click on the “Apply to Invoice” button. This will allow you to choose the invoice(s) to which the payment should be applied.
- Select Invoices to Apply Payment: On the “Apply Credit” screen, select the invoice(s) you want to apply the payment to. You can choose multiple invoices if the payment covers multiple outstanding invoices.
- Allocate Payment Amount: Enter the amount you want to apply to each invoice. You can apply the full payment amount to a single invoice or distribute it across multiple invoices as needed.
- Review and Save: Double-check the payment allocation to ensure accuracy. Once you’re satisfied, click on “Save and close” to apply the payment to the selected invoices.
By applying payments to invoices accurately, you ensure that your records reflect the actual status of your accounts receivable. QuickBooks Online simplifies this process, allowing you to easily allocate payments to the appropriate invoices and maintain a clear and updated view of your outstanding invoices and customer balances.
Step 6: Reconcile Payments
Reconciling payments in QuickBooks Online is essential for ensuring the accuracy and integrity of your financial records. By reconciling payments, you can verify that all transactions have been properly recorded and that your accounts match your bank statements. Here’s how to reconcile payments in QuickBooks Online:
- Access the Reconciliation Tool: From the QuickBooks Online home screen, click on the “Accounting” tab in the navigation menu on the left-hand side. Then, select “Reconcile” under the “Tools” section.
- Select the Account: Choose the bank account that corresponds to the payments you want to reconcile. Ensure that the statement date matches the date range of the payments you received.
- Review the List of Transactions: QuickBooks Online will display a list of transactions within the specified date range. This includes payments, deposits, and other bank-related activities. Compare this list with your bank statement to ensure accuracy.
- Mark the Payments as “Cleared”: As you reconcile each payment, mark it as “Cleared.” This indicates that the payment has been verified against your bank statement and is accurately recorded in QuickBooks Online.
- Verify the Ending Balance: Once you have marked all the payments as cleared, QuickBooks Online will calculate the ending balance based on the reconciled transactions. This should match the ending balance on your bank statement.
- Complete the Reconciliation: If the ending balance matches, click on the “Finish Now” button to complete the reconciliation process. If there are any discrepancies, review the transactions and investigate the discrepancies before finalizing the reconciliation.
Reconciling payments ensures the accuracy of your financial records and helps identify any discrepancies or errors promptly. By regularly reconciling your payments in QuickBooks Online, you can have confidence in the integrity of your financial data and make informed decisions for your business.
Conclusion
Managing payments efficiently is crucial for the success of any business, and QuickBooks Online provides a comprehensive platform to help you streamline and simplify the payment process. By following the steps outlined in this guide, you can set up payment options, create invoices, accept online payments, record cash and check payments, apply payments to invoices, and reconcile your accounts with ease.
QuickBooks Online not only saves you time and effort but also ensures accuracy and transparency in your financial records. With its user-friendly interface and powerful features, you can stay on top of your payments, improve cash flow, and maintain a professional and organized billing process.
Remember, effective payment management not only enhances the experience for your customers but also plays a vital role in maintaining a healthy financial outlook for your business. By utilizing the tools and functionalities offered by QuickBooks Online, you can focus on what matters most—growing your business and providing excellent products or services to your customers.
So, why wait? Start utilizing QuickBooks Online today and unlock the benefits of efficient payment management!