Introduction
Welcome to our guide on how to mark an invoice as paid in QuickBooks! As a business owner or accountant, it’s essential to keep track of your financial transactions accurately. In QuickBooks, marking an invoice as paid allows you to update your records and keep everything in order.
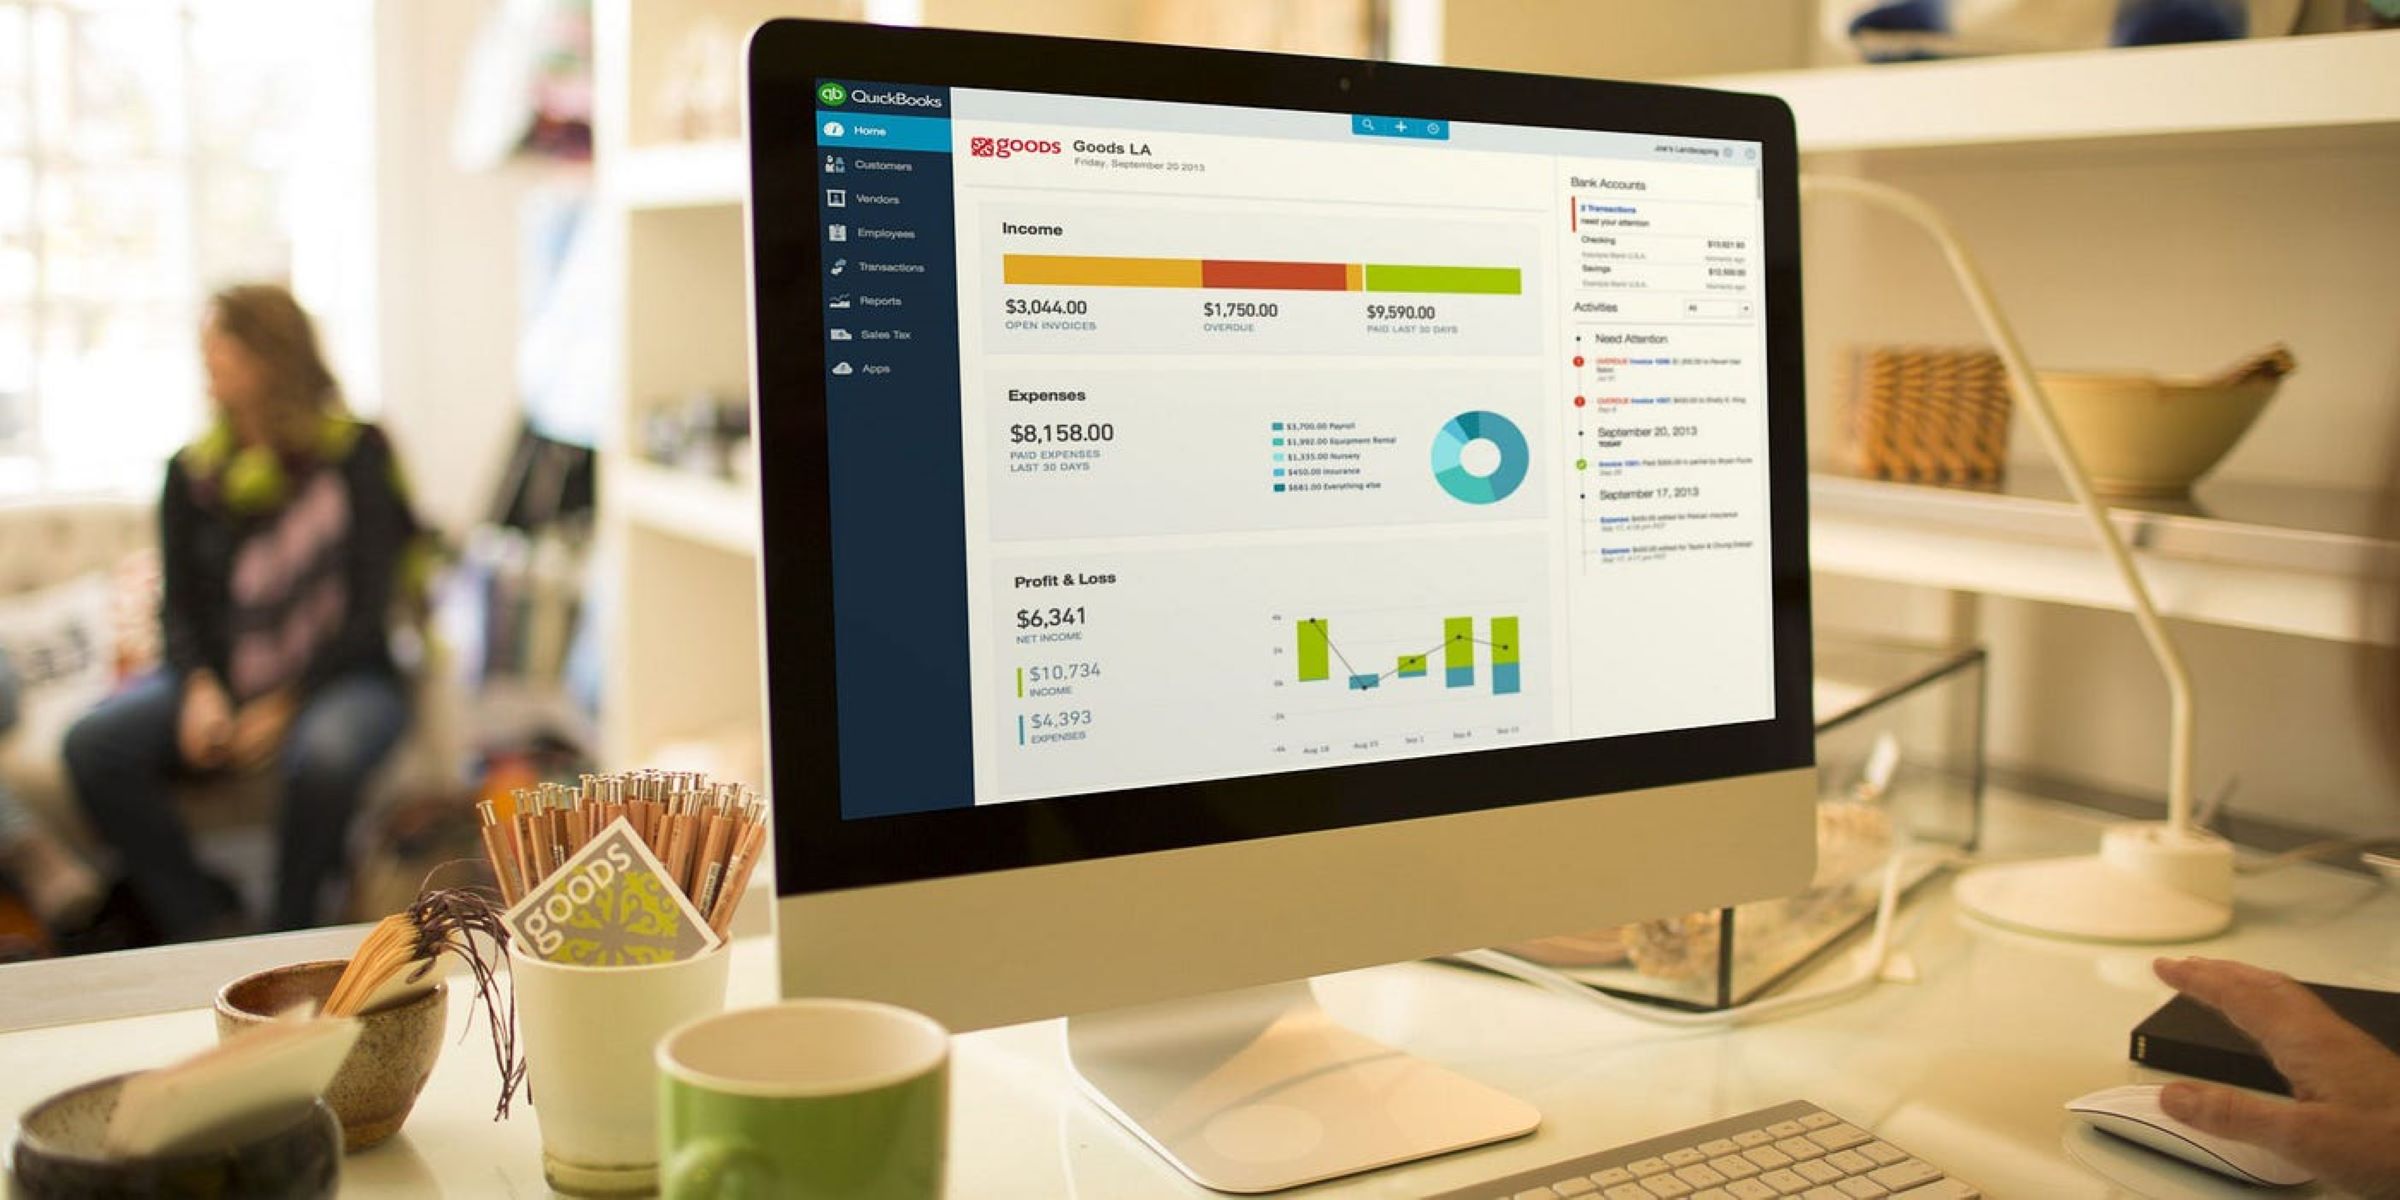
QuickBooks, developed by Intuit, is one of the leading accounting software solutions available today. It offers a wide range of features and capabilities to help businesses manage their finances effectively. One important task within QuickBooks is marking invoices as paid when you receive payment from customers.
In this guide, we will take you through the step-by-step process of marking an invoice as paid in QuickBooks. Whether you’re a seasoned QuickBooks user or new to the software, this guide will provide you with the necessary instructions to accomplish this task quickly and efficiently.
By properly marking invoices as paid, you can maintain accurate financial records and have a clear overview of your outstanding invoices. This is crucial for effective cash flow management, ensuring that you have an accurate picture of your business’s financial health.
Throughout this guide, we will walk you through each step, providing detailed instructions and screenshots to make the process easy to follow. So, let’s get started and learn how to mark an invoice as paid in QuickBooks!
Step 1: Open QuickBooks
The first step in marking an invoice as paid in QuickBooks is to open the software on your computer. Ensure that you have the correct login credentials and access to your company file. Follow these steps to open QuickBooks:
- Locate the QuickBooks application icon on your desktop or in your applications folder.
- Double-click on the icon to launch the software.
- Enter your login credentials, including your Username and Password.
- If applicable, choose the appropriate company file you want to work with, or if you only have one company file, it will open automatically.
- Click on the “Login” or “Open” button to access your QuickBooks account.
After completing these steps, QuickBooks will open, and you will be ready to proceed to the next step.
Note: If you do not have QuickBooks installed on your computer, you will need to download and install it. QuickBooks offers different versions catering to different business sizes and needs. Ensure that you choose the version that is suitable for your business.
Once you have successfully opened QuickBooks and logged in, you can start managing your invoices and marking them as paid. Let’s move on to the next step to learn how to access the invoices menu.
Step 2: Access the Invoices menu
After opening QuickBooks, the next step is to access the Invoices menu, where you can find the list of invoices and select the one you want to mark as paid. Follow these steps to access the Invoices menu:
- On the QuickBooks home screen, navigate to the top menu bar.
- Click on the “Customers” tab. It is usually located in the menu bar towards the top of the screen.
- A drop-down menu will appear. Select the “Create Invoices” option.
- Once you click on “Create Invoices,” QuickBooks will open the Invoices window. Here, you can view and manage your invoices.
- If you have already created the invoice you want to mark as paid, you can search for it using the search feature within the Invoices window.
- If the invoice is not created yet, you can choose to create a new invoice by clicking on the “New Invoice” button in the Invoices window.
The Invoices menu is where you can access all the necessary information about your invoices, such as the customer name, invoice number, due date, and amount. From this menu, you can select the specific invoice you want to mark as paid and move on to the next step.
Now that you have accessed the Invoices menu and located the invoice you want to mark as paid, let’s move on to the next step and learn how to select the invoice for payment.
Step 3: Select the invoice you want to mark as paid
Once you have accessed the Invoices menu in QuickBooks, the next step is to select the specific invoice that you want to mark as paid. Follow these steps to select the invoice:
- In the Invoices window, scan through the list of invoices to find the one you want to mark as paid. You can use the search feature or scroll through the list manually.
- Once you have located the desired invoice, click on it to select it.
- The selected invoice will be highlighted, indicating that it is ready for further actions, such as marking it as paid.
It’s important to ensure that you have selected the correct invoice before proceeding to the next steps. Double-check the customer name, invoice number, and other relevant details to confirm that you have chosen the right invoice.
Once you have successfully selected the invoice you want to mark as paid, you are ready to move on to the next step: clicking on the “Receive Payment” option. This will allow you to record the payment and update the invoice status in QuickBooks.
Note: If you have multiple invoices that need to be marked as paid, repeat this step for each individual invoice. QuickBooks allows you to handle multiple invoices simultaneously, making it easier to manage your accounts receivable.
Now that you have selected the invoice, let’s move on to the next step and learn how to record the payment in QuickBooks.
Step 4: Click on the Receive Payment option
After selecting the invoice you want to mark as paid in QuickBooks, the next step is to click on the “Receive Payment” option. This option allows you to record the payment you received from the customer and update the invoice accordingly. Follow these steps to proceed:
- In the selected invoice window, locate the top menu bar.
- Click on the “Receive Payment” option. It is usually displayed as a button in the menu bar.
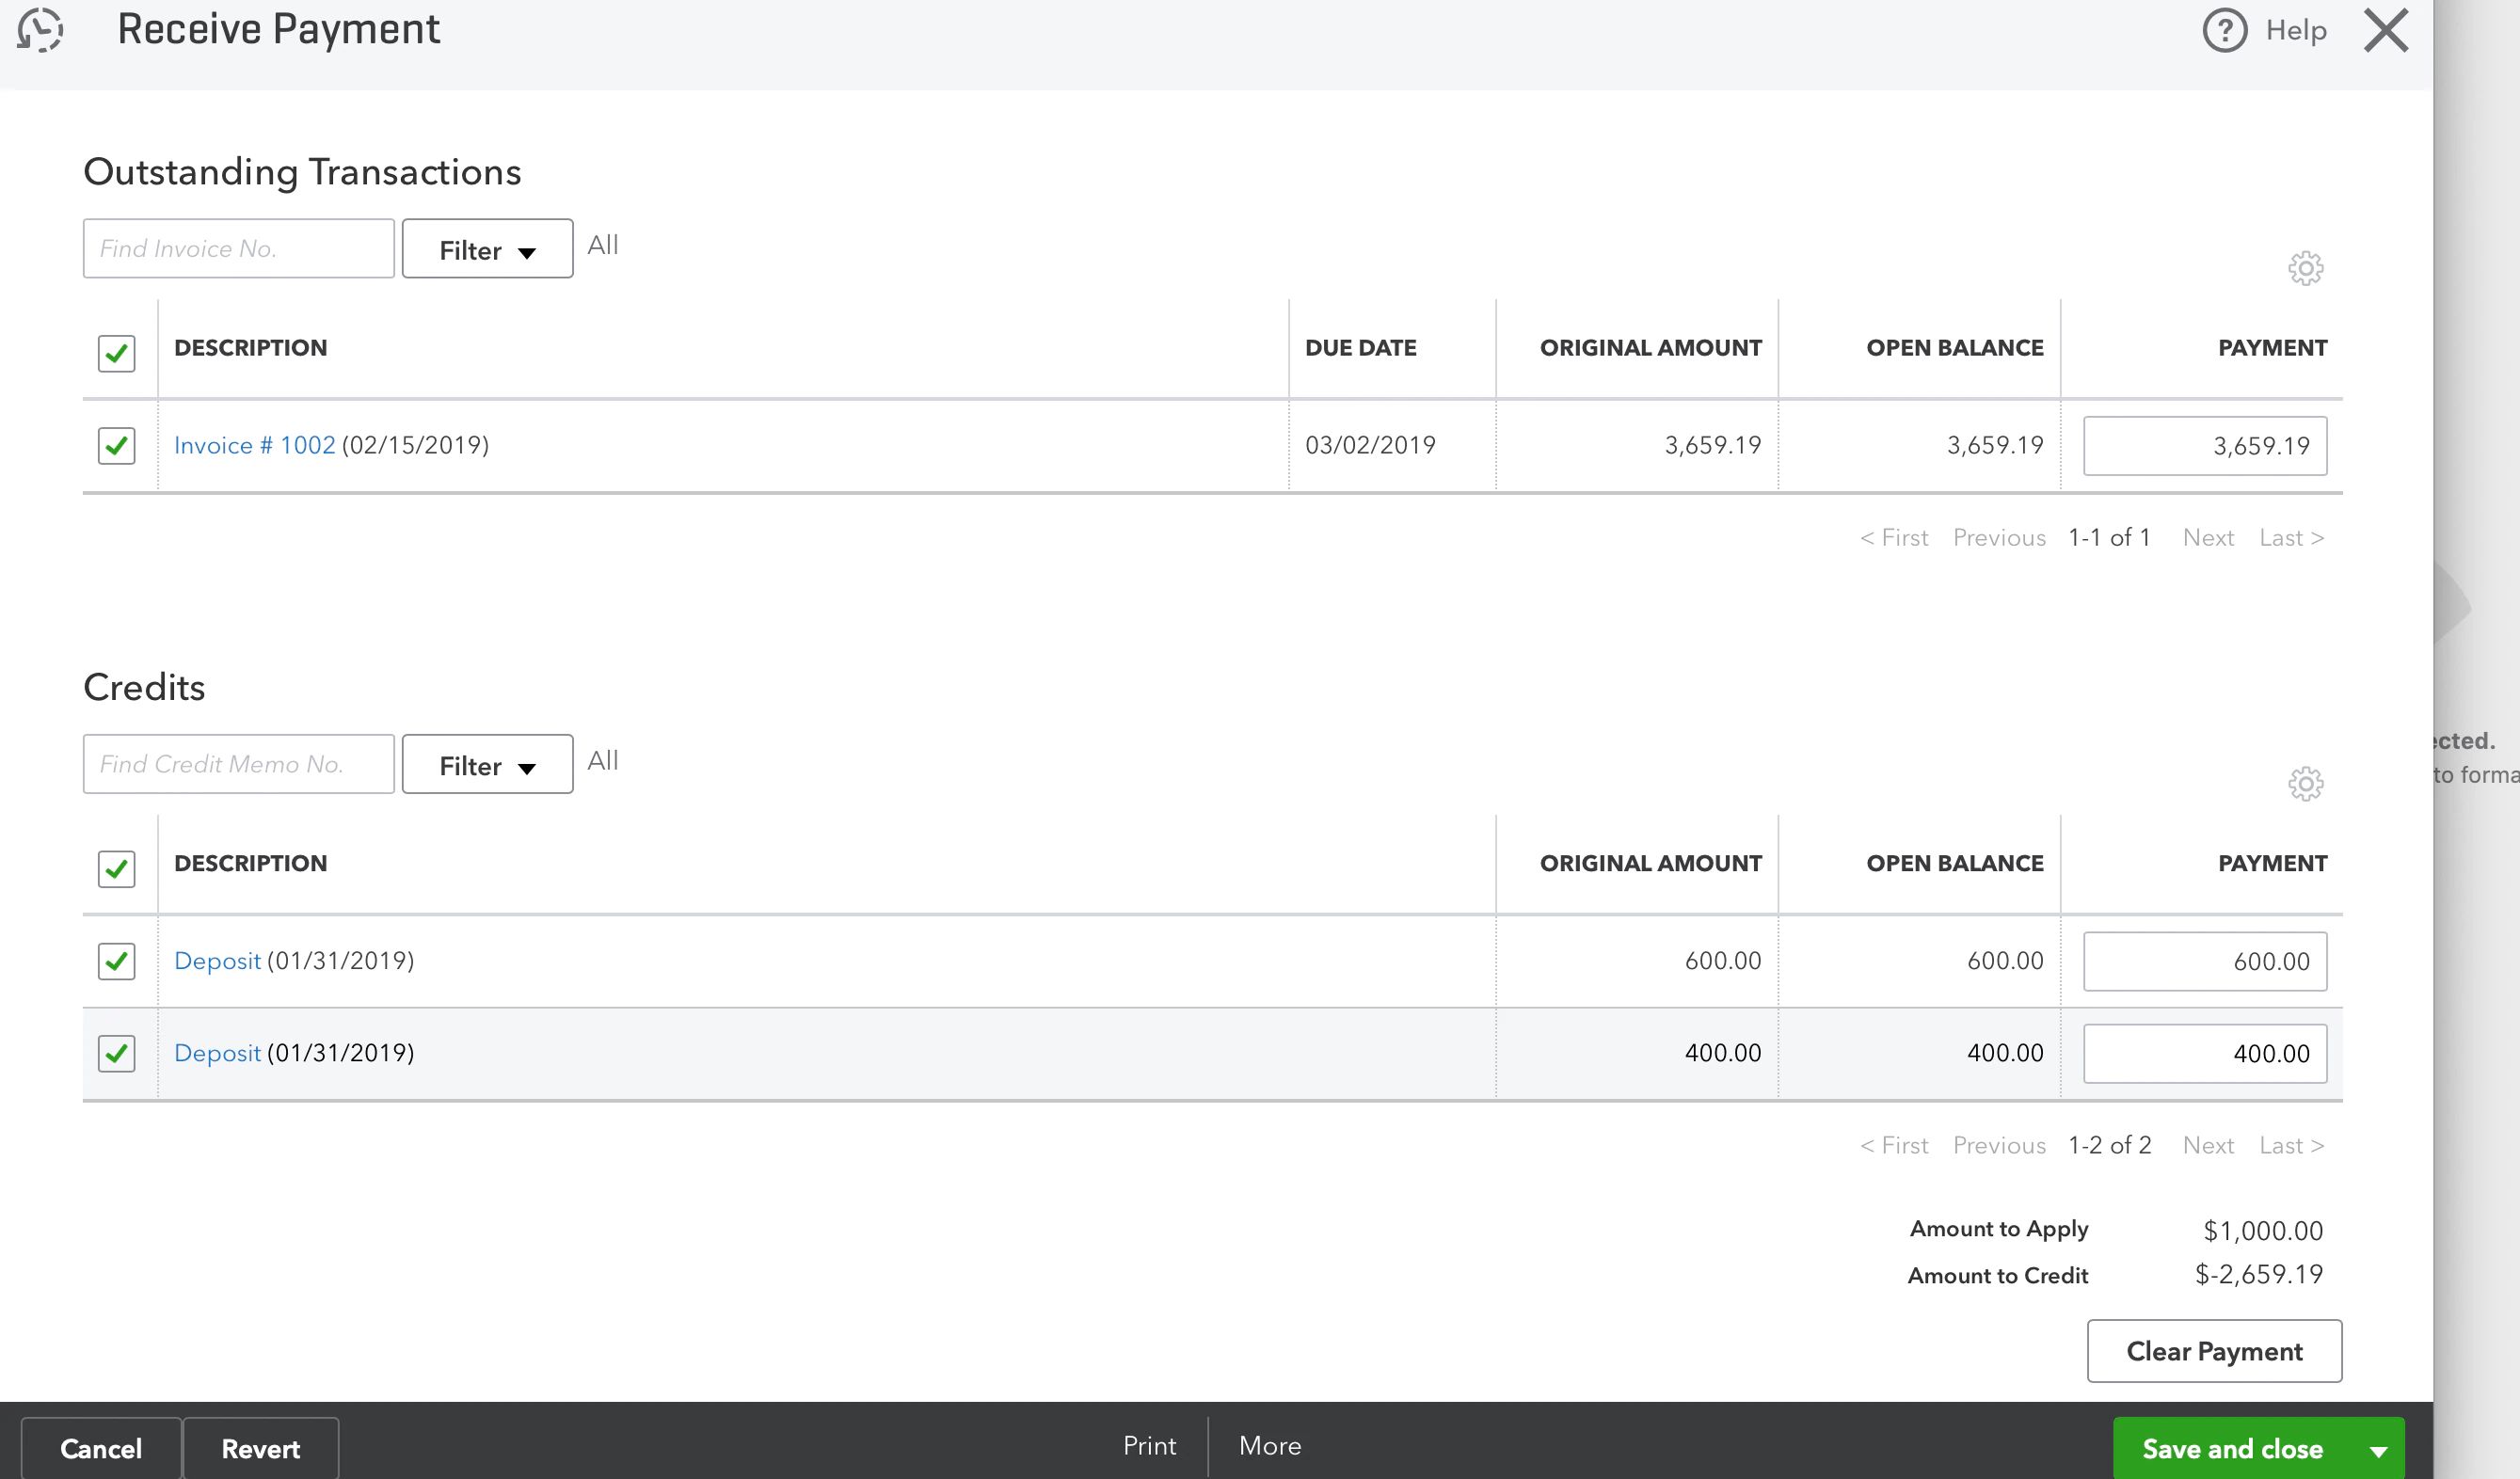
- As you click on the “Receive Payment” option, a new window will appear, known as the “Receive Payments” window. This is where you can enter the payment details for the selected invoice.
The “Receive Payments” window provides you with fields to enter important information about the payment, such as the payment amount, payment date, and payment method. You will fill in these details in the upcoming steps.
This step is a crucial part of marking an invoice as paid in QuickBooks. By clicking on the “Receive Payment” option and accessing the “Receive Payments” window, you are ready to move forward and enter the payment details accurately.
Now that you have clicked on the “Receive Payment” option, let’s proceed to the next step and learn how to enter the payment details for the selected invoice.
Step 5: Enter the payment details
Once you have accessed the “Receive Payments” window in QuickBooks, the next step is to enter the payment details for the selected invoice. Follow these steps to accurately record the payment:
- In the “Receive Payments” window, locate the field labeled “Amount Received” or a similar field.
- Enter the amount you received from the customer in the “Amount Received” field. This should match the payment you received for the invoice.
- Next, navigate to the field labeled “Payment Date” or a similar field.
- Enter the date on which you received the payment from the customer. This should be the date of the actual payment transaction.
At this point, you have entered the basic payment details for the selected invoice. However, there may be additional information required, depending on your business needs and the specific payment transaction. QuickBooks offers various fields and options to capture essential payment details accurately.
Take a moment to review the “Receive Payments” window and enter any additional relevant information, such as check numbers, reference numbers, or customer notes related to the payment.
It’s crucial to ensure that you enter the payment details accurately to maintain precise financial records. Double-check the amount, date, and any other relevant information to make sure everything is correct.
Now that you have entered the payment details for the selected invoice, let’s proceed to the next step and learn how to select the payment method in QuickBooks.
Step 6: Select the payment method
In the process of marking an invoice as paid in QuickBooks, the next step is to select the payment method that corresponds to the payment you received from the customer. Follow these steps to choose the appropriate payment method:
- In the “Receive Payments” window, locate the field labeled “Payment Method” or a similar field.
- Click on the drop-down arrow next to the “Payment Method” field to view the available options.
- From the list of payment methods, select the one that corresponds to the method through which you received the payment.
QuickBooks provides several commonly used payment method options, such as cash, check, credit card, electronic transfer, or other custom-defined options. Select the appropriate payment method from the list provided based on how the customer made the payment.
If the payment method you need is not included in the predefined list, you may have the option to add a custom payment method. QuickBooks allows you to customize the available payment methods to precisely match your business needs.
Remember to choose the correct payment method to accurately reflect the transaction and maintain accurate financial records.
Now that you have selected the payment method, let’s move on to the next step and learn how to save the payment in QuickBooks.
Step 7: Save the payment
After entering the payment details and selecting the appropriate payment method in QuickBooks, the next step is to save the payment. Saving the payment will update the invoice status, reflecting that it has been marked as paid. Follow these steps to save the payment:
- In the “Receive Payments” window, locate the “Save” button. It is usually located towards the bottom right corner of the window.
- Click on the “Save” button to save the payment and update the invoice status.
- Once the payment is saved, QuickBooks will display a confirmation message, indicating that the payment has been successfully recorded.
It’s crucial to ensure that you save the payment after entering the payment details and selecting the payment method. Saving the payment will make sure that the invoice status is updated and accurately reflects that it has been marked as paid.
By saving the payment, you are completing the process of marking the invoice as paid in QuickBooks. The payment will be recorded, and the corresponding invoice will be updated accordingly.
Now that you have saved the payment, let’s move on to the final step and verify that the invoice is marked as paid in QuickBooks.
Step 8: Verify the invoice is marked as paid
After saving the payment in QuickBooks, the final step is to verify that the invoice you marked as paid is reflected correctly in your records. Follow these steps to ensure that the invoice is marked as paid:
- Go back to the QuickBooks home screen.
- Navigate to the “Customers” menu or tab in the top menu bar.
- Select the “Customer Center” option from the drop-down menu.
- In the Customer Center, search for or locate the customer associated with the paid invoice.
- Click on the customer to view their information and transactions.
- In the customer’s transaction history, locate the specific invoice you marked as paid.
- Verify that the invoice status is now marked as “Paid” or a similar indicator, indicating that the payment has been successfully recorded.
It’s essential to double-check the invoice status to ensure that it is accurately updated in your QuickBooks records. This confirmation step will give you peace of mind that the invoice has been successfully marked as paid and that your financial records are up to date.
If you find that the invoice status is not updated or does not reflect it as paid, you may need to revisit the previous steps to identify any errors or missed actions. Reviewing the payment details, payment method, and saving the payment correctly will help you troubleshoot any discrepancies.
With the invoice now marked as paid and confirmed in QuickBooks, you have completed the process of marking an invoice as paid in QuickBooks successfully.
Congratulations! You have learned how to mark an invoice as paid in QuickBooks. By following these steps and accurately recording your payments, you can stay organized and maintain accurate financial records for your business.
Conclusion
Successfully marking an invoice as paid in QuickBooks is a vital task for maintaining accurate financial records and managing your business efficiently. By following the step-by-step process outlined in this guide, you can ensure that your invoices are properly updated and reflect the payments received from your customers.
From opening QuickBooks to accessing the Invoices menu, selecting the invoice, clicking on the Receive Payment option, entering the payment details, choosing the payment method, and saving the payment, each step is crucial in accurately recording the payment and updating the invoice status.
Remember to double-check the payment details, such as the payment amount and payment date, to ensure accuracy in your records. Additionally, verifying that the invoice is correctly marked as paid in QuickBooks will give you confidence in the integrity of your financial information.
Effective management of your invoices and accurate recording of payments in QuickBooks will provide you with a clear overview of your outstanding invoices, help you track payments received, and maintain a healthy cash flow for your business.
By following the guide provided here, you can confidently navigate QuickBooks and efficiently mark your invoices as paid. Whether you are a seasoned QuickBooks user or new to the software, these steps will enable you to manage your financial transactions effectively.
Remember to regularly update your QuickBooks records and mark invoices as paid promptly to stay on top of your financial obligations and have a clear picture of your business’s financial health.
We hope this guide has been helpful in assisting you with the process of marking an invoice as paid in QuickBooks. Now, you can proceed with confidence and manage your invoices with ease using this powerful accounting software.