Introduction
Welcome to the world of QuickBooks Online—a powerful accounting software that streamlines your invoicing process. If you regularly invoice your customers for recurring charges, QuickBooks Online offers a convenient feature called Recurring Invoices. This feature allows you to automate the creation and sending of invoices for repeated charges, saving you time and ensuring accuracy.
In this article, we will guide you through the process of editing recurring invoices in QuickBooks Online. Whether you need to update invoice details, change frequencies, or modify customer information, this step-by-step guide will help you make the necessary adjustments to your recurring invoices with ease.
Before we dive into the specifics, it’s important to note that the ability to edit recurring invoices in QuickBooks Online is only available to users with administrative rights. If you have the necessary permissions, let’s move on to accessing and editing your recurring invoice templates.
Please note that the steps and options discussed in this article may vary slightly depending on the version and settings of QuickBooks Online you are using. However, the general principles should remain the same.
Accessing Recurring Invoices
To begin editing your recurring invoices, you’ll first need to access them within your QuickBooks Online account. Follow these simple steps to find and access your recurring invoices:
- Log in to your QuickBooks Online account using your credentials.
- From the main navigation menu on the left, click on “Invoicing”.
- Next, select “Recurring Transactions” from the sub-menu options that appear.
- You will now see a list of your existing recurring invoices.
- To edit a specific recurring invoice, locate the invoice in the list and click on the corresponding “Edit” or “Edit Schedule” button.
Once you have accessed the recurring invoice you want to edit, you can proceed to make the necessary changes to the template, invoice details, frequencies, or customer information. In the following sections, we will explore each of these aspects in more detail.
It’s important to note that QuickBooks Online allows you to create multiple recurring invoice templates. If you have more than one template, you can select the template you want to edit by following the steps above and choosing the appropriate template from the list.
Now that you know how to access your recurring invoices, let’s move on to the next step—editing the recurring invoice templates.
Editing Recurring Invoice Templates
Before making changes to specific recurring invoices, it’s essential to understand and modify the template that is used to generate those invoices. This template serves as the foundation for all recurring invoices and includes the default settings and formatting.
To edit recurring invoice templates in QuickBooks Online, follow these steps:
- From the main navigation menu, click on “Invoicing”.
- Select “Recurring Transactions” and choose “Templates” from the sub-menu.
- In the templates list, locate the template that corresponds to the recurring invoices you want to edit and click on the corresponding “Edit” button.
- Make the desired changes to the template, such as updating the company logo, adding or removing fields, adjusting the layout, or modifying the default message.
- Once you have made the necessary changes, click “Save” to apply them to the template.
By editing the recurring invoice template, you can ensure that all invoices generated from that template follow the same formatting and include the desired information. This saves you time and ensures consistency in your invoicing process.
It’s worth mentioning that QuickBooks Online provides a range of customization options for invoice templates. You can add your logo and business information, choose colors and fonts, and even insert personalized messages for your customers.
Now that you’ve modified the template, let’s proceed to the next section and explore how to make changes to the invoice details of your recurring invoices.
Modifying Invoice Details
After accessing the recurring invoice you want to edit and making any necessary changes to the template, you may need to modify specific details of the individual invoices generated from that template. QuickBooks Online allows you to tailor the invoice details according to your needs.
Follow these steps to modify the invoice details of your recurring invoices:
- Start by accessing the recurring invoice you wish to edit. Follow the steps outlined in the “Accessing Recurring Invoices” section to locate the specific invoice.
- In the invoice editing screen, you will see various fields that you can modify, such as the customer name, billing address, invoice date, due date, line items, and quantities.
- To modify a specific field, click on it and enter the updated information.
- If you want to add or remove line items, use the “Add Line Item” or “Delete Line” buttons respectively.
- Additionally, you can update the payment terms, sales tax settings, and any other relevant details by clicking on the respective sections and making the necessary adjustments.
- Remember to save your changes by clicking on the “Save” button before exiting the invoice editing screen.
With the ability to modify invoice details, you can ensure that each recurring invoice contains accurate and up-to-date information specific to the customer and the services or products being billed.
It’s important to double-check the invoice details before saving your changes—any modifications you make will be applied to all future invoices generated from that recurring template.
Now that you know how to modify the invoice details, let’s move on to the next section—updating the frequencies of your recurring invoices.
Updating Invoice Frequencies
One of the key advantages of using recurring invoices in QuickBooks Online is the ability to customize the frequency at which these invoices are generated. Whether you need to change the invoice frequency to a weekly, monthly, or annual basis, QuickBooks Online offers flexibility to meet your needs.
Here’s how you can update the invoice frequencies for your recurring invoices:
- Access the recurring invoice you want to edit following the steps mentioned in the “Accessing Recurring Invoices” section.
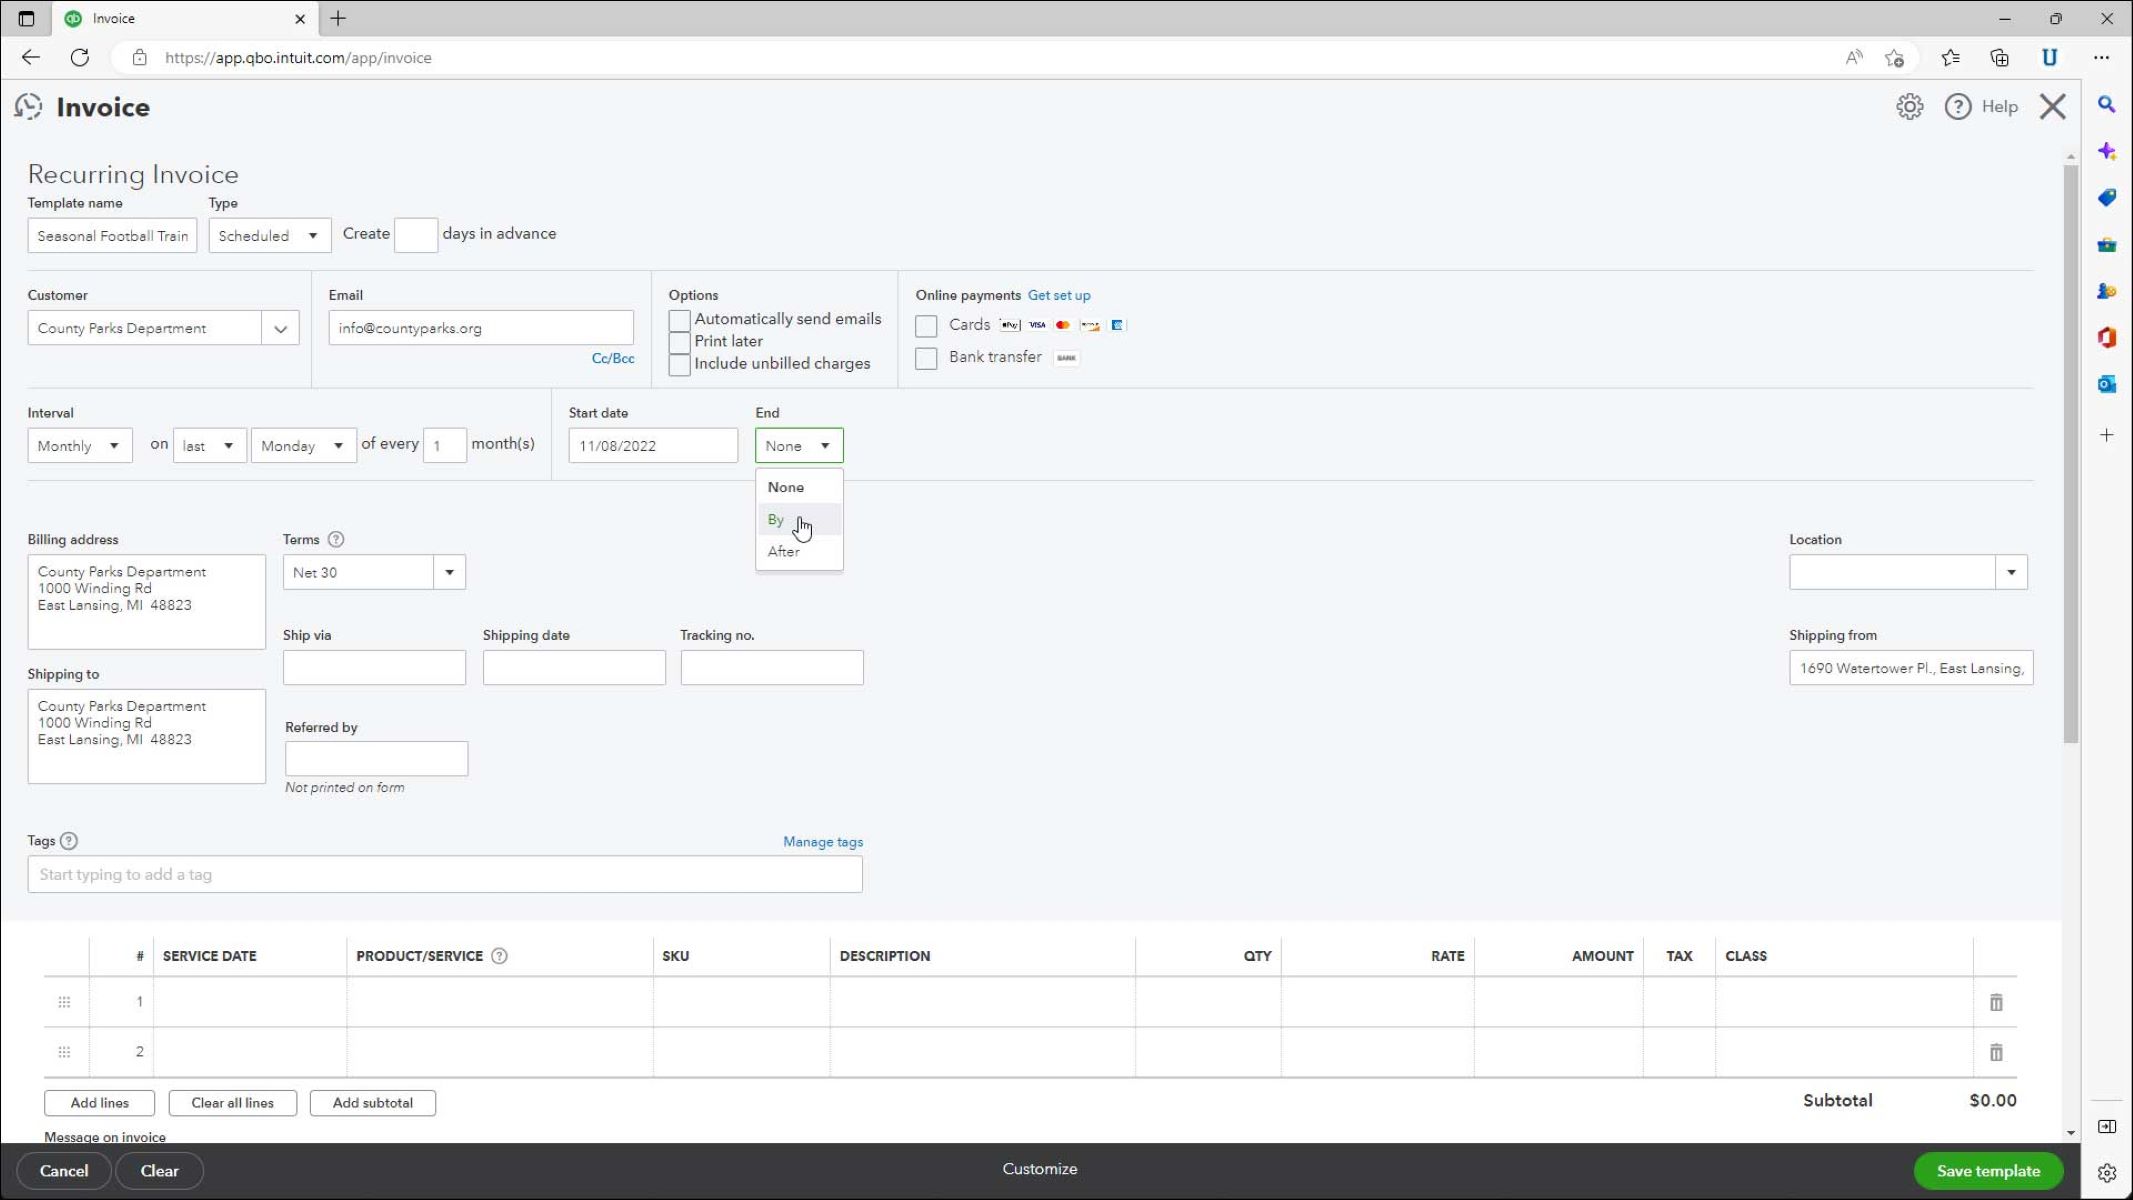
- In the invoice editing screen, locate the “Schedule” section.
- You will find options to update the frequency, start date, and end date of the recurring invoices.
- Select the desired frequency from the drop-down menu, such as daily, weekly, monthly, or yearly.
- Enter the appropriate start and end dates for the recurring invoices.
- If needed, you can also modify the interval and the day of the week or month for the recurring invoices.
- Once you have updated the invoice frequencies, click on the “Save” button to apply the changes.
Updating invoice frequencies allows you to align your recurring invoices with the billing cycles of your customers and the nature of your business. This flexibility ensures that invoices are generated at the right intervals, reducing manual effort and helping you manage cash flow effectively.
After updating the invoice frequencies, you can proceed to the next section to learn how to change the customer information associated with your recurring invoices.
Changing Customer Information
As your business grows and evolves, it’s common to have changes in your customer information. Whether it’s an updated billing address, a new contact person, or a change in payment terms, QuickBooks Online allows you to easily modify customer details associated with your recurring invoices.
Follow these steps to change customer information for your recurring invoices:
- Access the recurring invoice you wish to edit by following the steps outlined in the “Accessing Recurring Invoices” section.
- In the invoice editing screen, locate the customer information section.
- Click on the customer name or the associated contact information to open the customer profile.
- Within the customer profile, make the necessary changes to the customer details, such as the billing address, contact information, or payment terms.
- Save the changes within the customer profile.
- Return to the recurring invoice editing screen and verify that the updated customer information is reflected.
- Click on the “Save” button to apply the changes to the recurring invoice.
By easily changing customer information, you can ensure accurate billing and effective communication with your clients. QuickBooks Online simplifies the process, saving you time and minimizing errors.
Remember, modifying customer information in QuickBooks Online will update details for all future invoices associated with that particular customer. It’s important to review and double-check the changes before saving to avoid any discrepancies.
Now that you know how to change customer information, let’s move on to the next section—cancelling or deleting recurring invoices.
Cancelling or Deleting Recurring Invoices
There may come a time when you need to cancel or delete a recurring invoice in QuickBooks Online. Whether a customer has requested to stop receiving invoices or you no longer provide the services for which the recurring invoice was set up, QuickBooks Online offers a straightforward process for handling these situations.
Follow these steps to cancel or delete a recurring invoice:
- Access the recurring invoice you want to cancel or delete following the steps outlined in the “Accessing Recurring Invoices” section.
- In the invoice editing screen, locate the “Schedule” section.
- To cancel the recurring invoice, simply click on the “Cancel” button within the schedule.
- QuickBooks Online will prompt you to confirm the cancellation. Click “Yes” to confirm and stop the generation of future invoices from the recurring template.
- If you want to delete the recurring invoice entirely, click on the “More” button in the upper right corner of the invoice editing screen.
- Select “Delete” from the drop-down menu that appears.
- Confirm the deletion by clicking “Yes” when prompted. Please note that once deleted, the recurring invoice cannot be recovered.
Cancelling or deleting recurring invoices in QuickBooks Online gives you the flexibility to manage your invoicing efficiently. It allows you to stop generating invoices that are no longer needed, keeping your records accurate and up-to-date.
Before cancelling or deleting a recurring invoice, it’s essential to communicate any changes to your customers if necessary. Inform them of the cancellation or provide alternative invoicing options to avoid confusion or unexpected interruptions in payment.
Now that you know how to cancel or delete recurring invoices, let’s proceed to the final section—reviewing and saving your changes.
Reviewing and Saving Changes
After making all the necessary modifications to your recurring invoices in QuickBooks Online, it’s essential to review and confirm that the changes are accurate before saving them. Taking a moment to review ensures that your invoices are generated correctly and reflect the intended changes.
Follow these steps to review and save your changes:
- Ensure that you have made all the desired changes to the recurring invoice template, invoice details, frequencies, and customer information as per the previous sections.
- Carefully review each section of the recurring invoice to verify that the changes are accurate and meet your requirements.
- If you find any remaining adjustments or corrections, make the necessary changes before proceeding.
- Once you are satisfied with the modifications, click on the “Save” button to apply the changes and update your recurring invoices.
After saving your changes, QuickBooks Online will immediately implement them, ensuring that all future invoices generated from the recurring template reflect the updated information.
It’s important to note that saving changes to recurring invoices in QuickBooks Online does not affect invoices that have already been generated and sent. The changes will only apply to new invoices generated moving forward.
By carefully reviewing and saving your changes, you ensure that your recurring invoices are accurate, up-to-date, and aligned with your business requirements. This attention to detail helps maintain a smooth invoicing process and enhances your professional image with clients.
Congratulations! You have successfully learned how to edit recurring invoices in QuickBooks Online. With this knowledge, you can now make necessary modifications to your recurring invoices, customize templates, update invoice details, change frequencies, modify customer information, and cancel or delete invoices when needed.
Remember to regularly review and update your recurring invoices to ensure accuracy and efficiency in your invoicing process. By leveraging the power of QuickBooks Online, you can streamline your invoicing and focus on growing your business.
Conclusion
Invoicing is a crucial aspect of any business, and QuickBooks Online provides a powerful platform to manage your recurring invoices efficiently. With the ability to edit and customize your recurring invoices, you can ensure accuracy, save time, and maintain consistency in your billing process.
In this article, we explored the step-by-step process of editing recurring invoices in QuickBooks Online. We covered accessing recurring invoices, modifying invoice templates, updating invoice details, changing invoice frequencies, altering customer information, and cancelling or deleting recurring invoices.
By following the instructions outlined in each section, you can confidently navigate QuickBooks Online and make the necessary adjustments to your recurring invoices. With the flexibility and customization options available, you can tailor your invoices to meet the specific needs of your business and clients.
Remember, when editing recurring invoices, it’s essential to review your changes carefully before saving them. Accurate and up-to-date invoices help maintain a professional image and ensure smooth transactions with your customers.
We hope this article has provided you with valuable insights into editing recurring invoices in QuickBooks Online. By implementing these practices, you can streamline your invoicing process and focus on growing your business.
Thank you for reading, and we wish you success in managing your recurring invoices in QuickBooks Online!