Introduction
Invoices play a crucial role in managing the financial transactions of a business. However, there may come a time when you need to delete an invoice in QuickBooks. This could be due to various reasons such as duplicate entries, incorrect information, or simply the need to clean up your records.
Deleting an invoice in QuickBooks is a relatively simple process, but it is essential to proceed with caution. Once an invoice is deleted, it cannot be recovered, and all associated data will be permanently removed from your records. Therefore, it is crucial to double-check and ensure that you are deleting the correct invoice.
In this article, we will guide you through the steps to delete an invoice in QuickBooks effortlessly. Whether you are using QuickBooks Online or QuickBooks Desktop, the process is similar. By following these steps, you can maintain accurate and up-to-date financial records.
So, let’s get started on your journey to deleting an invoice in QuickBooks. By the end of this article, you will have the knowledge and confidence to delete any unwanted invoices and keep your financial records in order.
Step 1: Accessing the Invoice List
The first step in deleting an invoice in QuickBooks is to access the invoice list. This list contains all the invoices you have created in the software. Follow the instructions below to access the invoice list:
- Open QuickBooks on your computer and log in to your account.
- Navigate to the “Invoices” section. You can usually find it in the menu bar at the top of the screen, under the “Customers” or “Sales” tab.
- Once you are in the “Invoices” section, you should see a list of all your invoices, arranged by date or other relevant criteria.
- Scroll through the list to locate the invoice that you want to delete. If you have a large number of invoices, you can use the search bar or apply filters to narrow down the search.
By accessing the invoice list, you can easily locate the specific invoice that needs to be deleted. This ensures that you are working with the correct invoice and prevents accidental deletion of the wrong entry.
Now that you have successfully accessed the invoice list, you are ready to move on to the next step: locating the specific invoice you want to delete. Let’s proceed to the next step and find the invoice that needs to be removed from your records.
Step 2: Locating the Invoice to be Deleted
After accessing the invoice list, the next step is to locate the specific invoice that you want to delete. QuickBooks provides several methods to help you find the desired invoice quickly:
- Scrolling through the list: If you have a small number of invoices, you can manually scroll through the list and visually locate the invoice you want to delete. The invoices are typically arranged by date, making it easier to find the invoice based on its creation or due date.
- Using the search bar: QuickBooks has a search functionality that allows you to search for invoices by customer name, invoice number, or any other relevant keyword. Simply type in the search term in the search bar, and QuickBooks will filter the invoice list to show matching results.
- Applying filters: Filters can be applied to narrow down your search based on specific criteria such as customer name, amount, or status. By applying filters, you can quickly isolate the relevant invoices and locate the one you want to delete.
Take some time to familiarize yourself with these search and filtering options, as they can save you time and effort in locating the invoice to be deleted. Remember to double-check the invoice details to ensure that you have selected the correct one. Once you have successfully located the invoice, proceed to the next step to open it for editing and initiate the deletion process.
Step 3: Opening the Invoice for Editing
Once you have located the invoice you wish to delete, the next step is to open it for editing. Opening the invoice allows you to make changes and initiate the deletion process. Here’s how you can open the invoice in QuickBooks:
- From the invoice list, find the desired invoice and click on it. This will open the invoice in a new window or tab.
- Once the invoice is open, you will see the details of the transaction, including the customer’s name, invoice number, items or services provided, and the total amount due.
- If you need to review or modify any information on the invoice before deleting it, this is the time to do so. You can make changes to the customer details, item quantities, or any other relevant fields.
- Ensure that you carefully review all changes made to the invoice and verify that the changes are accurate. It is important to double-check the invoice details before proceeding with the deletion process.
By opening the invoice for editing, you have the opportunity to review and make any necessary changes before deleting it. This step ensures that you have complete control over the invoice and can verify its accuracy before proceeding. Take your time to carefully review the invoice and make any necessary modifications before moving on to the next step: deleting the invoice.
Step 4: Deleting the Invoice
Once you have opened the desired invoice for editing and verified that all the necessary changes have been made, you are ready to proceed with deleting the invoice. QuickBooks provides a simple and straightforward process to delete invoices. Follow the steps below to delete the invoice:
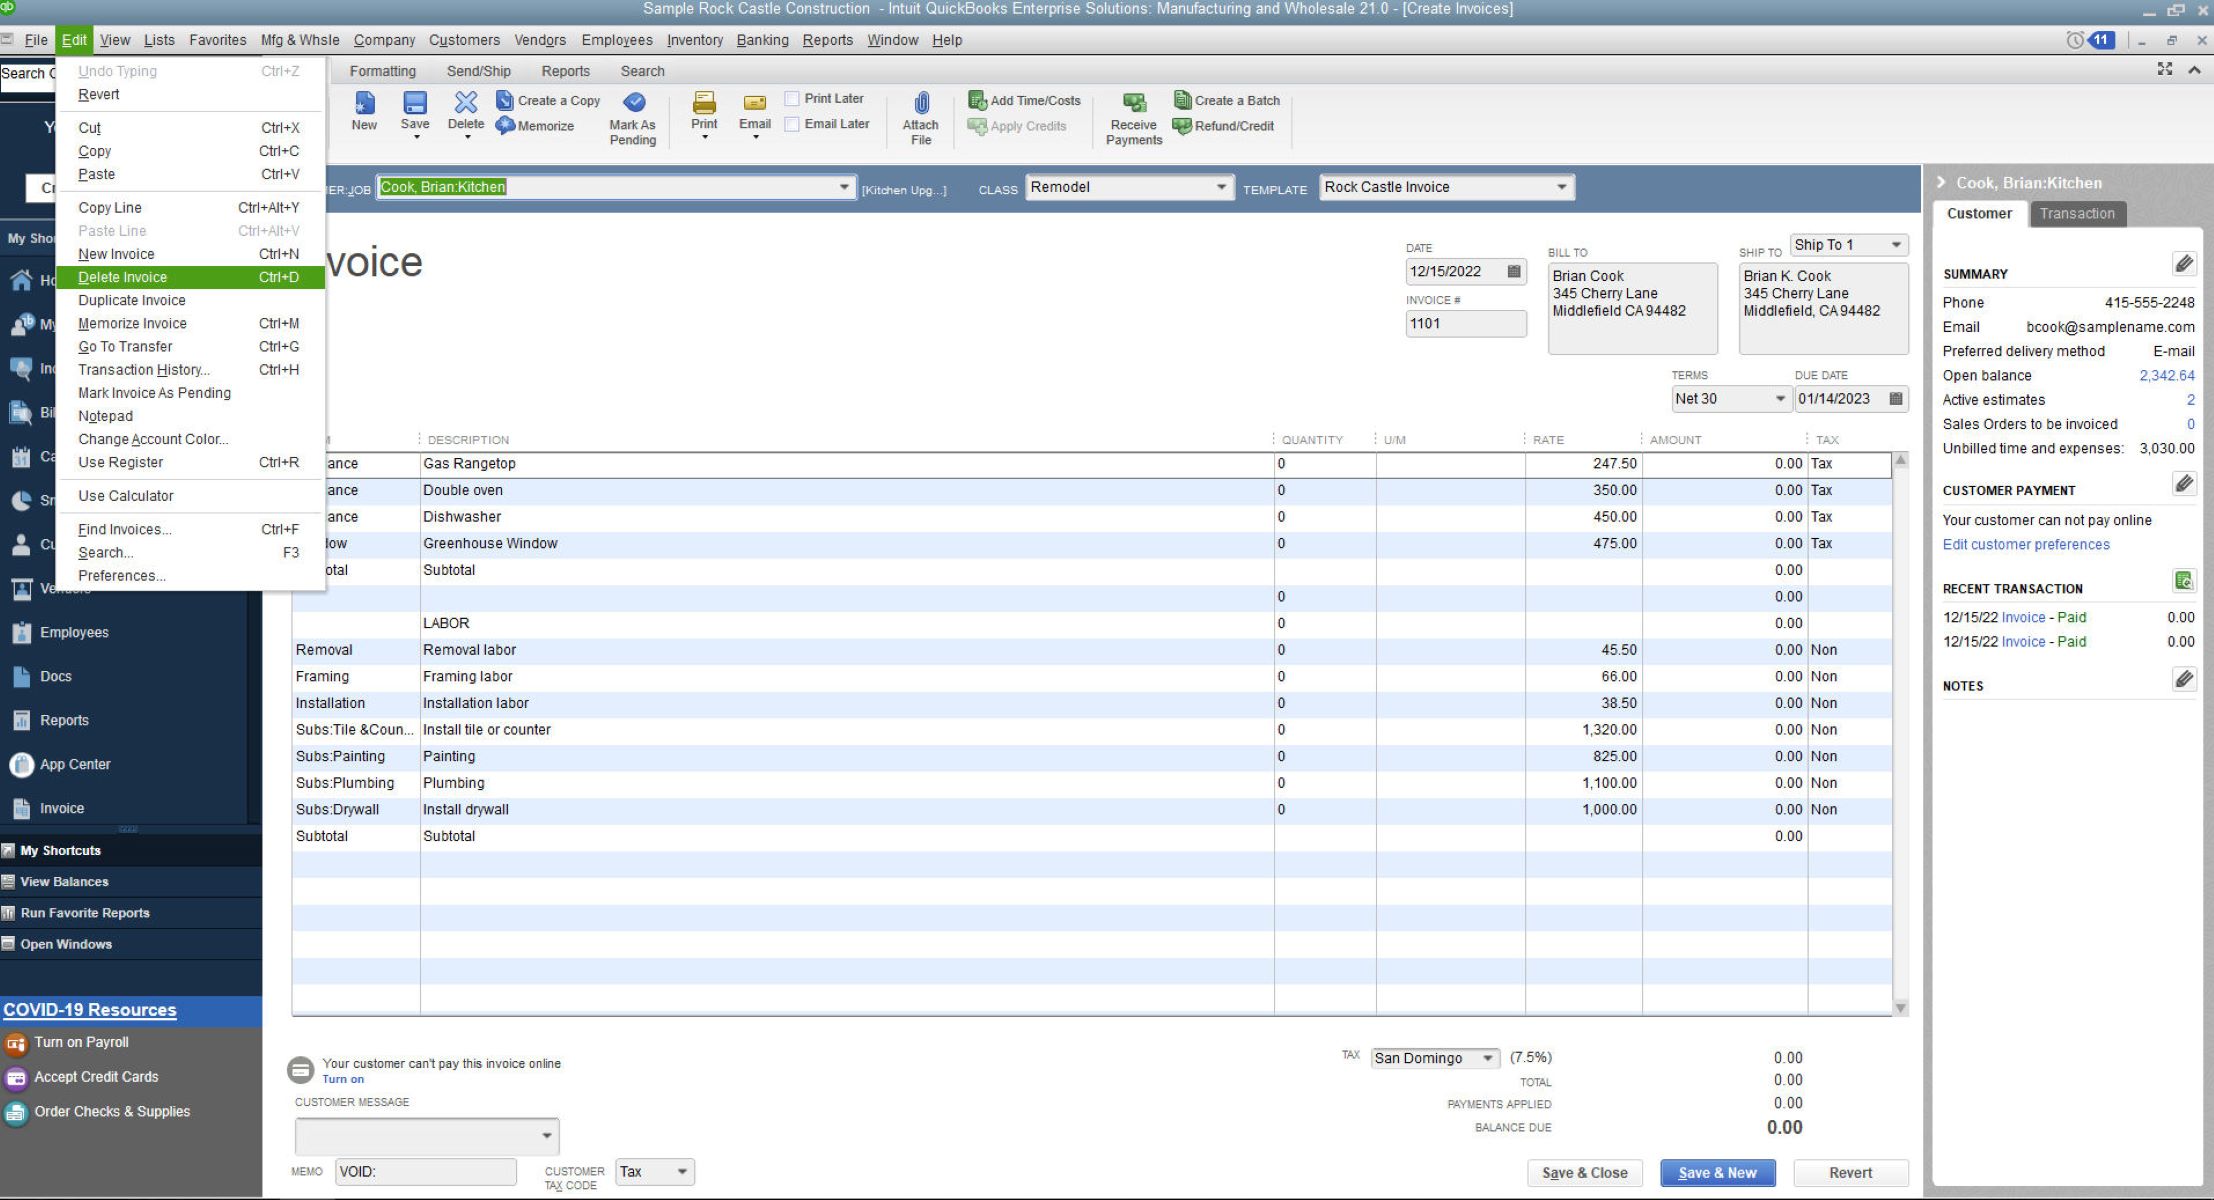
- In the open invoice window, locate the “Delete” or “Delete Invoice” option. This option is typically found in the top menu bar or in a drop-down menu.
- Click on the “Delete” option, and QuickBooks will prompt you with a confirmation message. This message will inform you that deleting the invoice cannot be undone and that all associated transaction history will be permanently removed.
- Read the confirmation message carefully to ensure that you are deleting the correct invoice. If you are sure about deleting the invoice, click on the “Yes” or “Delete” button to proceed.
- QuickBooks will then remove the invoice from your records. The invoice and its associated transaction history will no longer be accessible in your invoice list or financial reports.
It is important to note that once you delete an invoice, it cannot be recovered. Therefore, exercise caution and double-check the details of the invoice to ensure that you are deleting the correct one. Be sure that deleting the invoice is the action you want to take, as it cannot be reversed.
Now that you have successfully deleted the invoice, it is time to move on to the next step and confirm the deletion to ensure that the invoice has been removed from your QuickBooks records.
Step 5: Confirming the Deletion
After deleting the invoice in QuickBooks, it is important to confirm that the deletion was successful. This step ensures that the invoice has been permanently removed from your records. To confirm the deletion, follow the steps below:
- Return to the invoice list in QuickBooks.
- Scroll through the list or use the search and filtering options to locate the invoice you just deleted.
- If the deleted invoice no longer appears in the list, it indicates that the deletion was successful and the invoice has been removed from your records.
- If, however, you still see the deleted invoice on the list, ensure that you have followed the previous steps correctly. It is possible that the deletion process was not completed successfully.
By confirming the deletion, you can ensure that the invoice has been completely eradicated from your QuickBooks records. It provides peace of mind and reassurance that the unwanted invoice is no longer present in your financial data.
If the deleted invoice still appears on the invoice list, you may need to repeat the deletion process, making sure to carefully follow the steps mentioned in the previous section. It is essential to confirm the deletion to maintain accurate and up-to-date financial records in QuickBooks.
Now that you have confirmed the successful deletion of the invoice, it’s time to review the deleted invoice and ensure that all associated information has been properly removed from your records. Let’s proceed to the next step and review the deleted invoice.
Step 6: Reviewing the Deleted Invoice
After confirming the successful deletion of the invoice, it is essential to review the deleted invoice to ensure that all associated information has been properly removed from your QuickBooks records. Follow the steps below to review the deleted invoice:
- Access the invoice list in QuickBooks.
- Use the available search and filtering options to locate the deleted invoice.
- If the deleted invoice no longer appears in the list, it confirms that the invoice has been completely removed from your records.
- If, however, you still see the deleted invoice listed, double-check that you have followed the deletion process correctly. It is possible that there was an error during the deletion process, and the invoice was not removed as intended.
Reviewing the deleted invoice is crucial to ensure that there are no remnants of the invoice in your QuickBooks records. It helps to maintain the accuracy and integrity of your financial data.
If you find that the deleted invoice is still present in the invoice list, you may need to repeat the deletion process, ensuring that all steps are followed accurately. In case you encounter any difficulties or the issue persists, it is advisable to seek assistance from QuickBooks support or consult with a professional.
By thoroughly reviewing the deleted invoice, you can be confident that all traces of the invoice are eliminated from your QuickBooks records. This step concludes the process of deleting an invoice in QuickBooks.
Conclusion
Deleting an invoice in QuickBooks is a necessary task to maintain accurate financial records and keep your data organized. Throughout this article, we have walked you through the step-by-step process of deleting an invoice in QuickBooks. Let’s recap the key points:
First, we covered the importance of accessing the invoice list to locate the specific invoice you want to delete. We then discussed various methods, such as scrolling, searching, and applying filters, to help you easily find the desired invoice.
Next, we explained how to open the invoice for editing to review and make any necessary changes before proceeding with the deletion process. It is crucial to double-check and verify the accuracy of the invoice details to ensure you are deleting the correct one.
We then discussed the actual deletion process, emphasizing the importance of carefully reading and confirming the deletion prompt that appears in QuickBooks. Once you delete an invoice, it cannot be undone, so caution is necessary.
After deleting the invoice, we highlighted the significance of confirming the deletion by checking the invoice list. This step ensures that the invoice has been permanently removed from your QuickBooks records and reaffirms the successful execution of the deletion process.
Lastly, we emphasized the need to review the deleted invoice to ensure all associated information has been properly eradicated from your QuickBooks records. This final step verifies that the invoice is truly eliminated, achieving clean and accurate financial data.
By following these steps, you can confidently delete invoices in QuickBooks and maintain an organized and reliable financial record-keeping system.
Remember, it is crucial to exercise caution and attention to detail throughout the entire process. Always double-check the invoice details and confirm the deletion to avoid any unintentional errors.
Now that you have a clear understanding of how to delete invoices in QuickBooks, you are well-equipped to manage your financial records efficiently and effectively.