Introduction
Setting up recurring payments in QuickBooks can be a game-changer for businesses, allowing them to automate their billing processes and improve cash flow management. Recurring payments are especially beneficial for subscription-based businesses, service providers, and organizations that collect regular monthly or annual payments from their customers.
With QuickBooks, you can easily streamline your recurring payment workflows, saving time and effort that would otherwise be spent on manual invoicing and payment collection. By automating this process, you can focus on growing your business rather than chasing down payments.
In this guide, we will walk you through the step-by-step process of setting up recurring payments in QuickBooks. From getting your merchant account set up to scheduling and managing recurring payments, we will cover all the essential details to help you get started.
It’s important to note that to utilize the recurring payment feature in QuickBooks, you will need a merchant account that supports this functionality. This ensures that your business can securely process and accept credit card or bank transfer payments on a recurring basis.
So, if you’re ready to streamline your billing processes and take advantage of the benefits of recurring payments, let’s dive into the detailed steps to get it all set up in QuickBooks.
Step 1: Setting Up A Merchant Account
Before you can start leveraging the power of recurring payments in QuickBooks, you need to ensure that you have a merchant account set up that supports this functionality. A merchant account allows you to securely process credit card or bank transfer payments from your customers.
To set up a merchant account, follow these steps:
- Research merchant account providers: Start by researching different merchant account providers to find the one that best suits your business needs. Look for providers that offer recurring payment capabilities and have favorable pricing and terms.
- Contact the merchant account provider: Once you’ve chosen a merchant account provider, reach out to them to initiate the application process. They will guide you through the necessary documentation and verification procedures.
- Provide the required information: The merchant account provider will request specific information about your business, such as your company name, contact details, tax identification number, bank account details, and other relevant information. Ensure you have all the necessary documents and details prepared beforehand to expedite the application process.
- Complete the application and approval process: Fill out the merchant account application form accurately and thoroughly. The provider will review your application along with the supporting documents. Once approved, you will receive the necessary credentials and instructions to integrate the merchant account with QuickBooks.
Setting up a merchant account is a crucial step in enabling recurring payments in QuickBooks. It ensures that you have a secure and reliable system in place to process payments seamlessly. Additionally, having a merchant account allows you to offer flexible payment options to your customers, enhancing their experience with your business.
Once you have your merchant account set up and ready to go, you can proceed to the next step of enabling recurring payments within QuickBooks.
Step 2: Enabling Recurring Payments in QuickBooks
Now that you have your merchant account set up, it’s time to enable recurring payments within QuickBooks. Enabling this feature allows you to create and manage recurring payment templates for your customers.
Follow these steps to enable recurring payments:
- Access the QuickBooks settings: Log in to your QuickBooks account and navigate to the settings menu. The location of the settings may vary depending on the version of QuickBooks you are using.
- Select the “Payments” tab: Within the settings menu, locate and select the “Payments” tab. This tab will have options related to managing and accepting payments.
- Enable recurring payments: Look for the option to enable recurring payments and click on the corresponding toggle button to turn it on. This action enables the recurring payments feature for your QuickBooks account.
- Save your changes: After enabling recurring payments, remember to save your changes to apply the new setting to your account. This step ensures that you can access the recurring payment functionality in QuickBooks.
Enabling recurring payments in QuickBooks is a simple but essential step to unlock the power of automated billing. Once enabled, you can proceed to create recurring payment templates for your customers.
Having this feature activated allows you to seamlessly automate the billing process, making it easier to manage and track recurring payments from your customers. It also reduces human error and eliminates the need for manual invoicing, saving you precious time and effort.
With recurring payments enabled, you’re ready to dive into the next step: creating a recurring payment template in QuickBooks.
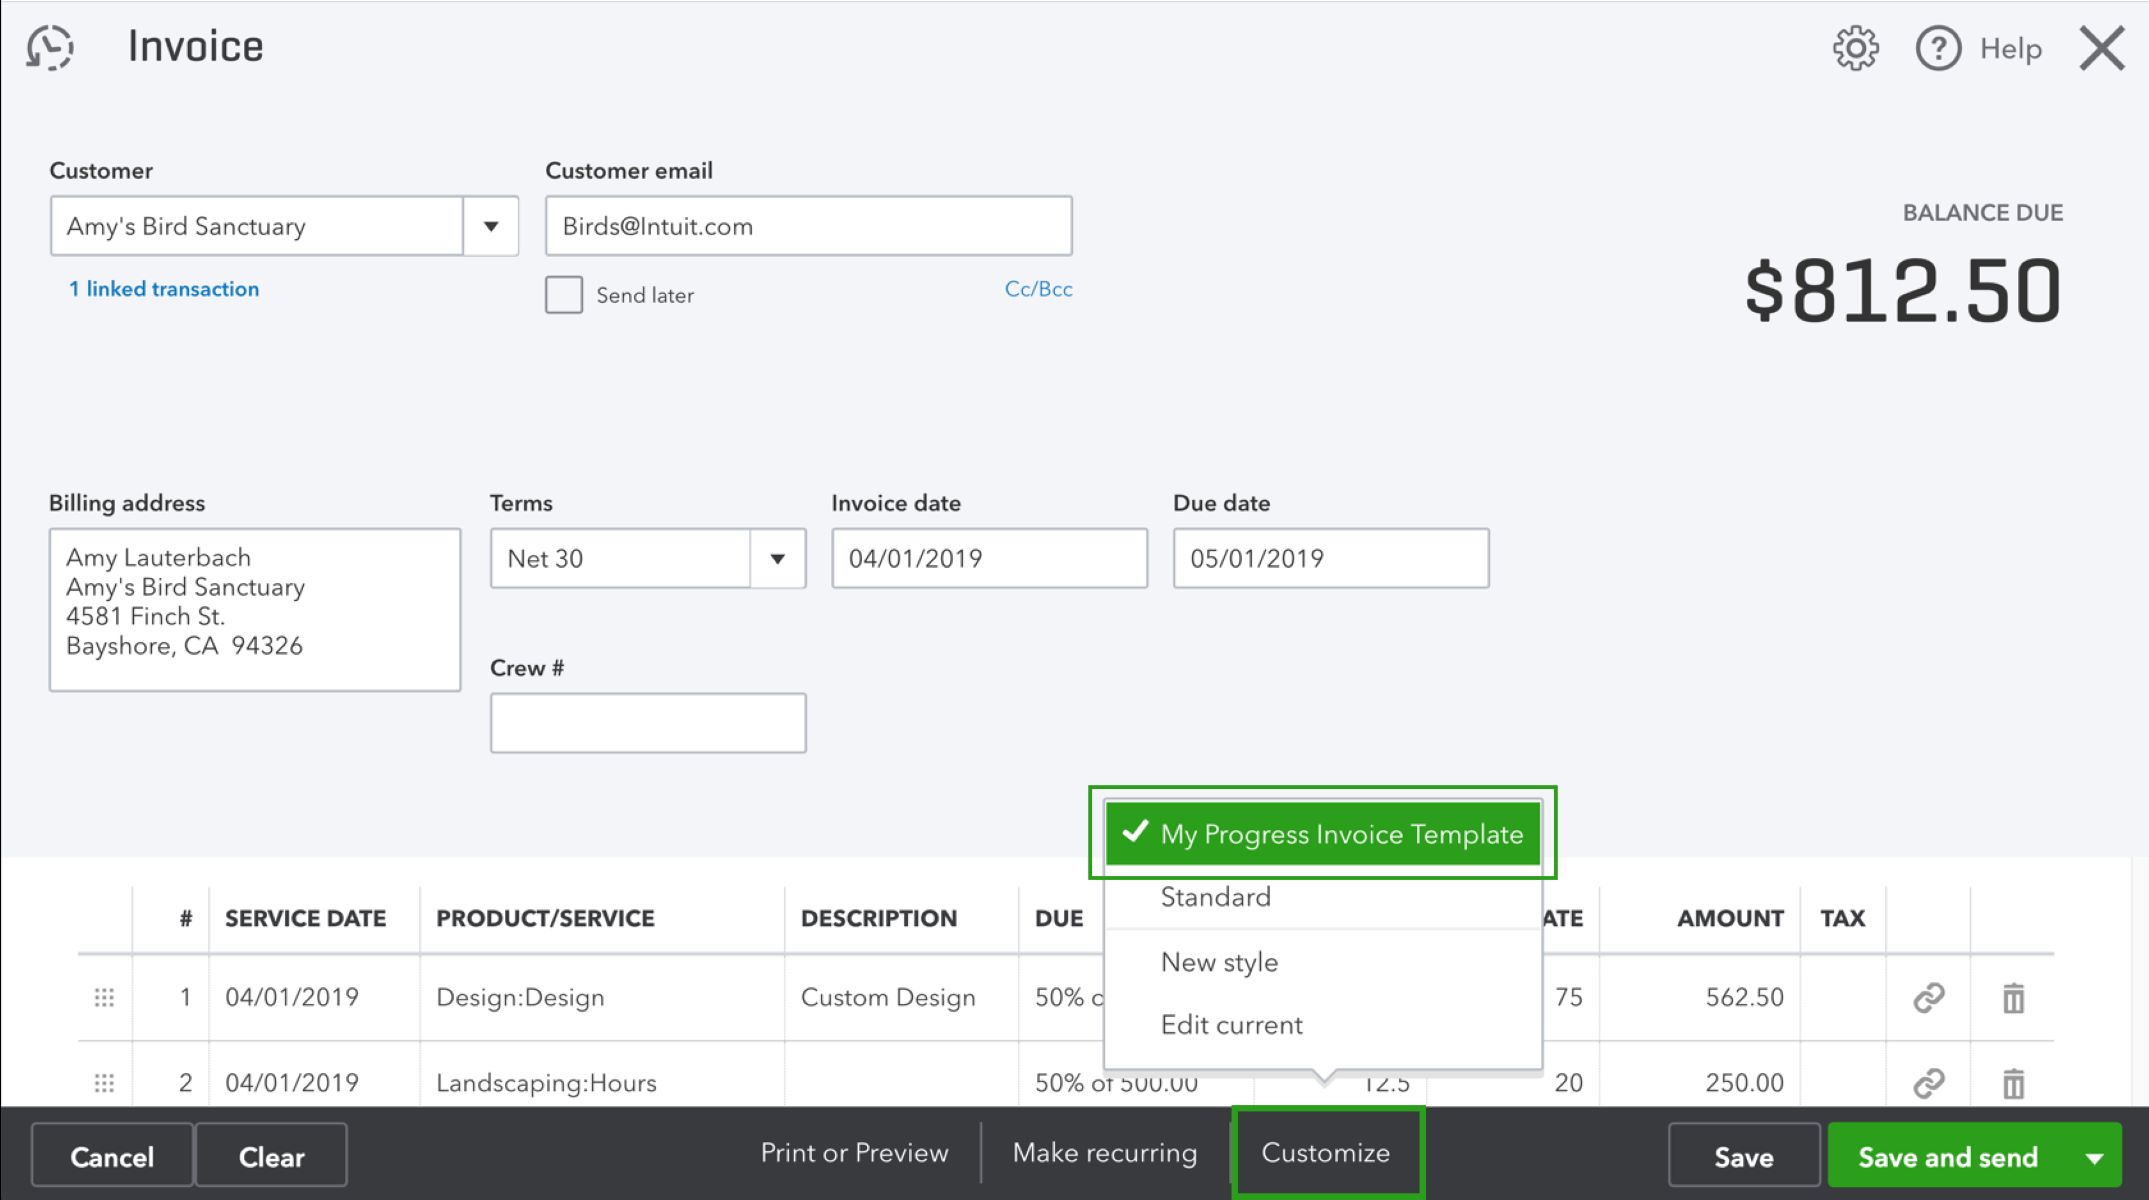
Step 3: Creating a Recurring Payment Template
Now that you have enabled recurring payments in QuickBooks, it’s time to create a recurring payment template. This template will serve as the blueprint for your recurring payments, allowing you to set specific details and parameters for each transaction.
Follow these steps to create a recurring payment template:
- Go to the QuickBooks dashboard: Log in to your QuickBooks account and navigate to the main dashboard.
- Select “Sales” or “Invoicing”: Depending on the version of QuickBooks you are using, look for either the “Sales” or “Invoicing” option in the main navigation menu and click on it.
- Click on “Recurring Transactions”: Within the “Sales” or “Invoicing” section, look for the “Recurring Transactions” option and click on it. This option allows you to manage and create recurring payment templates.
- Create a new recurring payment template: In the recurring transactions menu, locate the option to create a new template and click on it. This action will open a new template creation window.
- Set the template details: Fill in the necessary information for your recurring payment template, such as the customer’s name, payment amounts, billing frequency, payment method, and any additional details specific to the transaction. Make sure to provide clear and accurate information to avoid any confusion or issues with the payments.
- Save the recurring payment template: After setting all the required details, save the recurring payment template to your QuickBooks account. This step ensures that the template is accessible and ready for future use.
Creating a recurring payment template in QuickBooks is a crucial step in streamlining your billing processes. With these templates in place, you can easily generate and send recurring invoices to your customers, reducing manual effort and automating the payment collection.
Once you have created your recurring payment template, you can proceed to the next step: customizing the recurring payment details to align with your business needs.
Step 4: Customizing Recurring Payment Details
After creating a recurring payment template in QuickBooks, you have the flexibility to customize the details of each recurring payment to align with your business needs and specific customer requirements. This step allows you to tailor the payment terms, descriptions, and other relevant information for each transaction.
Follow these steps to customize recurring payment details:
- Access the recurring payment template: Log in to your QuickBooks account and navigate to the “Sales” or “Invoicing” section.
- Locate the recurring payment template: Look for the existing recurring payment template that you created in the previous step and open it.
- Make necessary modifications: Within the template, you can modify various details such as the payment schedule, payment terms, invoice descriptions, and any other pertinent information. Ensure that the changes accurately reflect your desired payment terms and align with your business requirements.
- Save the modifications: After customizing the recurring payment details, save the changes to update the template in your QuickBooks account.
Customizing recurring payment details allows you to have fine control over each payment transaction. You can adjust the payment schedule to meet specific customer preferences, add relevant descriptions to invoices, and define any unique terms or conditions associated with the recurring payment.
By tailoring the details of each recurring payment, you can provide a personalized experience to your customers and ensure that the billing process meets their individual expectations. This level of customization helps build stronger relationships with your customers and promotes a seamless payment experience.
Once you have customized the recurring payment details, you can proceed to the next step: adding customer information to the template.
Step 5: Adding Customer Information
Now that you have customized the recurring payment details, it’s time to add the customer information to the template. This step ensures that the recurring payment is linked to the correct customer and that the invoices are sent to the appropriate email address or mailing address.
Follow these steps to add customer information to the recurring payment template:
- Open the recurring payment template: Log in to your QuickBooks account and navigate to the “Sales” or “Invoicing” section.
- Locate the recurring payment template: Find the existing recurring payment template that you created and open it.
- Add customer details: Within the template, you will find fields to enter the customer’s name, contact information, email address, and mailing address. Fill in these details accurately to ensure proper communication and delivery of recurring payment invoices.
- Save the customer information: Once you have entered all the required customer details, save the changes to update the template within your QuickBooks account.
Adding customer information to the recurring payment template is crucial for ensuring that invoices are sent to the correct individuals or organizations. It also helps streamline communication and ensures that customers receive payment reminders and updates in a timely manner.
By linking customer information to the template, you can maintain accurate records of each transaction and easily track payments specific to individual customers. This level of organization and efficiency helps improve the overall billing process and customer satisfaction.
Once you have added the necessary customer information, you can proceed to the next step: scheduling the recurring payment.
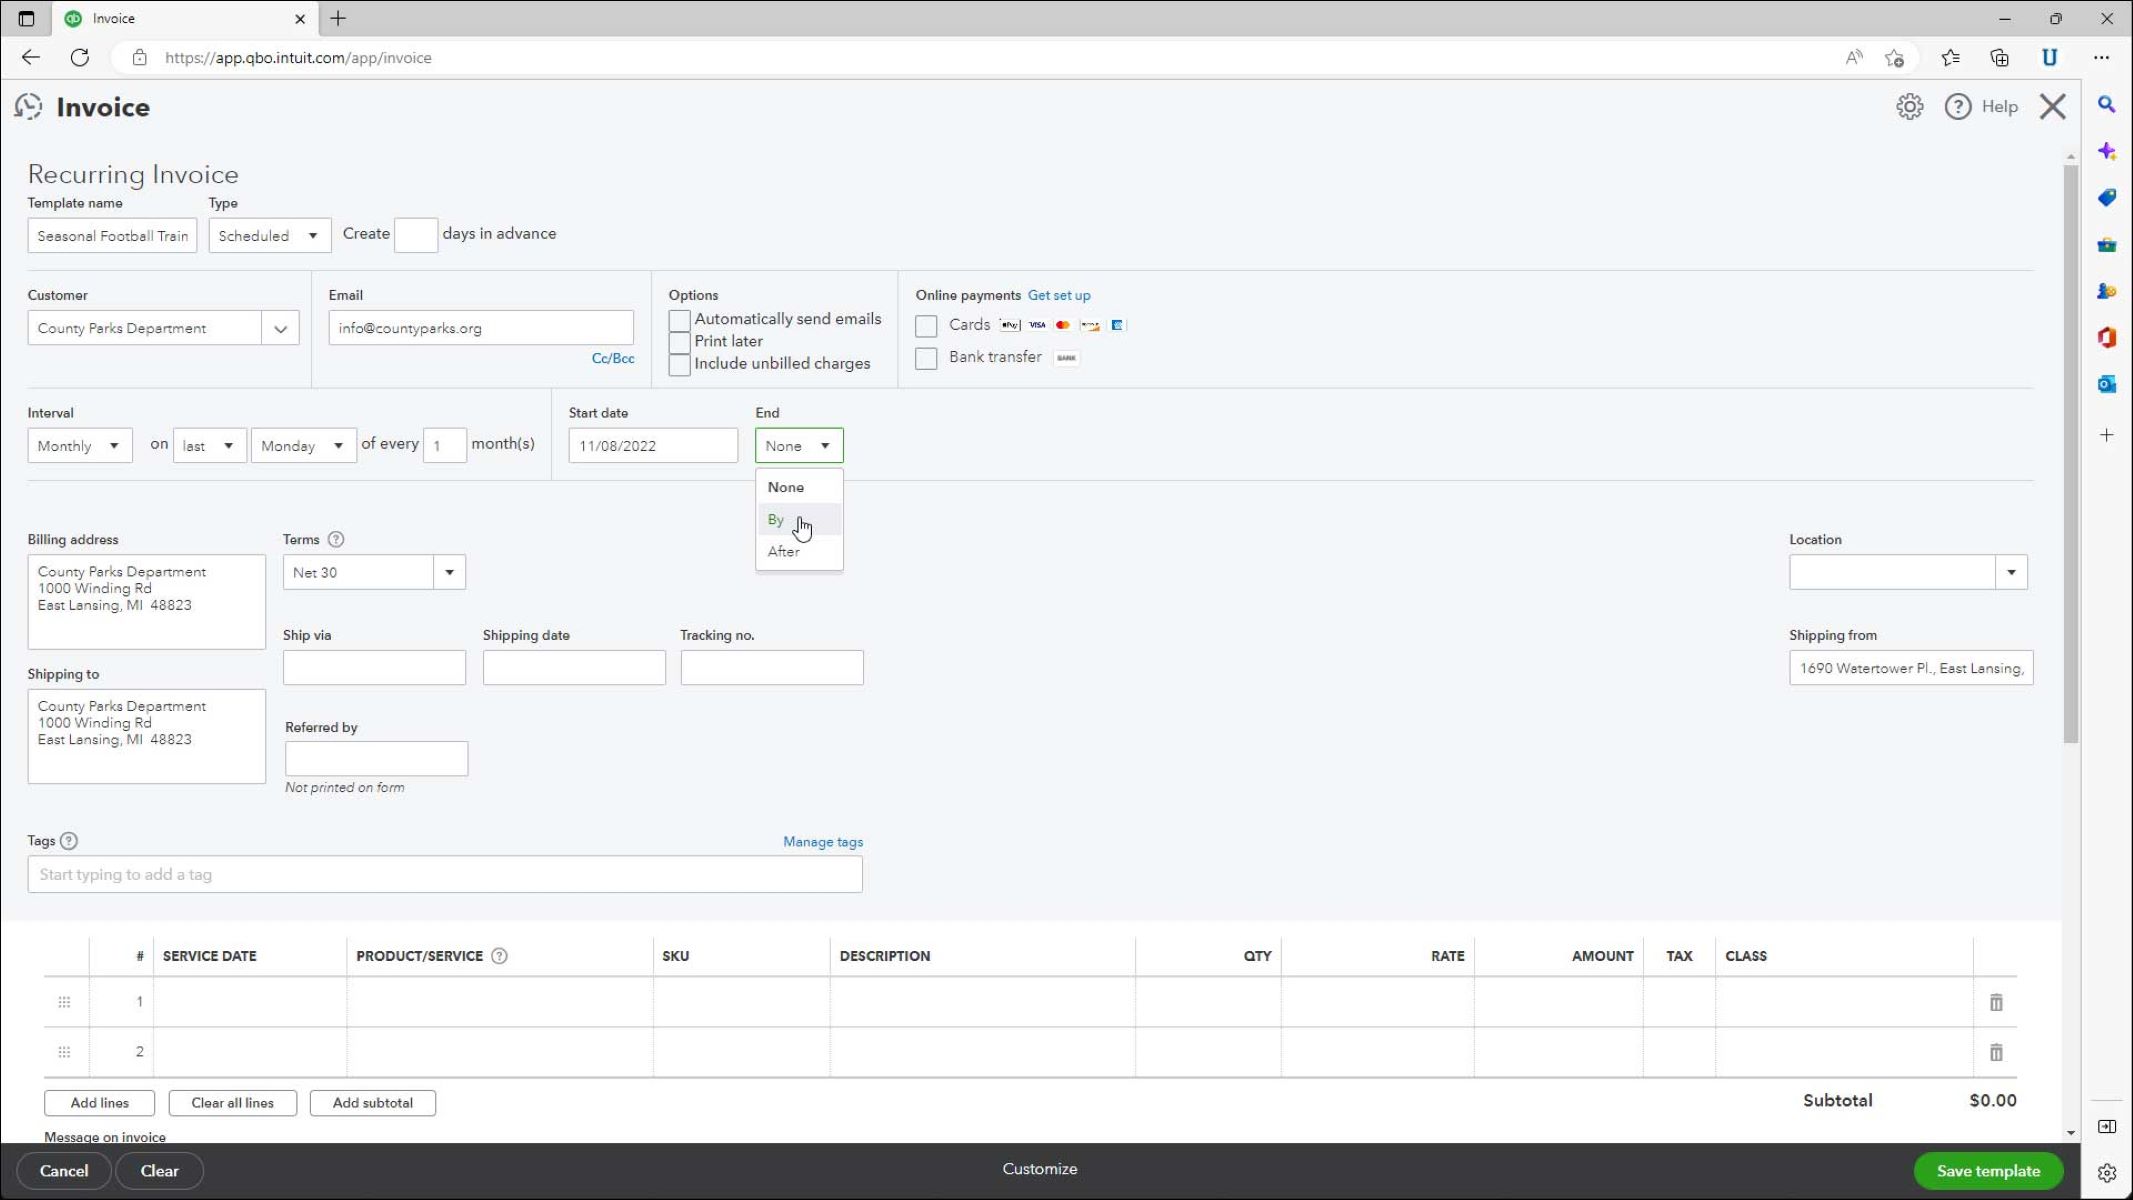
Step 6: Scheduling the Recurring Payment
After adding customer information to the recurring payment template, it’s time to schedule the recurring payment. This step involves setting the frequency and dates for the payments to be generated and sent to your customers.
Follow these steps to schedule the recurring payment:
- Access the recurring payment template: Log in to your QuickBooks account and navigate to the “Sales” or “Invoicing” section.
- Open the recurring payment template: Find the recurring payment template and open it.
- Select the payment frequency: Within the template, locate the payment frequency options and choose the desired interval, such as weekly, monthly, quarterly, or annually.
- Specify the payment start date: Enter the start date for the recurring payments. This will determine when the first payment is generated and sent to the customer.
- Set the end date (if applicable): If there is an end date for the recurring payments, specify it in the template. This allows you to define a specific time frame for the recurring payments.
- Save the recurring payment schedule: After setting the payment frequency, start date, and end date (if applicable), save the changes to finalize the recurring payment schedule.
Scheduling the recurring payment is an essential step in automating the payment process for your customers. By specifying the frequency and dates, QuickBooks will generate invoices and send them out automatically based on your defined schedule.
This automation saves you time and effort by eliminating the need for manual invoicing and reminders. It ensures that your customers receive their invoices consistently and helps you maintain a steady cash flow.
Once you have scheduled the recurring payment, you can proceed to the next step: reviewing and confirming the recurring payment process.
Step 7: Reviewing and Confirming the Recurring Payment
After scheduling the recurring payment, it’s crucial to review and confirm all the details to ensure accuracy and reliability. This step allows you to double-check the settings, payment amounts, and other relevant information before the recurring invoices are generated and sent to your customers.
Follow these steps to review and confirm the recurring payment:
- Access the recurring payment template: Log in to your QuickBooks account and navigate to the “Sales” or “Invoicing” section.
- Open the recurring payment template: Find the recurring payment template that you created and open it.
- Review the payment details: Carefully review all the payment details, including the payment amounts, billing frequency, start date, end date (if applicable), and any customizations made to the template.
- Verify customer information: Double-check that the customer information is accurate, including their name, contact details, and preferred method of communication.
- Confirm the recurring payment: Once you are satisfied with the recurring payment template and all the details within it, confirm the template to finalize and activate the recurring payment process.
Reviewing and confirming the recurring payment ensures that everything is set up correctly before the invoices are generated and sent to your customers. It minimizes the risk of errors or inaccuracies in the billing process and helps build trust and confidence with your customers.
By taking the time to review and confirm the recurring payment details, you can maintain a smooth and efficient payment system, saving you and your customers valuable time and effort.
Once you have reviewed and confirmed the recurring payment, you can proceed to the final step: managing and tracking recurring payments in QuickBooks.
Step 8: Managing and Tracking Recurring Payments
After setting up and confirming the recurring payments in QuickBooks, it’s important to effectively manage and track them to ensure seamless payment processing and transparency. This step allows you to stay organized, monitor payment statuses, and make necessary adjustments, if needed.
Follow these steps to manage and track recurring payments:
- Access the recurring payment dashboard: Log in to your QuickBooks account and navigate to the “Sales” or “Invoicing” section.
- Locate the recurring payment template: Find the recurring payment template that you created for the specific customer or subscription plan.
- View payment history: In the template, you can access the payment history for each recurring payment. This provides an overview of all the payments made, their dates, and the associated invoice details.
- Monitor payment statuses: Keep an eye on the payment statuses to ensure that all payments are going through as expected. QuickBooks will update the status of each payment, indicating if it was successful or if there were any issues encountered.
- Make adjustments if necessary: If you need to make any adjustments to the recurring payment details, such as changing the payment schedule, updating customer information, or modifying the payment amount, you can do so in the recurring payment template.
- Generate reports: Utilize the reporting features in QuickBooks to generate reports on recurring payments. These reports can provide an overview of your recurring revenue, payment history, and other key metrics related to your recurring billing processes.
Managing and tracking recurring payments in QuickBooks is crucial to maintaining accurate financial records, staying on top of payment statuses, and ensuring the smooth functioning of your billing system. By actively monitoring the payments, you can promptly address any issues that may arise and provide excellent customer service.
Moreover, generating reports allows you to gain insights into your recurring revenue, analyze payment trends, and make data-driven decisions to optimize your recurring billing processes.
With the proper management and tracking of recurring payments, you can enhance cash flow management, improve customer satisfaction, and streamline your overall payment operations.
Congratulations! By following these eight steps, you have successfully set up, customized, and managed recurring payments in QuickBooks. Enjoy the convenience and efficiency of automated billing, allowing you to focus on growing your business.
Conclusion
Setting up recurring payments in QuickBooks can revolutionize the way you handle billing and invoicing in your business. By automating the payment process, you can save time, reduce administrative work, and improve cash flow management. Implementing recurring payments is particularly beneficial for subscription-based businesses, service providers, and organizations that collect regular payments.
In this guide, we walked through the step-by-step process of setting up recurring payments in QuickBooks. From establishing a merchant account, enabling recurring payments, and creating payment templates to customizing payment details, adding customer information, scheduling payments, and managing the entire process, each step plays a vital role in streamlining your billing operations.
By taking advantage of QuickBooks’ recurring payment feature, you can ensure prompt and accurate billing, reduce errors, and provide a seamless payment experience for your customers. This not only saves time but enhances customer satisfaction and strengthens your relationship with them.
Remember to periodically review and track your recurring payments to stay organized and proactive. Monitor payment statuses, generate reports, and make adjustments as needed to optimize your billing processes and maximize revenue.
Now that you have gained a solid understanding of setting up recurring payments in QuickBooks, you are well-equipped to streamline your billing processes and focus on growing your business. Leverage the power of automation, improve cash flow management, and provide a seamless payment experience for your customers. With QuickBooks, you can efficiently manage recurring payments and enjoy the benefits of a streamlined invoicing system.
So, without further ado, start implementing recurring payments in QuickBooks and enjoy the peace of mind that comes with automated billing and efficient payment processing.