Introduction
Welcome to the world of QuickBooks Online, a powerful accounting software solution that helps you manage your business finances more efficiently. One of the essential features of QuickBooks Online is the ability to write checks, which allows you to make payments to vendors, suppliers, and other payees.
Writing checks in QuickBooks Online not only helps you track your expenses accurately but also simplifies the process of recording and reconciling your bank transactions. Whether you prefer to print physical checks or use electronic methods for payment, QuickBooks Online offers a user-friendly interface to streamline this process.
In this guide, we will walk you through the step-by-step process of writing checks in QuickBooks Online. You will learn how to set up bank accounts, access the check writing feature, enter payee and date information, add check details, print or write checks, save and record check transactions, void or delete checks, and reconcile bank statements.
Whether you are a small business owner, a freelancer, or a self-employed professional, mastering the art of check writing in QuickBooks Online will undoubtedly benefit you in managing your financial transactions with ease and accuracy.
So, let’s dive in and explore the world of check writing in QuickBooks Online, empowering you to streamline your payment processes and simplify your business finances.
Setting Up Bank Accounts in QuickBooks Online
Before you can start writing checks in QuickBooks Online, you need to set up your bank accounts. This step is crucial as it ensures accurate tracking of your financial transactions and keeps your records organized.
To set up bank accounts in QuickBooks Online, follow these simple steps:
- Log in to your QuickBooks Online account and click on the “Banking” tab located in the left-hand menu.
- Click on the “Add Account” button to initiate the setup process.
- Select your bank from the list or enter your bank’s name in the search bar.
- Follow the prompts to connect your bank account to QuickBooks Online securely. You may need to enter your online banking credentials or provide additional information.
- Once your bank account is connected, QuickBooks Online will automatically synchronize your transactions, making it easier to track and reconcile them.
It is important to note that you can set up multiple bank accounts in QuickBooks Online, including checking accounts, savings accounts, credit card accounts, and even PayPal accounts. Organizing your accounts in this way allows you to maintain separate records for each account and facilitates accurate tracking and reporting.
When setting up your bank accounts, ensure that you provide accurate information, including the account name, account type, and opening balance. This information will be used while writing checks and recording transactions in QuickBooks Online.
Once your bank accounts are set up, you are ready to start writing checks in QuickBooks Online. In the next section, we will explore how to access the check writing feature and enter payee and date information.
Accessing the Check Writing Feature
Once you have set up your bank accounts in QuickBooks Online, you can easily access the check writing feature to start creating checks for your payees. Here’s how you can do it:
- Log in to your QuickBooks Online account and navigate to the “Banking” tab located in the left-hand menu.
- Click on the “Write Check” button, usually located at the top right corner of the page. Alternatively, you can go to the “Transactions” tab and select “Checks” from the drop-down menu.
- A window will open, allowing you to enter the necessary information for your check.
By accessing the check writing feature in QuickBooks Online, you gain a centralized platform to fill out and manage your check transactions. This eliminates the need for manual check writing or using external writing tools, ensuring accuracy, and streamlining your payment processes.
Now that you know how to access the check writing feature in QuickBooks Online, let’s move on to the next section where we will explore how to enter payee and date information when writing a check.
Entering Payee and Date Information
When writing a check in QuickBooks Online, it is important to accurately enter the payee and date information to ensure proper record-keeping and tracking of your transactions. Here’s how you can enter this information:
- In the “Payee” field, enter the name of the person or business to whom the check is being paid. You can either type in the payee’s name manually or select from the list of existing vendors or suppliers in QuickBooks Online.
- Next, enter the date of the check in the “Date” field. This is typically the date on which the check is being written.
Entering the payee and date information accurately is essential for maintaining the integrity of your financial records. It enables you to track payments made to specific vendors and suppliers, generate accurate reports, and reconcile your bank transactions effectively.
In addition to the payee and date information, QuickBooks Online also allows you to add additional details to your checks, such as a memo or note, and attach any necessary documents for reference. This can be useful for providing additional context or documentation related to the payment.
Now that you know how to enter payee and date information when writing a check in QuickBooks Online, let’s move on to the next section where we will explore how to add check details such as account allocations and amounts.
Adding Check Details
When writing a check in QuickBooks Online, it’s important to provide accurate and detailed information about the payment. This includes specifying the account allocations and amounts for the transaction. Here’s how you can add check details in QuickBooks Online:
- In the “Category” or “Account” field, select the appropriate expense or income account from the drop-down menu. This determines the account to which the payment will be allocated.
- Enter the amount for each account allocation in the “Amount” field. QuickBooks Online will automatically calculate the total amount of the check based on the allocations.
- If needed, you can add additional account allocations by clicking the “+” button to the right of the line item. This allows you to split the payment across multiple expense or income accounts.
Adding check details accurately ensures that your financial transactions are properly categorized and recorded in the correct accounts. It helps you maintain accurate expense tracking and allows for accurate reporting and analysis of your business finances.
In addition to the account allocations and amounts, you can also include a memo or note for each line item to provide additional information or details about the payment. This can be useful for record-keeping purposes or to provide explanations for specific expenses.
Now that you know how to add check details in QuickBooks Online, let’s move on to the next section where we will explore how to print or write the checks once all the relevant information has been entered.
Printing or Writing Checks
Once you have entered all the necessary check details in QuickBooks Online, you have the option to either print physical checks or manually write them. QuickBooks Online offers flexibility in choosing the method that works best for your business. Here’s how you can print or write checks:
Printing Checks:
- Ensure that you have preloaded check stock, compatible with your printer, in the printer tray.
- Click the “Print Check” button located at the bottom-right corner of the check window.
- Select the check(s) you want to print from the list and adjust the printing settings if needed.
- Click the “Preview and Print” button to generate a preview of the check(s) and verify the alignment.
- If everything looks good, click the “Print” button, and QuickBooks Online will print the checks using your selected printer.
Writing Checks Manually:
- If you prefer to write checks manually, simply enter the necessary payment details, including the payee name, date, and check amount, on the check.
- Ensure that the check is legible, and all information is accurately recorded.
- You can then manually sign the check, detach it from the checkbook, and provide it to the payee.
Whichever method you choose, QuickBooks Online allows you to maintain a record of the check transaction in your account register. This ensures that your financial records are up to date and accurate.
Printing or writing checks in QuickBooks Online streamlines the payment process, eliminates the need for manual calculations and record-keeping, and provides a professional and organized approach to managing your business finances.
Now that you know how to print or write checks in QuickBooks Online, let’s move on to the next section where we will explore how to save and record check transactions for future reference.
Saving and Recording Check Transactions
After you have printed or written a check in QuickBooks Online, it is important to save and record the transaction to maintain accurate financial records. Saving and recording check transactions allows you to track your payments, reconcile your bank statements, and generate reports when needed. Here’s how you can save and record check transactions in QuickBooks Online:
- Click the “Save and Close” button or the “Save and New” button at the bottom-right corner of the check window to save the transaction.
- QuickBooks Online will prompt you to confirm the recording of the check transaction. Ensure that all the details are accurate before proceeding.
- Once confirmed, QuickBooks Online will save the check transaction and update your account balances accordingly.
- The check will be recorded in your account register, allowing you to review, edit, or delete the transaction if needed.
By saving and recording check transactions, you are creating an audit trail and maintaining a clear record of your financial activities. This ensures that you have a comprehensive view of your cash flow and can easily track your expenses.
In addition to saving and recording check transactions, QuickBooks Online also provides features for tracking bounced checks, managing outstanding payments, and creating recurring check templates for recurring expenses. These additional features further enhance your ability to effectively manage and track your finances.
Now that you know how to save and record check transactions in QuickBooks Online, let’s move on to the next section where we will explore how to void or delete checks if necessary.
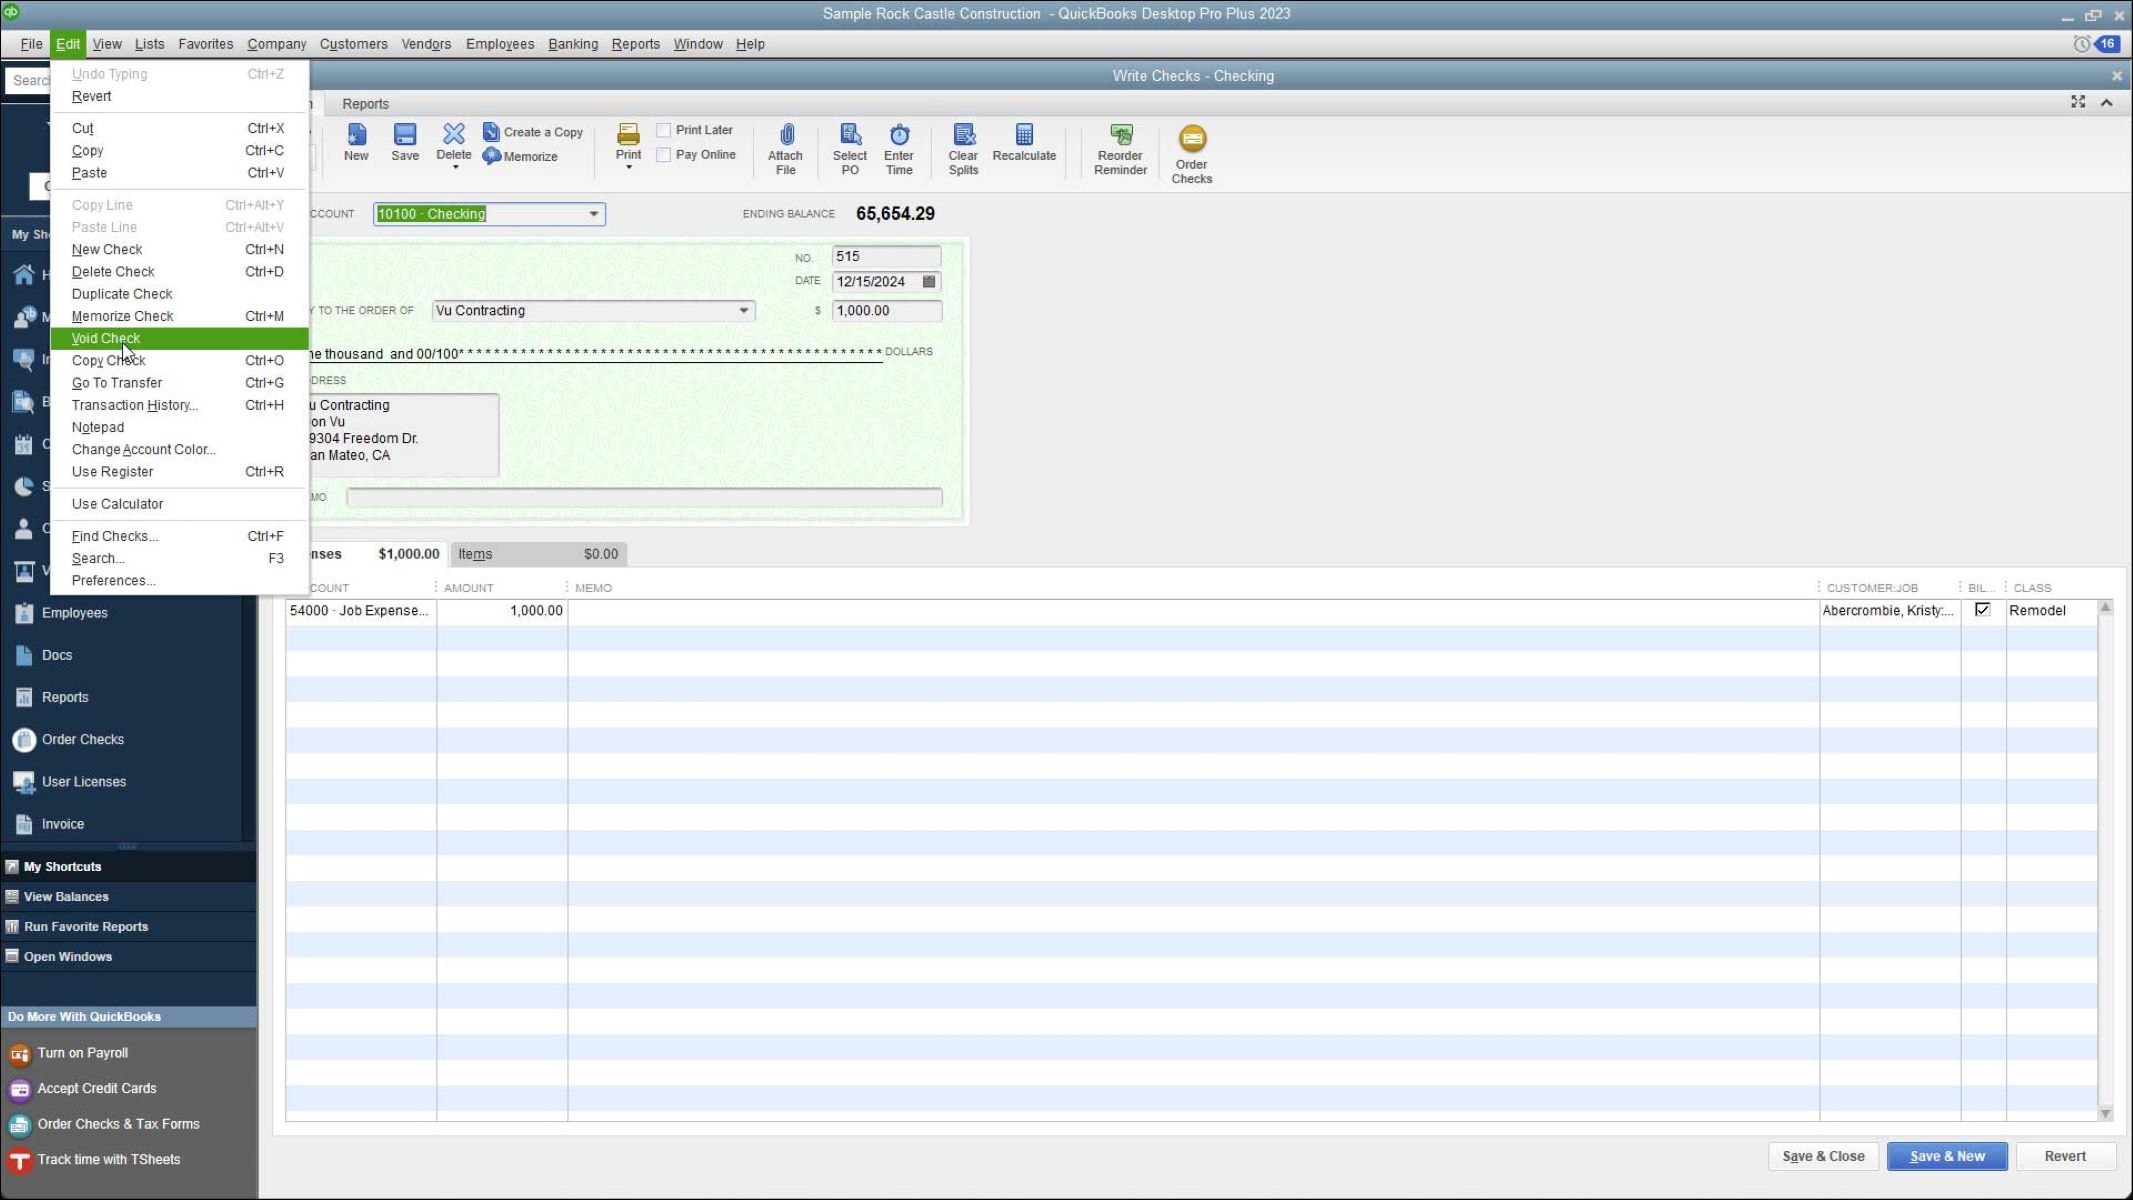
Voiding or Deleting Checks
There may be times when you need to void or delete a check in QuickBooks Online. This could be due to various reasons, such as an incorrect payment, a duplicate check, or a cancelled transaction. QuickBooks Online allows you to easily void or delete checks to maintain accurate records. Here’s how you can void or delete checks:
Voiding Checks:
- Go to the “Banking” tab and select “Checks” from the drop-down menu.
- Find and select the check you want to void from the list.
- Click the “More” button next to the check and select “Void”.
- Confirm the void action, and QuickBooks Online will mark the check as voided without deleting it.
Deleting Checks:
- Go to the “Banking” tab and select “Checks” from the drop-down menu.
- Find and select the check you want to delete from the list.
- Click the “More” button next to the check and select “Delete”.
- Confirm the deletion action, and QuickBooks Online will permanently delete the check transaction.
It is important to note that once a check is voided or deleted, it cannot be undone. Therefore, it is recommended to exercise caution when performing these actions and ensure that you are deleting or voiding the correct check.
Voiding or deleting checks in QuickBooks Online helps you maintain accurate records and prevent any discrepancies in your financial reports. It ensures that your accounting data is up to date and reflects the true state of your business finances.
Now that you know how to void or delete checks in QuickBooks Online, let’s move on to the next section where we will explore how to reconcile your bank statements to ensure accuracy and completeness.
Reconciling Bank Statements
Reconciling your bank statements is a crucial step in ensuring the accuracy and integrity of your financial records in QuickBooks Online. This process involves comparing your recorded transactions in QuickBooks with the transactions listed on your bank statement to identify any discrepancies. Here’s how you can reconcile your bank statements in QuickBooks Online:
- Go to the “Accounting” tab and select “Reconcile” from the drop-down menu.
- Select the bank account that you want to reconcile from the list.
- Enter the statement date and ending balance as shown on your bank statement.
- QuickBooks Online will display a list of transactions that have cleared your bank according to your bank statement. Match each transaction with the corresponding transaction in QuickBooks.
- If a transaction is missing or listed incorrectly, click the checkbox next to it and click the “Edit” button to make any necessary adjustments.
- Once all the transactions are matched and any adjustments are made, confirm that the “Difference” amount is zero.
- If the “Difference” amount is zero, click the “Finish” button to complete the reconciliation. This will update your reconcile status and record the reconciliation in QuickBooks.
Reconciling your bank statements regularly not only ensures the accuracy of your financial records but also helps identify any errors or fraudulent activities that may have occurred. It provides a clear and transparent view of your cash flow and helps you make informed financial decisions.
After reconciling your bank statements, it is recommended to retain a copy of the reconciled bank statement and supporting documentation for reference and audit purposes.
Now that you know how to reconcile your bank statements in QuickBooks Online, you are well-equipped to maintain accurate and up-to-date financial records for your business.
Conclusion
Writing checks in QuickBooks Online is an essential aspect of managing your business finances. With the ability to set up bank accounts, access the check writing feature, enter payee and date information, add check details, print or write checks, save and record transactions, void or delete checks, and reconcile bank statements, QuickBooks Online provides a comprehensive solution for efficient check management.
By following the step-by-step processes outlined in this guide, you can streamline your payment processes, maintain accurate financial records, and improve the overall organization of your business finances. QuickBooks Online offers a user-friendly interface that simplifies the check writing process, making it accessible to both beginners and experienced users.
Remember to enter accurate payee and date information, add detailed check information, and ensure the proper allocation of payments to the correct expense or income accounts. Regularly saving and recording check transactions will provide a clear audit trail of your financial activities, facilitating accurate tracking and reporting.
Additionally, the ability to void or delete checks provides flexibility and control in managing your payments, ensuring accurate records are maintained at all times. Reconciling your bank statements on a regular basis is also important to verify the accuracy of your financial records and identify any discrepancies.
By mastering the art of writing checks in QuickBooks Online, you can effectively manage your business finances and make informed decisions based on accurate and up-to-date financial data.
So, go ahead and utilize the power of QuickBooks Online to simplify your check writing process, streamline your payment workflows, and maintain accurate financial records for your business.