Introduction
Welcome to the world of HDMI! In this ever-evolving world of technology, it’s important to keep up with the latest advancements. One such advancement is the HDMI (High-Definition Multimedia Interface) input on laptops, opening up a whole new world of possibilities for users.
So, what exactly is HDMI? HDMI is a digital interface that allows high-quality audio and video signals to be transmitted from one device to another. It has quickly become the standard for connecting devices such as DVD players, gaming consoles, and Blu-ray players to televisions and monitors.
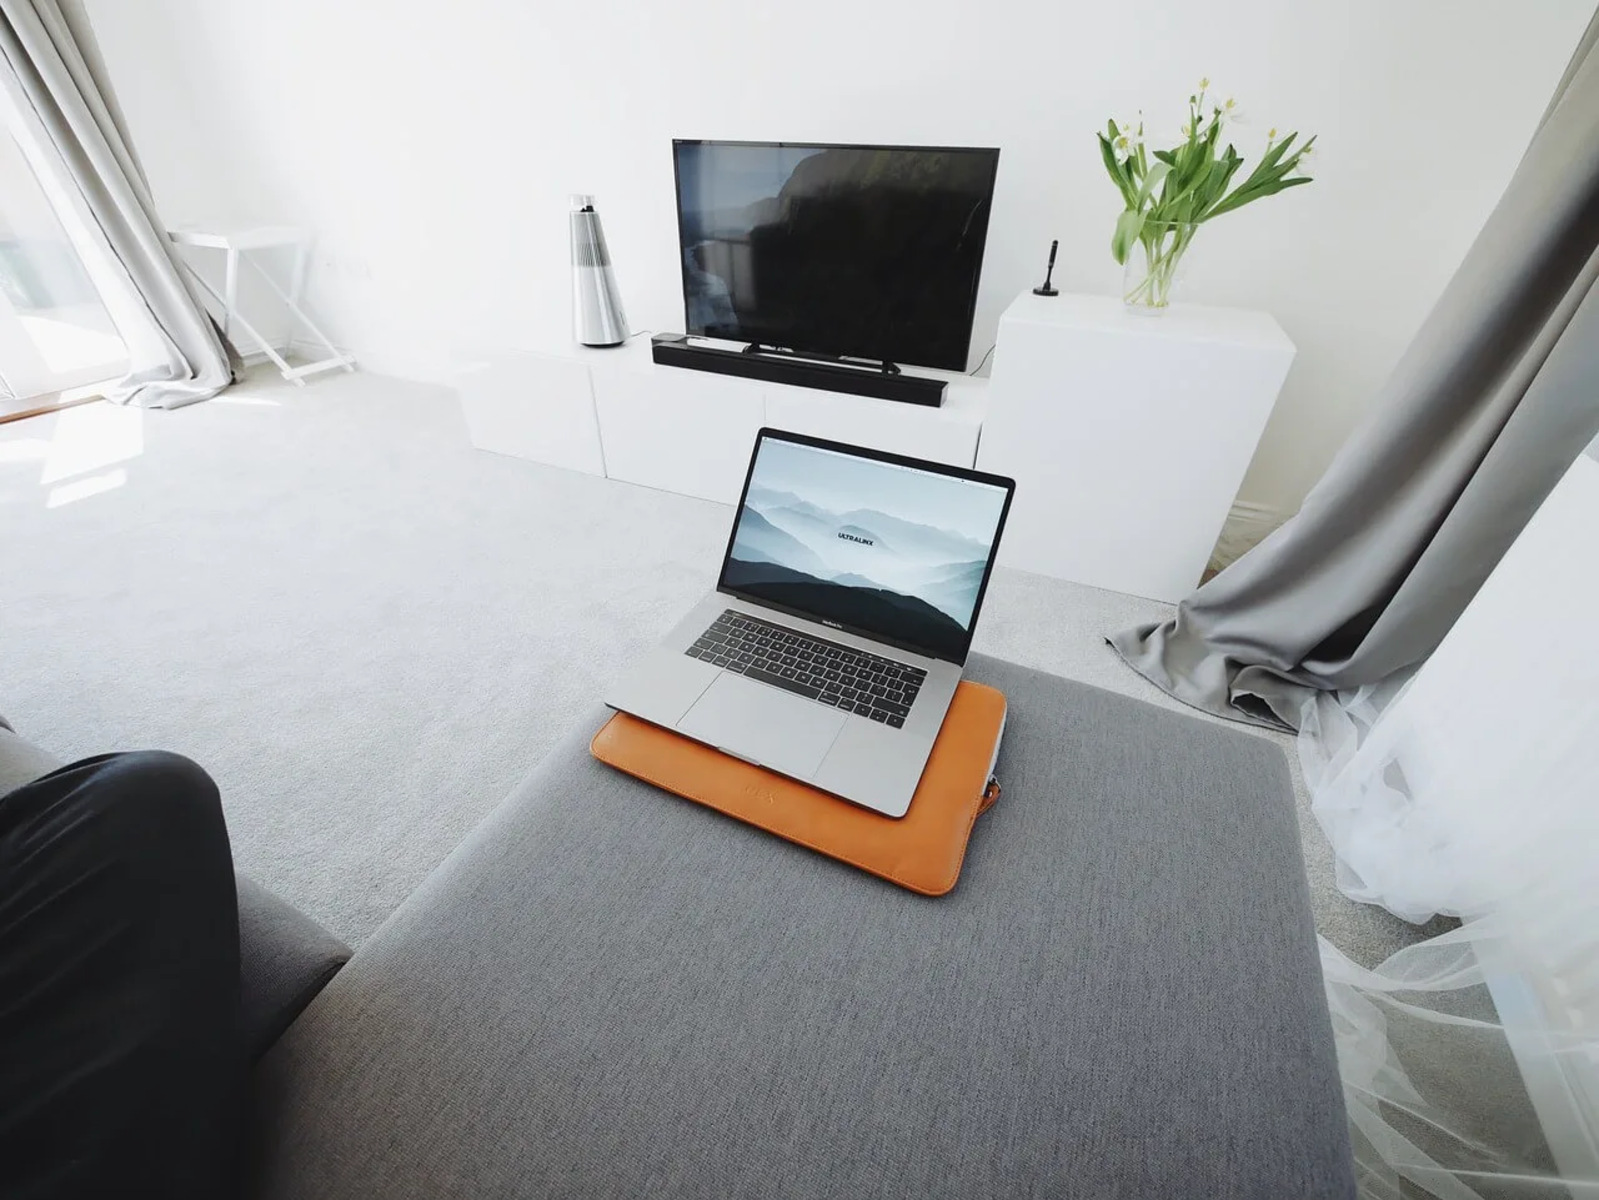
But why would you want to use the HDMI input on your laptop? Well, there are several benefits to doing so. First and foremost, it allows you to connect your laptop to an external device, such as a larger monitor or a high-definition television, and enjoy a bigger and more immersive viewing experience. Whether you’re watching movies, playing games, or even working on a project, having a larger screen can greatly enhance your productivity and enjoyment.
Furthermore, using the HDMI input can also enable you to display content from your laptop on a larger screen in a presentation or meeting setting, making it ideal for professionals who frequently give presentations or collaborate with colleagues.
Now that you understand the importance and benefits of using the HDMI input on your laptop, the next step is to check if your laptop has an HDMI port. This is crucial, as not all laptops are equipped with this interface. In the next section, we will guide you through the process of checking whether your laptop supports HDMI connectivity.
What is HDMI?
HDMI, which stands for High-Definition Multimedia Interface, is a digital interface that allows for the transmission of high-quality audio and video signals between devices.
Before HDMI came into existence, traditional analog cables such as VGA and RCA were used to connect devices together. However, these analog connections could often result in loss of quality and clarity, particularly when transmitting high-definition content. HDMI was introduced to address these limitations and provide a seamless and superior digital connection.
One of the standout features of HDMI is its ability to transmit both audio and video signals over a single cable. This eliminates the need for multiple cables and simplifies the setup process. Additionally, HDMI supports uncompressed high-definition video, delivering crystal-clear visuals with vibrant colors and sharp details.
HDMI also supports various audio formats, including Dolby TrueHD, DTS-HD Master Audio, and 7.1 surround sound, allowing for an immersive audio experience. This is especially beneficial when watching movies, playing games, or listening to music that relies heavily on high-quality audio.
Another advantage of HDMI is its compatibility with various resolutions, including standard definition (480p), high definition (720p and 1080p), and even ultra-high definition (4K and 8K). This ensures that HDMI can cater to diverse display technologies, from older televisions to the latest 8K monitors.
Furthermore, HDMI supports two-way communication between devices, allowing for advanced features such as device control and audio return channel (ARC). With device control, you can use a single remote to control multiple HDMI-connected devices, simplifying the overall entertainment experience. ARC enables the transmission of audio from the television back to the audio system, eliminating the need for a separate audio cable.
In summary, HDMI is a versatile and highly capable digital interface that offers superior audio and video transmission. Its ability to deliver high-definition content, support various resolutions, and simplify the connectivity process has made HDMI the standard for modern devices. Now that you understand what HDMI is and its key features, let’s move on to the next section, where we will explore why using the HDMI input on your laptop can be beneficial.
Why Use HDMI Input on a Laptop?
The HDMI input on a laptop opens up a world of possibilities and benefits for users. Let’s explore some of the reasons why you should consider using the HDMI input on your laptop:
1. Enhanced Visual Experience: By connecting your laptop to an external device such as a larger monitor or a high-definition television, you can enjoy a more immersive and visually stunning experience. Whether you’re watching movies, playing games, or editing photos and videos, a bigger screen can greatly enhance your viewing pleasure and productivity.
2. Improved Productivity: If you’re someone who frequently works on complex projects or multitasks, using the HDMI input on your laptop can significantly boost your productivity. You can connect your laptop to a larger monitor and take advantage of the extended screen real estate to have multiple windows and applications open simultaneously, making it easier to work on different tasks or compare documents side by side.
3. Collaborative Presentations: If you regularly give presentations or collaborate with colleagues, using the HDMI input allows you to showcase your work on a larger screen. This makes it easier for everyone in the room to see and follow along with your content, whether it’s a PowerPoint presentation, a design concept, or a video demonstration. By connecting your laptop to a projector or a larger display using HDMI, you can make a greater impact and effectively communicate your ideas.
4. Gaming and Entertainment: Gaming enthusiasts can take their gaming experience to the next level by connecting their laptops to a bigger screen with HDMI. Whether you’re immersed in the latest AAA title or enjoying retro gaming, playing games on a larger display can provide a more cinematic experience. Additionally, you can connect your laptop to a sound system for enhanced audio and truly immerse yourself in the virtual world.
5. Flexibility and Portability: Using the HDMI input on your laptop gives you the flexibility to connect to various devices without the need for additional adapters or converters. Whether you want to connect to a monitor, a projector, a television, or even a home theater system, HDMI ensures a seamless and hassle-free connection. Moreover, HDMI cables are widely available and easy to carry, making it convenient for travel or working in different locations.
Now that you understand the benefits of using the HDMI input on your laptop, the next step is to check if your laptop has an HDMI port. In the next section, we will guide you through the process of checking for an HDMI port on your laptop.
Checking the Laptop’s HDMI Port
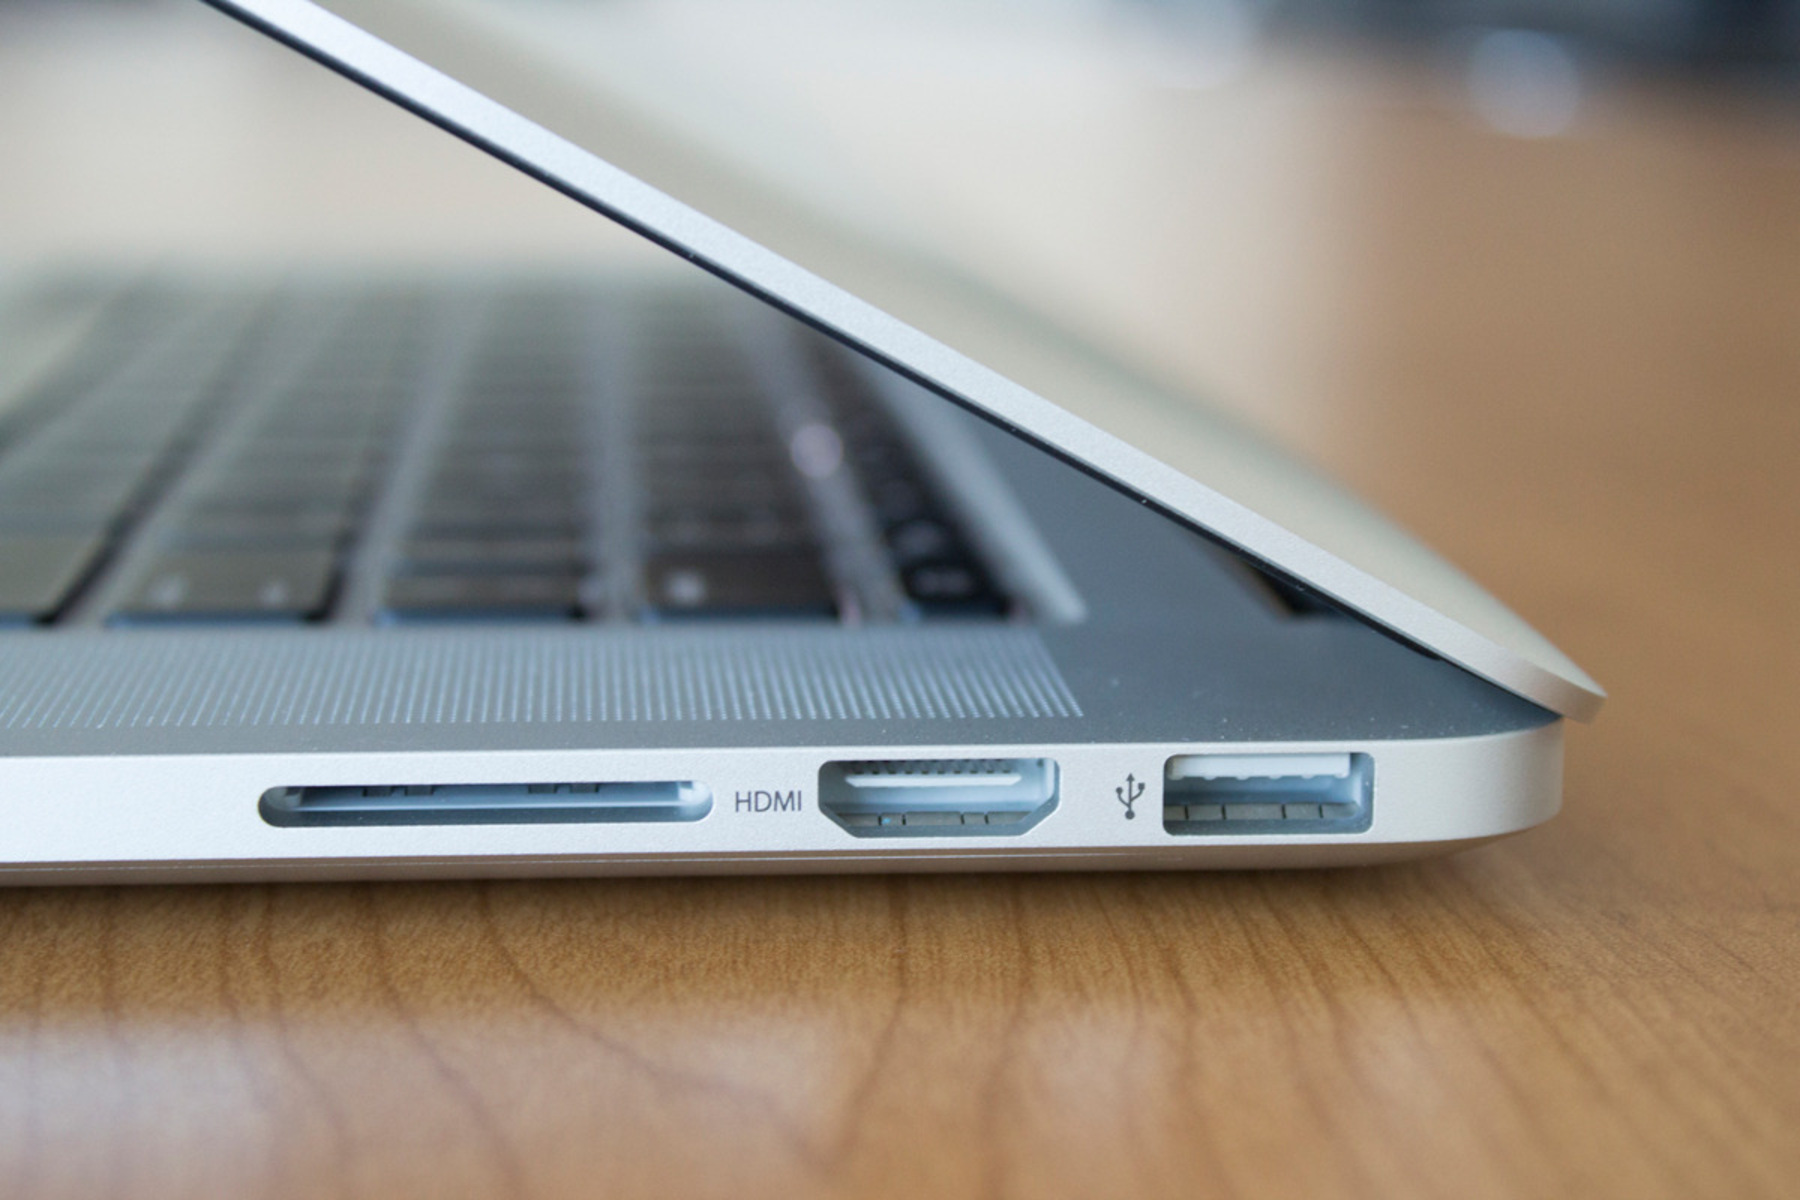
Before you can take advantage of the HDMI input on your laptop, you need to ensure that your laptop is equipped with an HDMI port. Here’s how you can check for the presence of an HDMI port on your laptop:
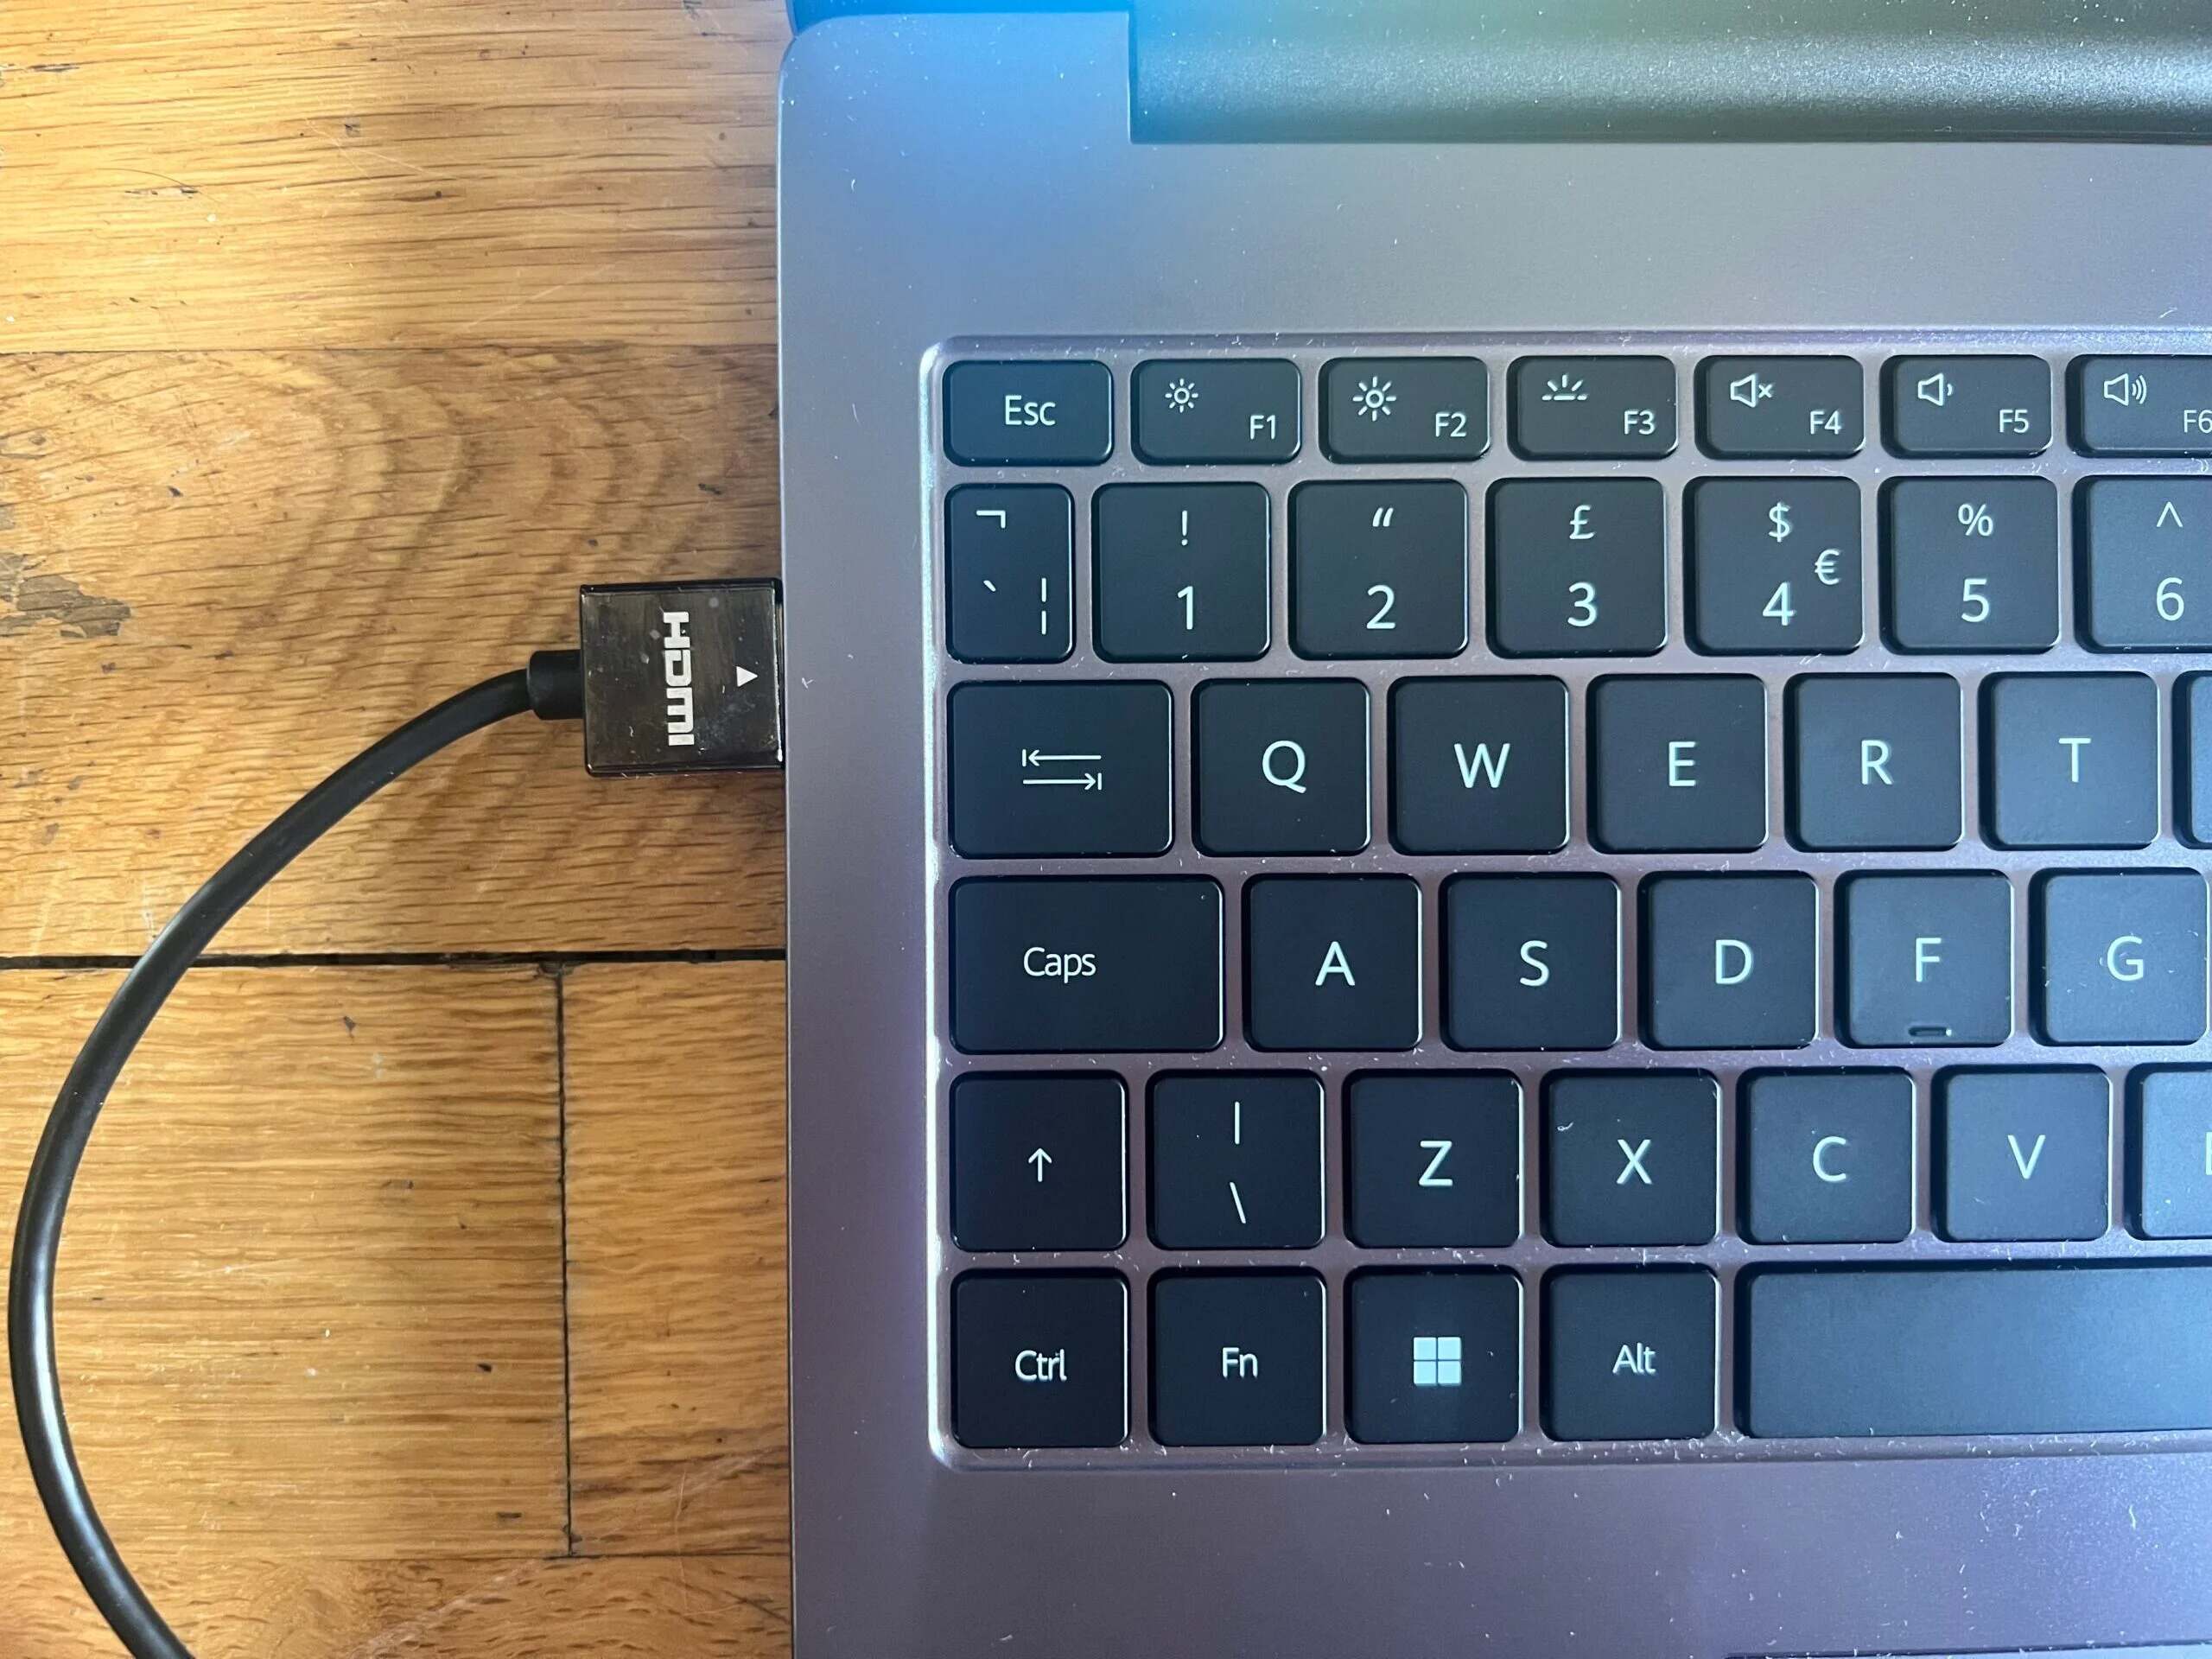
1. Examine the Physical Ports: Begin by carefully examining the sides and back of your laptop for any rectangular-shaped ports labeled “HDMI”. It’s typically located close to other ports such as USB, Ethernet, and VGA. The HDMI port should have a thin, rectangular shape with multiple small pins inside.
2. Consult the User Manual: If you’re unable to locate the HDMI port by visual inspection, refer to your laptop’s user manual. This manual will provide a detailed diagram or description of the laptop’s ports, including the HDMI port. Make sure to review the documentation specific to your laptop model, as port placement may vary.
3. Check Online Specifications: If you no longer have the physical user manual, you can search for your laptop’s specifications online. Visit the manufacturer’s website or use a search engine to find the specifications for your laptop model. Look for details related to video output or connectivity options, which will indicate the presence of an HDMI port.
4. Contact Manufacturer Support: If you’re still unsure whether your laptop has an HDMI port or need further assistance, reach out to the manufacturer’s support team. They can provide accurate and specific information about your laptop’s ports and connectivity options.
Once you have confirmed that your laptop has an HDMI port, you’re ready to connect your laptop to an external device such as a monitor or a television. In the next section, we will guide you through the process of connecting your laptop to an external device via HDMI.
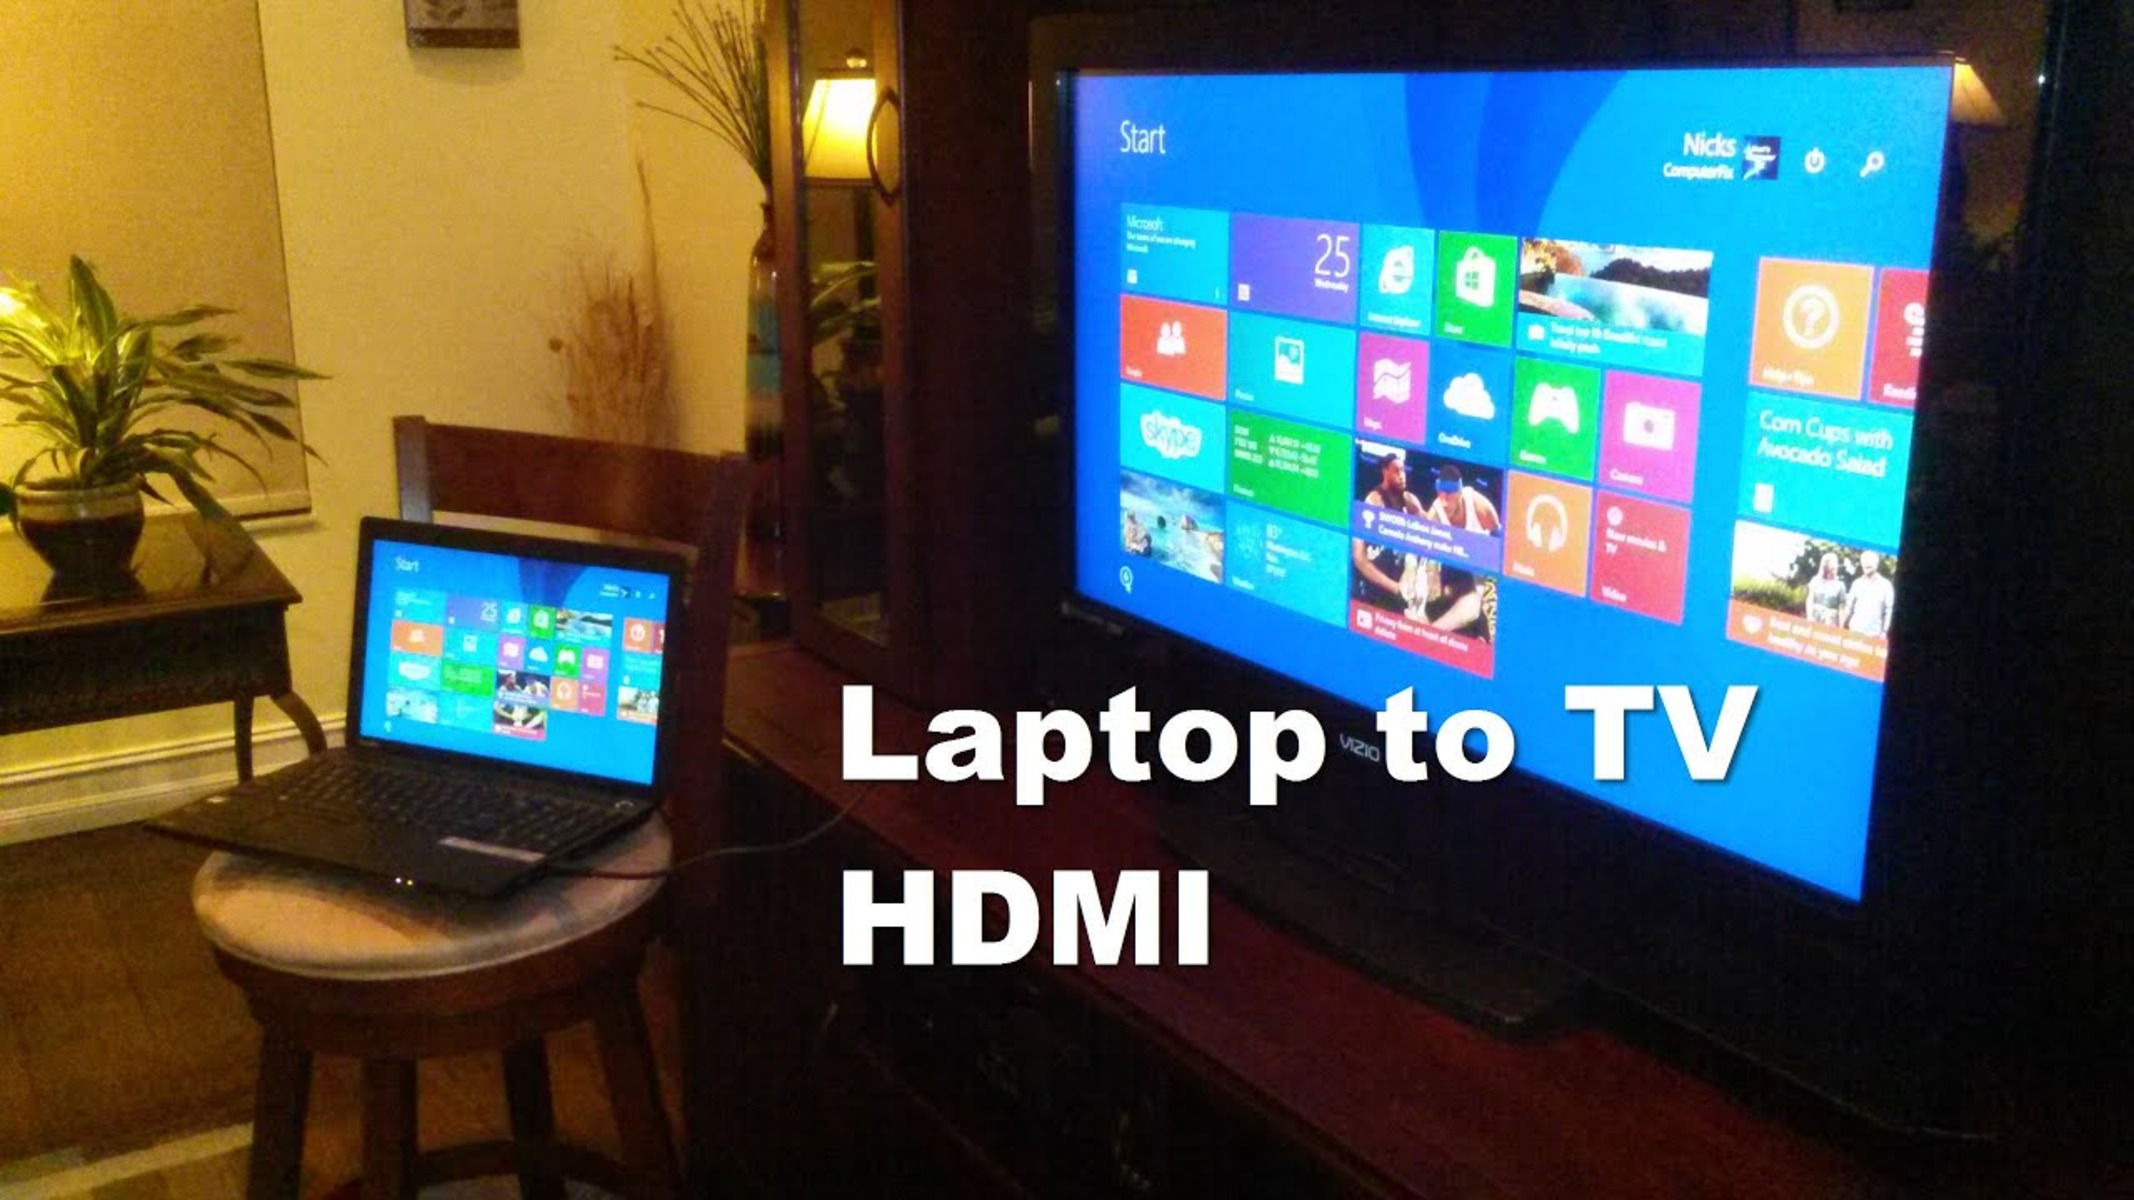
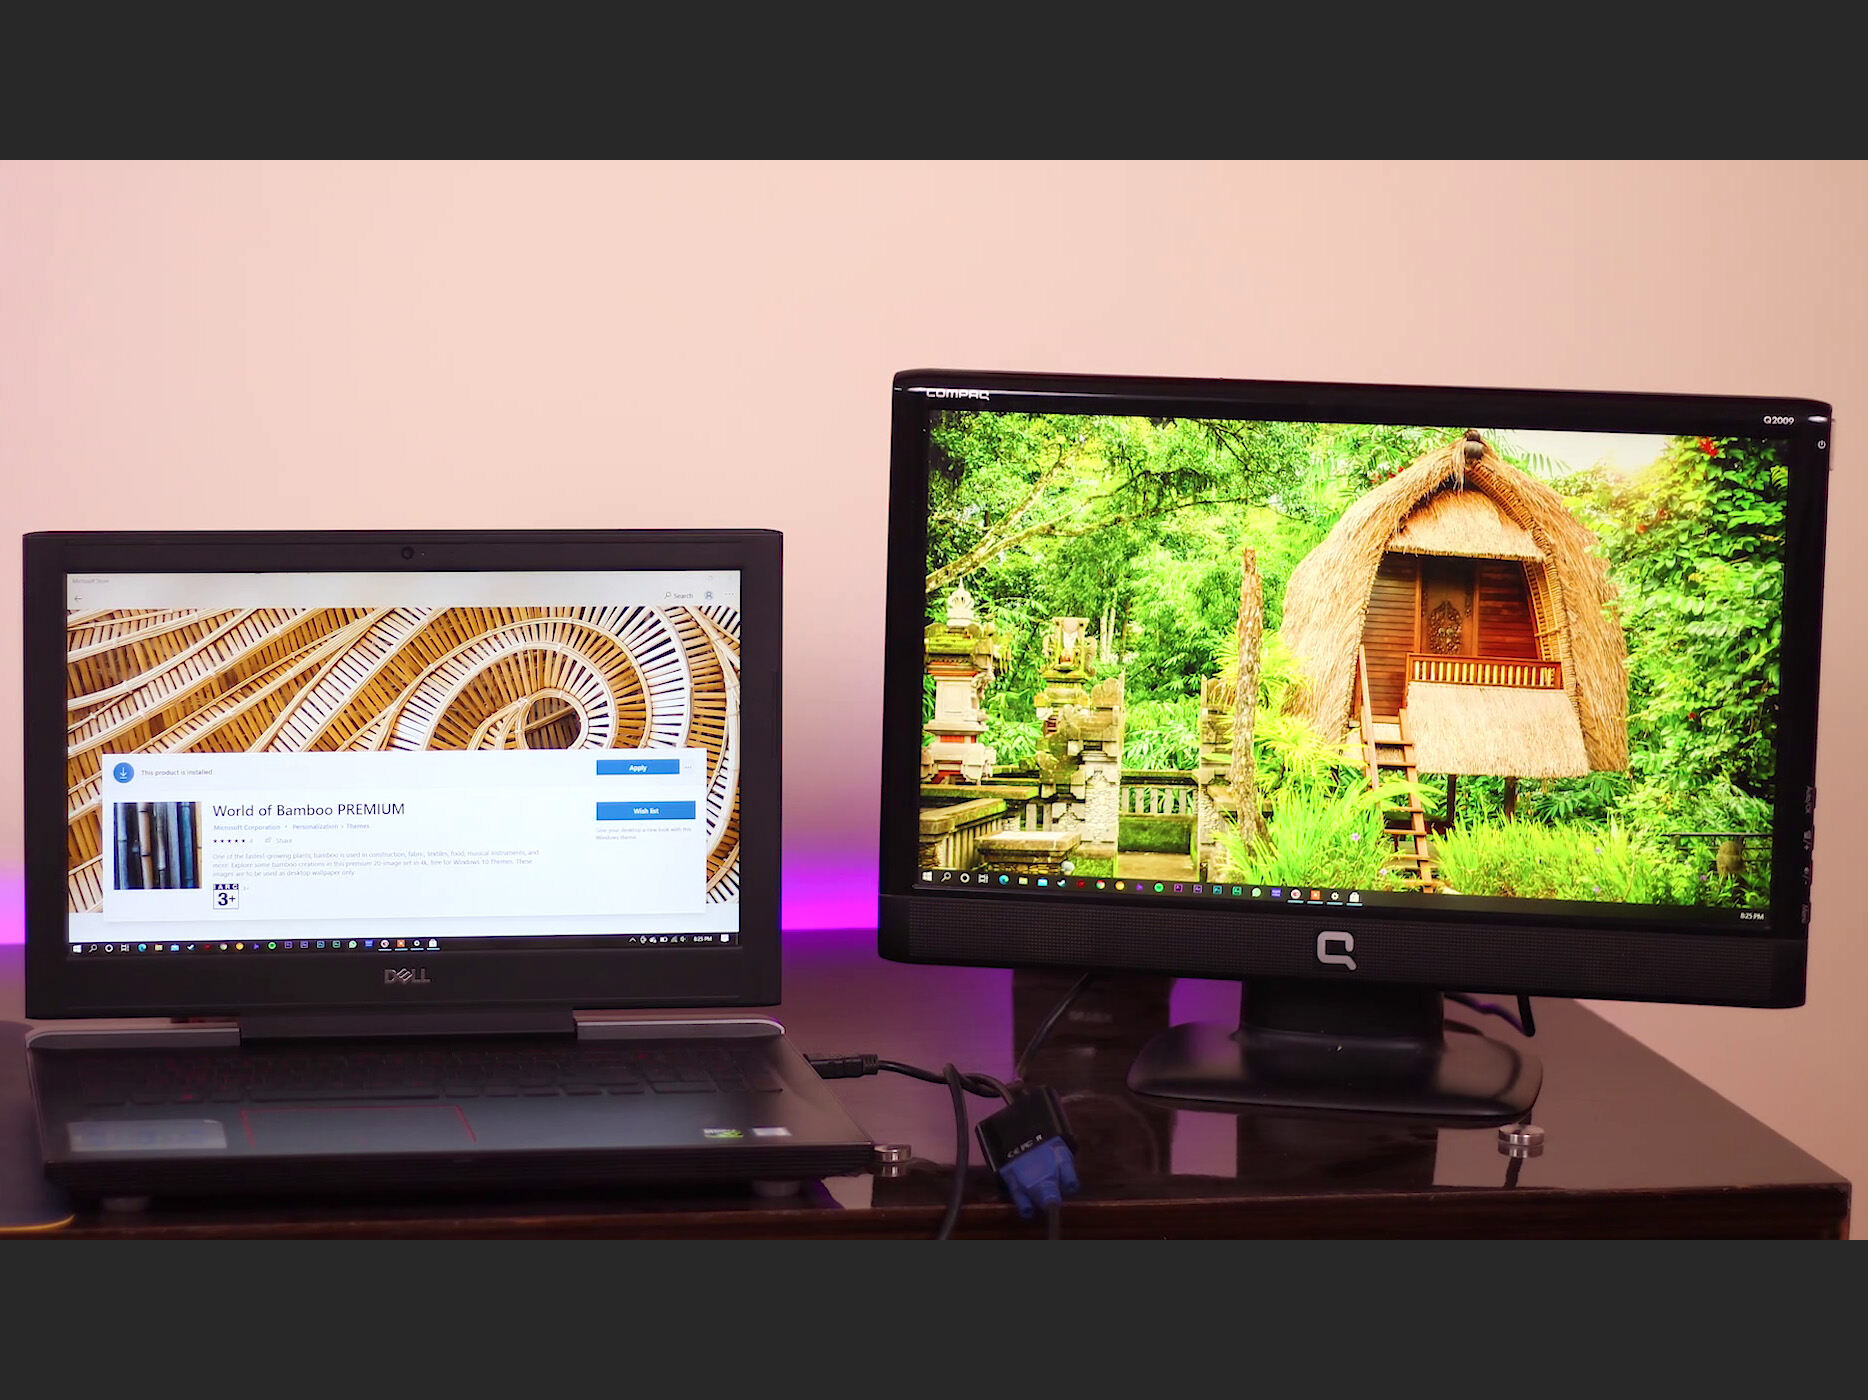
Connecting the Laptop to an External Device via HDMI
Now that you have confirmed that your laptop has an HDMI port, it’s time to connect it to an external device such as a monitor, TV, or projector. Follow these steps to establish the HDMI connection:
1. Prepare the HDMI Cable: Ensure you have an HDMI cable that matches the HDMI port on your laptop and the input port on the external device. HDMI cables come in different sizes, so choose one that is long enough to reach the external device comfortably.
2. Power Off Both Devices: Before making any connections, turn off both your laptop and the external display. This will prevent any electrical damage or system errors.
3. Connect One End to the Laptop: Take one end of the HDMI cable and insert it into the HDMI port on your laptop. The HDMI port should be labeled and easily identifiable. Make sure the connection is secure but avoid using excessive force.
4. Connect the Other End to the External Device: Take the other end of the HDMI cable and insert it into the HDMI input port on the external device. This port is typically labeled as “HDMI In,” and its location varies depending on the device model. Ensure a firm connection but handle the cable with care.
5. Power On Both Devices: After making the connections, power on both your laptop and the external device.
6. Select the HDMI Input on the External Device: Use the remote control or on-screen menu of the external device to select the HDMI input you connected the laptop to. The input source can usually be changed using buttons or a menu interface on the device or its remote control.
7. Configure Laptop Display Settings: Once the HDMI connection is established, you may need to configure your laptop’s display settings. On most laptops, you can do this by right-clicking on the desktop, selecting “Display Settings” or “Graphics Options,” and then choosing the appropriate display mode (e.g., “Extend,” “Duplicate,” or “Second Screen Only”). Adjust the resolution and other settings as desired.
That’s it! Your laptop is now connected to the external device via HDMI. You should see your laptop’s screen projected on the external display. Enjoy the larger screen and immersive viewing experience for work, entertainment, or presentations.
In some cases, you may need to adjust the audio settings separately to ensure that sound is played through the external device. Refer to your laptop’s audio settings or consult the user manual for instructions on redirecting audio output via HDMI.
If you encounter any issues or difficulties during the connection process, refer to the next section for troubleshooting common HDMI input issues.
Configuring the Laptop’s Display Settings
Once you’ve successfully connected your laptop to an external device via HDMI, you may need to configure the display settings to optimize your viewing experience. Here’s how to adjust the display settings on your laptop:
1. Right-click on the Desktop: Begin by right-clicking anywhere on your laptop’s desktop. A context menu will appear.
2. Select “Display Settings” or “Graphics Options”: From the context menu, choose either “Display Settings” or “Graphics Options.” The exact wording may vary depending on your laptop’s make and model.
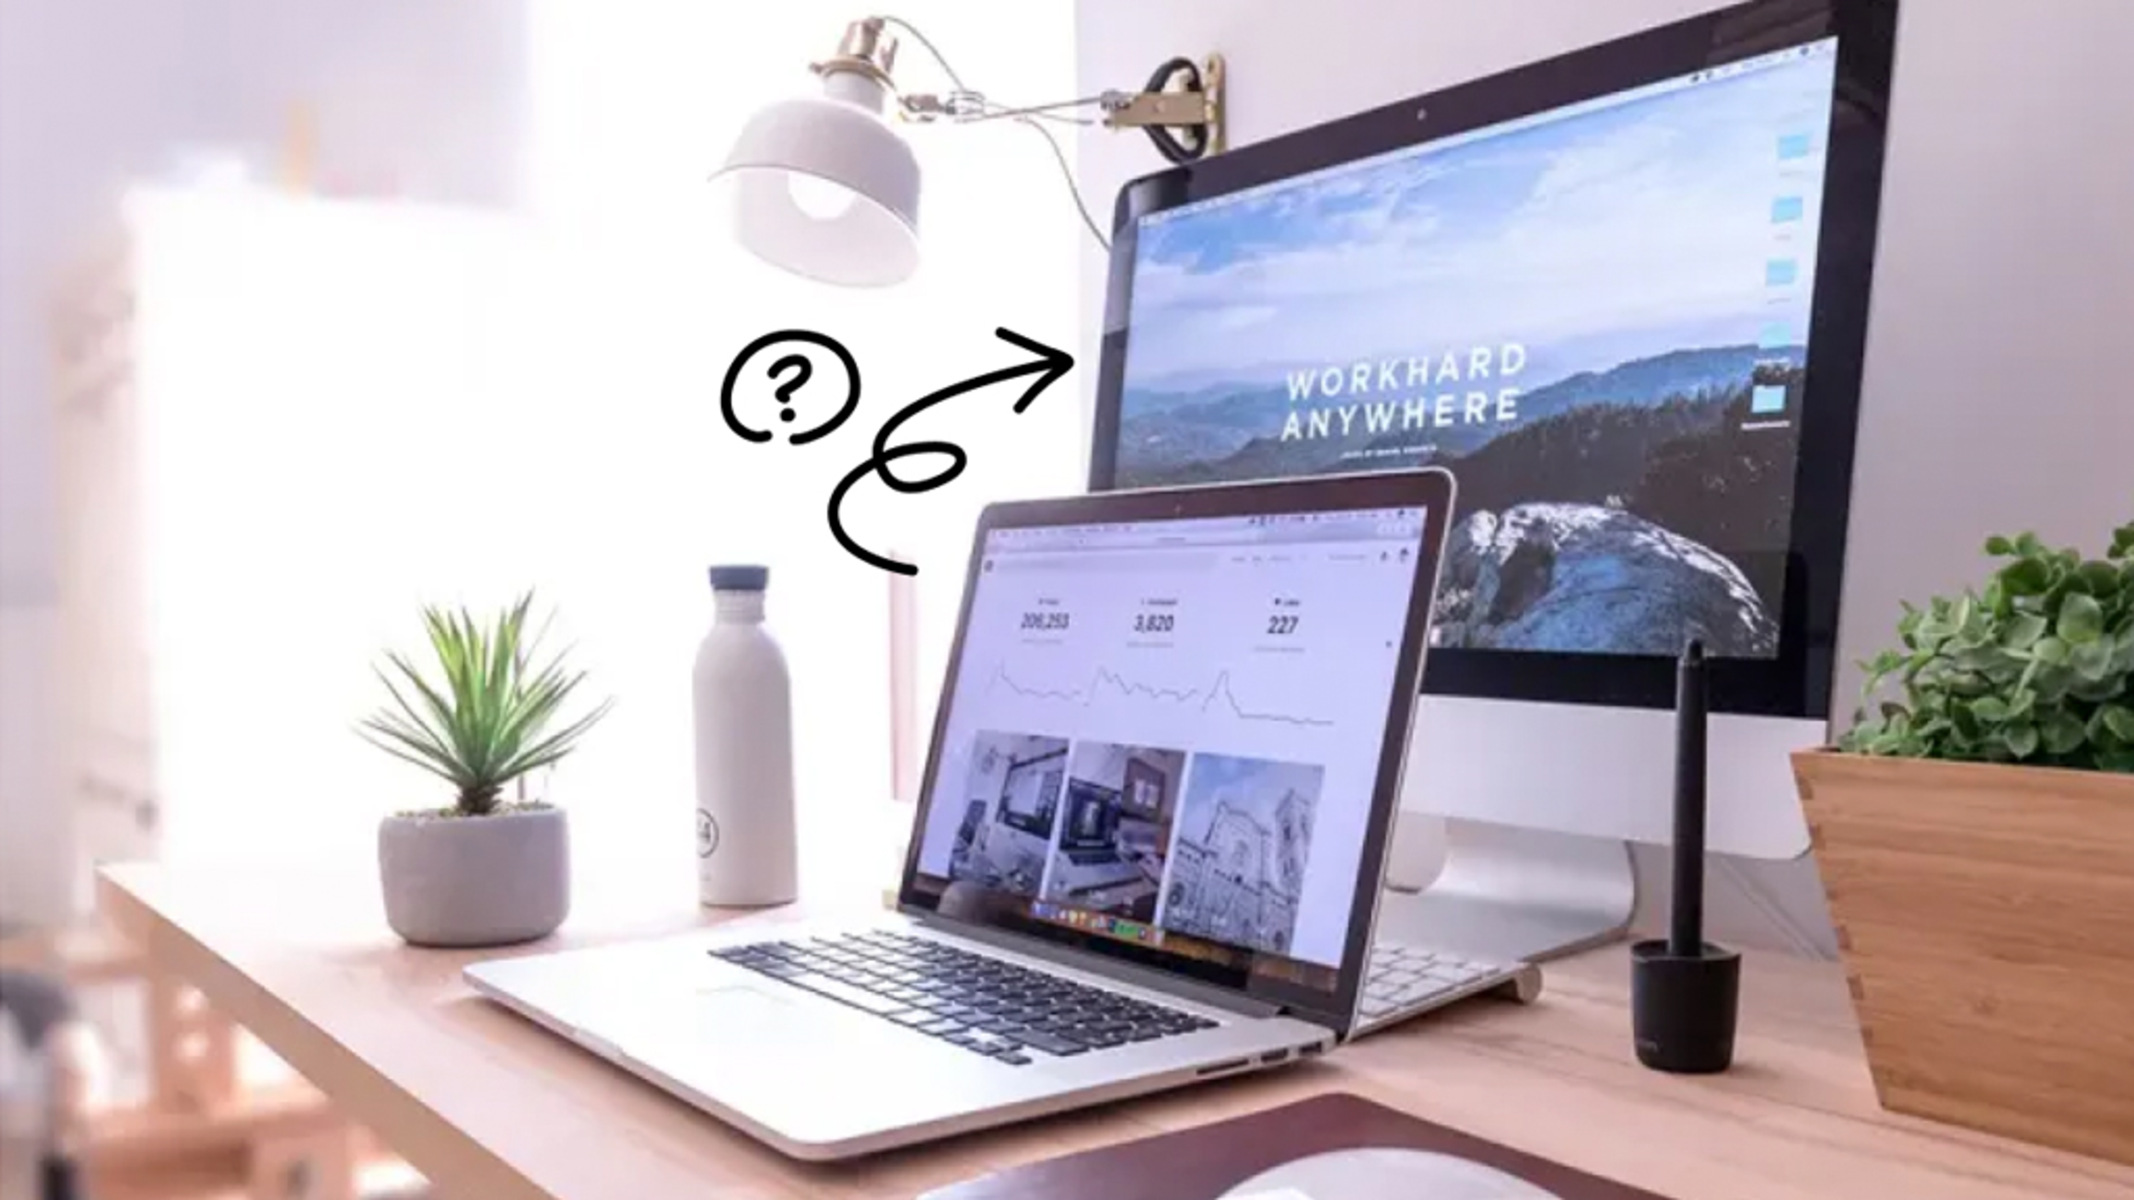
3. Identify External Display: In the display settings window, you should see two monitors labeled as “Display 1” and “Display 2.” Display 1 represents your laptop’s built-in screen, while Display 2 represents the external device connected via HDMI.
4. Choose Display Mode: Select the second display (Display 2) and choose the desired display mode based on your preference:
- Extend: This mode extends your laptop’s desktop across both screens, effectively giving you more screen real estate.
- Duplicate: This mode mirrors your laptop’s screen onto the external display, showing the same content on both screens.
- Second Screen Only: This mode disables your laptop’s built-in screen and displays only on the external device.
5. Adjust Resolution and Orientation: Depending on your external device’s capabilities, you may have multiple resolution options to choose from. It’s recommended to select the resolution that best matches the capabilities of your external device for optimal visual quality. Additionally, you can adjust the screen orientation if needed (e.g., landscape, portrait).
6. Apply the Changes: Once you have configured the display settings according to your preferences, click the “Apply” button. Your laptop’s screen should now adjust accordingly based on the chosen display mode.
It’s important to note that not all laptops have the exact same display settings options. The instructions provided here are general guidelines, and the actual steps may vary slightly depending on your laptop’s operating system and graphics drivers.
Remember to experiment with different settings to find the arrangement that suits your needs best. You can always go back to the display settings and make further adjustments if necessary.
Now that you have successfully configured the laptop’s display settings, you can enjoy the benefits of using the HDMI input on your laptop and make the most out of your external display.
In case you encounter any issues or face challenges with the HDMI input, refer to the next section where we will address common HDMI input issues and provide troubleshooting tips.
Troubleshooting Common HDMI Input Issues
While using the HDMI input on your laptop, you may encounter some common issues that can hinder the connection or affect the display quality. Here are some troubleshooting tips to help you resolve these issues:
1. Check Cable Connections: Start by ensuring that both ends of the HDMI cable are securely connected to the laptop and the external device. Sometimes, a loose or faulty connection can cause display issues.
2. Verify Power and Input Settings: Make sure both your laptop and the external device are powered on and set to the correct HDMI input. Double-check the input settings on the external device to ensure it is set to receive the HDMI signal.
3. Restart Devices: Try restarting both your laptop and the external device. Sometimes, a simple restart can resolve temporary issues and restore the HDMI connection.
4. Update Graphics Drivers: Outdated or incompatible graphics drivers on your laptop can lead to HDMI connectivity problems. Visit the website of your laptop manufacturer or the graphics card manufacturer to download and install the latest graphics drivers.
5. Test with Different HDMI Cable: If you suspect a faulty HDMI cable, try using a different cable to establish the connection. It’s also worth trying the original cable with another HDMI-enabled device to verify if the issue lies with the cable or the laptop.
6. Adjust Resolution and Refresh Rate: In the display settings on your laptop, try adjusting the resolution or refresh rate to see if it resolves any display issues. Ensure that the resolution is supported by both your laptop and the external device.
7. Disable Display Sleep Mode: Some laptops automatically put the display to sleep after a certain period of inactivity. Check the power settings on your laptop and disable any display sleep or power-saving mode that could interrupt the HDMI connection.
8. Test on a Different Display: If possible, connect your laptop to a different external device (such as another TV or monitor) using the same HDMI cable. This helps determine if the issue is specific to the original external device or the laptop’s HDMI output.
9. Reset Display Settings: If you’ve made changes to the display settings on your laptop, you can try resetting them to their default values. This can be done by right-clicking on the desktop, selecting “Display Settings,” and choosing the “Reset” or “Restore Defaults” option.
10. Seek Technical Support: If the above troubleshooting steps do not resolve the HDMI input issues, it may be necessary to contact the technical support team of your laptop manufacturer or seek professional assistance to diagnose and address the problem.
Remember to follow the manufacturer’s instructions and refer to the user manual for specific troubleshooting steps related to your laptop’s HDMI connectivity.
By troubleshooting and following these guidelines, you can overcome common HDMI input issues and ensure a smooth and uninterrupted experience while using the HDMI input on your laptop.
Conclusion
Using the HDMI input on your laptop opens up a world of possibilities for enhancing your viewing experience, boosting productivity, and facilitating seamless connectivity. HDMI allows you to connect your laptop to external devices such as monitors, TVs, and projectors, providing a larger screen size and superior audio and video quality.
In this article, we have explored what HDMI is and its key features, discussing the benefits of using the HDMI input on your laptop. We also provided guidance on checking if your laptop has an HDMI port and how to connect your laptop to an external device using HDMI. Additionally, we guided you through configuring the display settings and troubleshooting common HDMI input issues.
By understanding the potential of the HDMI input, you can enjoy a more immersive visual experience, improve productivity through extended screen space, and effectively present your work to others. Whether you’re watching movies, playing games, giving presentations, or working on complex tasks, incorporating the HDMI input into your laptop usage can enhance your overall digital experience.
Remember to always check your laptop’s specifications and user manual for specific instructions related to HDMI connectivity. If you encounter any difficulties or have further questions, do not hesitate to seek assistance from the laptop manufacturer or consult with technical support.
Now that you have the knowledge and tools to utilize the HDMI input on your laptop, go ahead and reap the benefits of seamless connectivity and an enhanced multimedia experience!