Introduction
Google Calendar is a versatile and user-friendly tool that can greatly assist students in managing their schedules and staying organized. Whether you are a high school student juggling assignments, a college student with a packed class schedule, or a graduate student balancing work and studying, Google Calendar can be a valuable resource to help you stay on top of your commitments. This article will guide you through the process of setting up and effectively using Google Calendar for school.
With Google Calendar, you can easily create and edit events, color-code and organize your schedule, set reminders and notifications, invite and collaborate with peers on group projects, share your calendar with others, sync it with your mobile devices, and take advantage of its additional features. By harnessing the power of this digital tool, you can streamline your time management, reduce stress, and increase your productivity as a student.
Whether you’re a master of organization or need some assistance in that area, Google Calendar can adapt to your needs. It provides a flexible and intuitive interface that allows you to customize your calendar to suit your preferences and requirements. No more forgotten due dates, missed appointments, or double bookings. With Google Calendar, you can take control of your schedule and make the most out of your academic journey.
In the following sections, we will delve deeper into the various features and functionalities of Google Calendar and provide you with step-by-step instructions on how to effectively use this powerful tool. By the end of this article, you will be equipped with the knowledge and skills to conquer your academic schedule and achieve a better work-life balance with Google Calendar at your side.
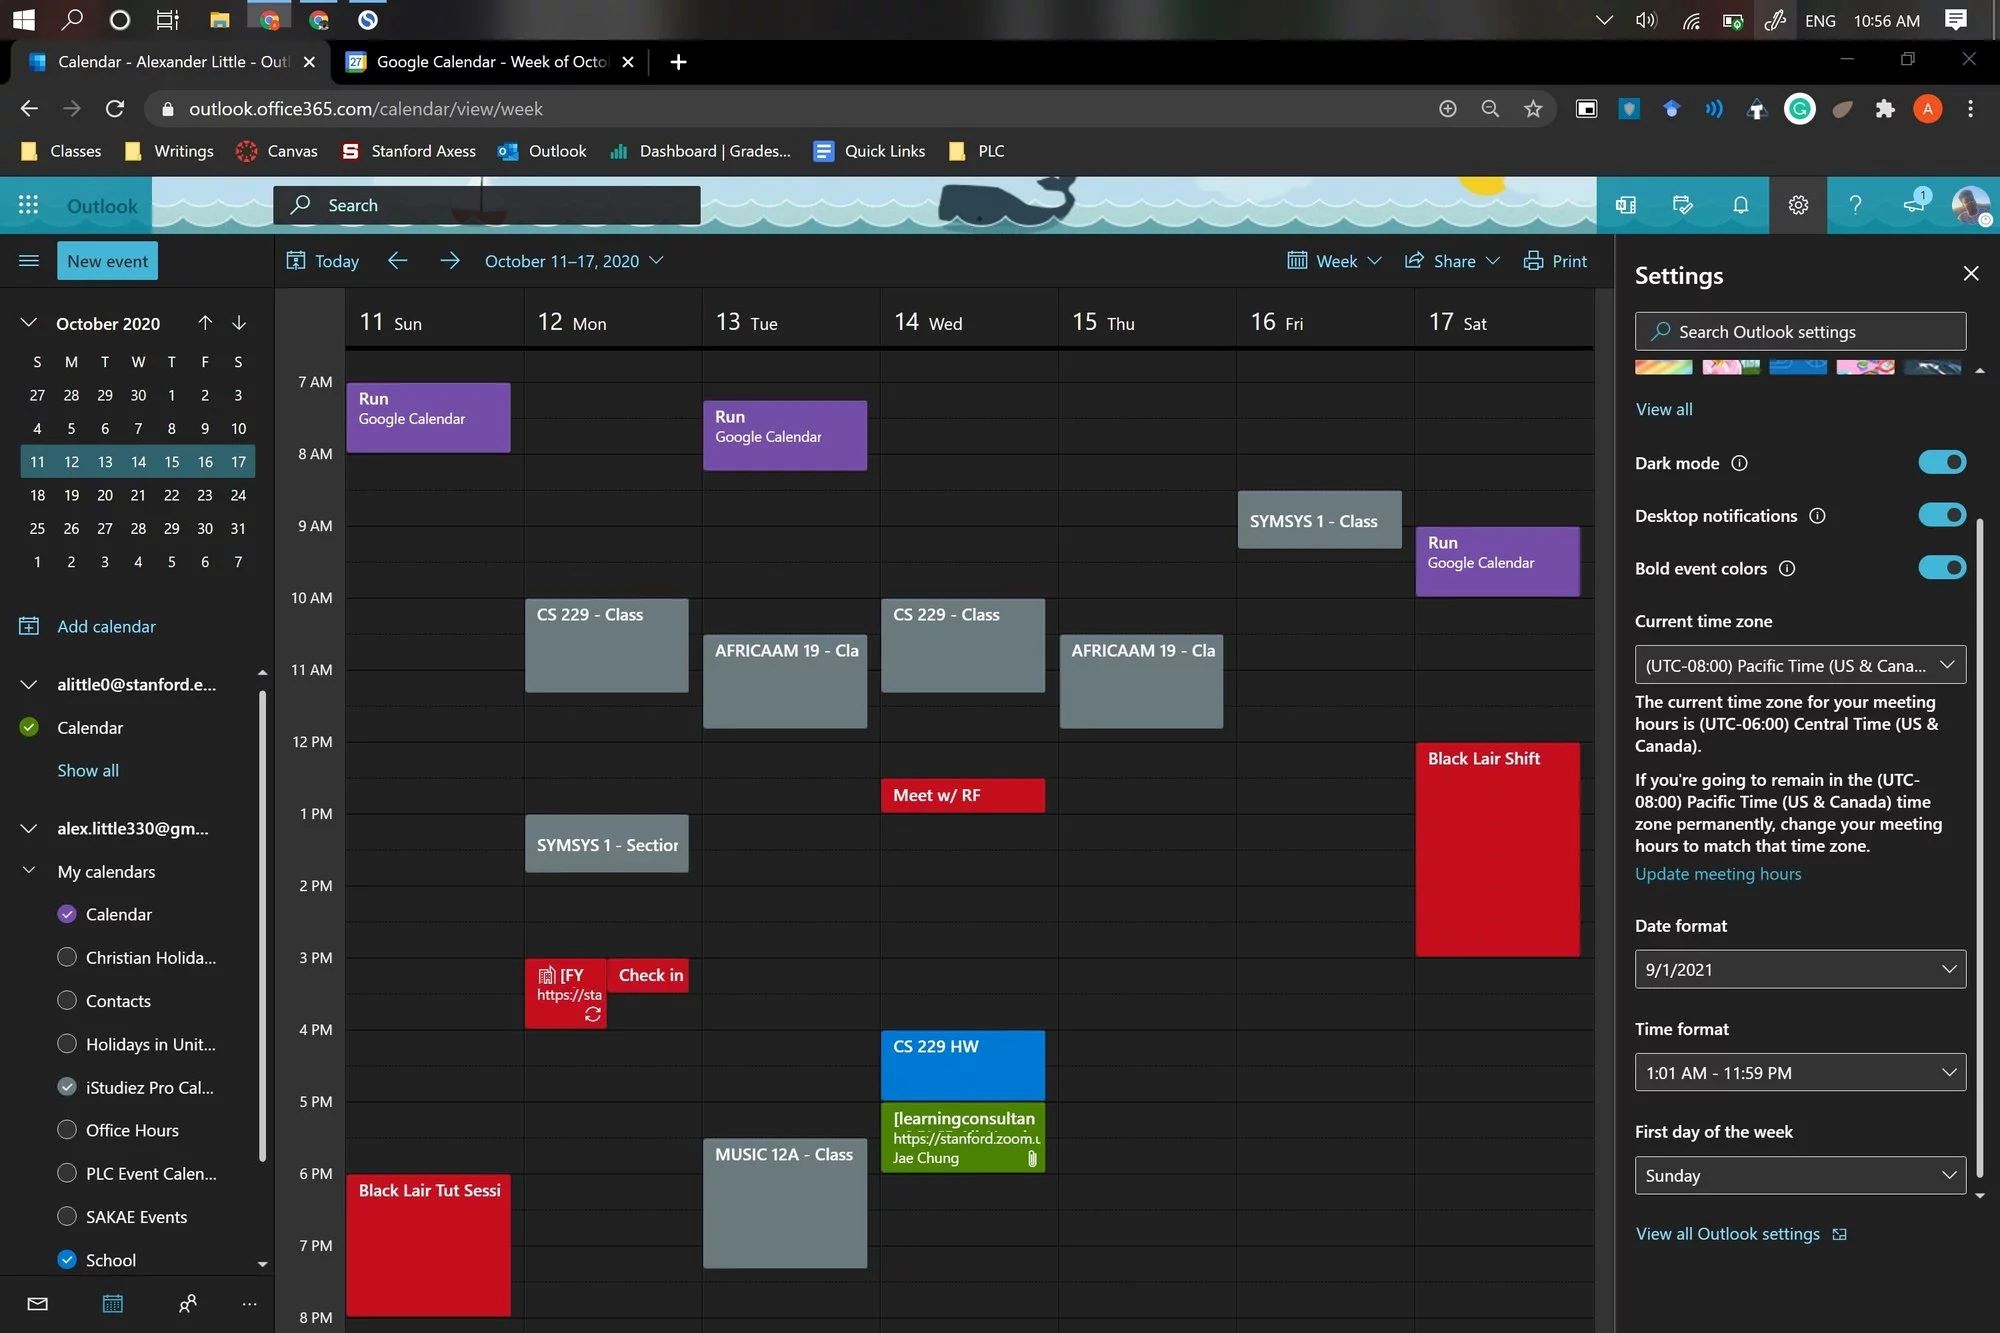
Setting Up Google Calendar
Before you can start using Google Calendar for school, you need to set up your account and configure the basic settings. If you already have a Google account, you can skip the first step. Here’s how to get started:
- Sign in to your Google account or create a new one if you don’t have one already. Visit the Google Calendar website (calendar.google.com) and click “Sign In”. Follow the prompts to sign in or create a new account.
- Once you’re signed in, you’ll be taken to the main Calendar interface. On the left-hand side, you’ll see a sidebar with various options. Click on the gear icon at the top right corner and select “Settings” from the drop-down menu.
- In the Settings menu, you can personalize your calendar by adjusting the time zone, date format, and default view. Take a moment to review these settings and make any necessary changes to suit your preferences.
- Next, navigate to the “Event settings” section. Here, you can enable or disable features such as the ability to automatically add invites to your calendar and show weekends. Customize these options based on your needs and preferences.
- Scroll down to the “View options” section. This is where you can choose the default view for your calendar. You may prefer the month view, week view, or agenda view. Experiment with these options and select the one that works best for you. Remember, you can always switch between views later.
Once you have set up your Google Calendar account and personalized the settings to your liking, you are ready to start adding events and managing your school schedule. In the next section, we will explore how to add and edit events in Google Calendar.
Adding and Editing Events
Google Calendar makes it incredibly easy to add and edit events in your schedule. Whether it’s a class, assignment due date, study session, extracurricular activity, or any other important task, you can quickly add it to your calendar. Here’s how:
- To add an event, simply click on the desired date and time on your Calendar interface. A pop-up window will appear where you can enter the event details.
- Start by entering a title for the event. Be specific and descriptive to make it easier to identify later.
- Next, select the date and time for the event. You can also choose the duration, set it as an all-day event, or make it repeat regularly if necessary.
- In the “Location” field, you can specify the physical or virtual location of the event. This can be a classroom, library, online meeting platform, or any other relevant venue.
- Use the “Description” field to provide additional information about the event. Here, you can add notes, instructions, or any other details that are important to remember.
- If you need to invite other people to the event, you can enter their email addresses in the “Guests” field. This is particularly useful for group projects, study groups, or meetings with classmates or professors.
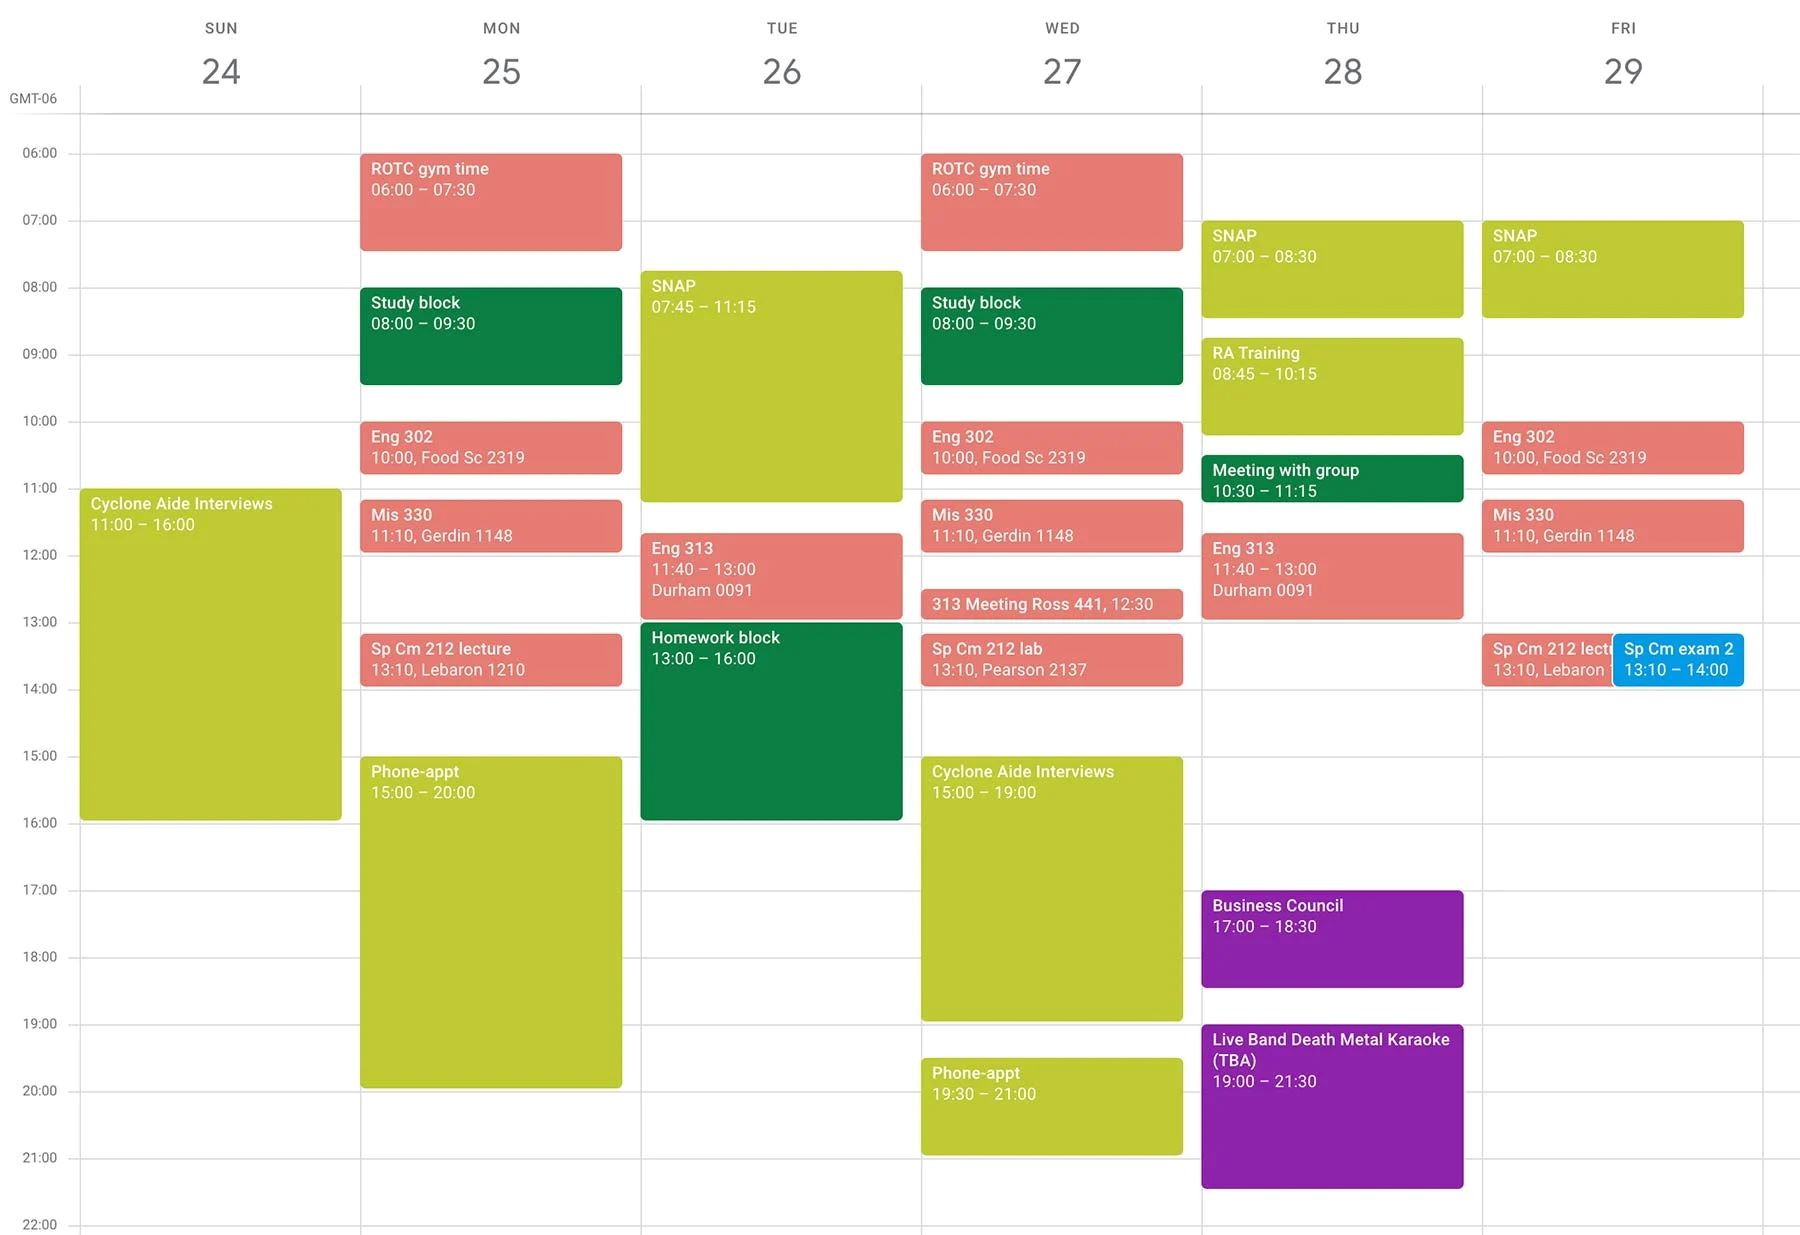
- Color-code your events using the “Event color” option. This allows you to visually distinguish between different types of events, making it easier to identify them at a glance.
- Once you have entered all the necessary details, click “Save” to add the event to your calendar.
To edit an event, simply double-click on it in your calendar. The pop-up window will appear again, allowing you to make any necessary changes. You can modify the event details, change the date or time, add or remove guests, or make any other adjustments as needed.
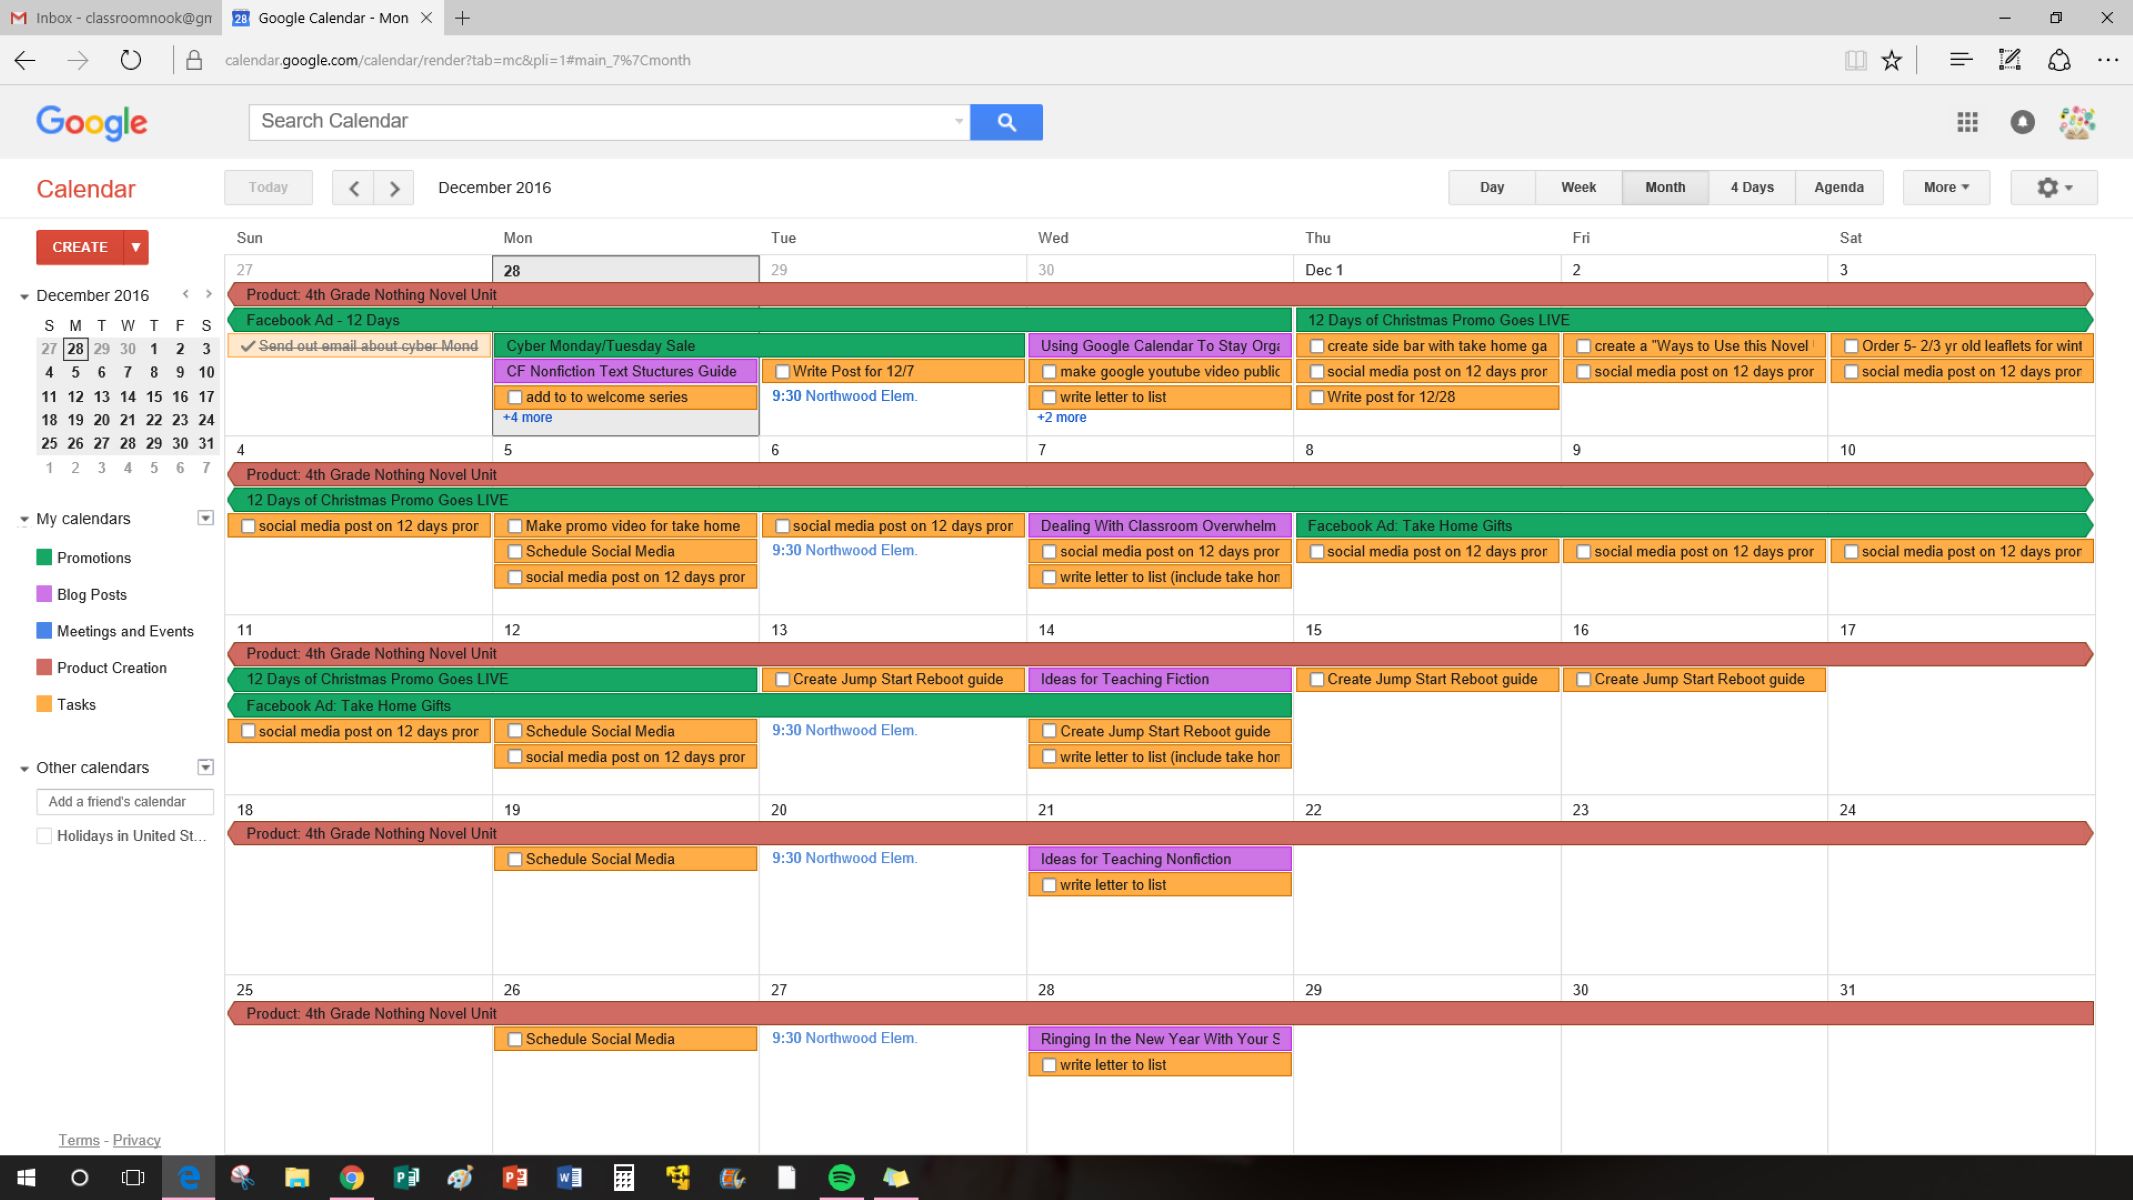
Google Calendar also allows you to view and manage your events in different ways. You can switch between day, week, month, and agenda views to get a comprehensive overview of your schedule. Additionally, you can search for specific events, use filters to display or hide certain types of events, and even create multiple calendars to organize different aspects of your life.
Now that you know how to add and edit events in Google Calendar, it’s time to explore other useful features to further enhance your productivity and organization. In the next section, we will discuss color-coding and organizing events in Google Calendar.
Color-Coding and Organizing Events
Google Calendar offers a convenient way to visually organize and differentiate your events through color-coding. By assigning specific colors to different types of events, you can quickly identify and categorize them at a glance. This helps in maintaining a well-structured and organized calendar. Here’s how to color-code and organize your events in Google Calendar:
- To assign a color to an event, click on the event in your calendar to open the event details pop-up window.
- Under the “Event color” option, click on the color palette icon to choose a color from the available options.
- Select a color that represents the type of event. For example, you might choose green for classes, blue for extracurricular activities, and yellow for assignment due dates.
- Once you have assigned a color to an event, it will be displayed on your calendar with that specific color. This makes it easier to identify and distinguish between different types of events.
In addition to color-coding, Google Calendar also provides options to organize your events efficiently:
- Create separate calendars for different aspects of your life. You can have a calendar for school-related events, another for personal appointments, and even one for social activities. This allows you to view your events separately based on their categories.
- To create a new calendar, click on the “+” button next to “Add a calendar” in the left sidebar. Give your calendar a name and choose a color to represent it. You can then add events to this specific calendar and toggle its visibility on or off as needed.
- You can also create sub-calendars within a main calendar. For example, within your school calendar, you can have sub-calendars for different subjects or courses. This further aids in organizing and managing your academic schedule.
- Group related events using labels and tags. For example, you can add labels such as “Study”, “Test”, “Project”, or “Meeting” to your event titles to create further categorization and make it easier to search for specific events in the future.
- Use the search function in Google Calendar to find specific events or filter events based on specific criteria. This is especially helpful when you have a busy schedule and need to locate specific events quickly.
By utilizing the color-coding and organizational features of Google Calendar, you can maintain a clear and concise view of your upcoming events, assignments, and activities. This allows for better time management and ensures that no important tasks are overlooked.
In the next section, we will explore how to set reminders and notifications in Google Calendar to help you stay on top of your schedule.
Setting Reminders and Notifications
One of the key features of Google Calendar is the ability to set reminders and notifications for your events. Reminders help ensure that you don’t miss important deadlines or appointments, while notifications keep you informed about upcoming events. Here’s how to set reminders and notifications in Google Calendar:
- To set a reminder for an event, open the event details pop-up window by clicking on the event in your calendar.
- Under the “Notifications” section, you can choose when you would like to receive a reminder. The options range from minutes to weeks before the event.
- Click on the drop-down menu next to the reminder time and select the desired duration.
- You can also choose whether you want to receive the reminder by email, SMS, or a pop-up notification on your computer or mobile device.
- Additionally, you can set a default reminder time for all events by going to the “Settings” page and navigating to the “Event settings” section. Adjust the “Default notification” option according to your preferences.
In addition to reminders, Google Calendar also provides notifications for your events. Notifications can be particularly useful for receiving real-time updates on your schedule. Here’s how to set up notifications:
- Go to the “Settings” page by clicking on the gear icon at the top right corner of the Calendar interface.
- Click on “Settings” in the drop-down menu and navigate to the “Notifications” tab.
- Here, you can customize the type of notifications you want to receive. You can choose to receive notifications for upcoming events, event updates, or even daily agendas.
- Select your preferred notification method, such as email, desktop notification, or mobile notification.
- Adjust the timing of the notifications as per your preference. For example, you can choose to receive notifications 10 minutes before an event or notifications for all events on the day.
By setting reminders and notifications in Google Calendar, you can stay organized and ensure that you never miss an important event or deadline. Reminders and notifications serve as helpful prompts to keep you on track and allow you to allocate your time effectively.
In the next section, we will explore how to invite and collaborate with others using Google Calendar for group projects and study groups.
Inviting and Collaborating with Others
Google Calendar offers seamless collaboration features that allow you to invite and work with others on various events and projects. Whether you are organizing a study group, planning a group project, or scheduling a meeting with classmates or colleagues, Google Calendar makes it easy to collaborate effectively. Here’s how to invite and collaborate with others using Google Calendar:
- To invite others to an event, open the event details pop-up window by clicking on the event in your calendar.
- In the “Guests” section, you can enter the email addresses of the people you want to invite. You can add multiple guests by separating their email addresses with commas.
- Once you have added the guests, they will receive an email invitation to the event. They can then accept or decline the invitation directly from their email or through their own Google Calendar.
- When guests accept the invitation, the event will automatically be added to their calendars, and any changes or updates you make to the event will be reflected in their calendars as well.
- Collaborators can also add comments or notes to the event. This feature is particularly useful for discussing details or coordinating efforts with other participants.
- If you are collaborating on a larger project or need advanced scheduling features, consider using Google Calendar’s integrated “Google Meet” or “Google Hangouts” options for virtual meetings and video conferences.
Collaboration in Google Calendar extends beyond just adding guests and sharing events. You can also create and share separate calendars with specific individuals or groups. This allows for better coordination and organization, especially when working on different projects or with multiple teams. To share a calendar:
- Click on the “+” button next to “Add a calendar” in the left sidebar.
- Select “Create new calendar” or “New calendar” from the drop-down menu.
- Customize the calendar settings, including the name, color, and sharing permissions.
- Under the “Share with specific people” section, enter the email addresses of the individuals or groups you want to share the calendar with.
- Choose their level of access, such as “Make changes to events” or “See all event details.”
- Click “Add” to share the calendar with the selected individuals or groups.
Through effective collaboration in Google Calendar, you can ensure everyone involved is on the same page and can contribute to the planning, scheduling, and organizing of events or projects. This streamlines communication and fosters productivity within a team or group setting.
In the next section, we will explore how to share your calendar with others, allowing them to view your schedule and availability.
Sharing Calendars
Sharing your calendar with others can be beneficial in various scenarios, whether you want to let your classmates, colleagues, or family members view your schedule or collaborate more effectively. Google Calendar offers user-friendly sharing options that allow you to control who can see your calendar and the level of access they have. Here’s how to share your calendar with others in Google Calendar:
- Open Google Calendar and locate the calendar you want to share in the left sidebar.
- Hover over the calendar name and click on the three dots that appear.
- From the drop-down menu, select “Settings and sharing.”
- In the “Share with specific people” section, enter the email addresses of the individuals you want to share the calendar with.
- Choose their level of access from the options provided. You can select “See only free/busy” to allow others to view your availability without details, or “Make changes to events” to grant full editing permissions.
- If you want to share your calendar publicly, you can toggle on the “Make available to public” option. This allows anyone with the calendar’s URL to view it, but they won’t be able to make changes.
- Click on the “Send” button to notify the recipients about the shared calendar.
If you want to manage multiple calendars and share them, you can create separate calendars and customize the sharing settings for each one. This feature is particularly useful if you want to share specific calendars with different groups of people or have separate calendars for personal and professional commitments.
Furthermore, if you have been granted access to someone else’s shared calendar, you can view it by following these steps:
- Open Google Calendar and click on the “+” button next to “Add a calendar” in the left sidebar.
- Select “From URL” from the drop-down menu.
- Copy and paste the shared calendar’s URL into the provided field.
- Click on the “Add calendar” button to view the shared calendar alongside your existing calendars.
Sharing calendars in Google Calendar streamlines communication, enhances coordination, and ensures that everyone is well-informed about events and schedules. It is a powerful feature that promotes productivity and collaboration in both personal and professional settings.
In the next section, we will explore how to sync Google Calendar with other devices to have access to your schedule wherever you go.
Syncing Google Calendar with Other Devices
Keeping your Google Calendar synchronized across multiple devices is essential for accessing your schedule on the go, regardless of whether you’re using a computer, smartphone, or tablet. Google Calendar offers seamless synchronization capabilities, allowing you to stay up to date with your appointments and events no matter where you are. Here’s how to sync Google Calendar with other devices:
To sync Google Calendar with your mobile device, follow these steps:
- For Android devices:
- Open the Google Calendar app on your Android device.
- Tap the menu icon (three lines) in the top-left corner.
- Scroll down and tap “Settings”.
- Select the calendar you want to sync or tap “Add account” to add a new Google account.
- Make sure the “Sync” toggle is turned on for the selected account.
- Repeat the process for any other calendars you want to sync.
- For iOS devices:
- Open the Settings app on your iOS device.
- Scroll down and tap “Calendar”.
- Tap “Accounts” then “Add Account”.
- Select “Google” and sign in with your Google account.
- Toggle on “Calendars” to sync your Google Calendar.
- Repeat the process for any other calendars you want to sync.
Once you have synced your Google Calendar with your mobile device, any changes or updates you make to your calendar on one device will automatically be reflected on all devices with the calendar synced.
If you want to sync Google Calendar with other devices, such as your computer or tablet, follow these steps:
- Open your web browser and visit the Google Calendar website (calendar.google.com).
- Sign in with your Google account if you haven’t already.
- To access your calendar offline, click on the “Settings” gear icon in the top-right corner and select “Settings” from the drop-down menu.
- In the left sidebar, click on the calendar you want to sync.
- In the “Integrate calendar” section, you will find options to sync your calendar with other services or applications, such as Microsoft Outlook or Apple Calendar. Follow the provided instructions to complete the sync process.
Syncing Google Calendar with other devices ensures that you have access to your schedule wherever you go. It helps you stay organized, manage your time effectively, and avoid conflicts or missed events.
In the next section, we will explore additional features in Google Calendar that can further enhance your scheduling and productivity.
Utilizing Google Calendar’s Additional Features
Google Calendar offers a range of additional features that can enhance your scheduling and productivity. These features go beyond basic event management and provide you with powerful tools to organize your time effectively. Here are some key additional features of Google Calendar:
- Goals: Google Calendar allows you to set personal goals, such as exercising, reading, or learning a new skill. By inputting your desired frequency and duration, Google Calendar will suggest the optimal time slots for you to work on your goals, making it easier to incorporate them into your schedule.
- Time zone support: If you travel frequently or work with people in different time zones, setting the correct time zone in Google Calendar ensures that your events are accurately displayed in your local time zone and avoids confusion or missed appointments.
- Working hours: You can specify your working hours in Google Calendar, which helps others respect your availability and reduces the chances of scheduling conflicts. Events outside your working hours will be marked differently, making it clear when you have personal time.
- Quick add: Instead of creating events through the traditional process, you can use the “Quick add” feature in Google Calendar. Simply type in a natural language format, such as “Lunch with John tomorrow at 12 PM”, and Google Calendar will intelligently interpret and create the event accordingly.
- Task integration: Google Calendar seamlessly integrates with Google Tasks, allowing you to create and manage your to-do lists alongside your events. You can add tasks as sub-tasks under events or create standalone tasks to keep track of your assignments, deadlines, or personal tasks.
- Event attachments: Google Calendar allows you to attach files or documents to your events. This is particularly useful for adding important documents, presentation slides, or reference materials directly within the event, making them easily accessible when needed.
- Weather forecast: Google Calendar provides a weather feature that displays the current weather conditions and the forecast for your location. This can help you plan your activities accordingly, whether it’s an outdoor study session, a group project meeting, or a relaxing day at the park.
These additional features in Google Calendar are designed to streamline and enhance your scheduling experience. By utilizing them, you can further optimize your time management, increase productivity, and ensure that your calendar becomes an indispensable tool for organizing your life.
In the final section of this article, we will summarize the key points discussed and emphasize the benefits of using Google Calendar to manage your school schedule.
Conclusion
Google Calendar is a valuable tool for students to effectively manage and organize their school schedules. From setting up Google Calendar to adding and editing events, color-coding and organizing events, setting reminders and notifications, inviting and collaborating with others, sharing calendars, syncing with other devices, and utilizing additional features, Google Calendar offers a wide range of functionalities to enhance time management and productivity.
By using Google Calendar, students can easily keep track of classes, assignments, study sessions, extracurricular activities, and other important commitments. The ability to color-code events and create separate calendars allows for easy identification and organization of different types of activities. Setting reminders and notifications ensures that no deadlines are missed, and collaboration features enable seamless group work and coordination.
With Google Calendar’s sharing capabilities, students can share their calendars with classmates, professors, or family members to keep everyone informed and facilitate better planning. The option to sync Google Calendar with multiple devices ensures that students can access their schedules anywhere, anytime, and stay up to date.
Google Calendar’s additional features, such as goals, time zone support, working hours, quick add, task integration, event attachments, and weather forecast, further enhance the functionality and versatility of this tool. Students can set personal goals, manage their tasks, add attachments to events, and even stay updated on weather conditions for better planning.
In summary, Google Calendar is an invaluable tool for students, providing them with a streamlined and efficient way to manage their school schedules. Its user-friendly interface, collaboration features, and synchronization capabilities make it a powerful resource for students seeking to stay organized, manage their time effectively, and achieve academic success.
So, why not give Google Calendar a try? Start by setting up your account, exploring its features, and incorporating it into your daily routine. By harnessing the power of Google Calendar, you can take control of your school schedule, reduce stress, and stay on top of your academic commitments.